Affect Element (8 min)
Completion requirements
01 Getting Started
In this lesson, you will learn how to affect elements using the Affected Elements node.
You can trigger the Affected Elements node from any condition or element with an On Click Action option.
You can trigger the Affected Elements node from any condition or element with an On Click Action option.
02 Affected Elements - Overview
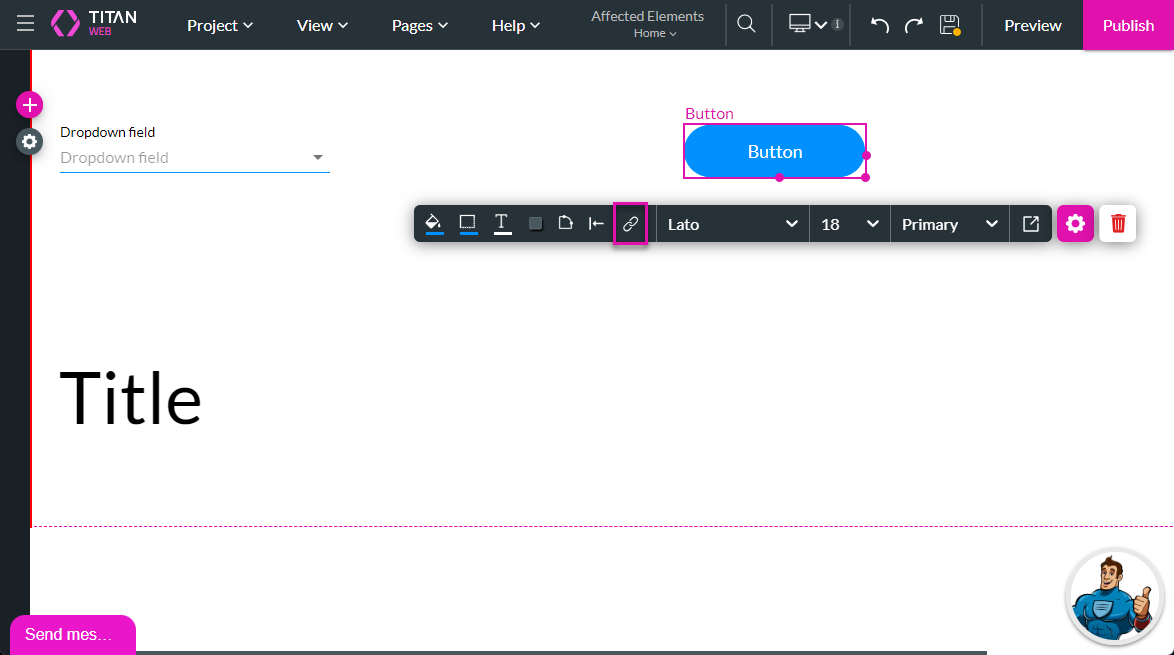
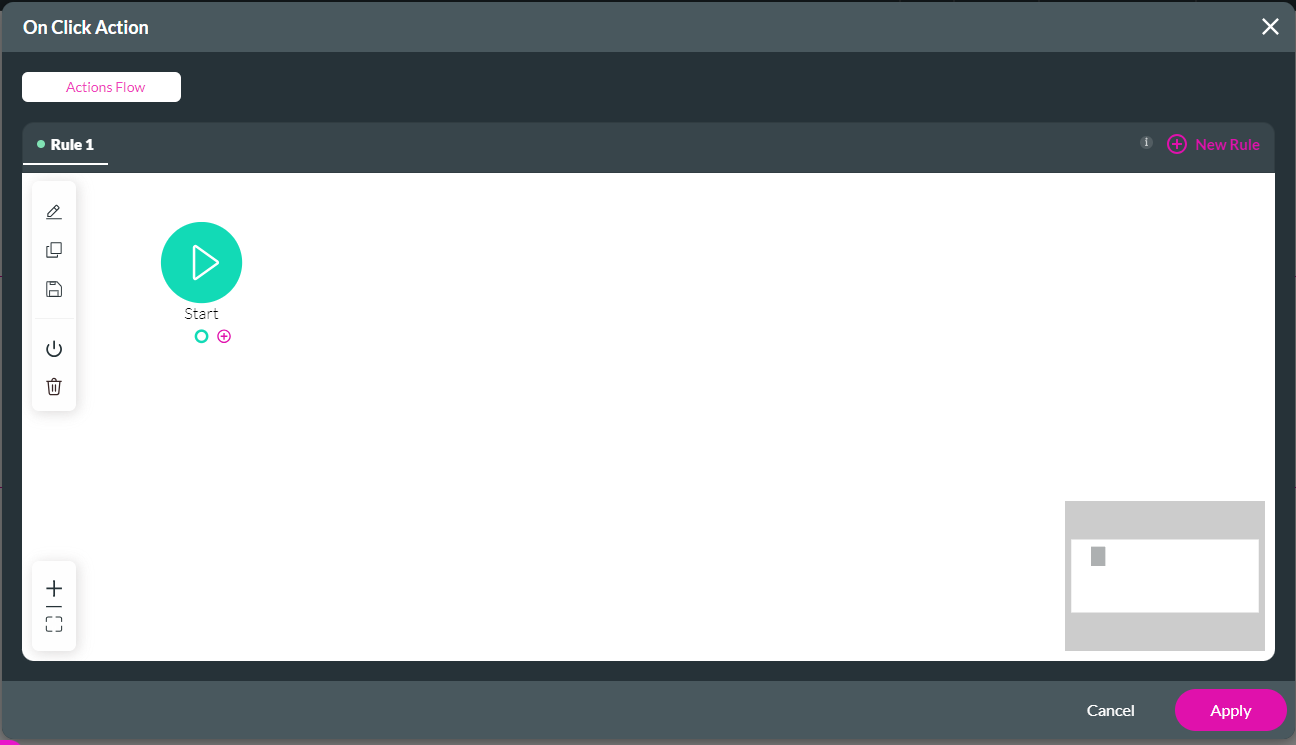
1. Click the button element and click the On Click Action icon.
2. Hover with your mouse over the Start and click the + icon.

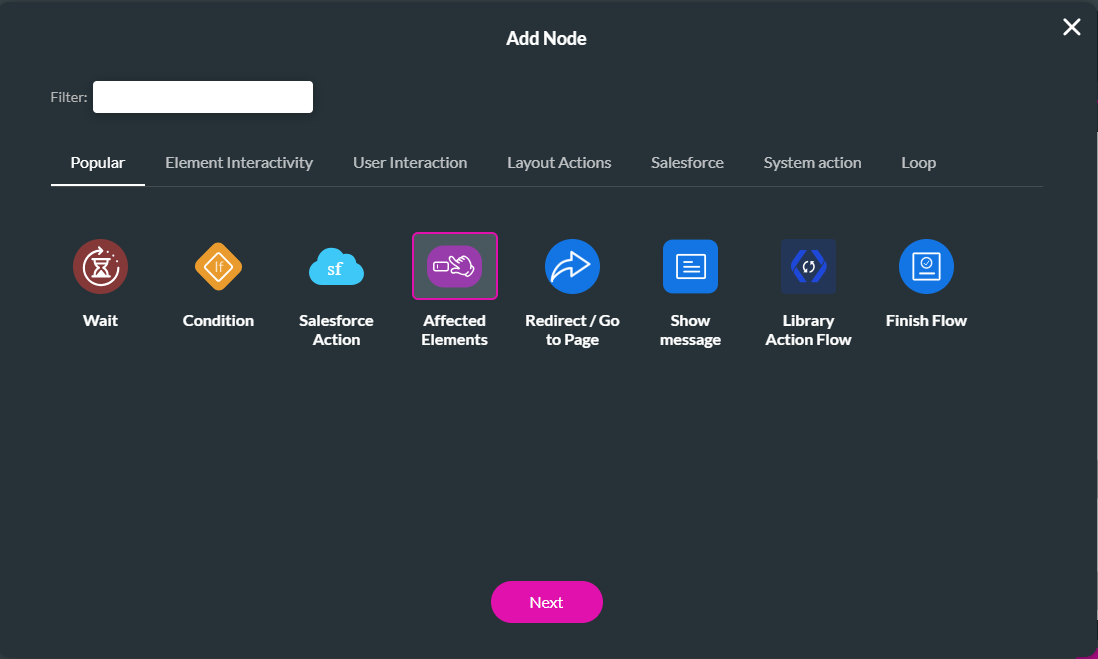
3. Click the Affected Elements option and click the Next button. The Add Node/ Affected Elements screen opens with a list of the available elements.

4. Click the Apply Filters option and select an option.
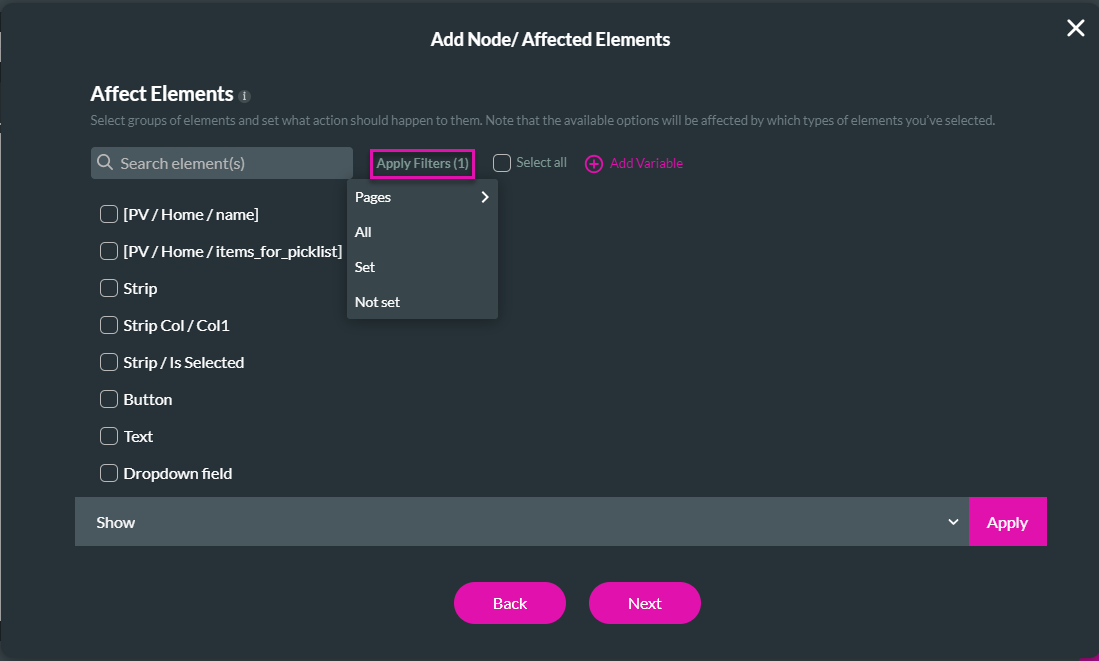
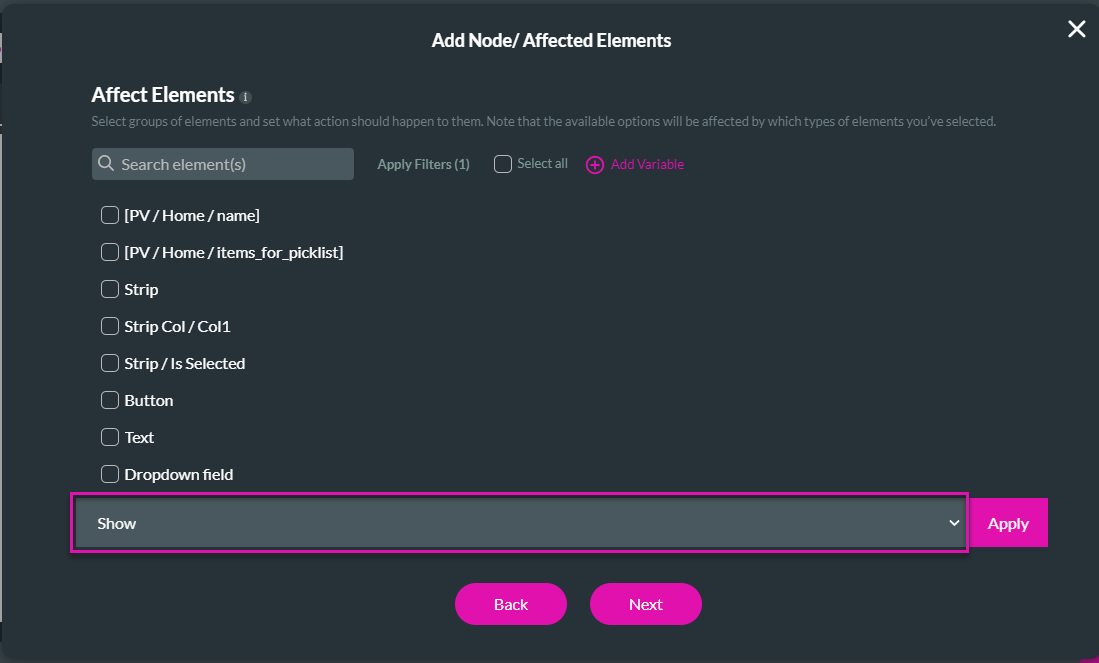
5. Click the list to see all the options. The following options are available:
2. Hover with your mouse over the Start and click the + icon.
3. Click the Affected Elements option and click the Next button. The Add Node/ Affected Elements screen opens with a list of the available elements.
4. Click the Apply Filters option and select an option.
- Pages: This shows all the project pages.
- All: this shows all the elements.
- Set: this shows the elements that have already been set.
- Not set: this shows the elements that have not been set.
5. Click the list to see all the options. The following options are available:
- Show or Hide
- Enable or Disable
- Mandatory or Not mandatory
- Activate
- Set color or Set background color
- Set focus
- Set value or Set value from
- Set items from JSON
- Set custom value
- Run animation
- Clear items
- Reset value
- Increment (+1) or Decrement (-1)
03 Use the Set Color Action On an Element
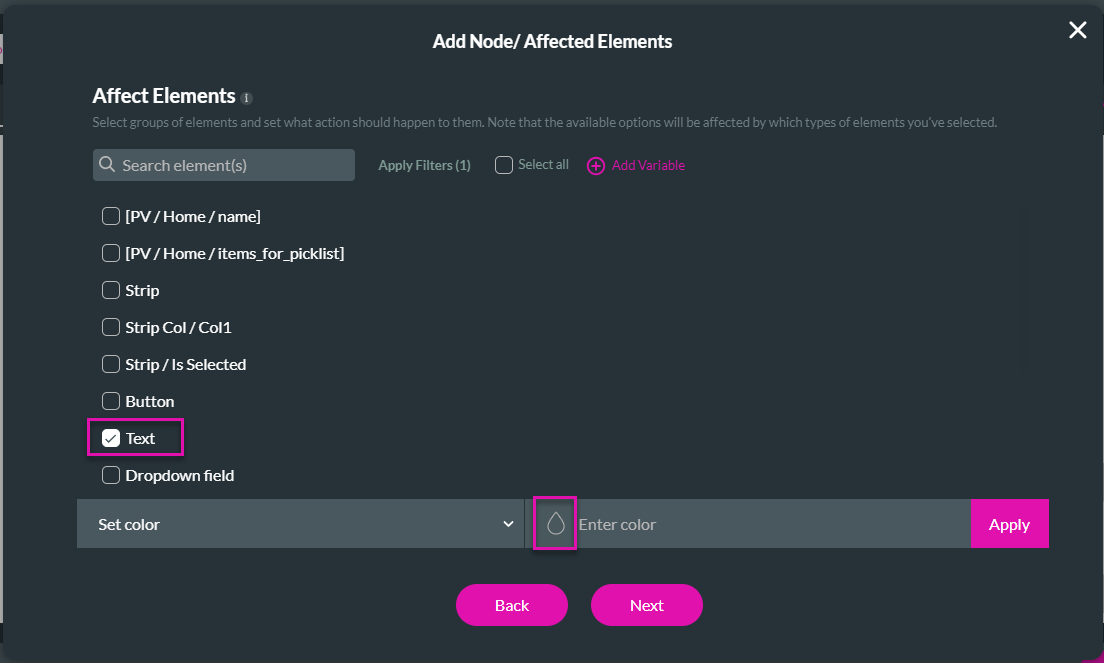
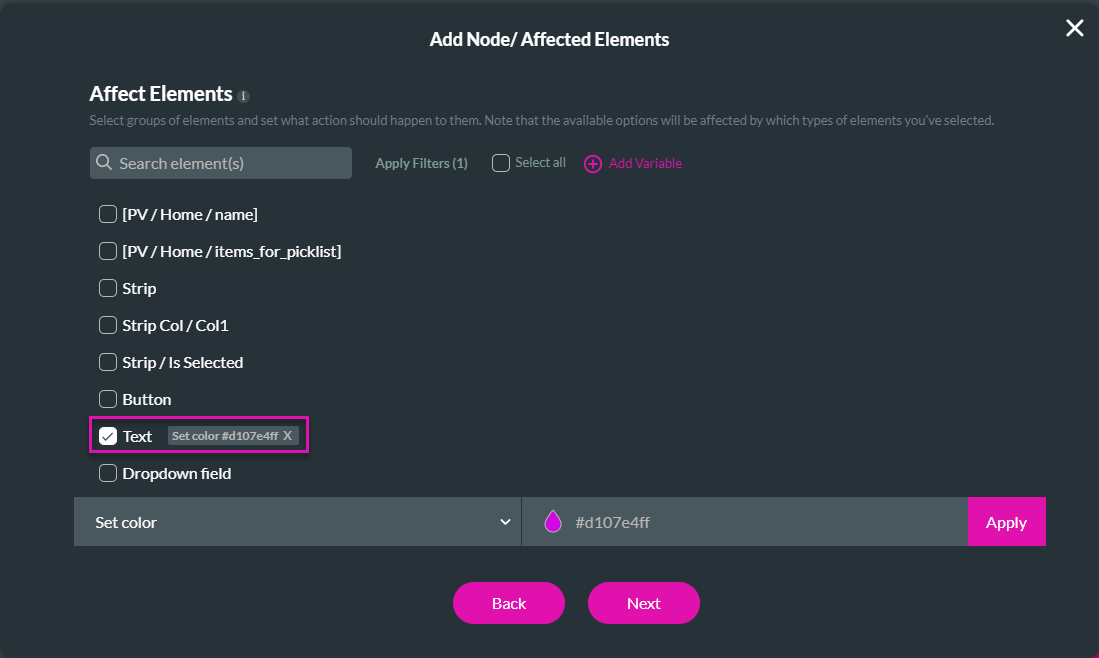
1. Select the Set color option.
2. Click the Text checkbox and the color icon to open the color palette.
3. Select a color and click the Apply button. The action is added to the Text element on the list.
4. Click the Next button.
5. Add a tag and click the Insert button.
6. Save and Preview the project.
When you click the button, the text element will change color.
04 Set action on page level
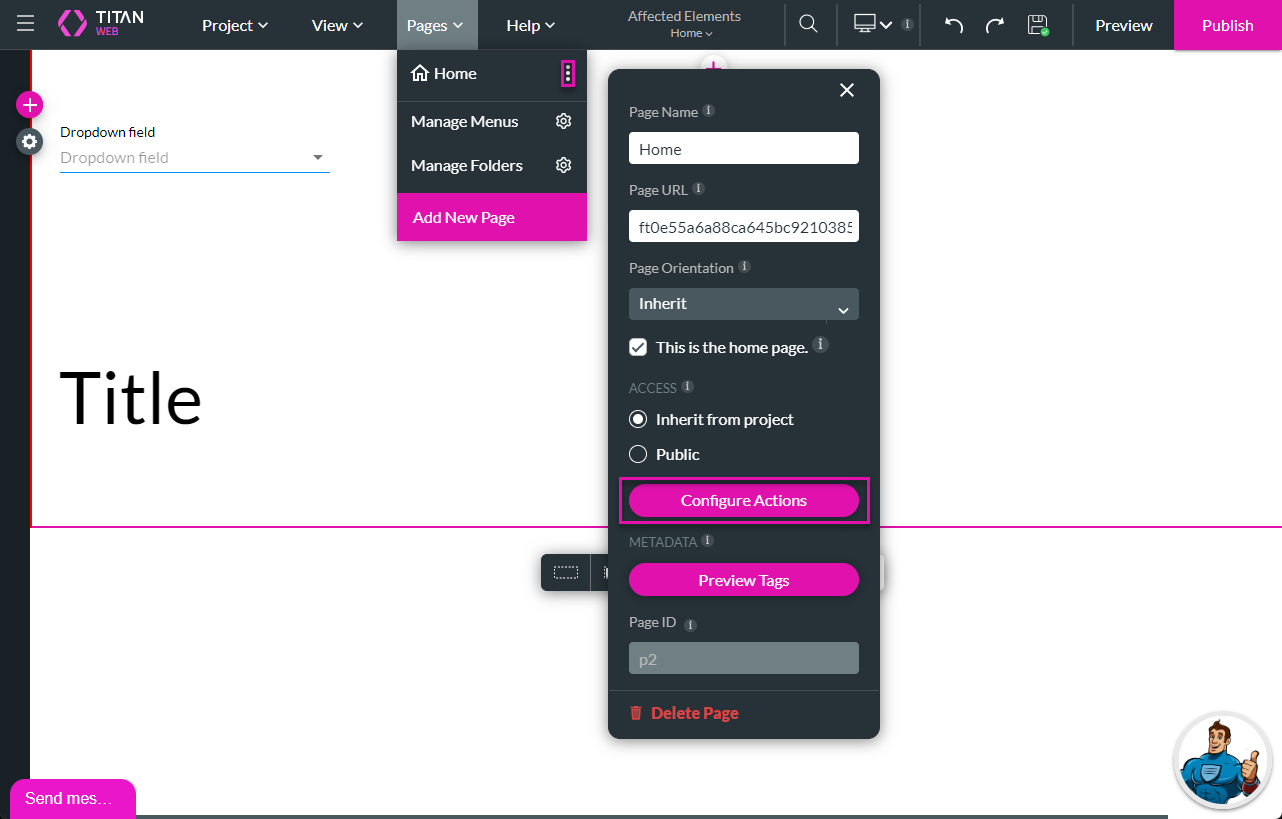
1. Click the Page drop-down list and click the Kebab icon next to the page.
2. Click the Configure Actions button.
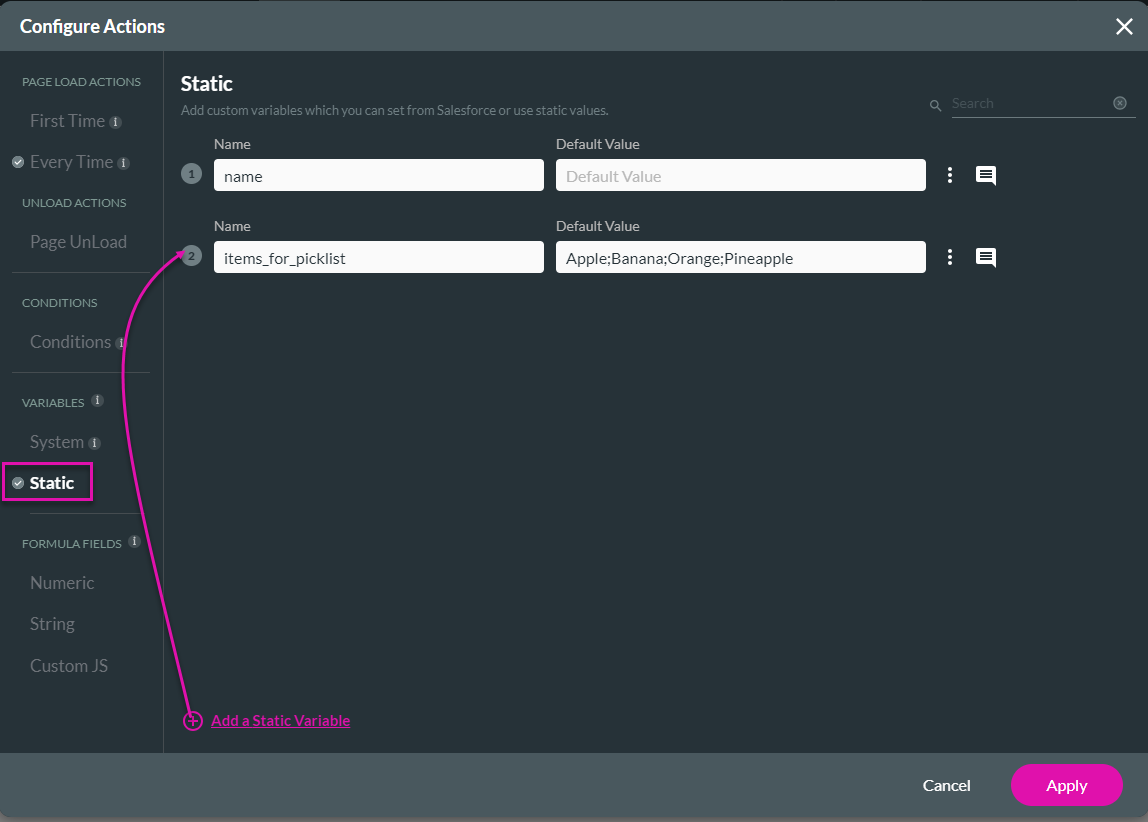
3. Click the Static option.
4. Click the Add a Static Variable option to add variables. In this example, we named the variable static.

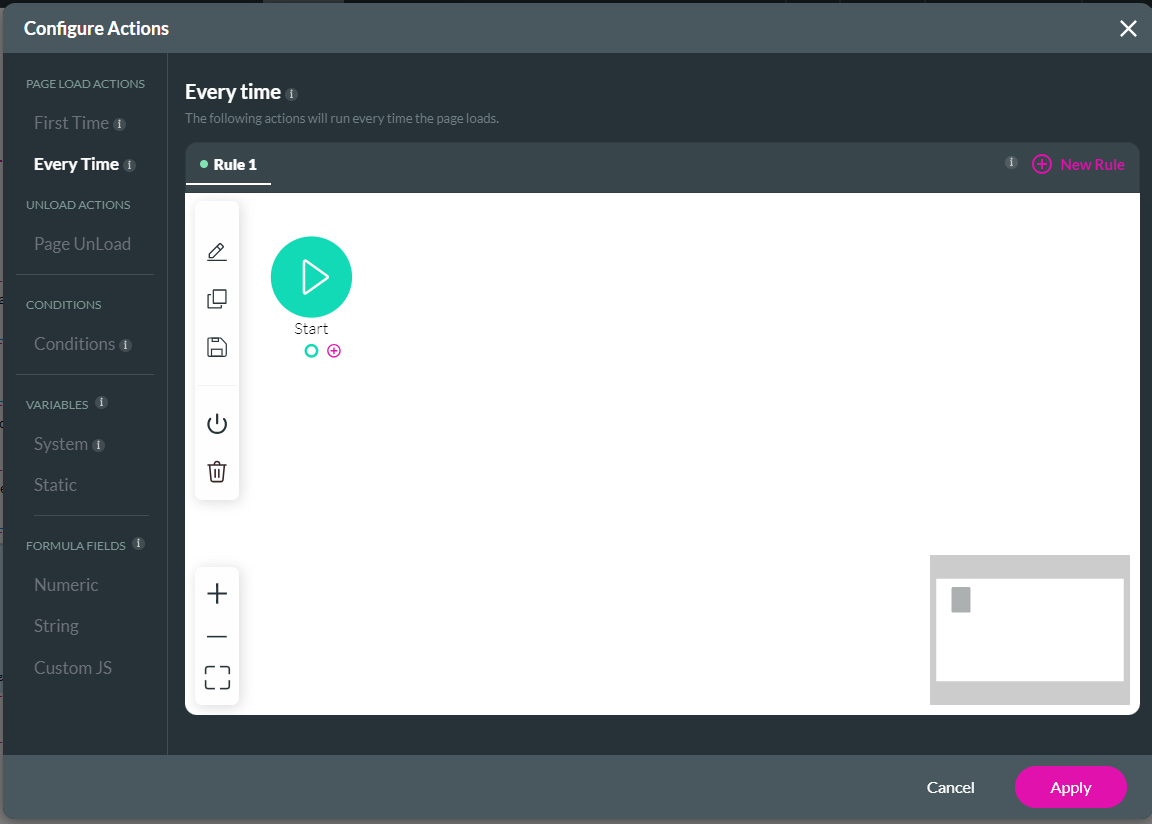
5. Click on the Every Time option.
6. Hover with your mouse over the Start and click the + icon.
7. Click the Affected Elements option and click the Next button.
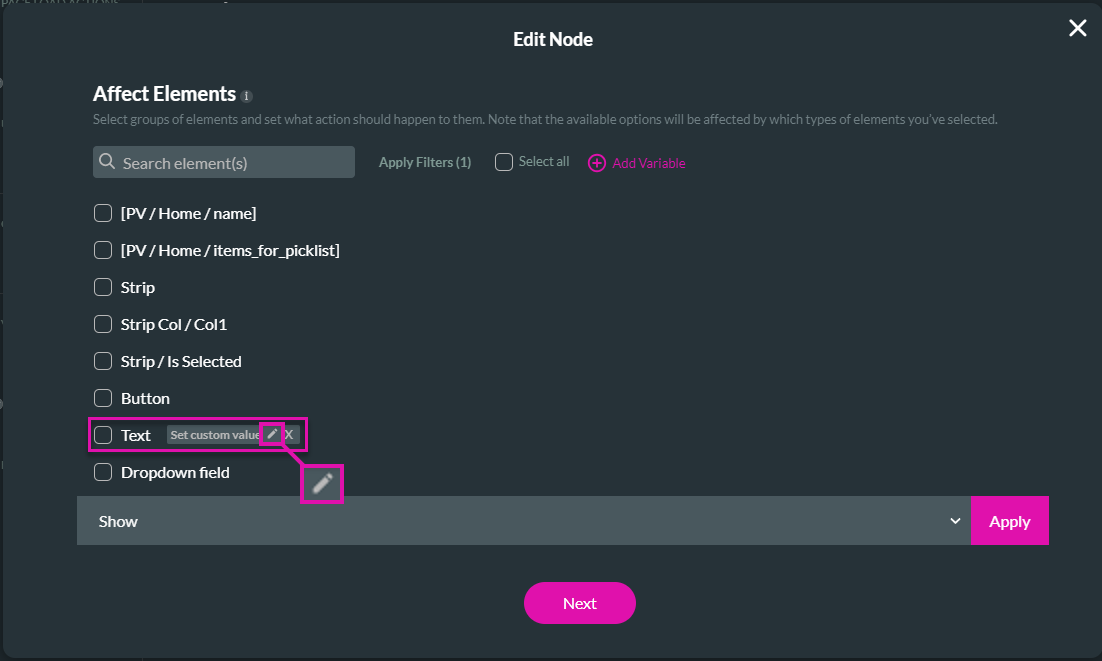
8. Click the Text element checkbox.
9. Select the Set custom value from the list and click the Configure button.
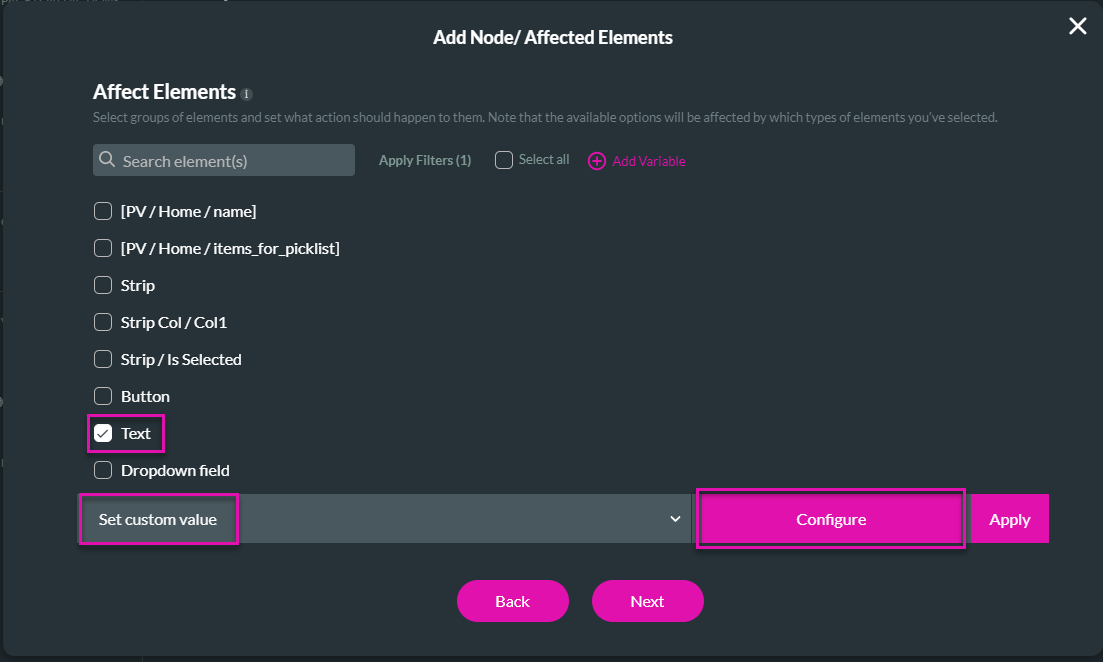
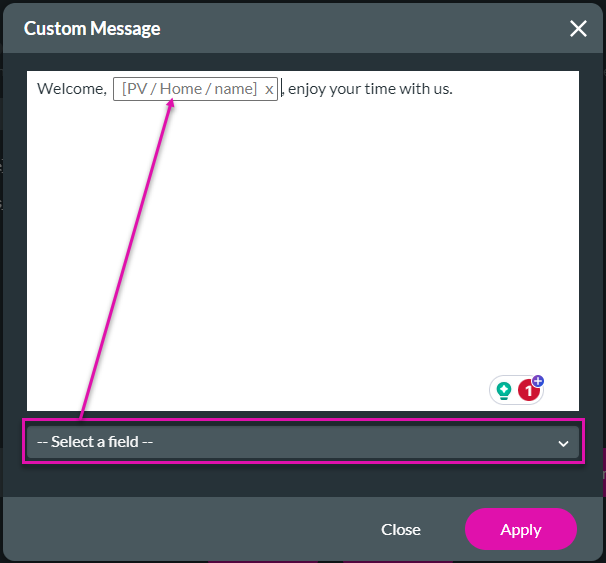
10. Type your custom message.
11. If necessary, click the drop-down list to select any dynamic field. You can add multiple dynamic fields.
12. Click the Apply button.
13. Click the Apply button to add the action to the Text field.
14. Click the Apply button.
16. Add a tag and click the Insert button.
17. Save and Preview the project.
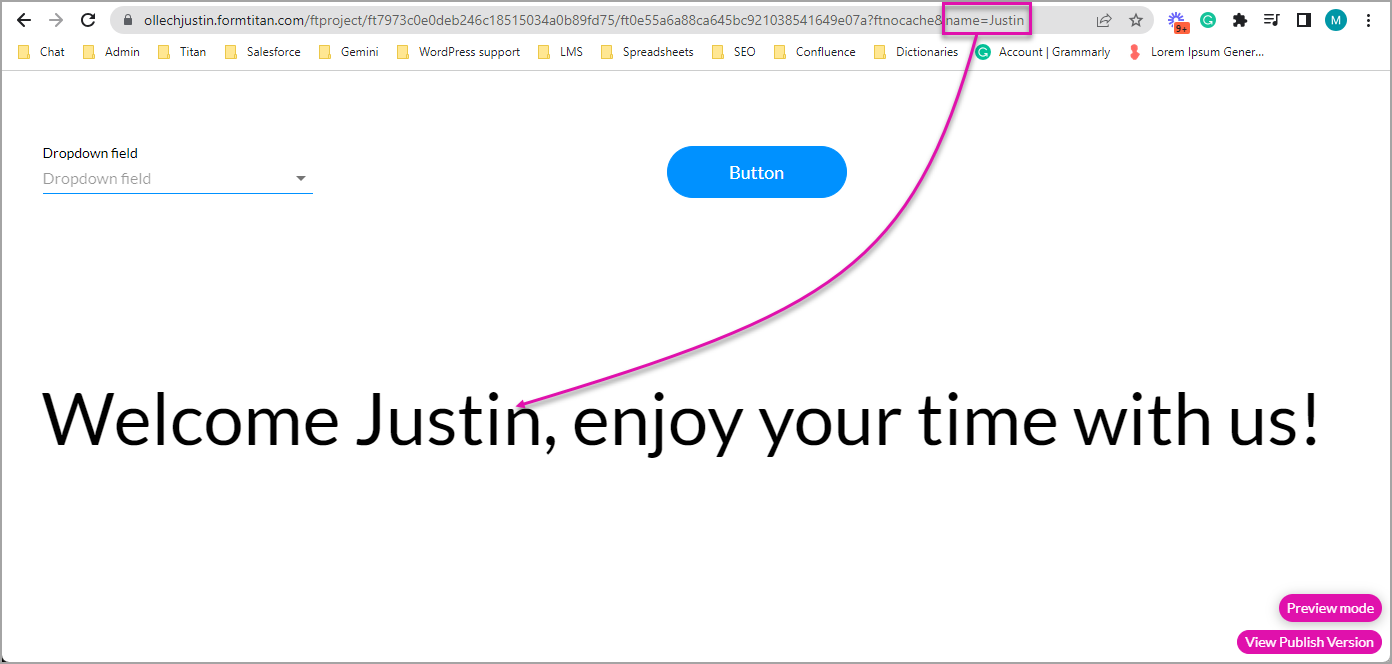
In this example, we added the name using the variable "name" from the URL, and the custom text shows on the webpage.
2. Click the Configure Actions button.
3. Click the Static option.
4. Click the Add a Static Variable option to add variables. In this example, we named the variable static.
5. Click on the Every Time option.
6. Hover with your mouse over the Start and click the + icon.
7. Click the Affected Elements option and click the Next button.
8. Click the Text element checkbox.
9. Select the Set custom value from the list and click the Configure button.
10. Type your custom message.
11. If necessary, click the drop-down list to select any dynamic field. You can add multiple dynamic fields.
12. Click the Apply button.
13. Click the Apply button to add the action to the Text field.
14. Click the Apply button.
- If you need to edit the custom text, click the Edit icon.
16. Add a tag and click the Insert button.
17. Save and Preview the project.
In this example, we added the name using the variable "name" from the URL, and the custom text shows on the webpage.
05 Affect a drop-down element with a variable
In this example, we will dynamically set the drop-down element values
1. Click the Page drop-down list and click the Kebab icon next to the page.
2. Click the Configure Actions button.

3. Click the Static option.
4. Click the Add a Static Variable option to add variables. In this example, we said the items for the picklist static variable. You can add any options here.
5. Click the Apply button.
6. Click the button element and click the On Click Action icon.

7. Hover with your mouse over the Start and click the + icon.
8. Click the Affected Elements option and click the Next button. The Add Node/ Affected Elements screen opens with a list of the available elements.
9. Click the Dropdown field checkbox.
10. Select the Set items from the JSON option and click the variable in the list.
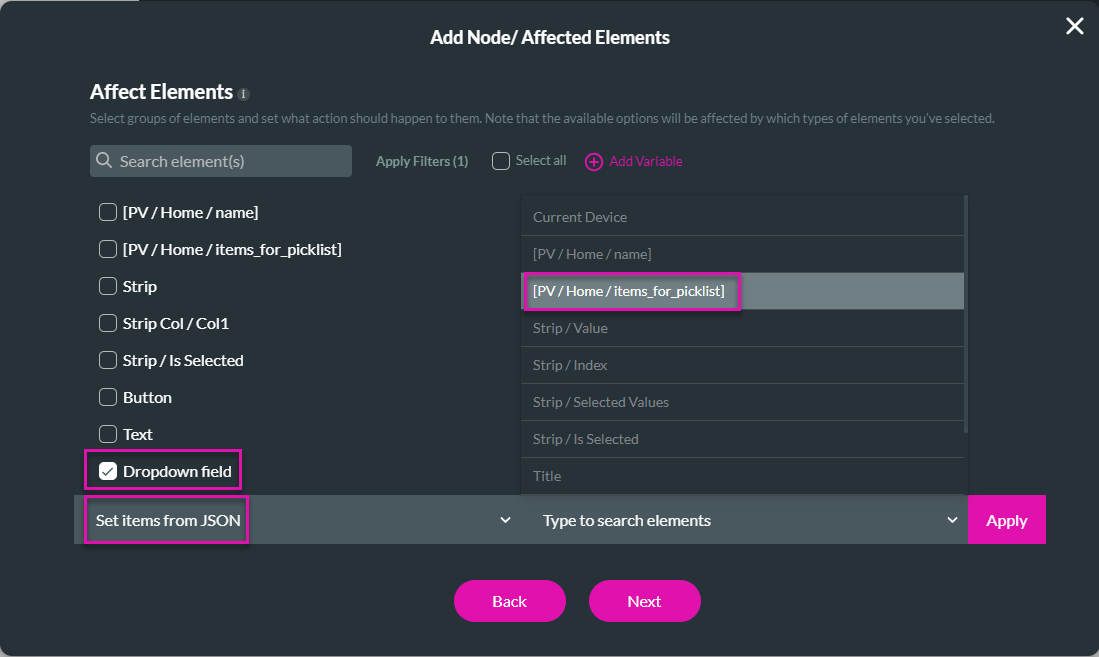
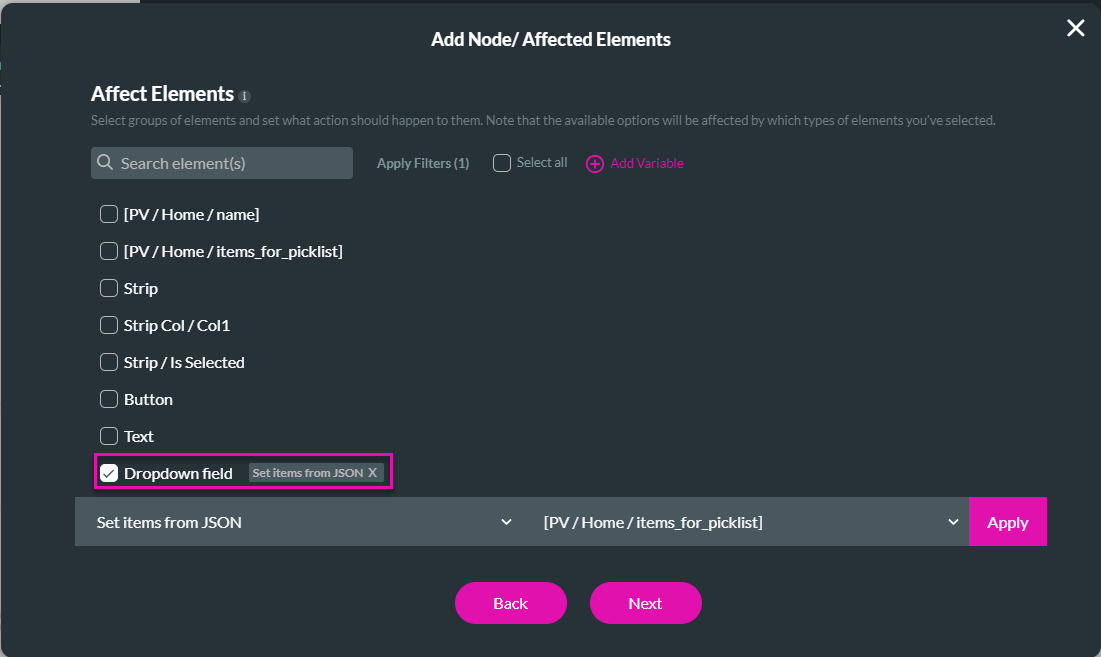
11. Click the Apply button. The action is added to the Dropdown field.
12. Click the Next button.
13. Add a tag and click the Insert button.
14. Save and Preview the project.
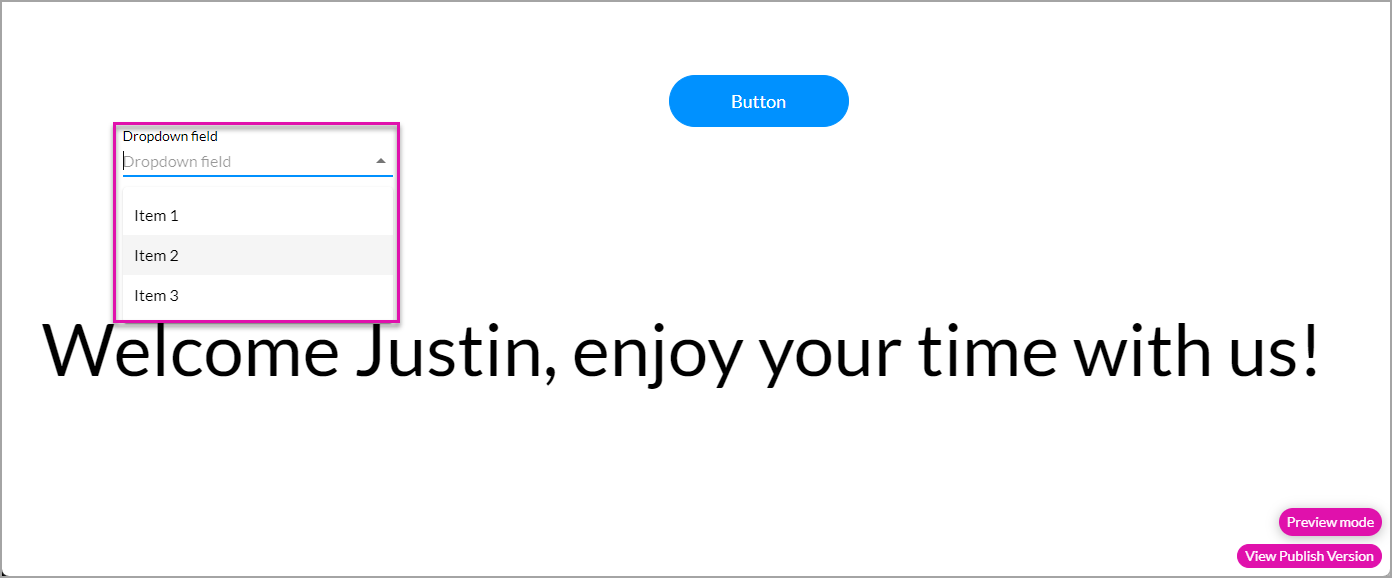
At first, the options in the drop-down list are the standard options on the element.
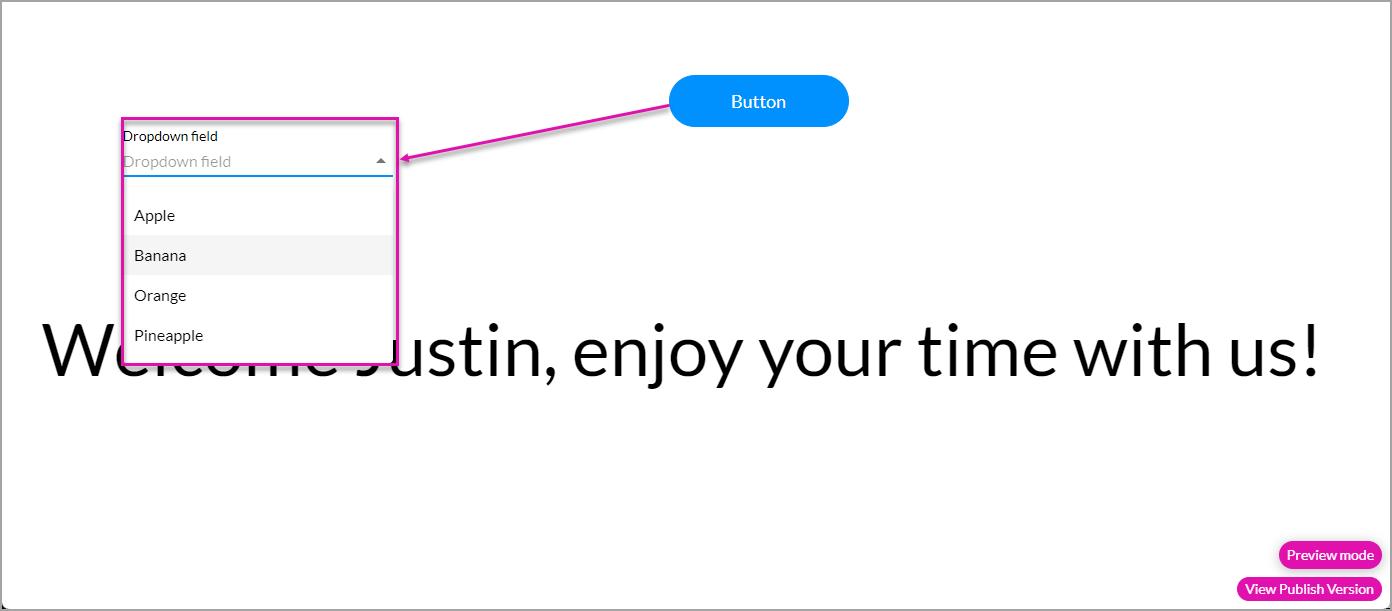
If you click the button, the options change to the variable list.
These are just some of the ways you can affect elements.
1. Click the Page drop-down list and click the Kebab icon next to the page.
2. Click the Configure Actions button.
3. Click the Static option.
4. Click the Add a Static Variable option to add variables. In this example, we said the items for the picklist static variable. You can add any options here.
5. Click the Apply button.
6. Click the button element and click the On Click Action icon.
7. Hover with your mouse over the Start and click the + icon.
8. Click the Affected Elements option and click the Next button. The Add Node/ Affected Elements screen opens with a list of the available elements.
9. Click the Dropdown field checkbox.
10. Select the Set items from the JSON option and click the variable in the list.
11. Click the Apply button. The action is added to the Dropdown field.
12. Click the Next button.
13. Add a tag and click the Insert button.
14. Save and Preview the project.
At first, the options in the drop-down list are the standard options on the element.
If you click the button, the options change to the variable list.
These are just some of the ways you can affect elements.