Publishing Your Project (5 min)
Completion requirements
01 Getting Started
This tutorial will cover how to publish your project.
02 Overview
1. Click the Gear icon, and under Overview, you will see the project status.
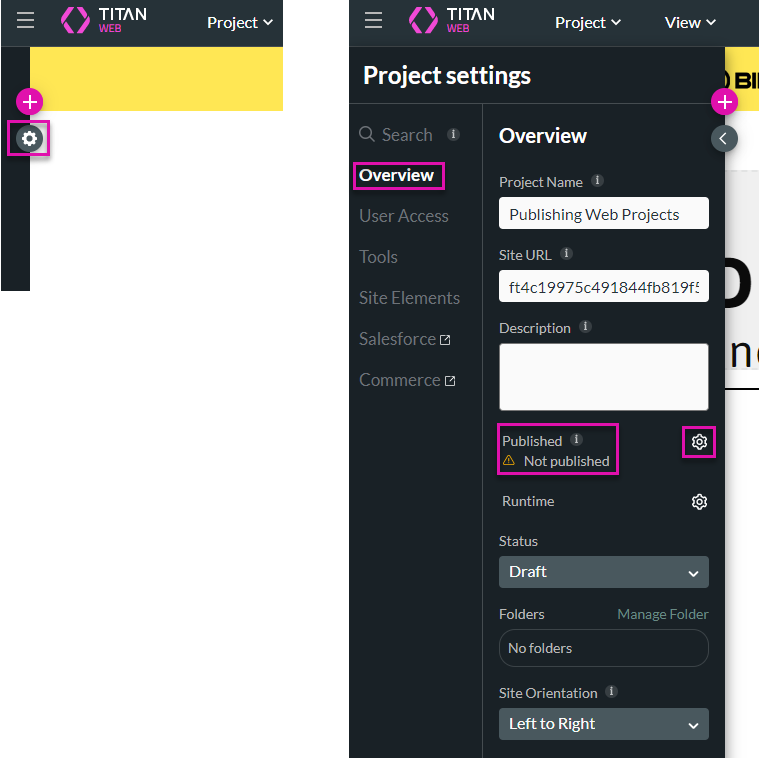
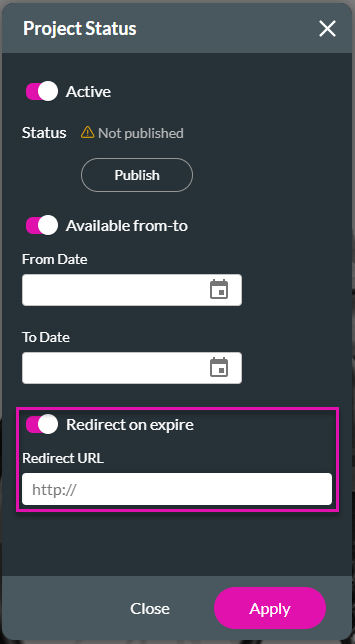
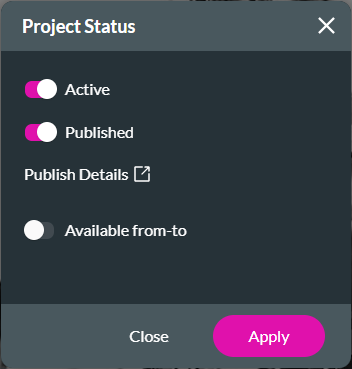
2. Click the Gear icon next to the status. The Project Status screen opens. From this screen, you can do several things.
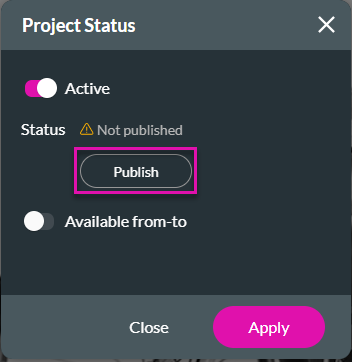
3. Use the Active toggle switch to set the project as inactive. The default is “Active”. No one will have access to an inactive project.
4. Click the Publish button to publish the project. This is one of the ways to publish.
5. Use the toggle switch to set the availability of the project. The screen changes, and you can set the From Date and To Date.
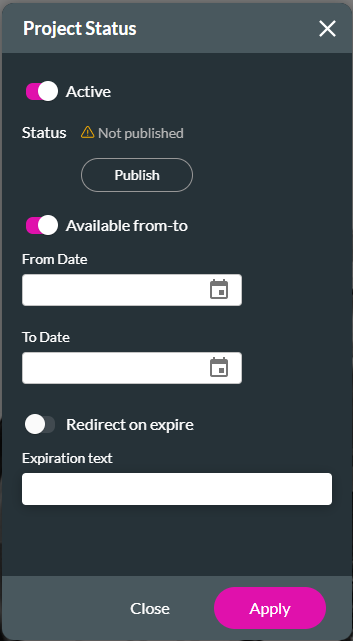
6. Click the Calendar icon to choose the date and time.
7. Add Expiration text in the field showing when the webpage expires.
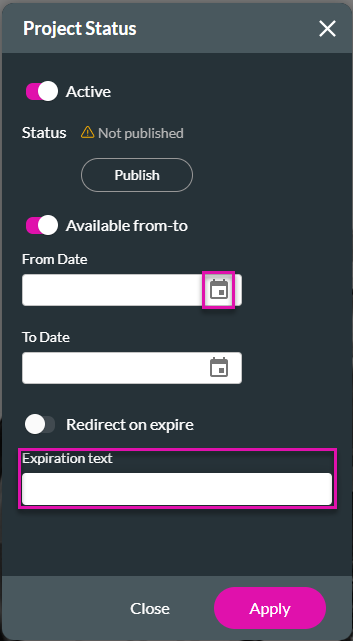
8. Alternatively, add a custom redirect URL in the field using the Redirect on the Expire toggle switch. When the project expires, the user will be redirected to the custom URL.
2. Click the Gear icon next to the status. The Project Status screen opens. From this screen, you can do several things.
3. Use the Active toggle switch to set the project as inactive. The default is “Active”. No one will have access to an inactive project.
4. Click the Publish button to publish the project. This is one of the ways to publish.
5. Use the toggle switch to set the availability of the project. The screen changes, and you can set the From Date and To Date.
6. Click the Calendar icon to choose the date and time.
7. Add Expiration text in the field showing when the webpage expires.
8. Alternatively, add a custom redirect URL in the field using the Redirect on the Expire toggle switch. When the project expires, the user will be redirected to the custom URL.
03 How to Publish
1. Click the Publish button at the top right of the screen. The Publish Project screen opens, and a new tab automatically launches the project. If the new tab doesn’t open, click the Launch Site button.

2. Click the Copy icon to copy the URL that you can distribute in any way that suits your business needs.
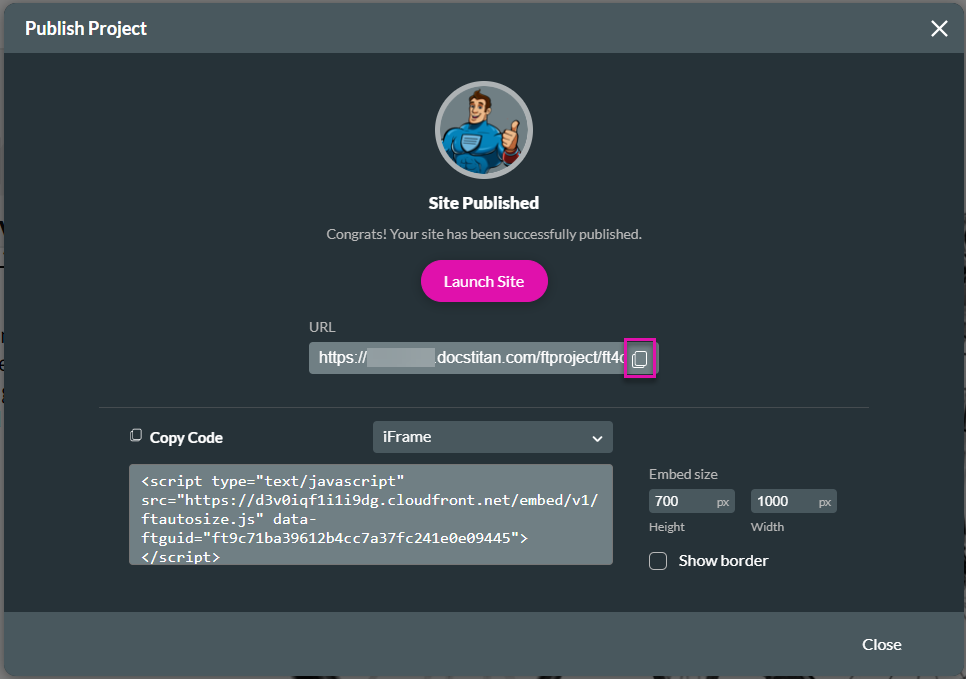
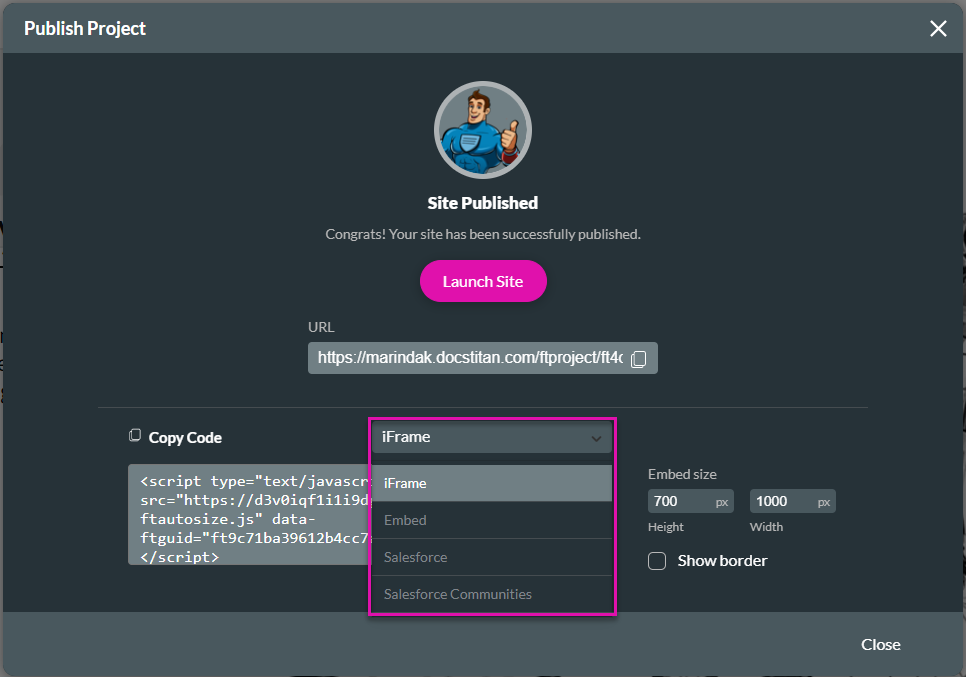
3. Use the drop-down list to see the options for embedding your project on your website. We will discuss these in another lesson.
4. Click the Close button.
2. Click the Copy icon to copy the URL that you can distribute in any way that suits your business needs.
3. Use the drop-down list to see the options for embedding your project on your website. We will discuss these in another lesson.
4. Click the Close button.
04 Check the Status
1. Click the Gear icon, and under Overview, you will see the project status.
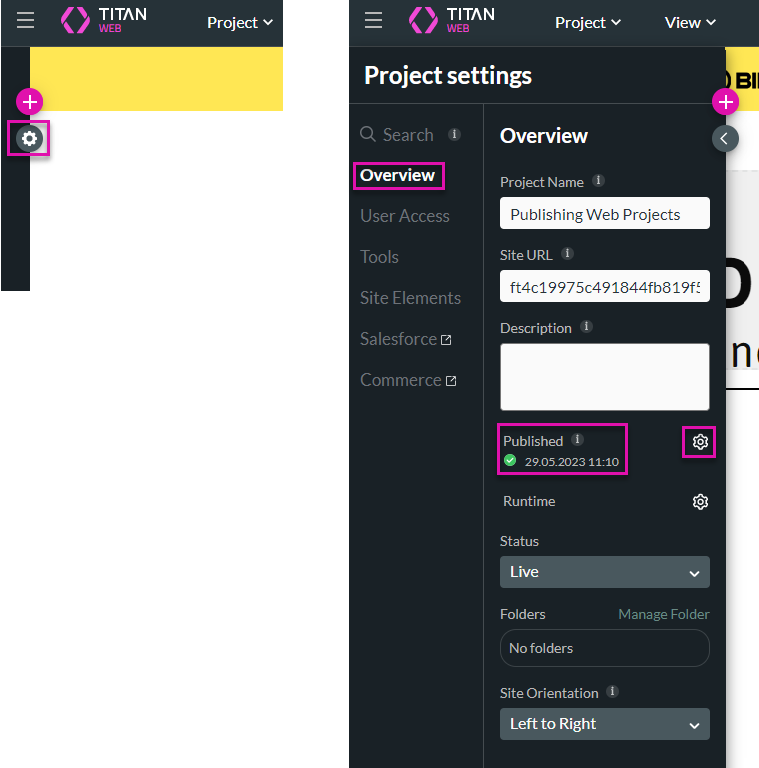
2. Click the Gear icon next to the status. The Project Status screen opens. The Published toggle switch is added and is automatically switched on.
2. Click the Gear icon next to the status. The Project Status screen opens. The Published toggle switch is added and is automatically switched on.