Working with Modals (10 min)
Completion requirements
01 Getting Started
This tutorial will explore working with two types of modals in Titan Web:
- Titan Web Native Modals
- Custom Modals
02 Native Modals
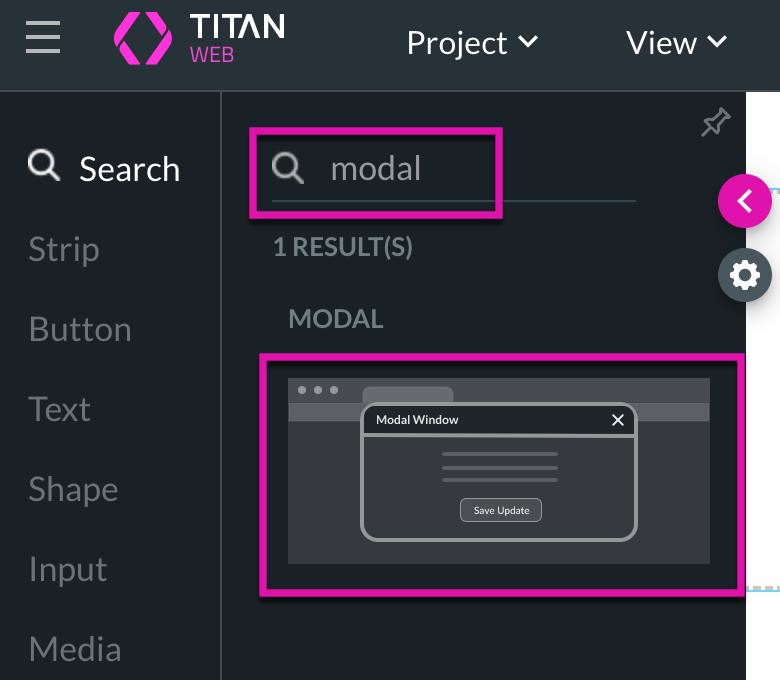
1. Drag and drop a modal from the Elements list.
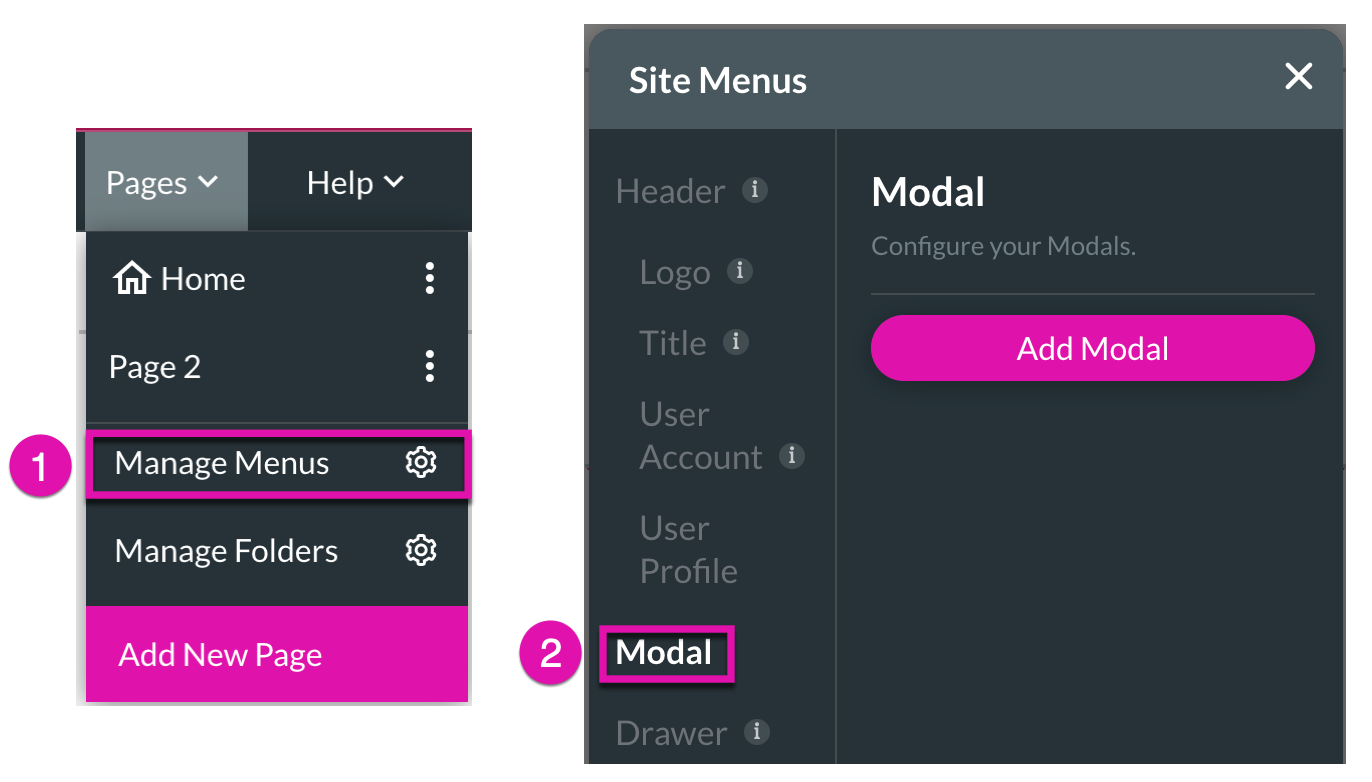
2. Alternatively, you can find modals under the Pages tab.
3. Choose the Manage Menus and Modal option before clicking the Add Modal button.
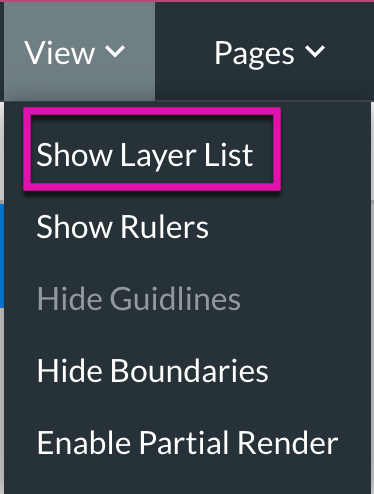
4. Make sure to open your Layer List by clicking on View and selecting Show Layer List.
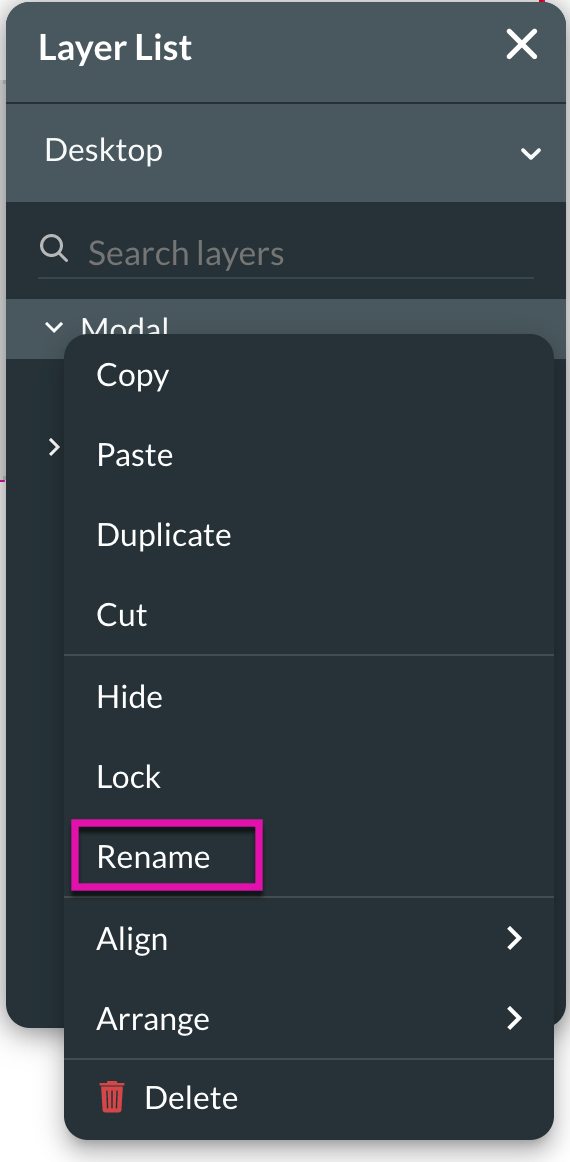
5. To rename your modal, right-click on your element in the Layer List and choose Rename.
6. In the Tag Name field, type the new name of your modal and click the pink check button to save.

2. Alternatively, you can find modals under the Pages tab.
3. Choose the Manage Menus and Modal option before clicking the Add Modal button.
4. Make sure to open your Layer List by clicking on View and selecting Show Layer List.
5. To rename your modal, right-click on your element in the Layer List and choose Rename.
6. In the Tag Name field, type the new name of your modal and click the pink check button to save.
03 To Hide your Modal
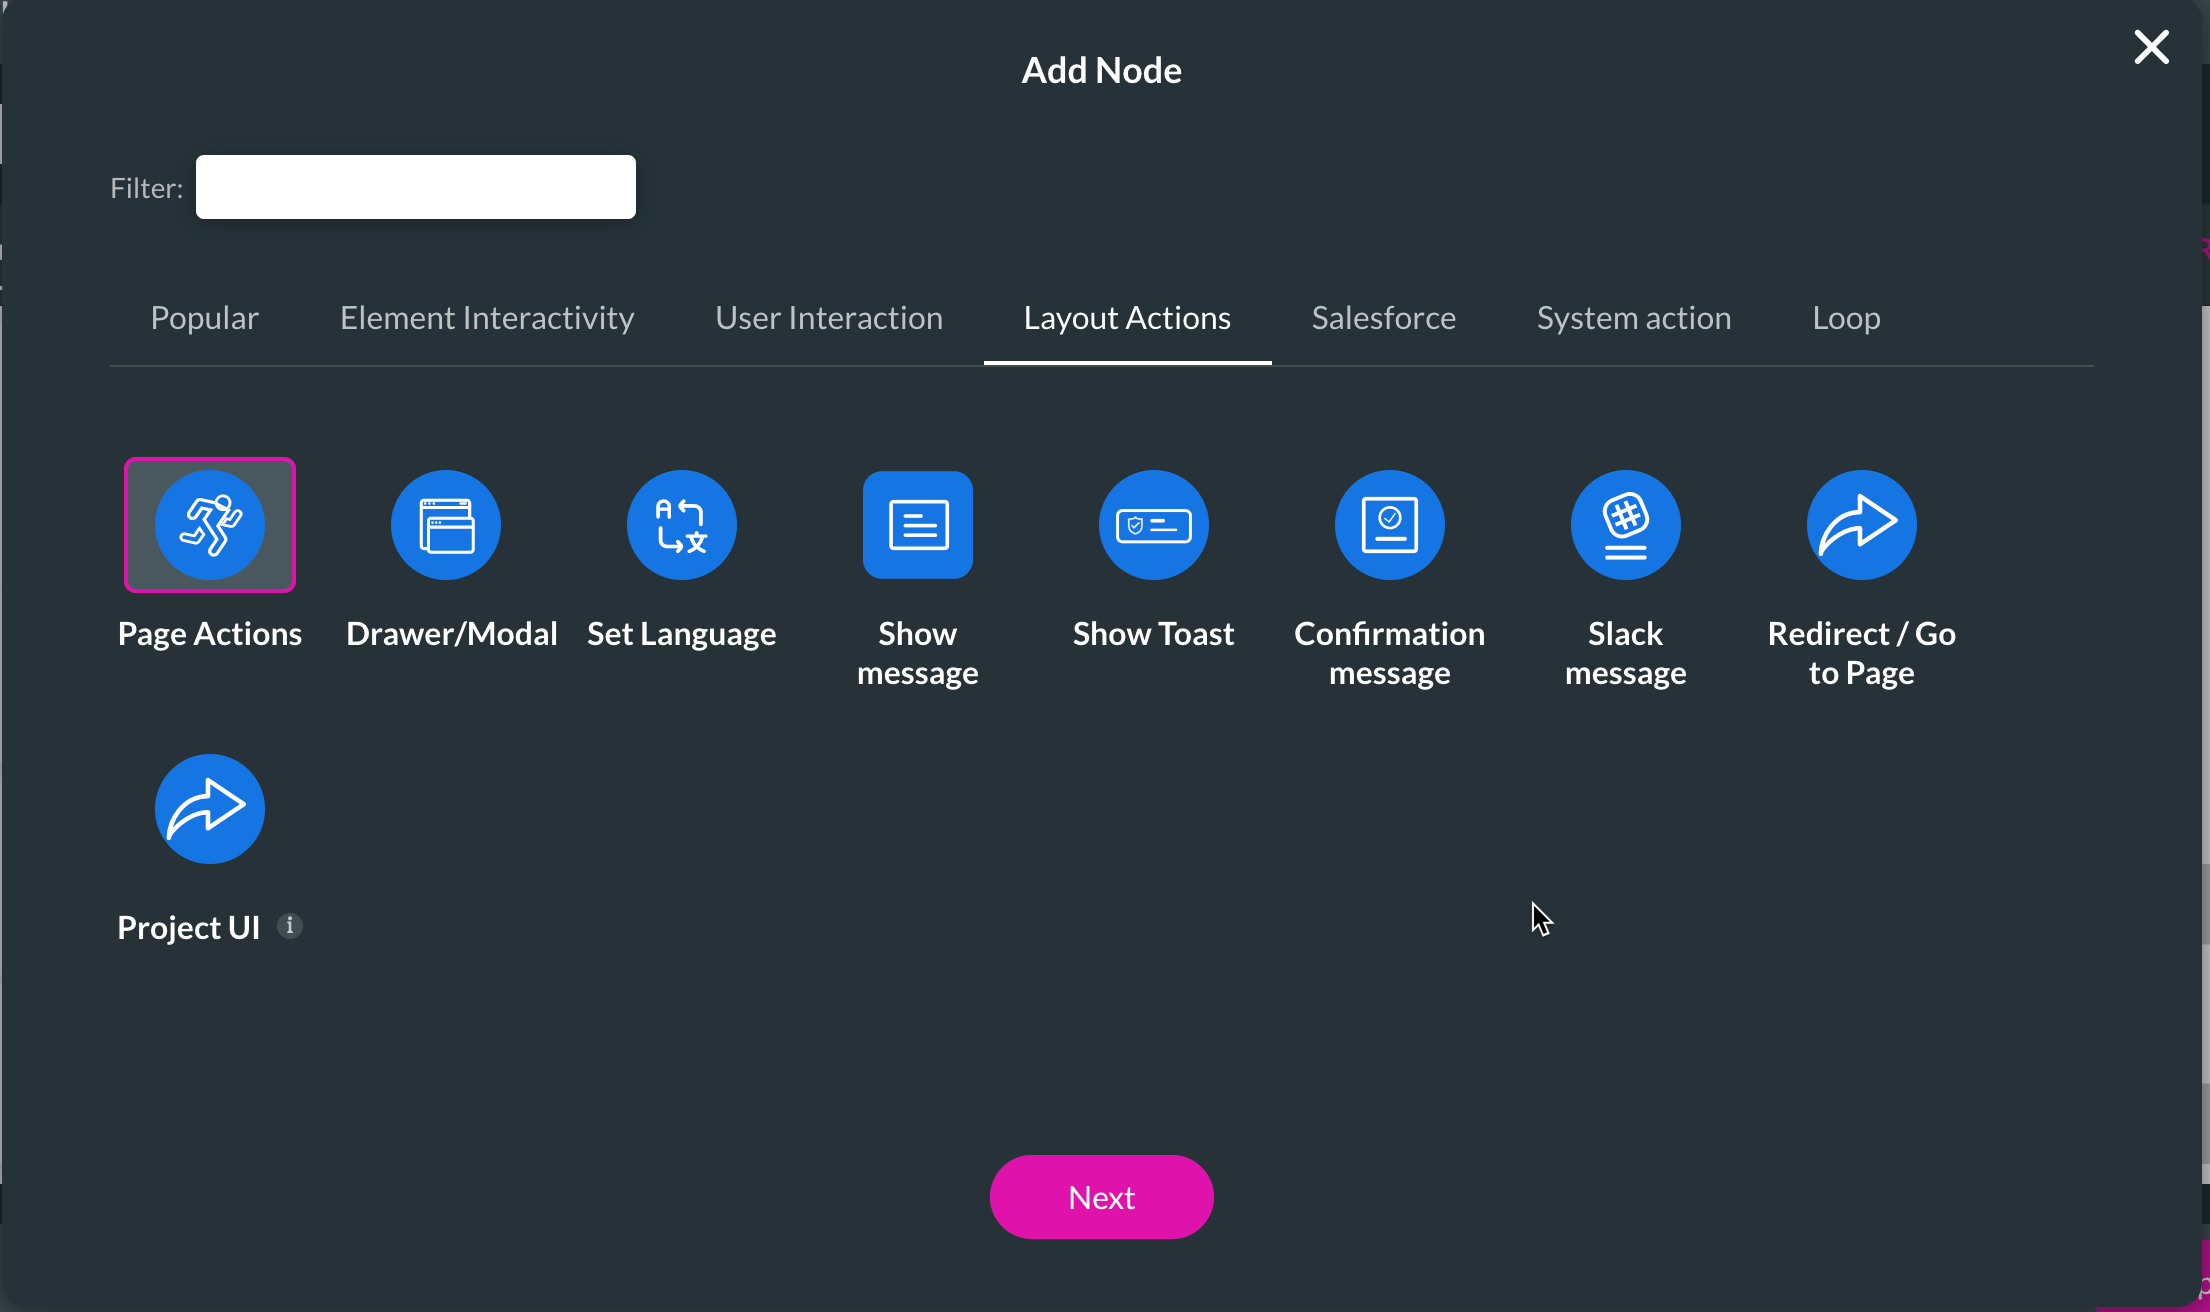
1. Add an On Click Action to a button of your choice by selecting the Drawer/Modal interactivity.
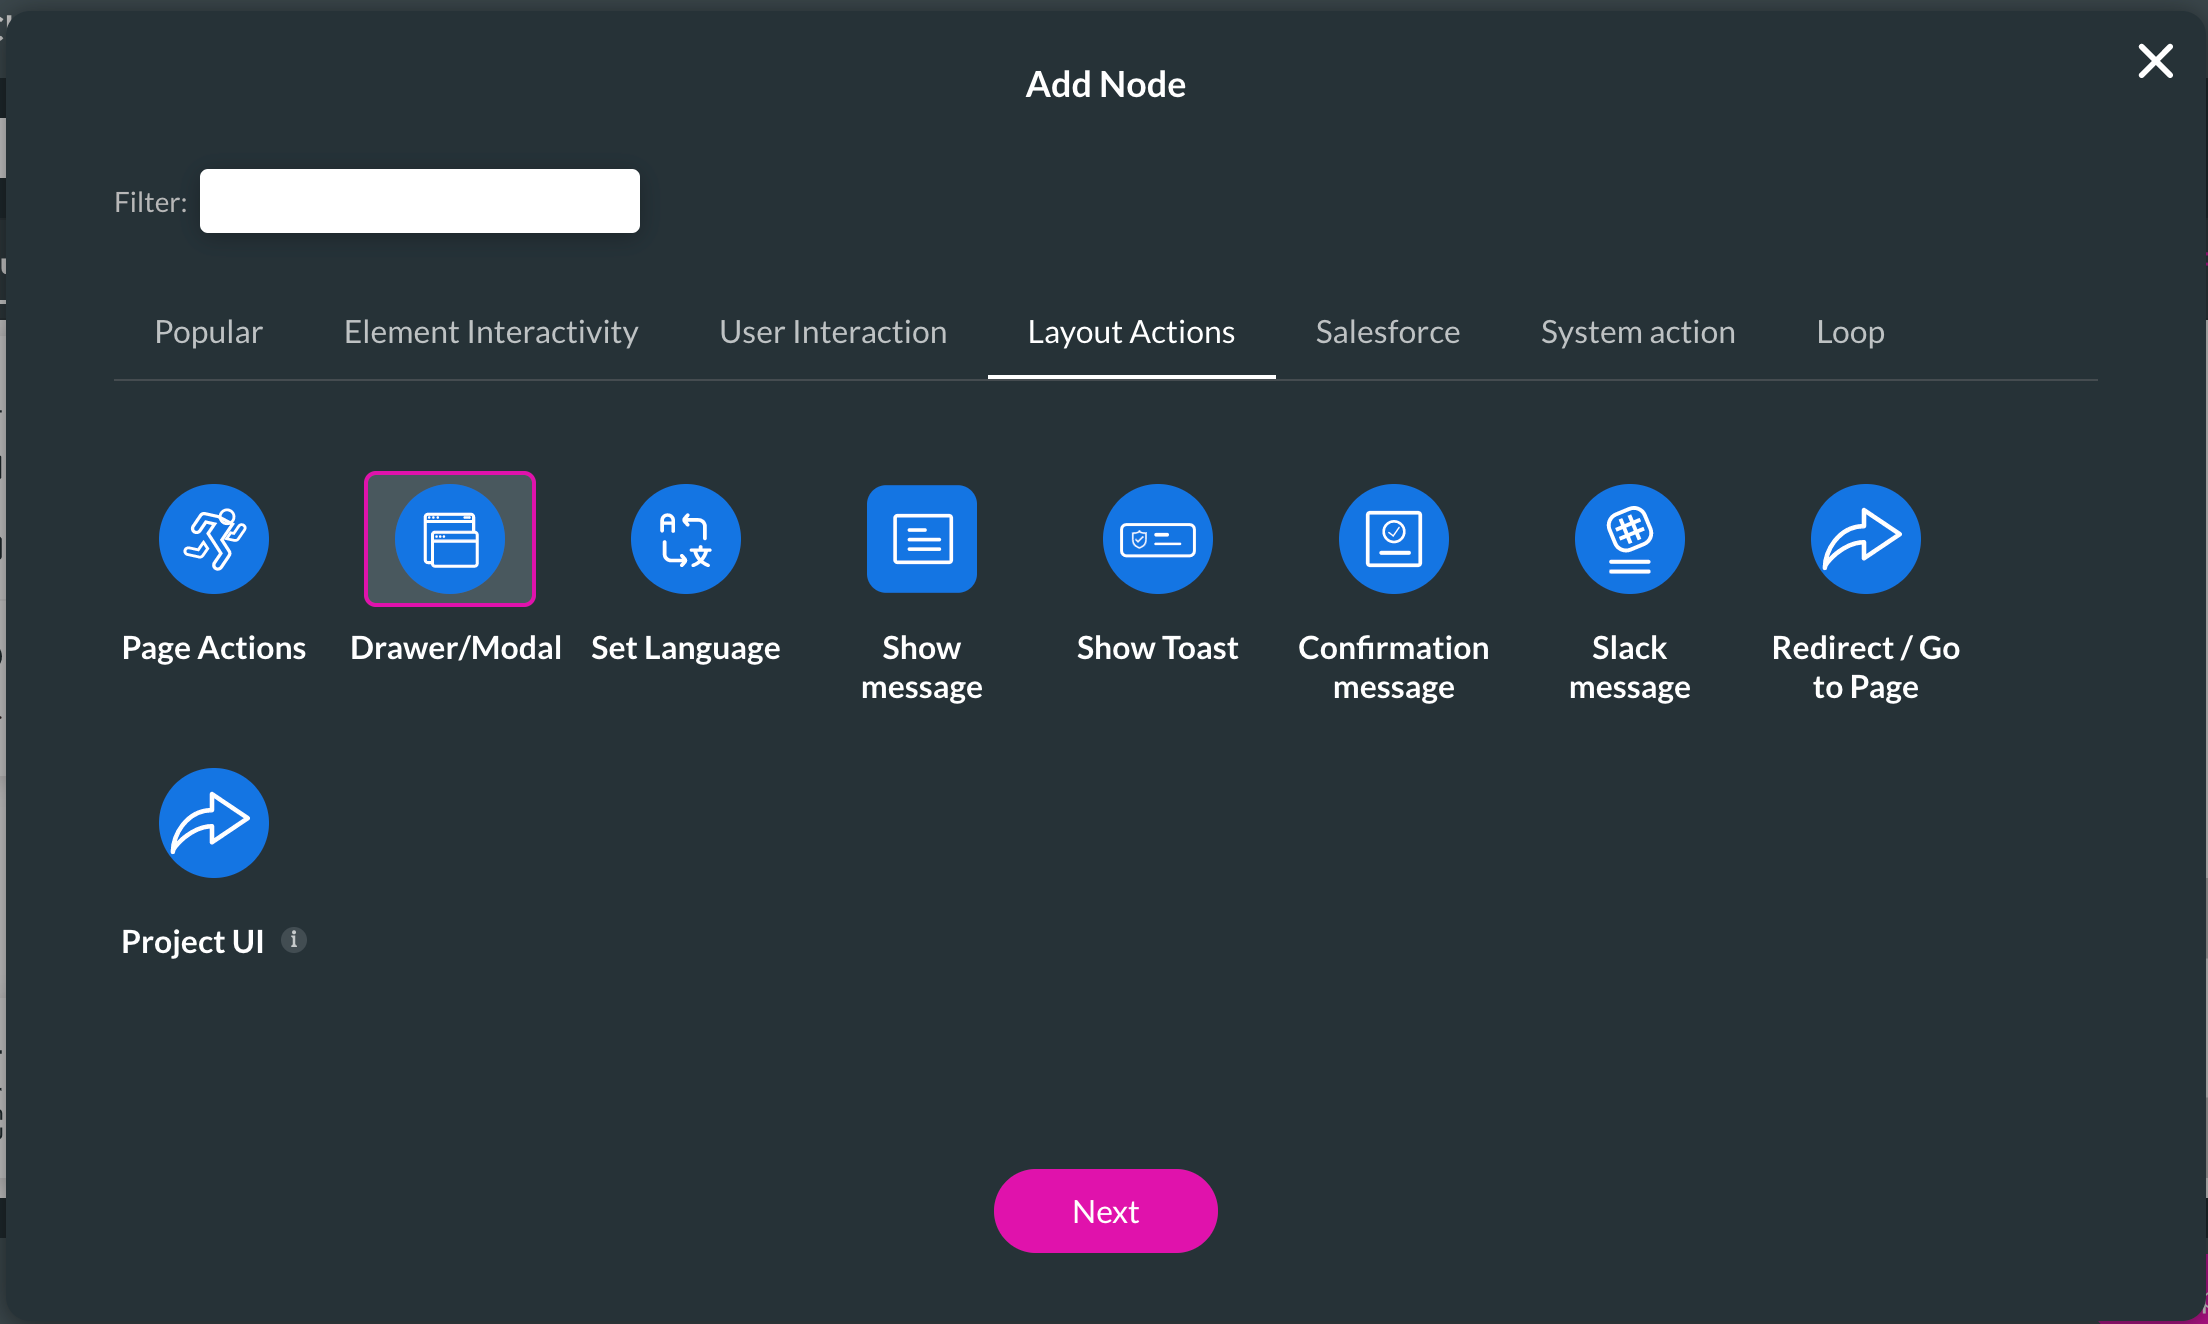
2. Choose the Modal option from the side menu and ensure the Enable toggle switch is on.
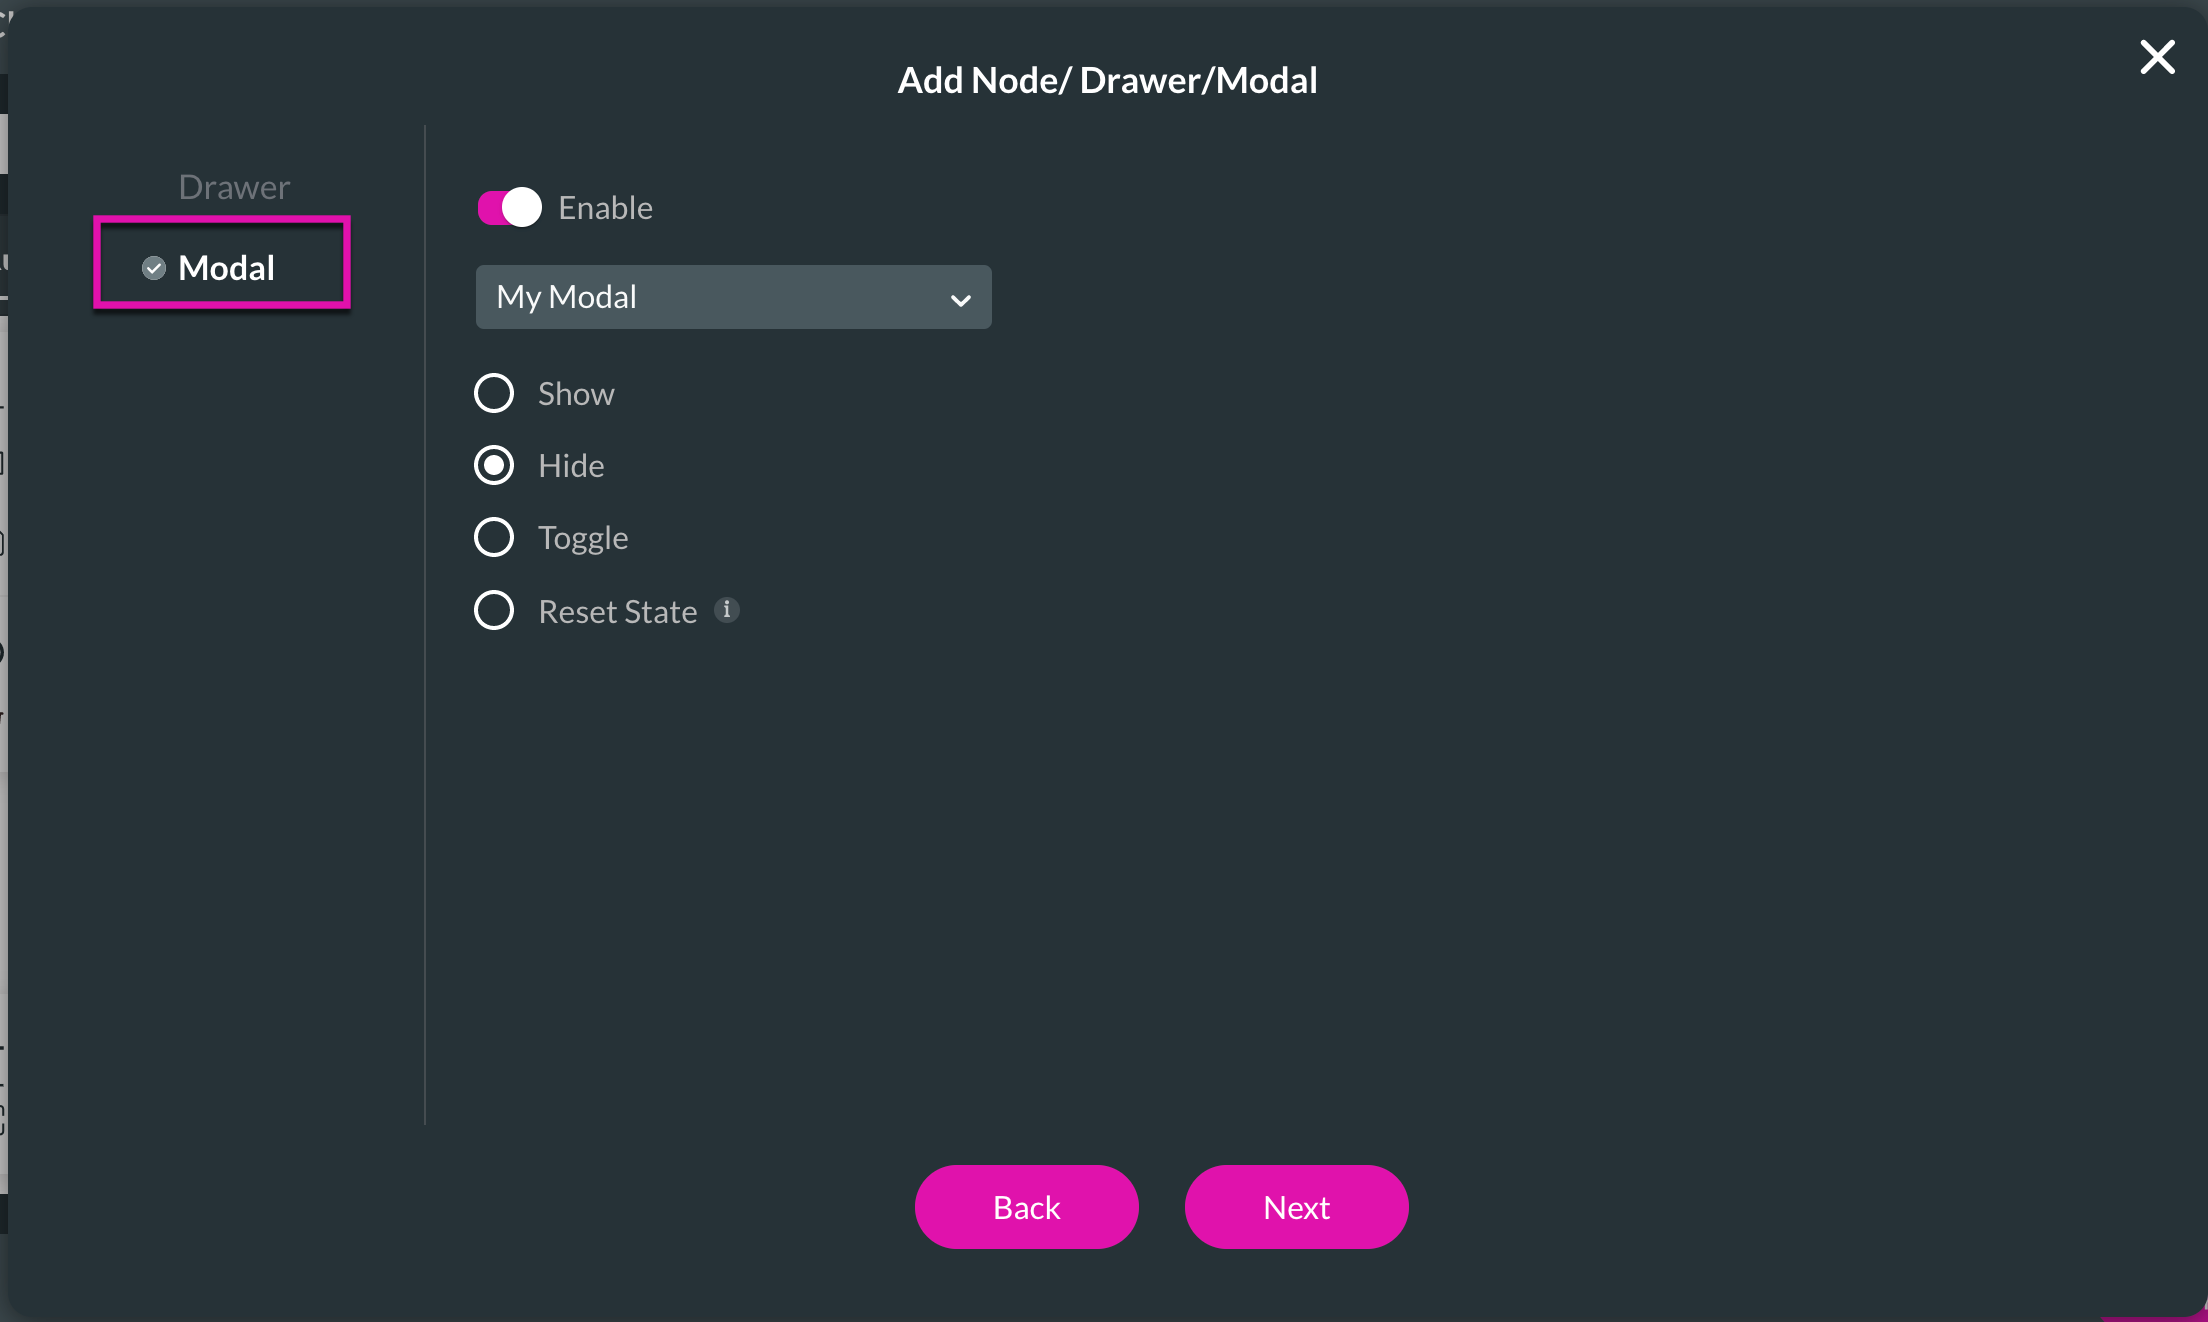
3. Select your modal and choose the Hide radio button. Save and preview your project. When you click your button, your modal should disappear.
2. Choose the Modal option from the side menu and ensure the Enable toggle switch is on.
3. Select your modal and choose the Hide radio button. Save and preview your project. When you click your button, your modal should disappear.
04 To Show your Modal
1. Add an On Click Action to a button of your choice by selecting the Drawer/Modal interactivity.

2. Choose the Modal option from the side menu and ensure the Enable toggle switch is on.
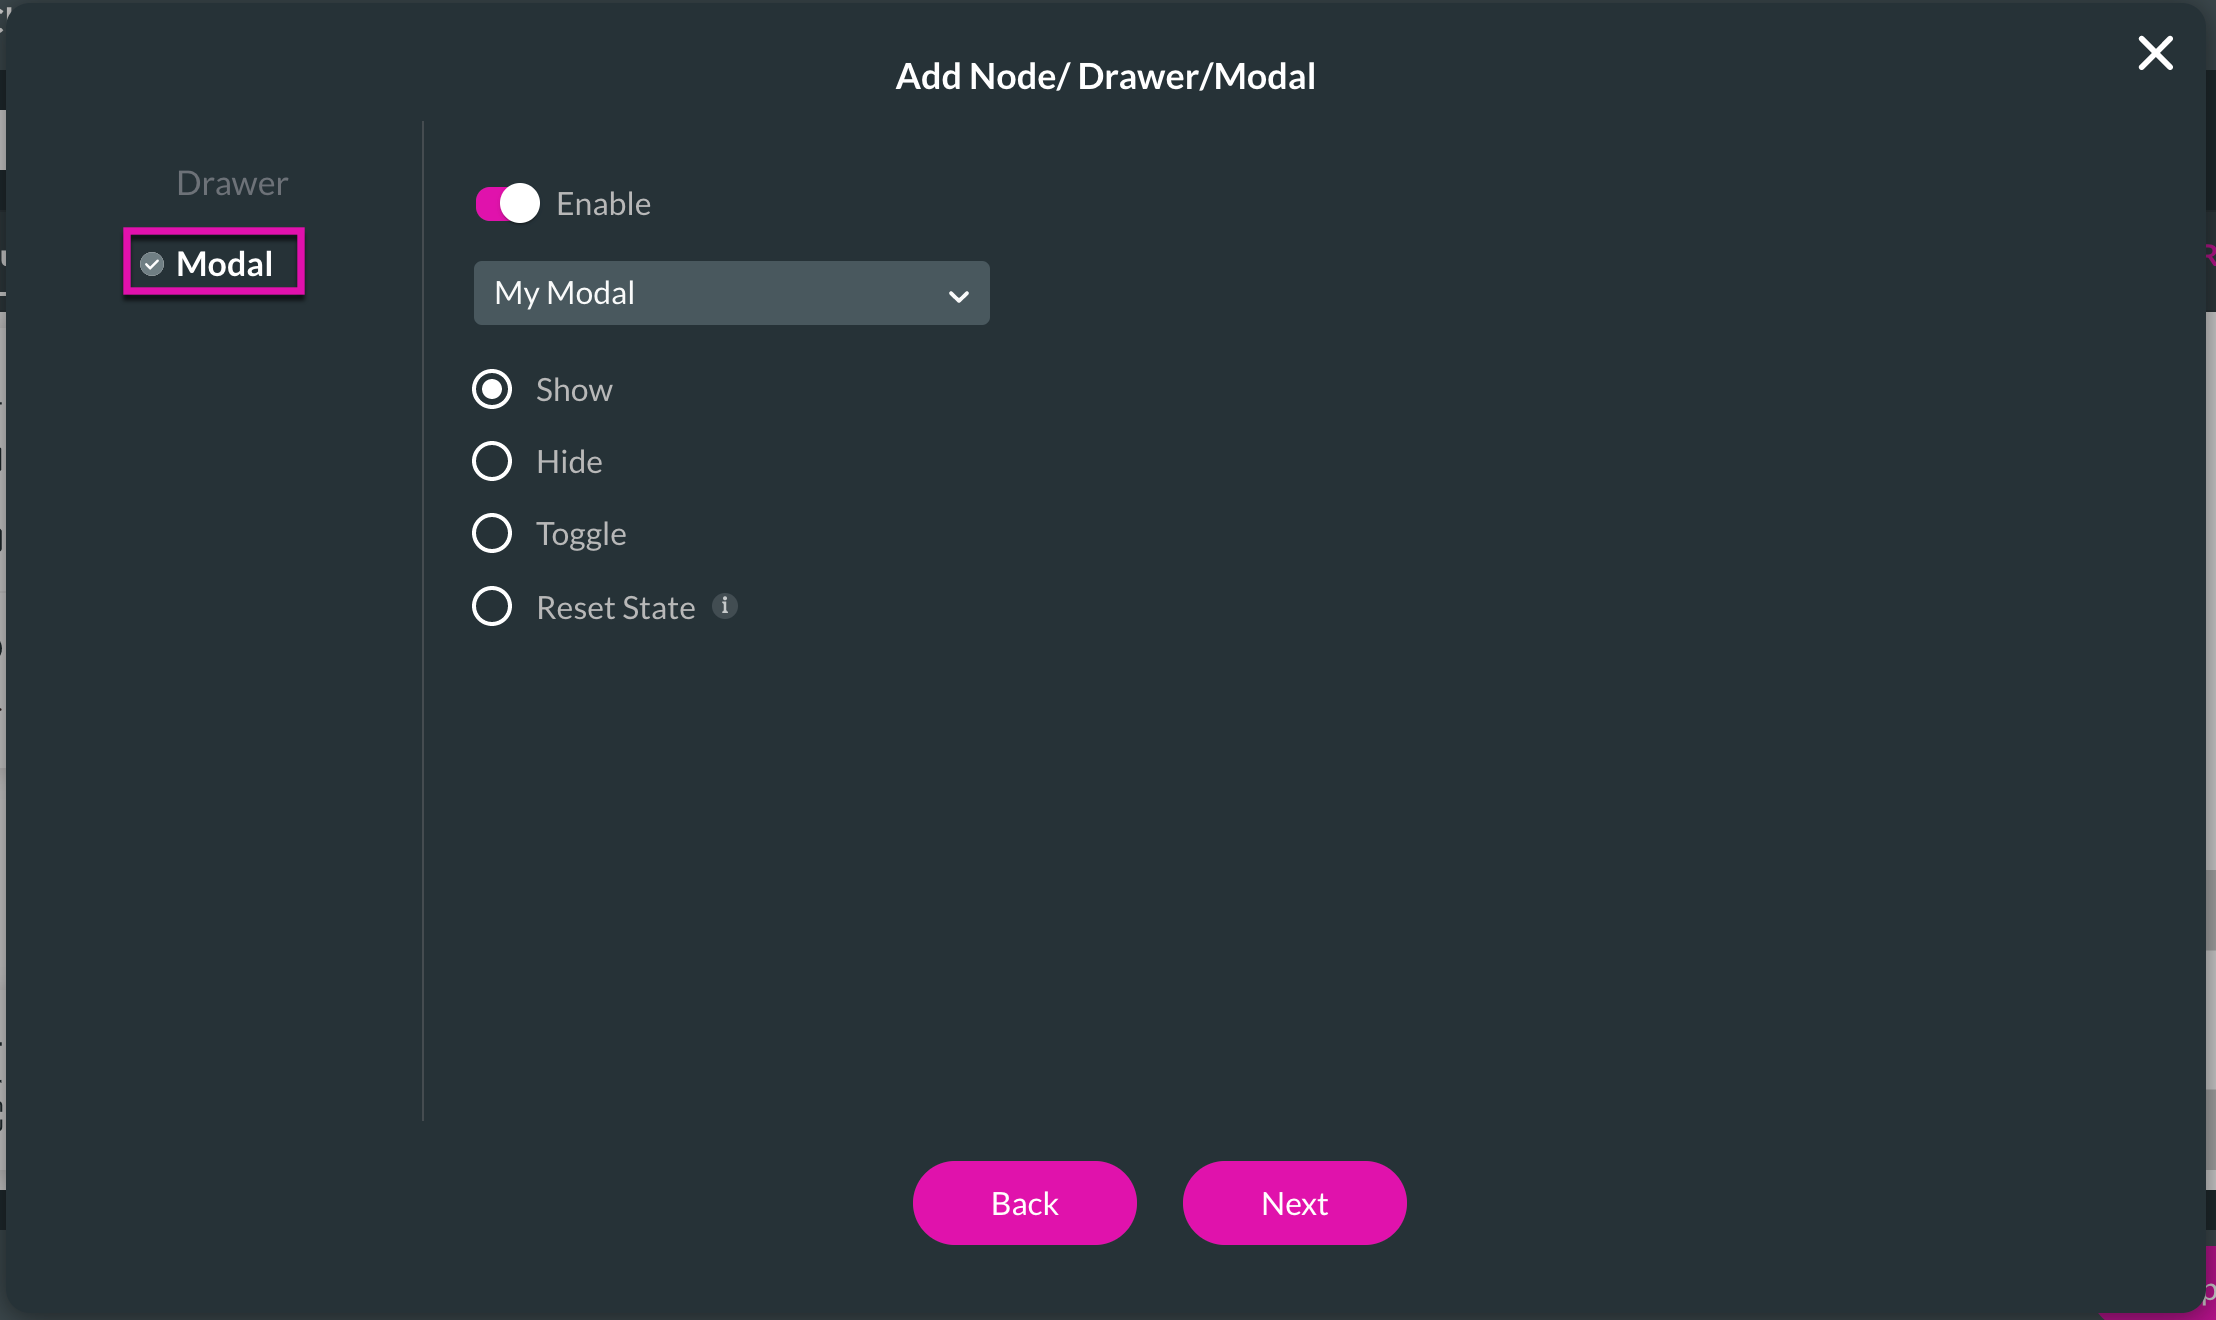
3. Select your modal and choose the Show radio button.
Save and preview your project. When you click your button, your modal should appear.
2. Choose the Modal option from the side menu and ensure the Enable toggle switch is on.
3. Select your modal and choose the Show radio button.
Save and preview your project. When you click your button, your modal should appear.
05 Custom Modals
Custom modals are usually pages in your web project.
Simple Show/Hide Interactivity for Custom Modals
Simple Show/Hide Interactivity for Custom Modals
06 To Show your Custom Modal
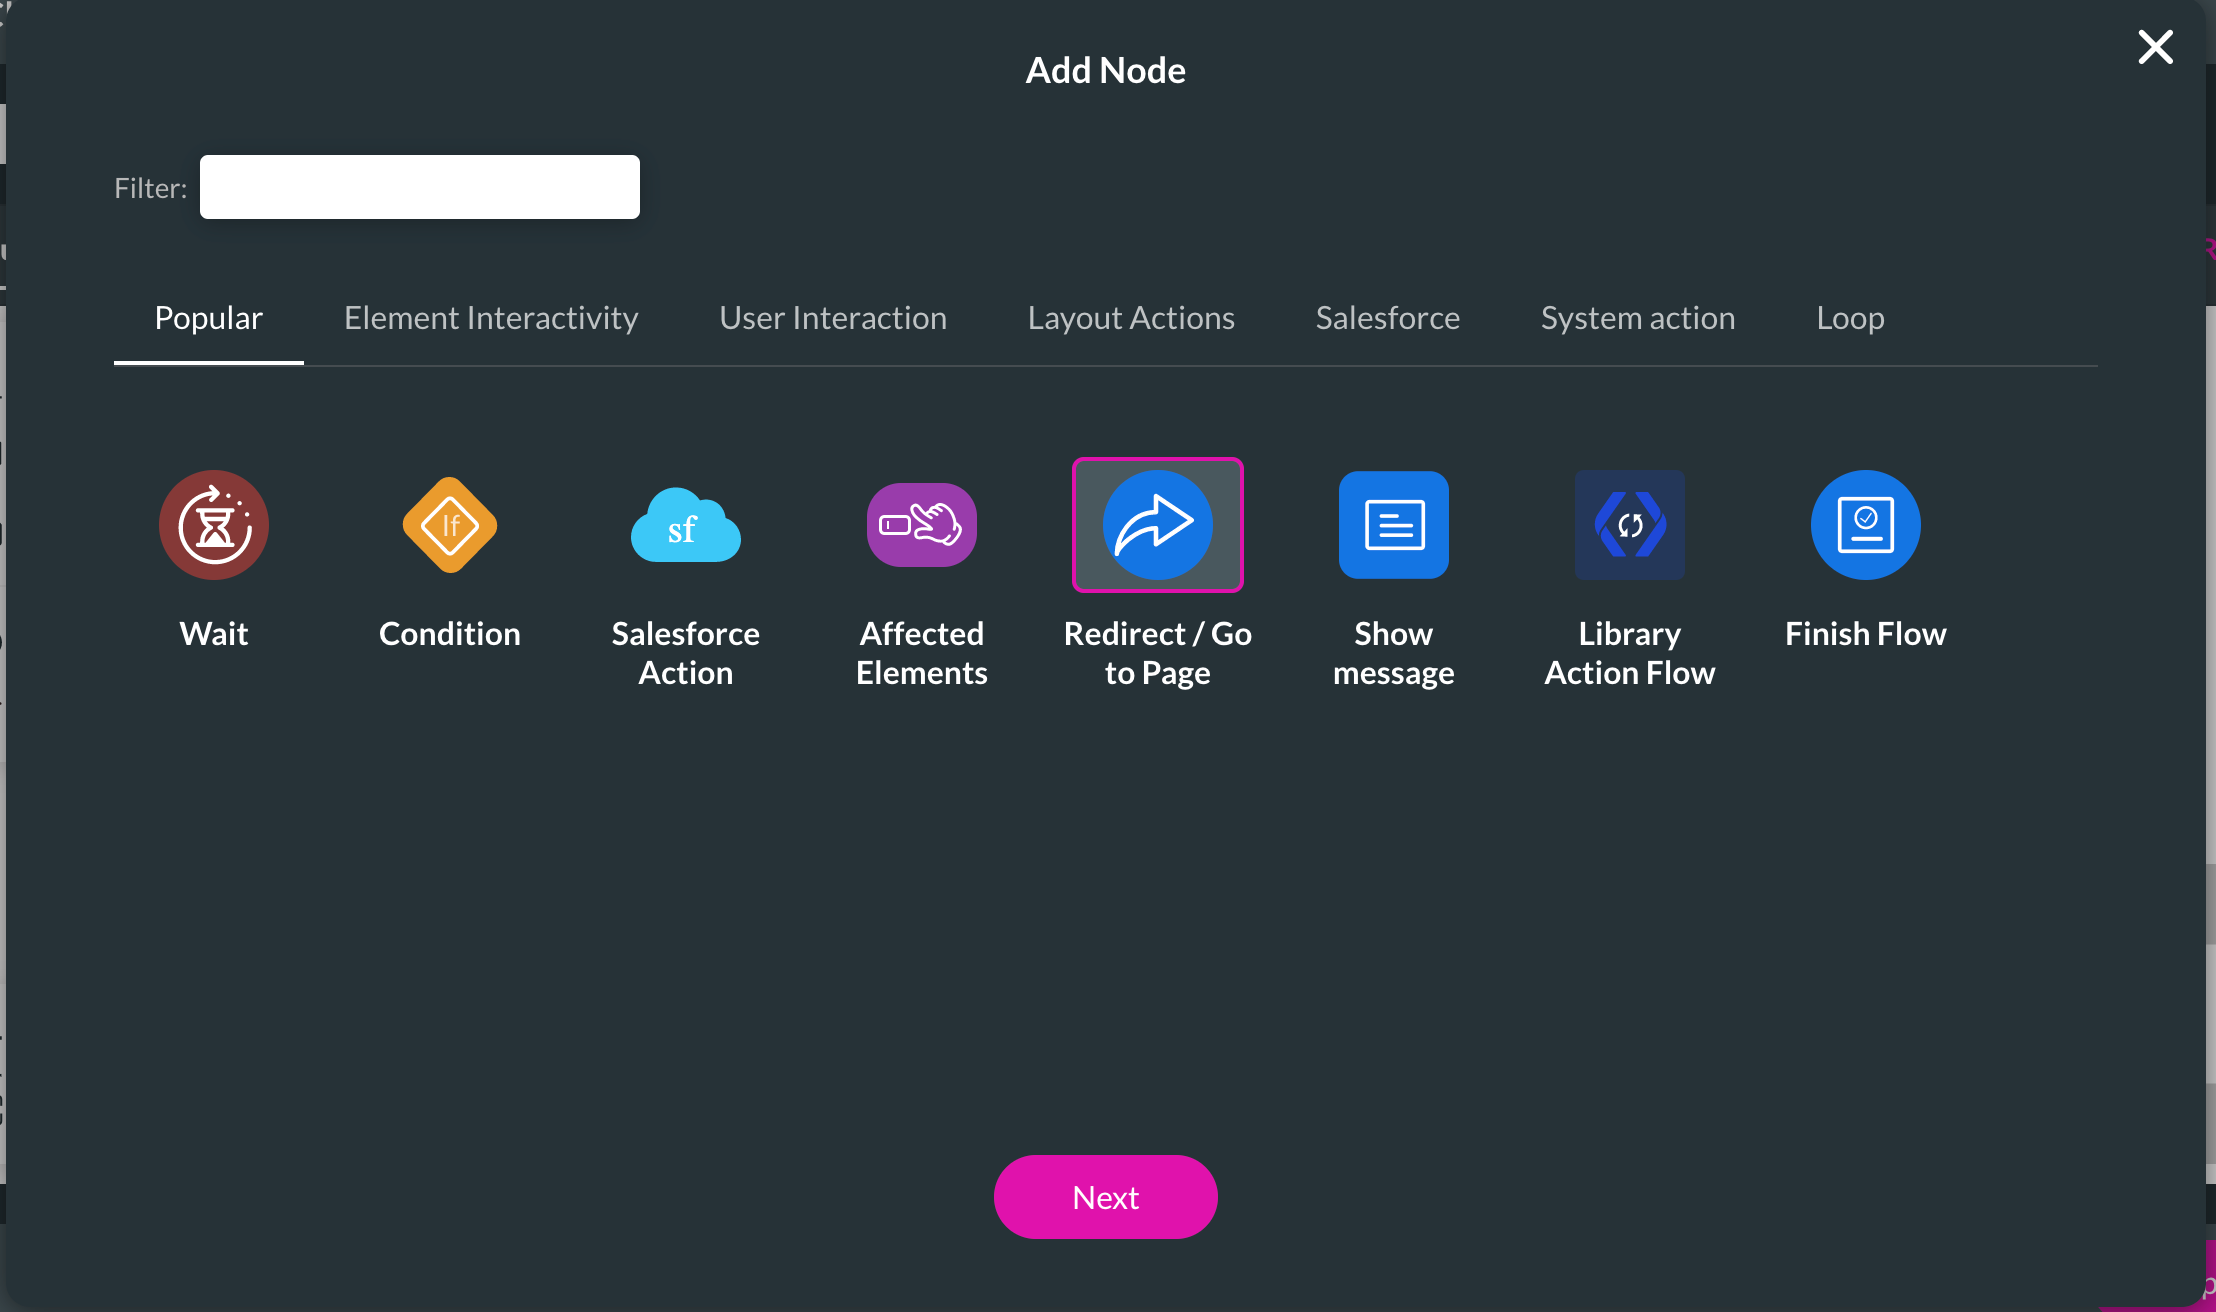
1. Add an On Click Action to a button of your choice by selecting the Redirect/ Go to Page interactivity.
2. Choose the Internal option from the side menu and select the Project Page you want to redirect.
3. Use the Open In dropdown to select the Modal option.
4. Remember to set the Parameters for the modal as well.
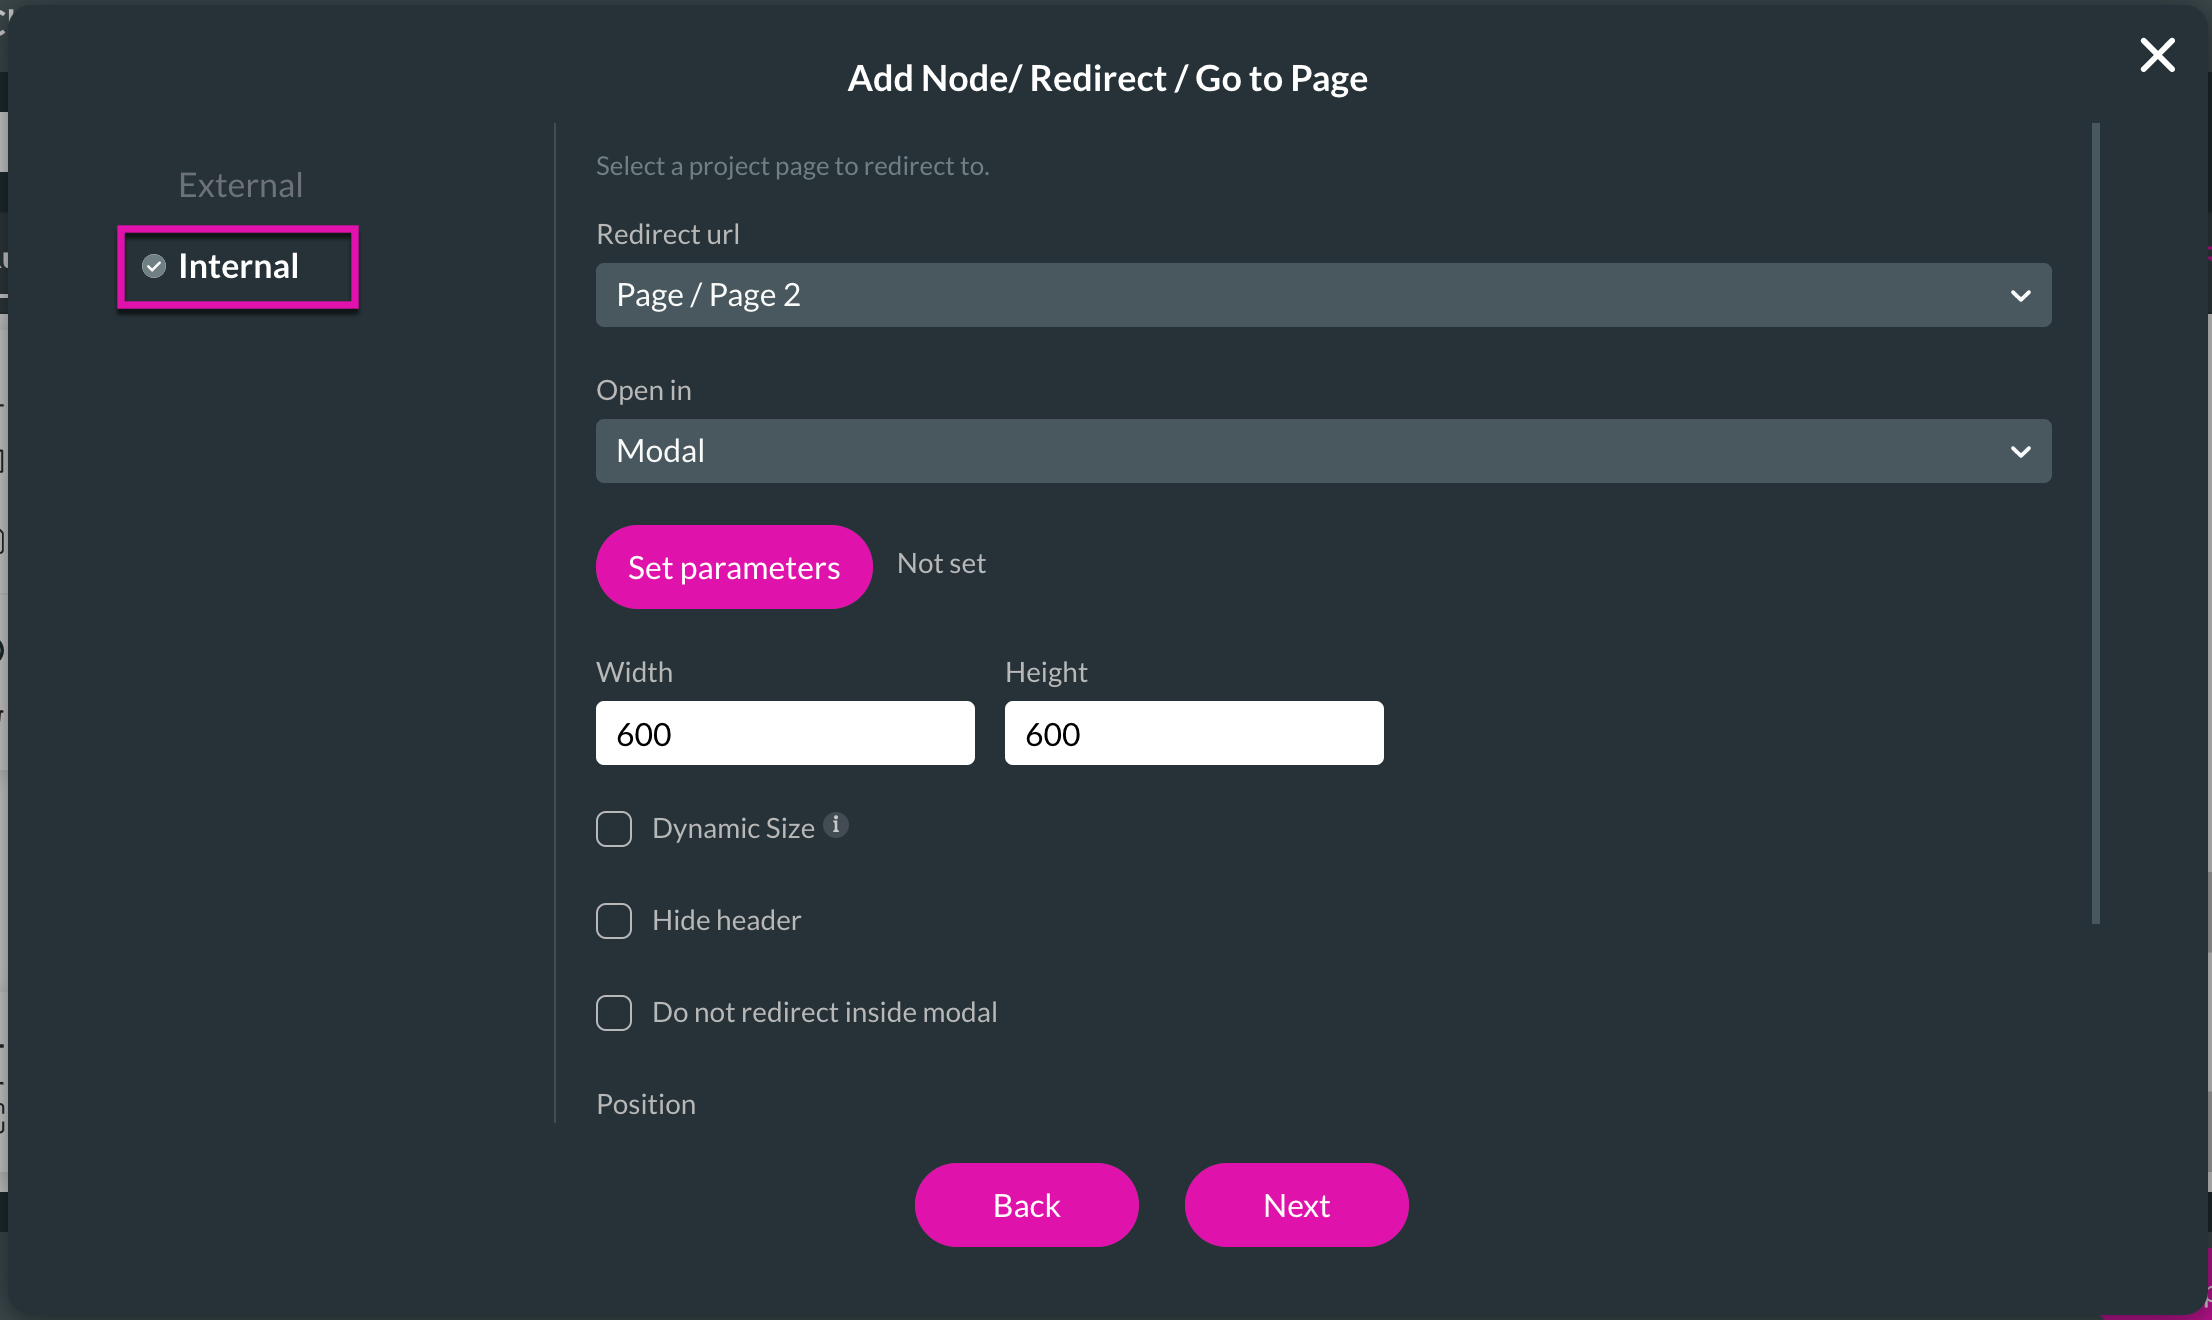
Save and preview your project. You should be directed to your assigned web page when you click your button.
2. Choose the Internal option from the side menu and select the Project Page you want to redirect.
3. Use the Open In dropdown to select the Modal option.
4. Remember to set the Parameters for the modal as well.
Save and preview your project. You should be directed to your assigned web page when you click your button.
07 To Hide your Custom Modal
1. Add an On Click Action to a button of your choice by selecting the Page Actions interactivity.
2. Choose the Close Modal option from the side menu and ensure that the Enable checkbox is ticked.
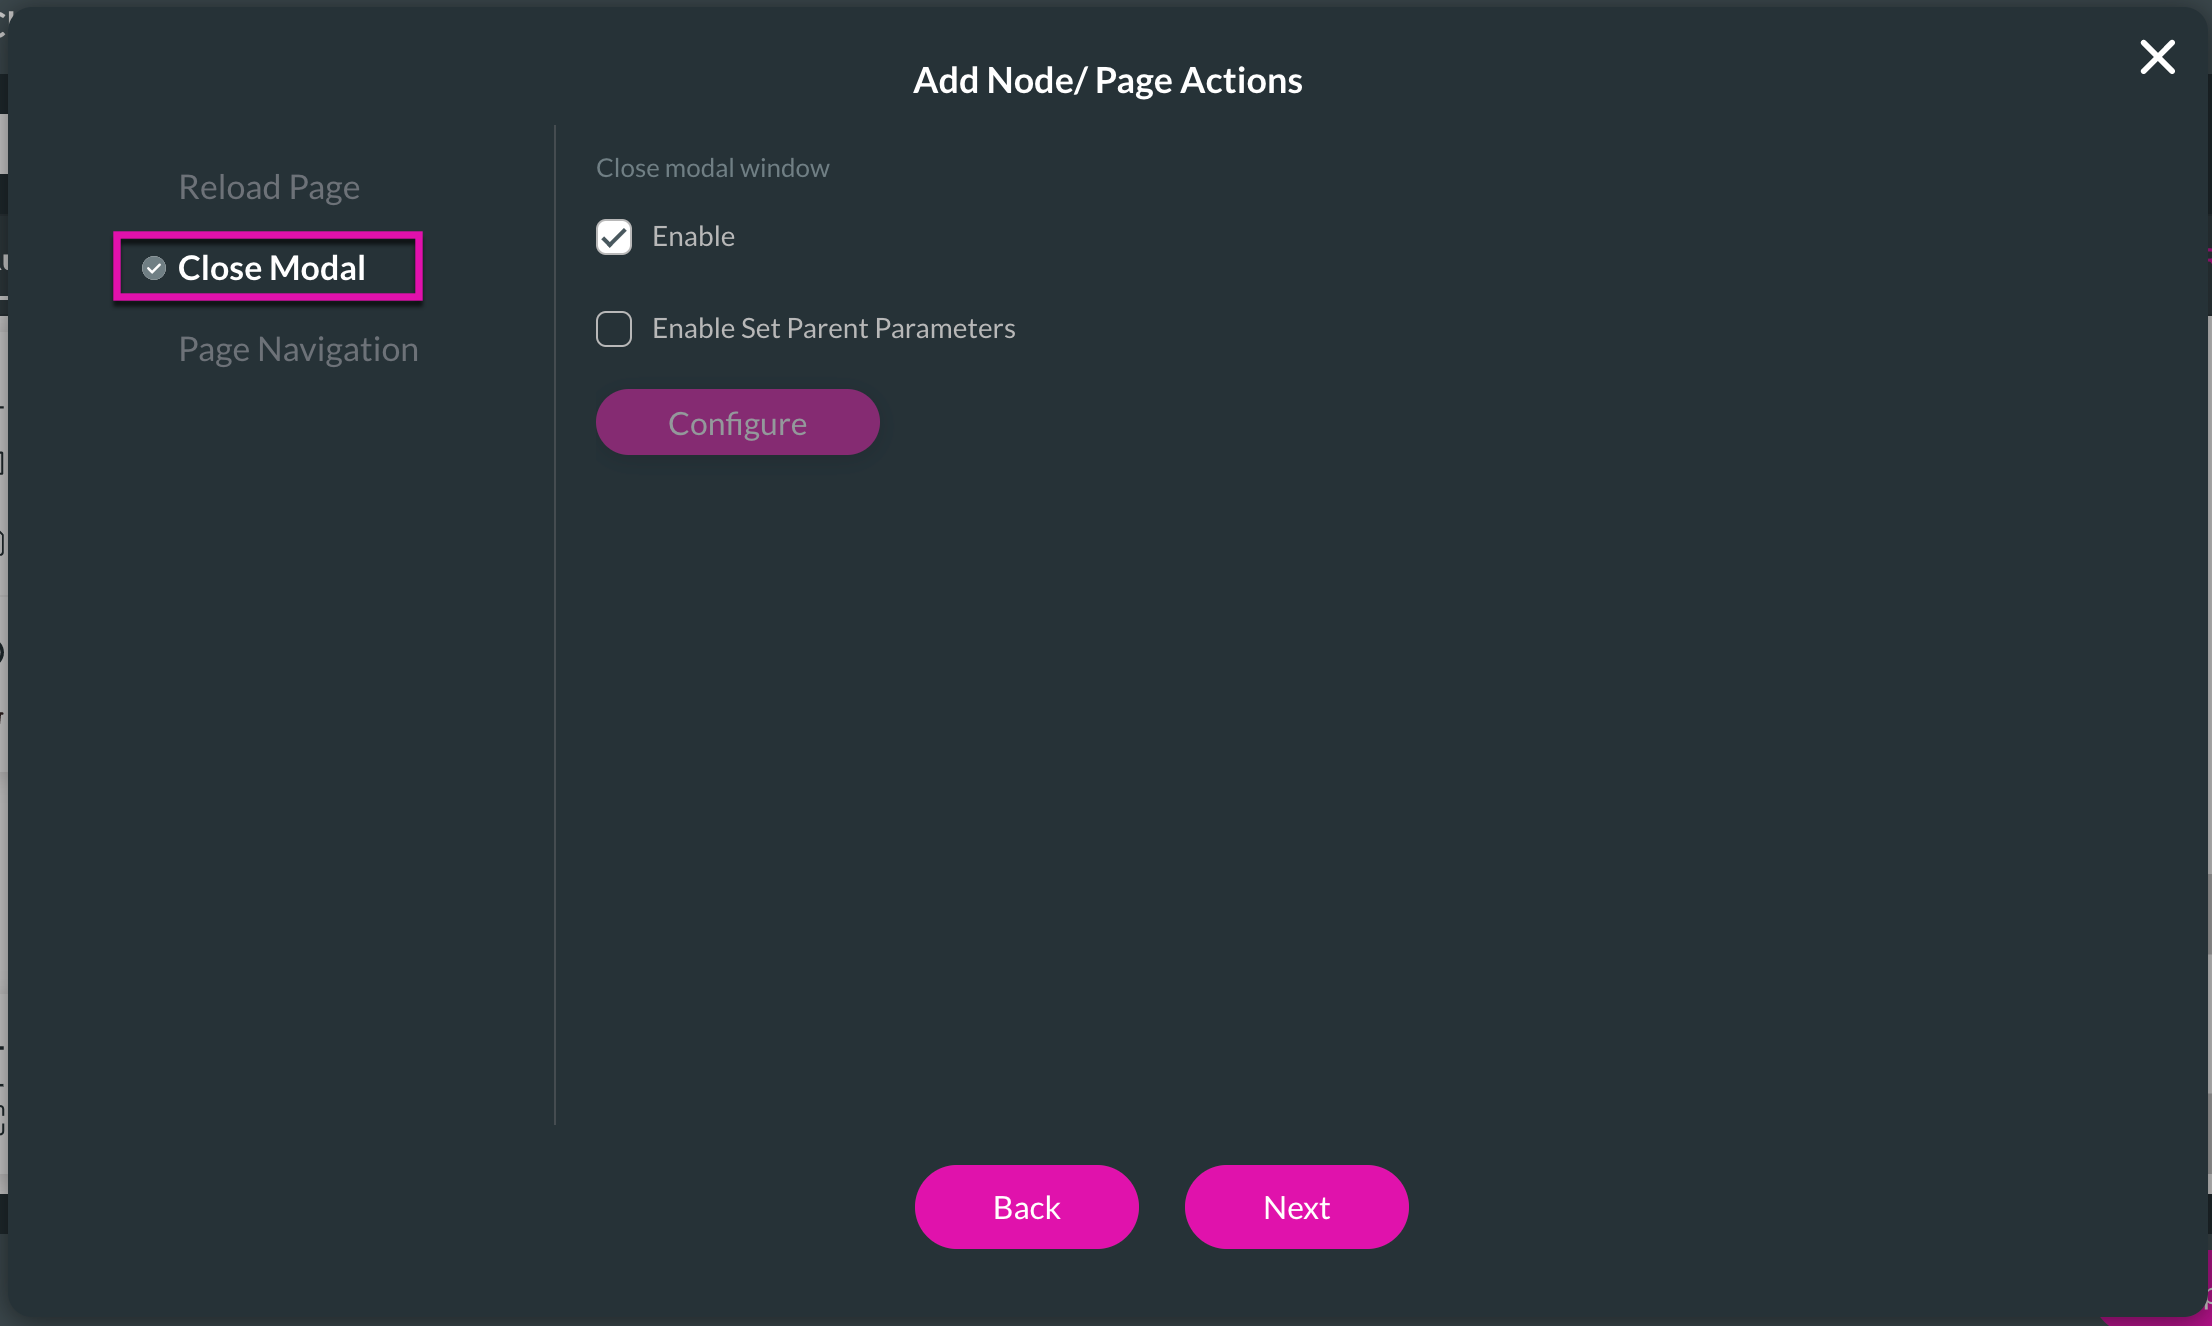
Save and preview your project. When you click your button, your modal should disappear.
2. Choose the Close Modal option from the side menu and ensure that the Enable checkbox is ticked.
Save and preview your project. When you click your button, your modal should disappear.
08 Titan’s Takeaway
When you want to take quick action, use Native Modals, which are fast at controlling variables between web pages. Native Modals can see all variables, whereas Custom Modals cannot since they exist on a different web page. Whenever you need more control of the layout or need to perform more complex actions, choose our Custom Modal options.