Upload Files to a Single Record (7 min)
Completion requirements
01 Getting Started
This tutorial will show you how to upload a file to a single record.
02 Creating a Simple Form
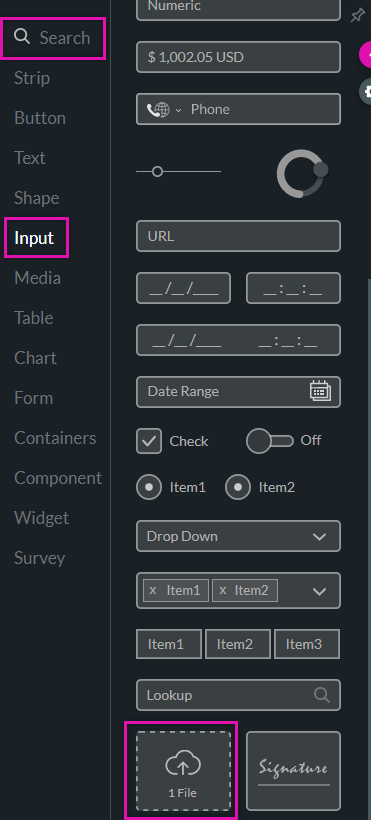
1. Use the element menu and insert the elements you need for your form. Ensure that a file upload element is included; this can be found under the input tab or by searching in the finder field.
2. Insert a button element; configuration will be applied to the button to invoke an action.
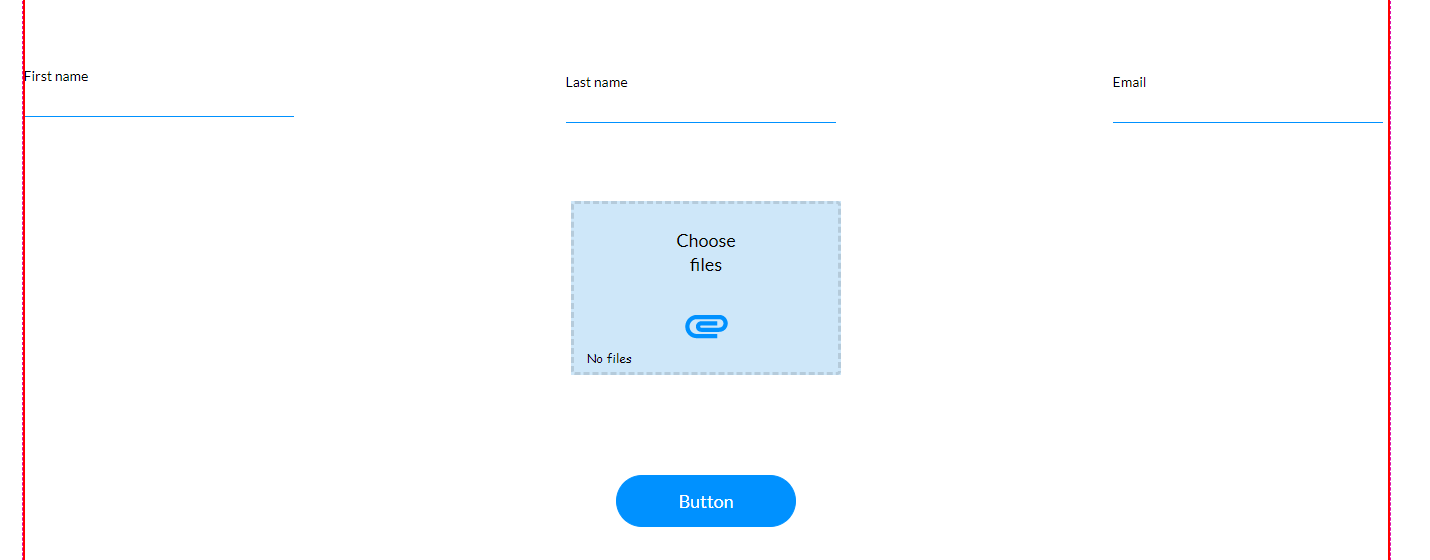

2. Insert a button element; configuration will be applied to the button to invoke an action.

03 Configurating the Push
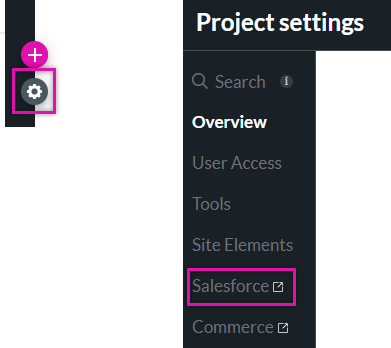
1. Click on the gear icon and select the Salesforce tab. The Salesforce Integration screen opens.
2. Select the Push tab and click Create New. The Map Salesforce Screen opens.
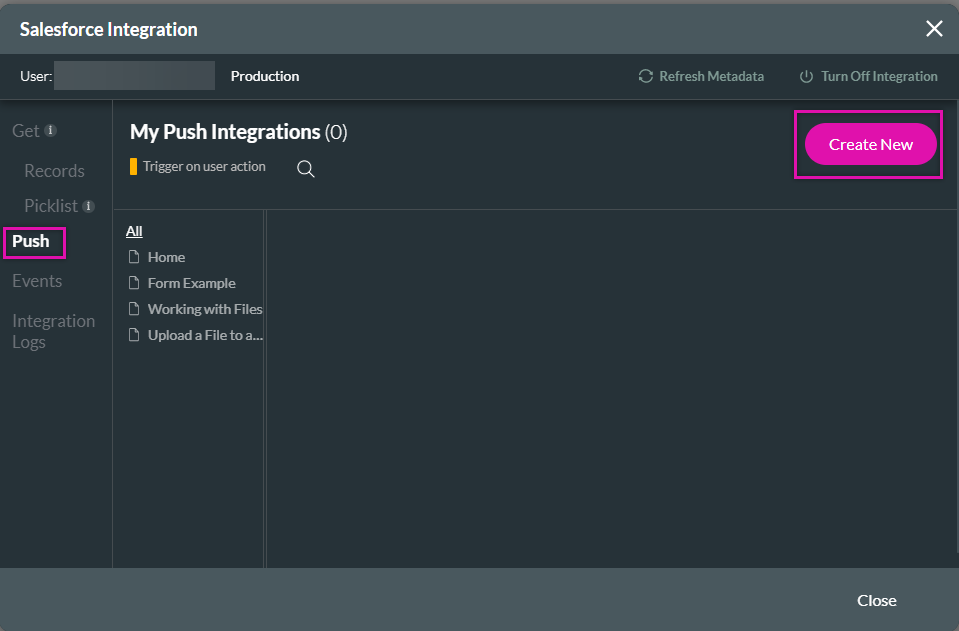

2. Select the Push tab and click Create New. The Map Salesforce Screen opens.

04 The Object Settings Tab
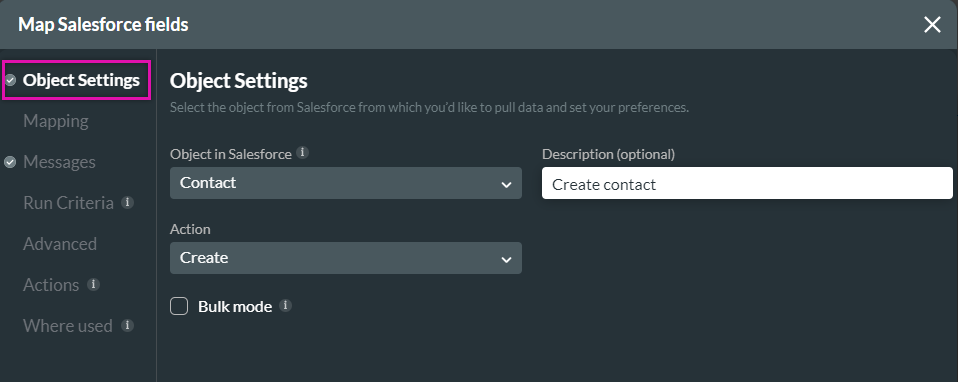
1. Using the drop-down, select the object in Salesforce, for example, Contact.
2. Add a description to detail the purpose of the Push.
3. Use the action drop-down to choose the operation, for example, Create.
2. Add a description to detail the purpose of the Push.
3. Use the action drop-down to choose the operation, for example, Create.

05 The Mapping Tab
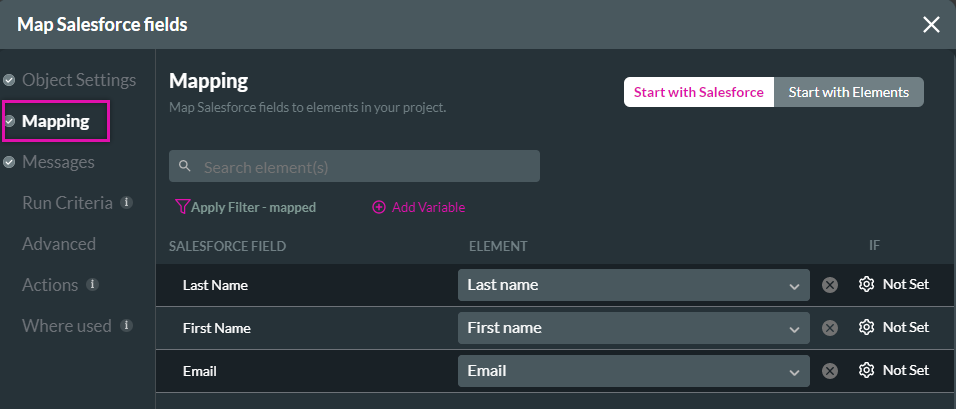
1. Click on the Mapping tab and use the drop-downs to match your web fields to objects in Salesforce—for example, the Last Name Salesforce field - Last Name Element.

06 Creating a Child Push
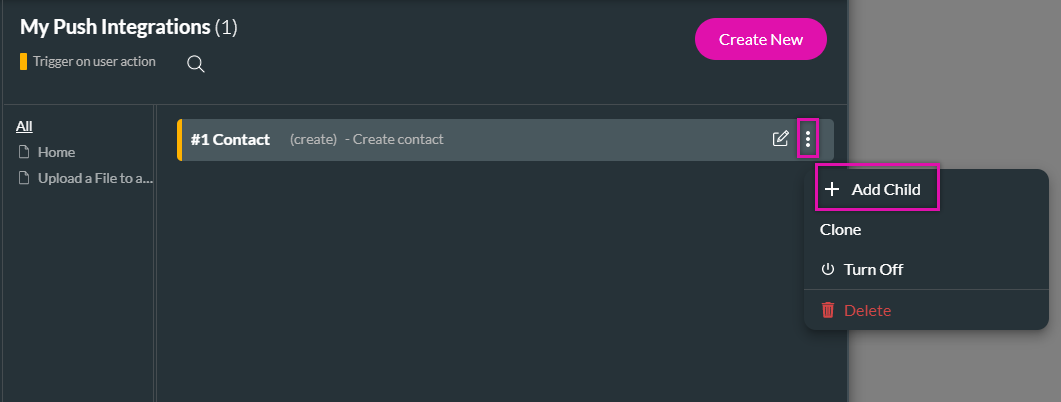
1. Click on the kebab menu next to the created push and select + Add Child.

07 The Child Push Object Settings Tab
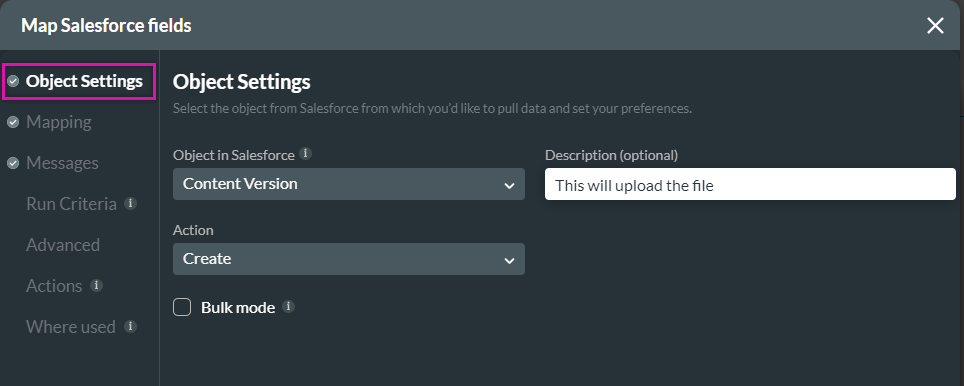
1. Use the Object in the Salesforce drop-down to select Content Version (this option is also known as files.)
2. Add a description to detail the purpose of the child Push.
3. Use the action drop-down to choose the operation, for example, Create.
2. Add a description to detail the purpose of the child Push.
3. Use the action drop-down to choose the operation, for example, Create.

08 The Child Push Mapping Tab
1. Click on the Mapping tab.
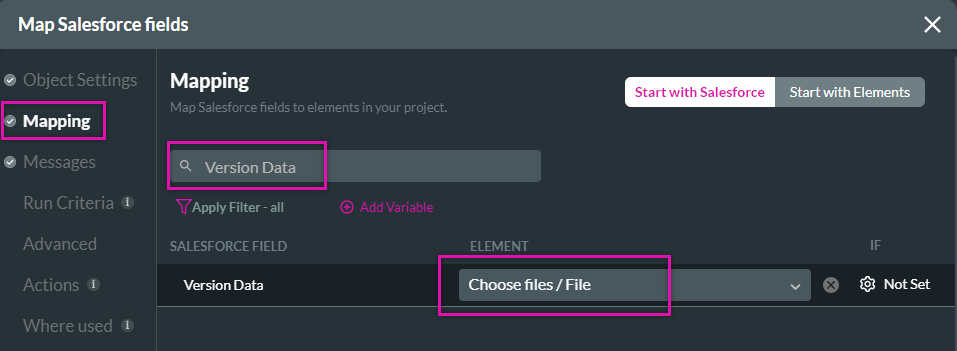
2. Use the search bar and type in Version Data. Use the Element drop-down to choose the file upload element.
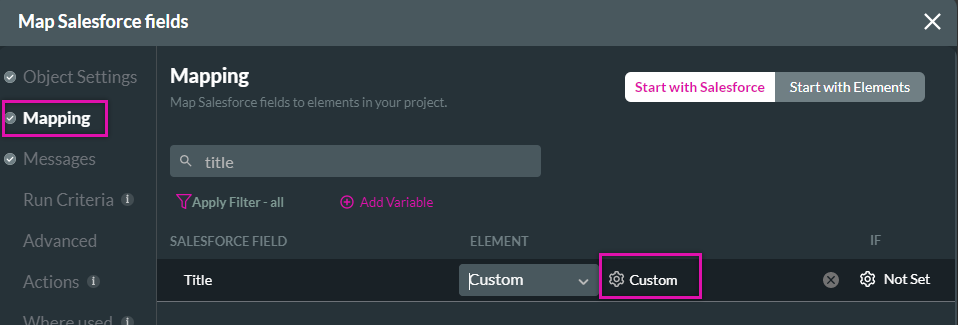
3. Type Title into the search bar to configure the document's labeling.
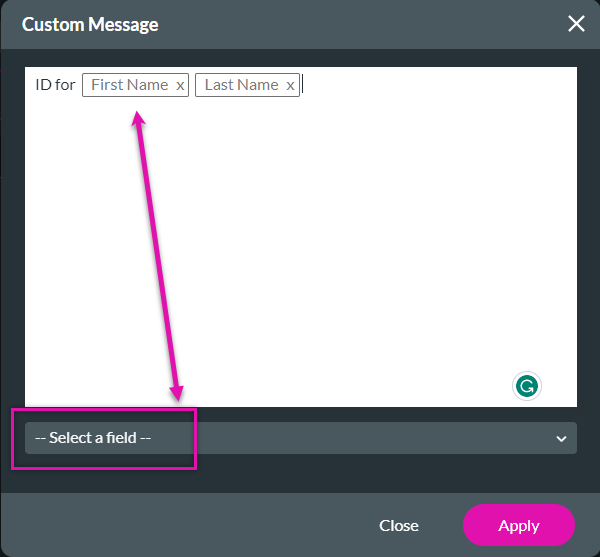
4. Add a custom message and use the drop-downs to select the fields. This will be the Title of your document. Click Apply.
Your created child push will be displayed under the parent push.

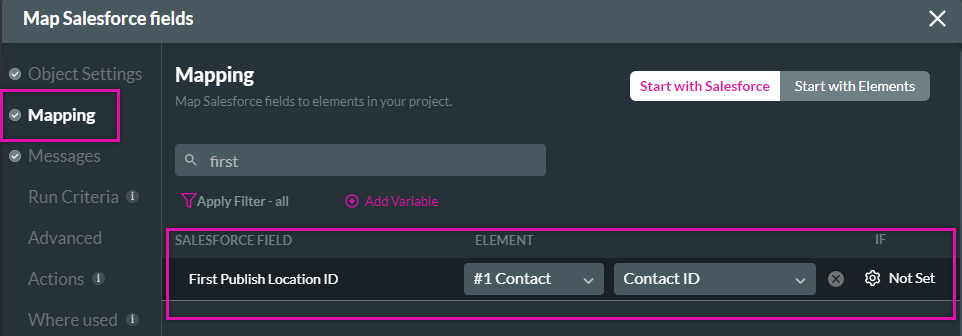
- The First Published Location ID will be automatically mapped for you.

2. Use the search bar and type in Version Data. Use the Element drop-down to choose the file upload element.
- You can save the file as is or as an HTML.

3. Type Title into the search bar to configure the document's labeling.
4. Add a custom message and use the drop-downs to select the fields. This will be the Title of your document. Click Apply.

Your created child push will be displayed under the parent push.

09 Assigning the Action to a Button
1. Click on the button element and select the link icon. The On Click Action screen opens.

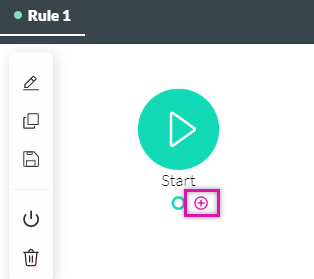
2. Click on the + Icon next to the start. The Add Node Screen Opens.
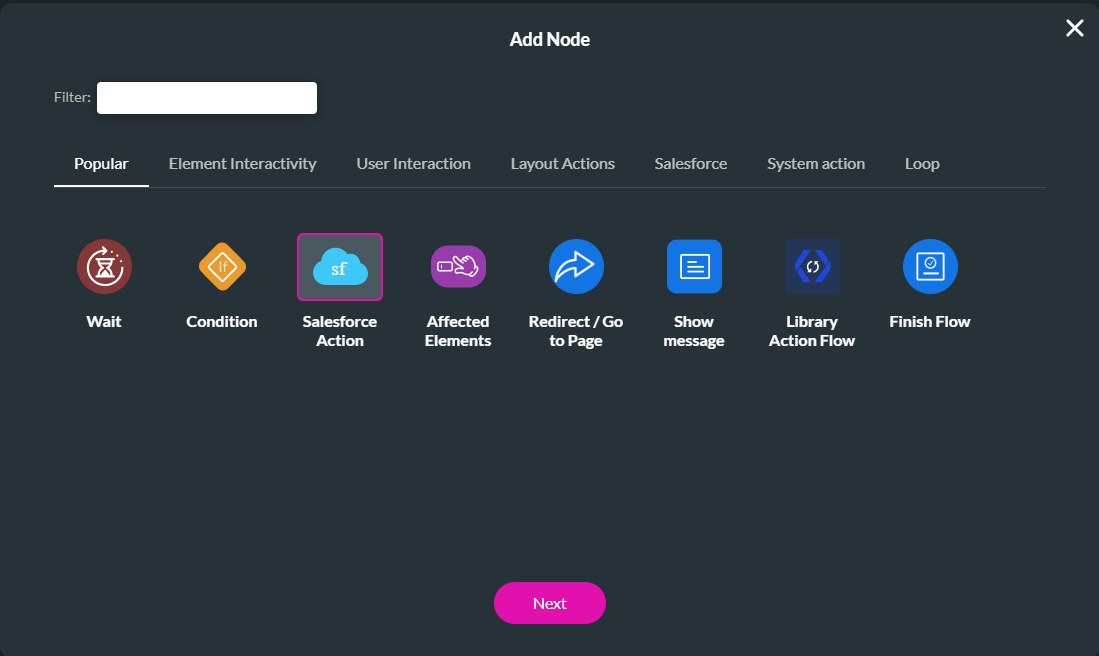
3. Select the Salesforce Action option and click the Next button.
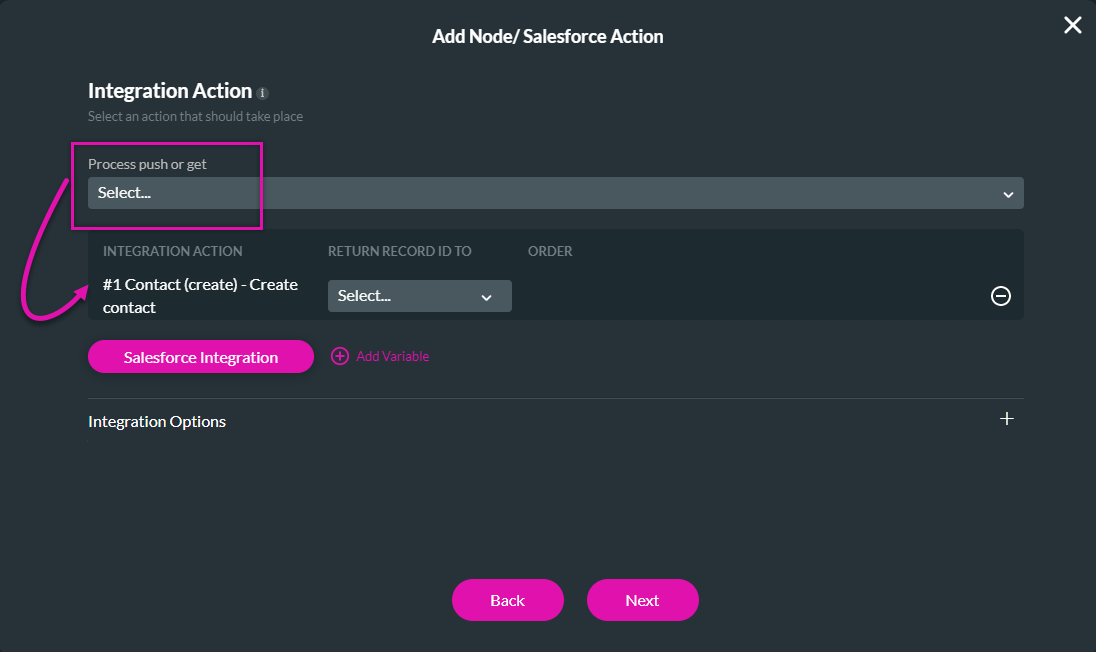
4. Use the Process push or get drop-down list and select the Push you created. Click the Next button.
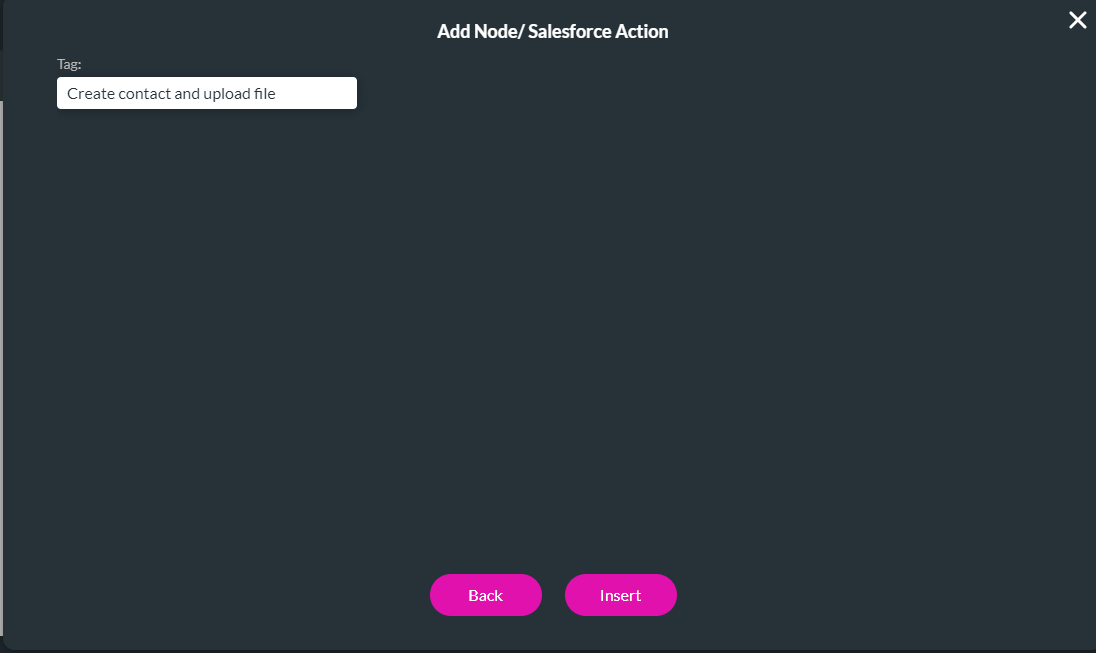
5. Add a tag if necessary and click the Insert button.
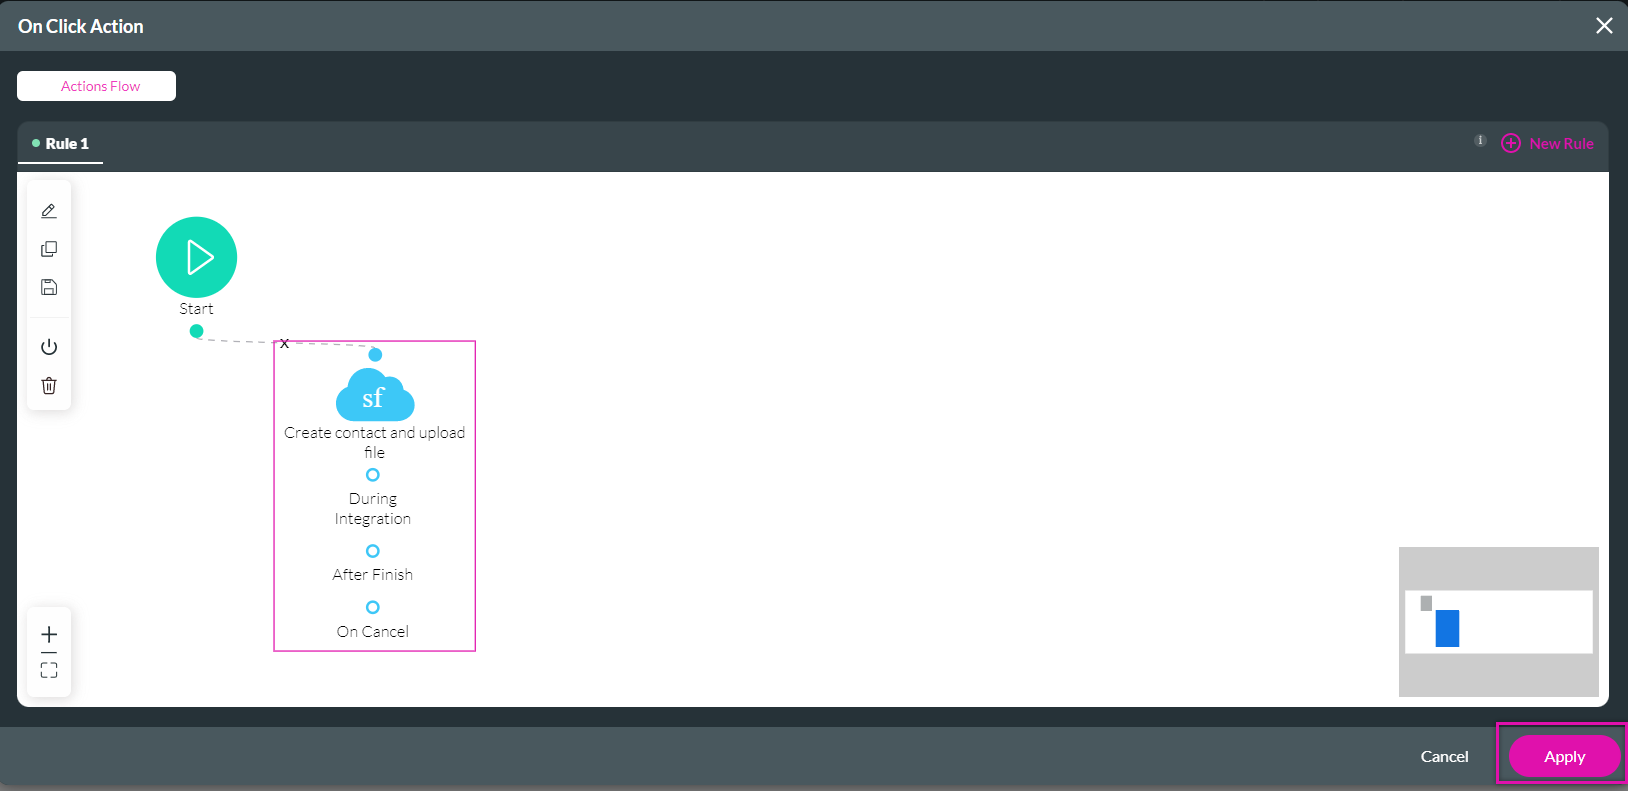
6. The configured action displays in the Action Flow window. Click Apply.

2. Click on the + Icon next to the start. The Add Node Screen Opens.
3. Select the Salesforce Action option and click the Next button.

4. Use the Process push or get drop-down list and select the Push you created. Click the Next button.

5. Add a tag if necessary and click the Insert button.

6. The configured action displays in the Action Flow window. Click Apply.

10 Preview the Project
1. Click save and preview the project.
The user inputs their details and clicks submit. The details, including the uploaded document, will be captured in Salesforce.
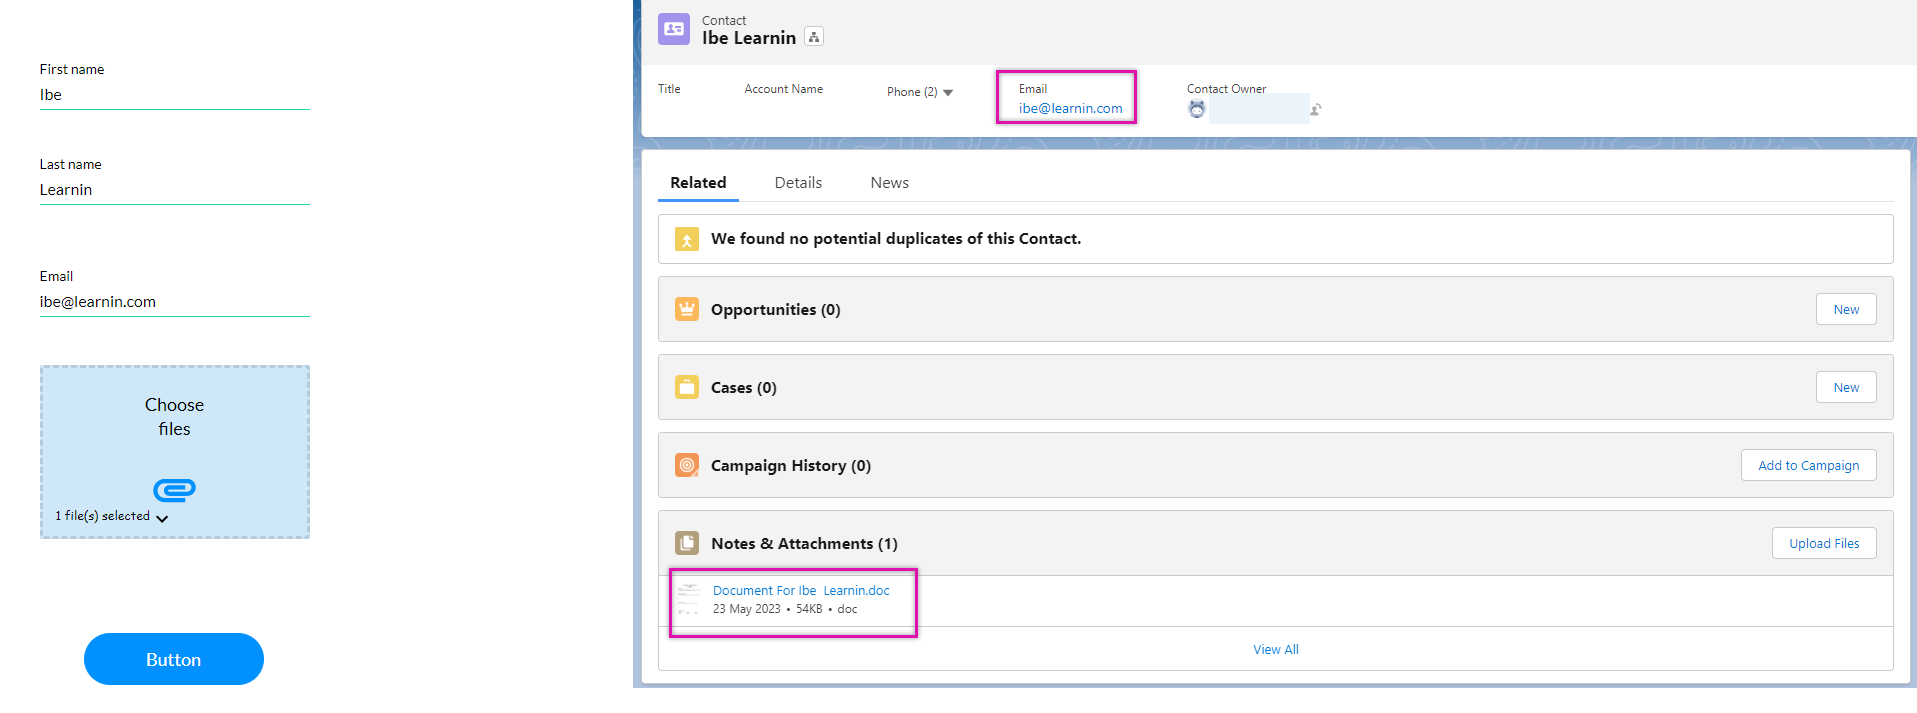
The user inputs their details and clicks submit. The details, including the uploaded document, will be captured in Salesforce.
