The Overview Tab (3 min)
01 Introduction
In this lesson, we will learn about the options available to us in the Overview Tab. This tab is the first of three tabs in the Project Settings Menu:
(1) Overview
(2) Survey
(3) Site Elements.
This lesson includes learning how to rename a project, setting up the availability of a survey in advance, saving projects to folders, and updating the alignment of a survey.
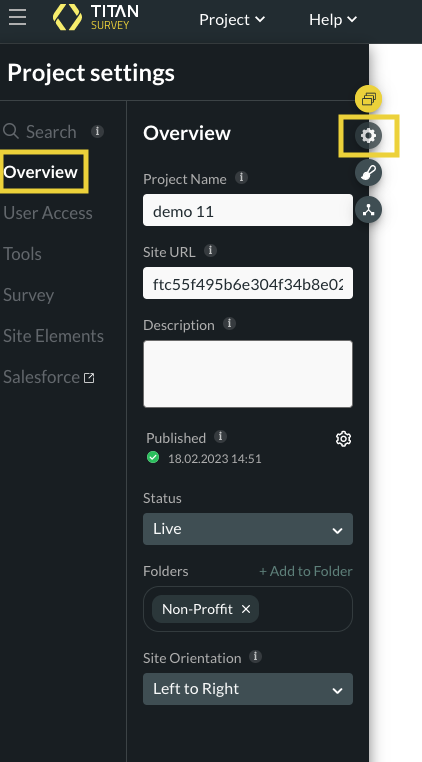
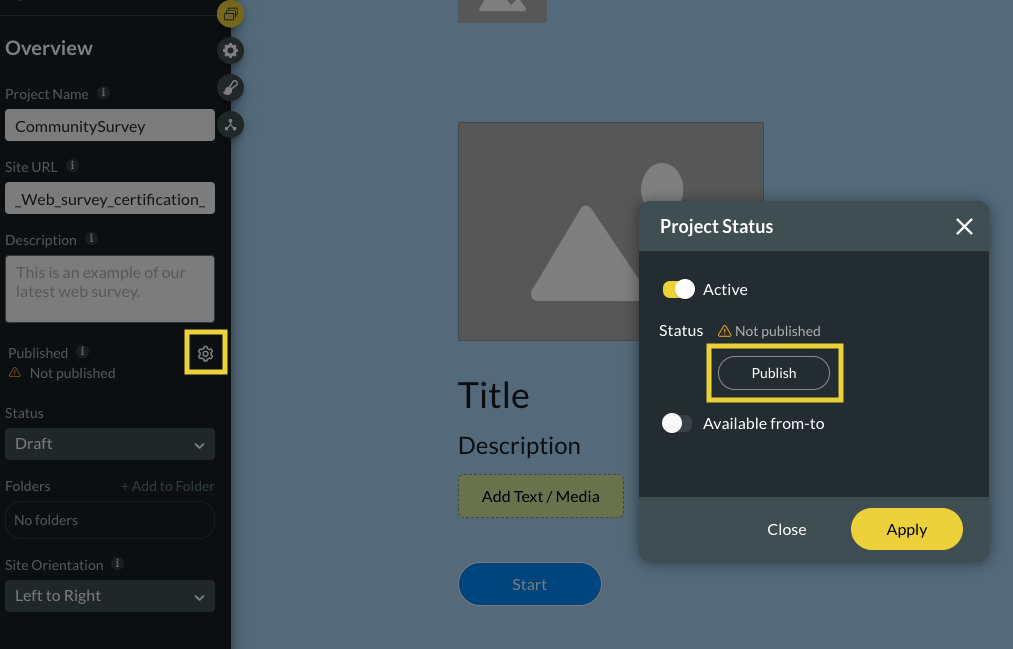
02 The Overview Tab
We can use the Overview Tab to configure the following settings:
- Project Name Field - allows us to change the name of a project.
- Site URL Field - allows us to set a custom URL.
- Description Field - provides an opportunity to add a text description about the survey only visible to project owners.
- Publish - the settings button gives you the benefit of publishing a survey immediately or at a scheduled time with an expired message or redirected URL option for survey takers.
- Folders - allows you to save your surveys in a new or existing folder.
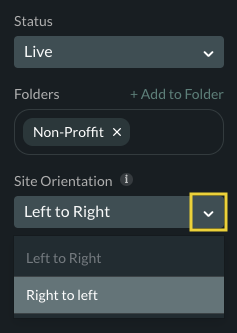
- Site Orientation - changes the alignment of the survey.
03 Accessing the Overview Tab
Select the Project Settings button and then choose the Overview tab.
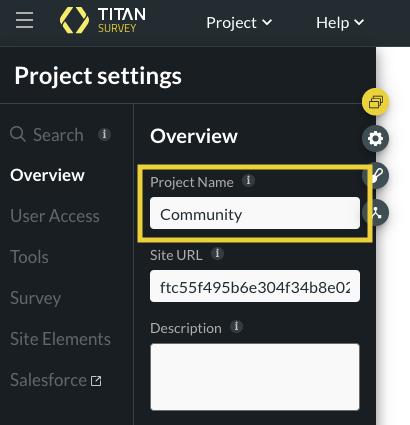
04 Changing the Name of a Survey:
Type a name in the Project Name field to change the name of your survey.
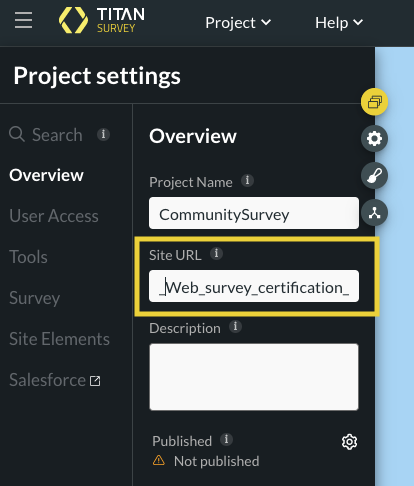
05 Create a Customized URL
Replace the existing URL with a new one.
*Keep in mind that the URL must be unique and cannot include spaces.
06 Adding a Description to the Survey:
Add a short description for the survey by typing in the Description field.
*The description text is not visible to respondents.

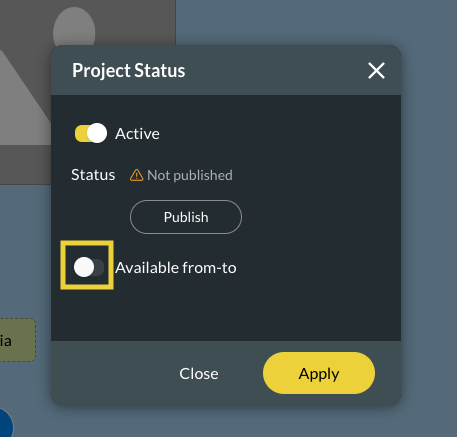
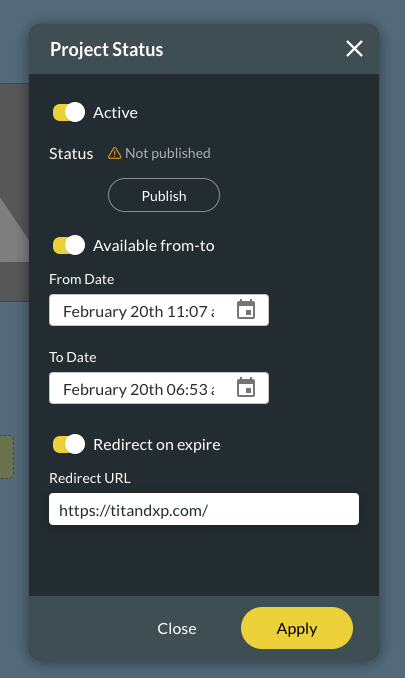
07 Configure the Availability of your Survey
1. Select the Settings button to bring up the Project Status box.
2. Choose the Publish button to immediately publish your survey.
3. Alternatively, choose the Available from-to toggle switch to configure a publish date for your survey.
4. Select the start and end dates for your survey going live.
5. Switch the Redirect on expire toggle if your survey will expire. Add a link to the Redirect URL field to direct survey takers to a working web page.
08 Saving a Survey
Save a survey in an existing or new folder by choosing an available folder or selecting the + Add to folder button.

09 Change the Alignment of the Survey