CLM Salesforce Architecture (7 min)
Completion requirements
01 Getting Started
This tutorial covers the Salesforce architecture in CLM (Contract Lifecycle Management).
We will begin with an overview of entity-relationship diagrams (ERDs) and how records are created and edited, and documents are saved in Salesforce.
02 Entity Relationship Diagrams
Despite the name, an entity-relationship diagram is more than a visual chart. It’s the blueprint of your CRM data model. It defines how objects relate to one another, clarifies dependencies, and ensures accurate reporting.
03 CLM Object Setup in Salesforce
Let’s look at a standard CLM object setting in Salesforce. In this example, there are three standard objects and four custom objects. Remember, there are many ways to customize your CLM app in Salesforce; this is just one variation.

04 Understanding Object Relationships
To better understand how these objects connect, here’s a visual ERD for the current setup.
- We have a trigger object, like an Account or an Opportunity.
- This trigger generates a document that passes through the CLM process and produces multiple Titan Sign Documents.
- Each of these is related to multiple Titan Sign Tracking records, one per event, and each event is linked to the signer involved.
05 Live Example in Salesforce
Now, let’s look at a live example of how records are created and connected in Salesforce.
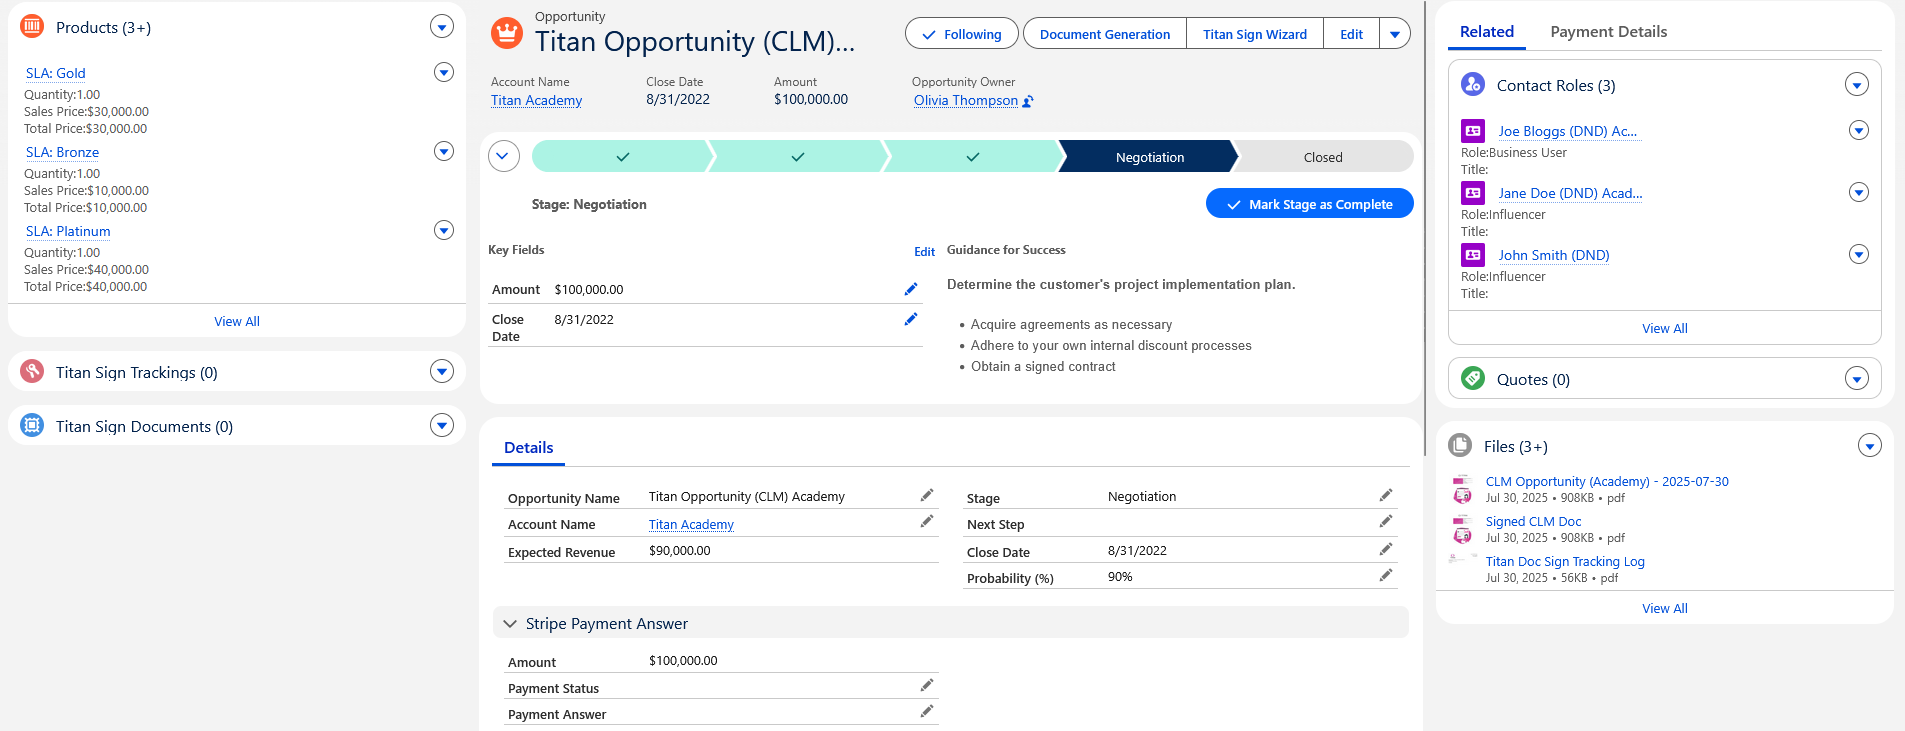
In this case:
In this case:
- The Opportunity triggers the CLM process
- It’s linked to an Account, which hosts Contacts assigned as contact roles.
- Several custom objects connect to these records to track each stage of the collaboration.
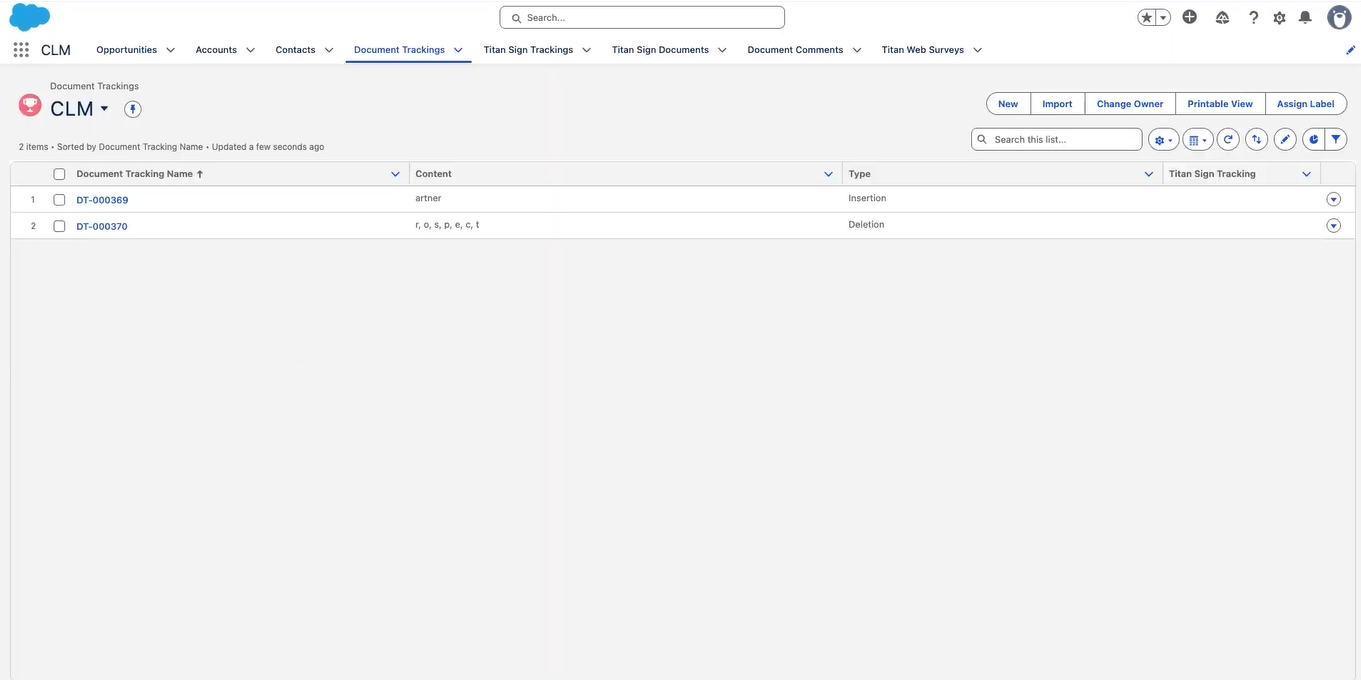
06 Tracking Records and Events
For each event, a Titan Sign Tracking record is created and linked to its parent Document Tracking record.
This contains the details of the specific event, for example, when a document was updated or viewed.
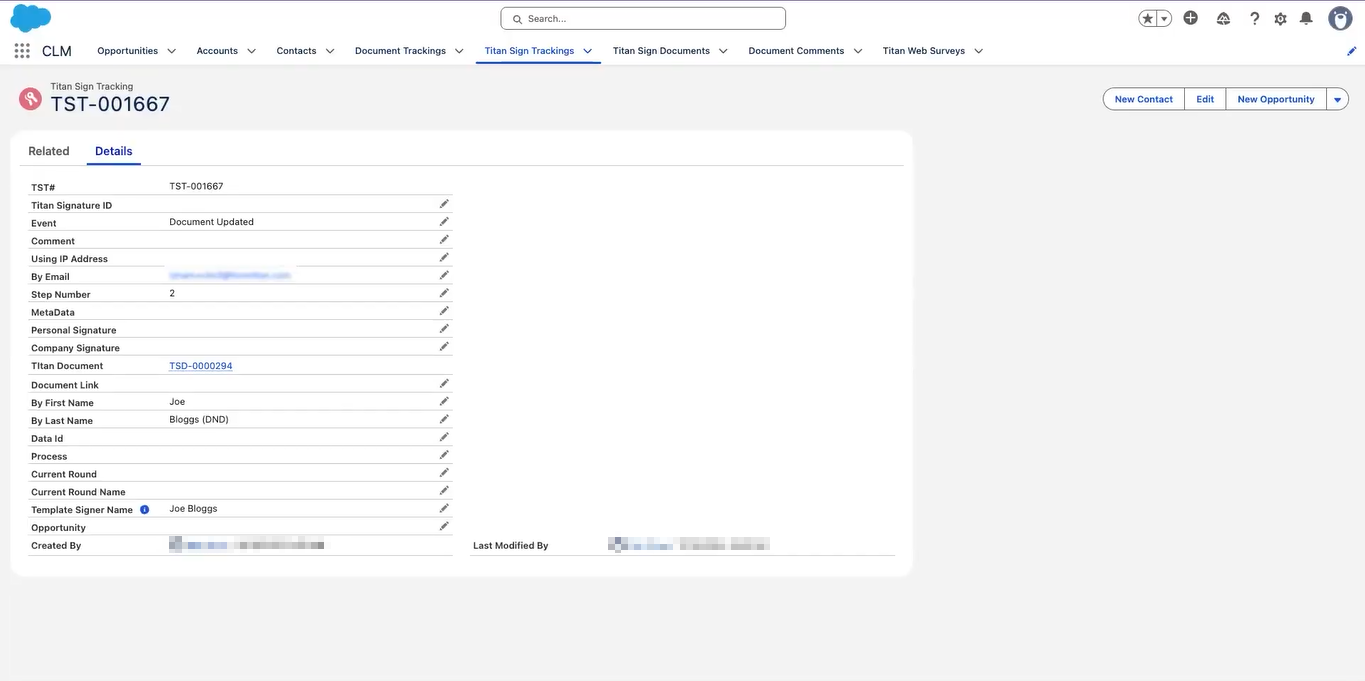
Within Related Records, you’ll see the edited document captured, along with any comments made.
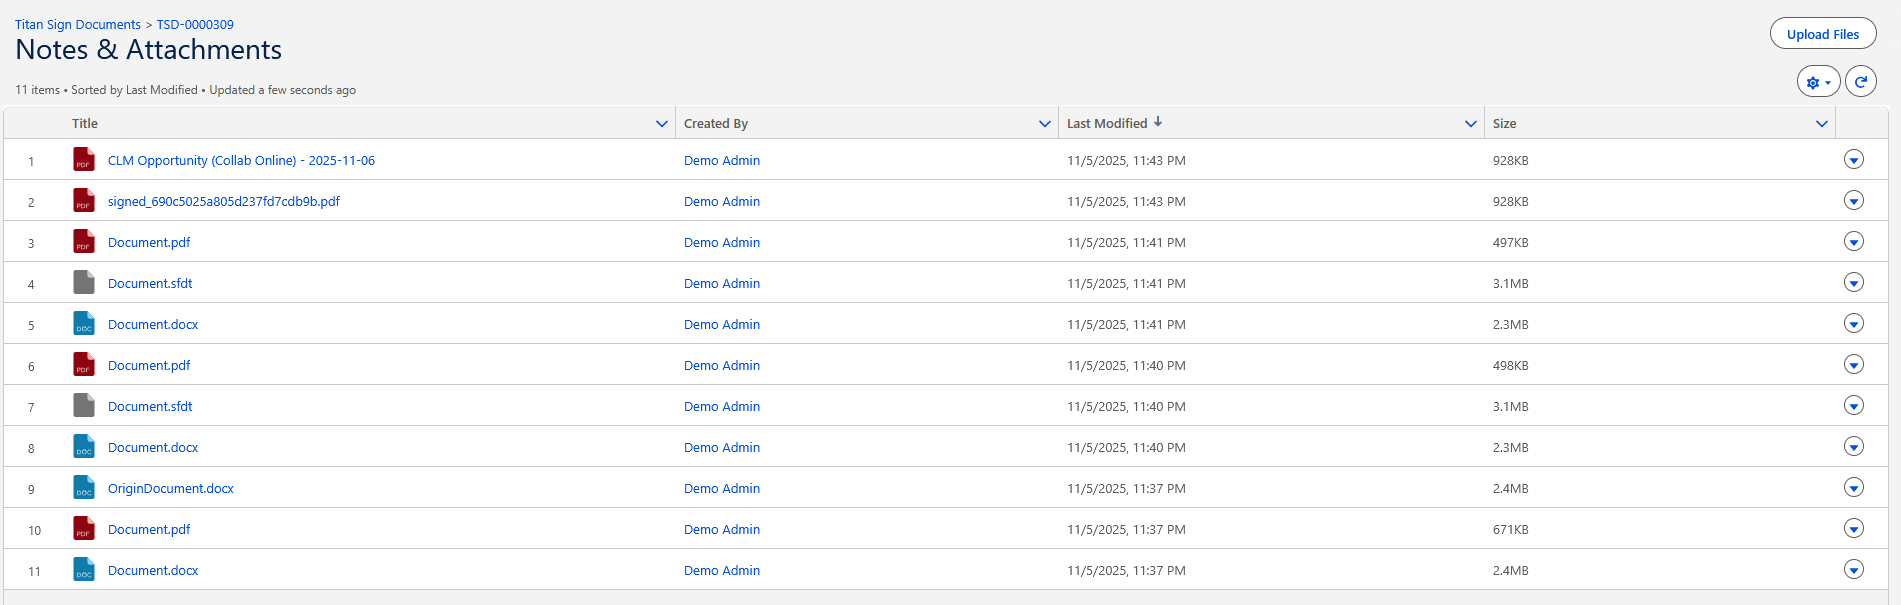
Each Titan Sign Document record stores the signed file or versions created during the editing process. This means users can access both the original document and the final, signed version with all signatures captured.
This contains the details of the specific event, for example, when a document was updated or viewed.
Within Related Records, you’ll see the edited document captured, along with any comments made.
Each Titan Sign Document record stores the signed file or versions created during the editing process. This means users can access both the original document and the final, signed version with all signatures captured.
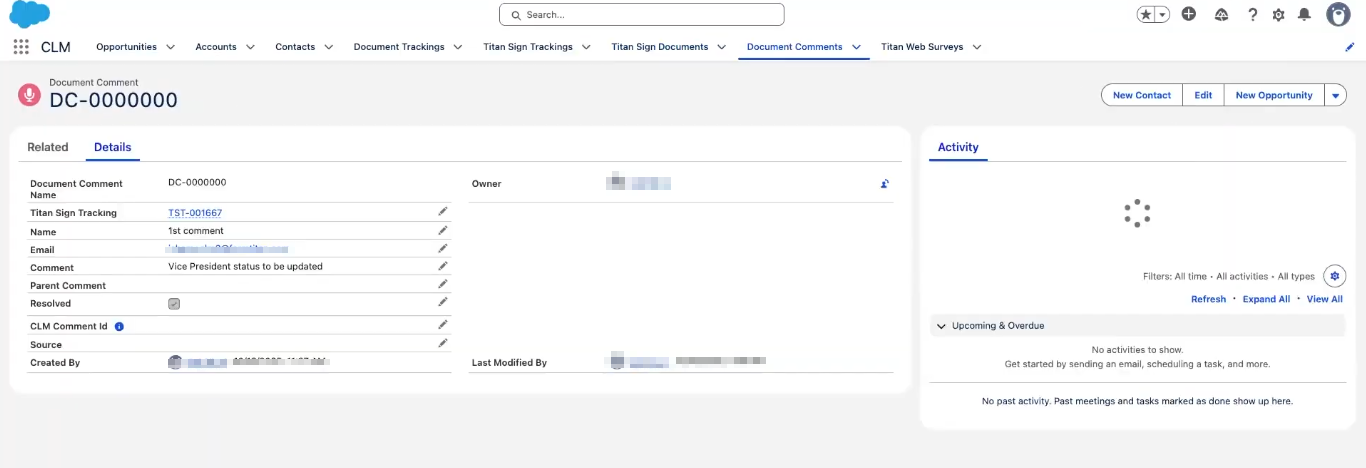
07 Document Comments
Reviewers can leave feedback directly on a Document Tracking record, ensuring that all discussions related to a contract are stored in one place.
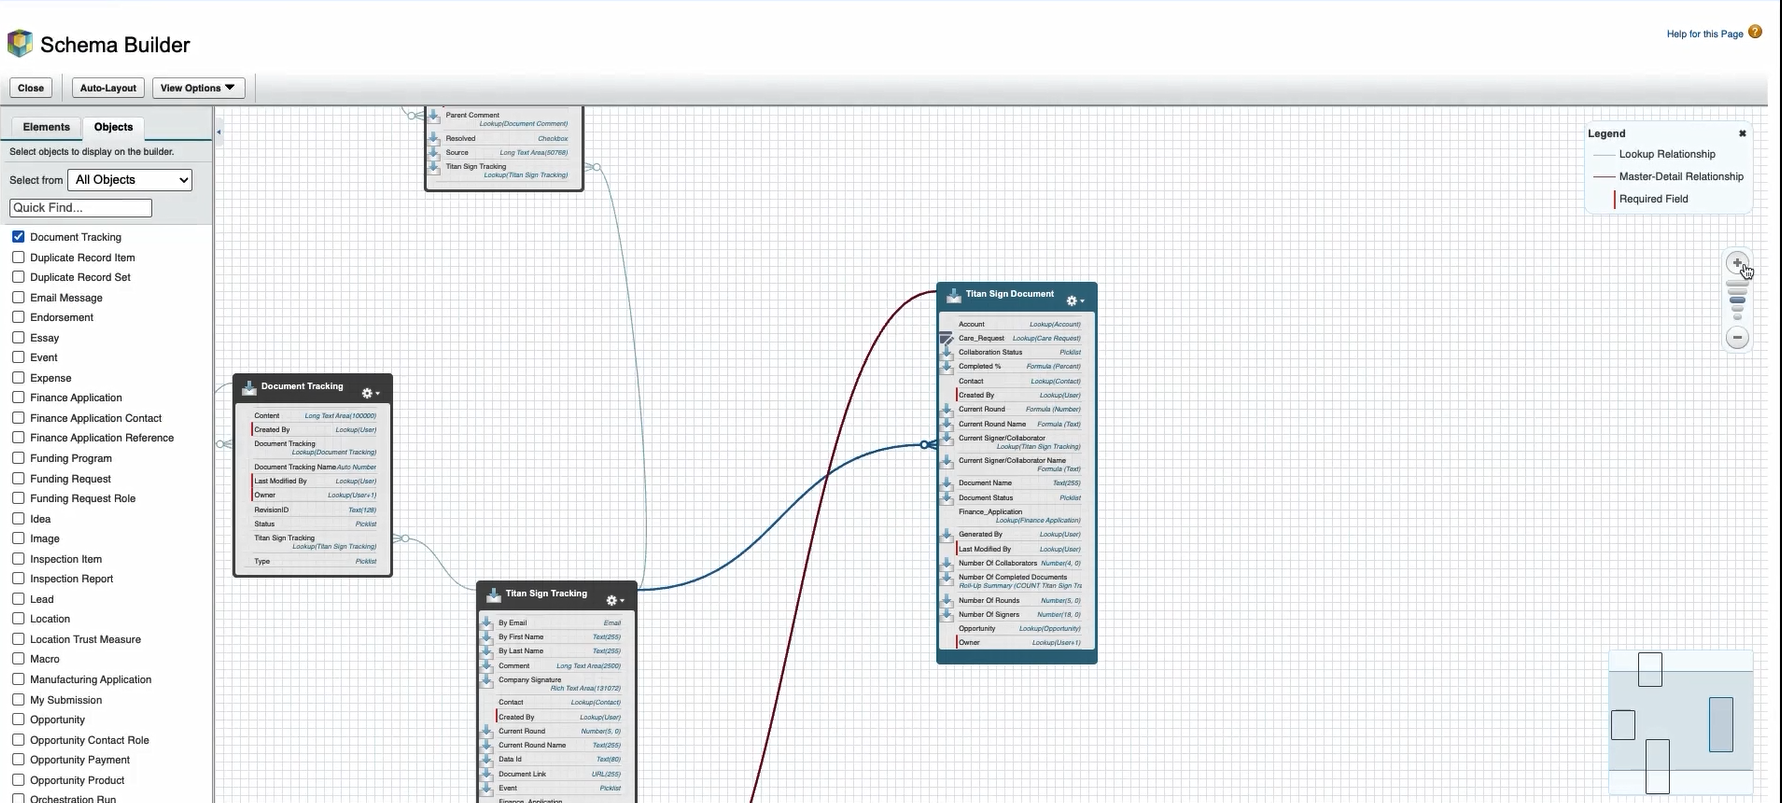
08 Schema Builder Overview
Finally, let’s see how all these objects connect in Salesforce Schema Builder.
At the center is Titan Sign Document which is the core record for every signing process.
At the center is Titan Sign Document which is the core record for every signing process.
- Each document can have multiple tracking records showing progress, such as when a signer opens or completes an action.
- Those tracking records can also contain related comments to log updates or notes throughout the workflow.
- Clear organization
- Support for multiple signing scenarios
- A full compliance trail
- Easier reporting and auditing
09 Summary
This architecture maintains a structured and transparent CLM process. By keeping clear data relationships in Salesforce, you improve efficiency, ensure compliance, and create a smoother signing experience from start to finish.