File Upload (6 min)
Completion requirements
01 Getting Started
We will demonstrate how to use the file uploader element. We will focus on the limits that can be set for end users, how to trigger Salesforce actions when a file is added or deleted from the uploader, and how to push an uploaded file to a rich text field in Salesforce.
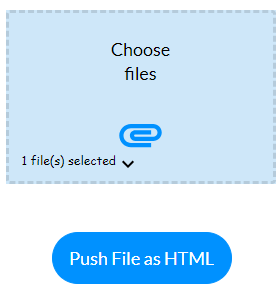
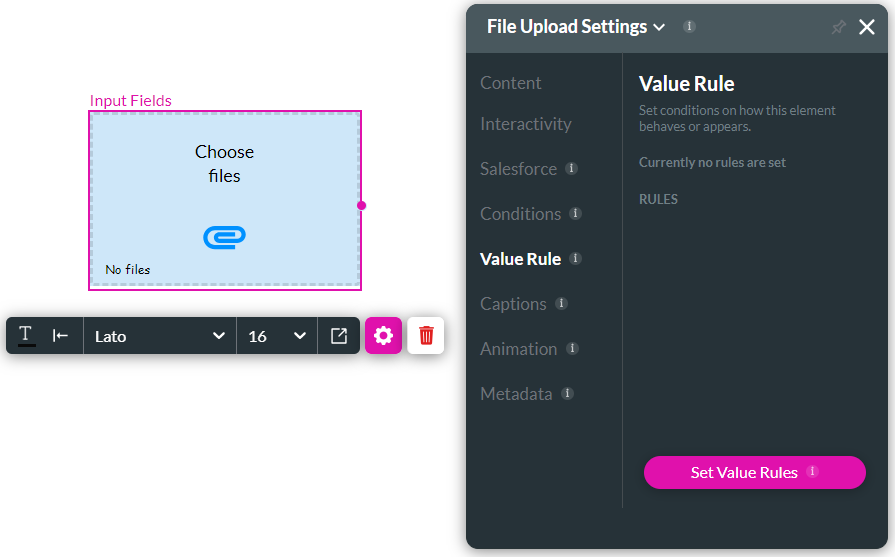
The project in this lesson has a file upload input element:
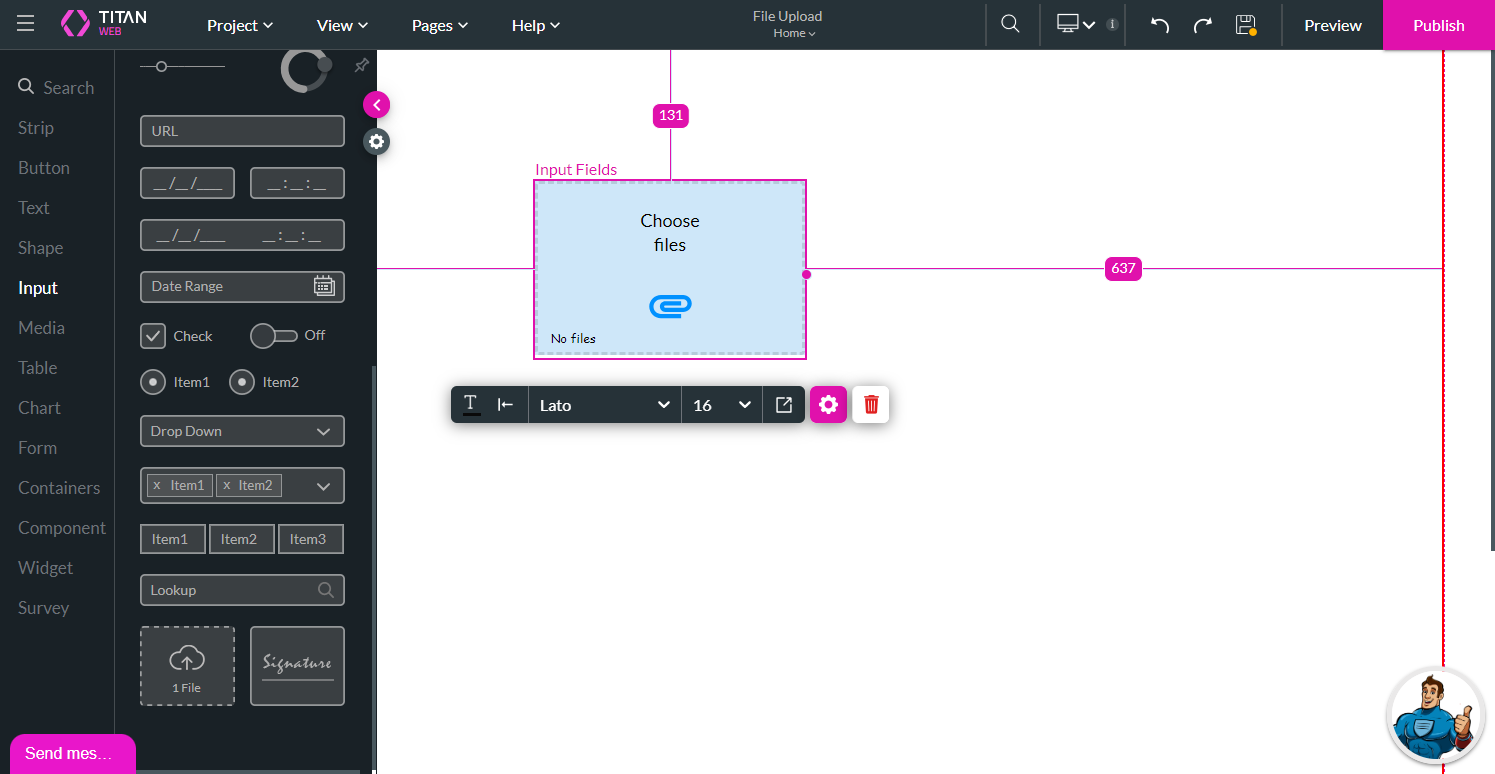
The project in this lesson has a file upload input element:
02 Configure On Attach Actions
You can add an action that will be triggered when a file is attached or deleted.
03 Create a Salesforce Push Action
The following Salesforce Push was added to the project:
1. Open the Project Settings and click the Salesforce option.
2. Click the Create New button.
3. Select Content Version from the Salesforce object drop-down list. The Create action is the default.
4. Click the Apply button.
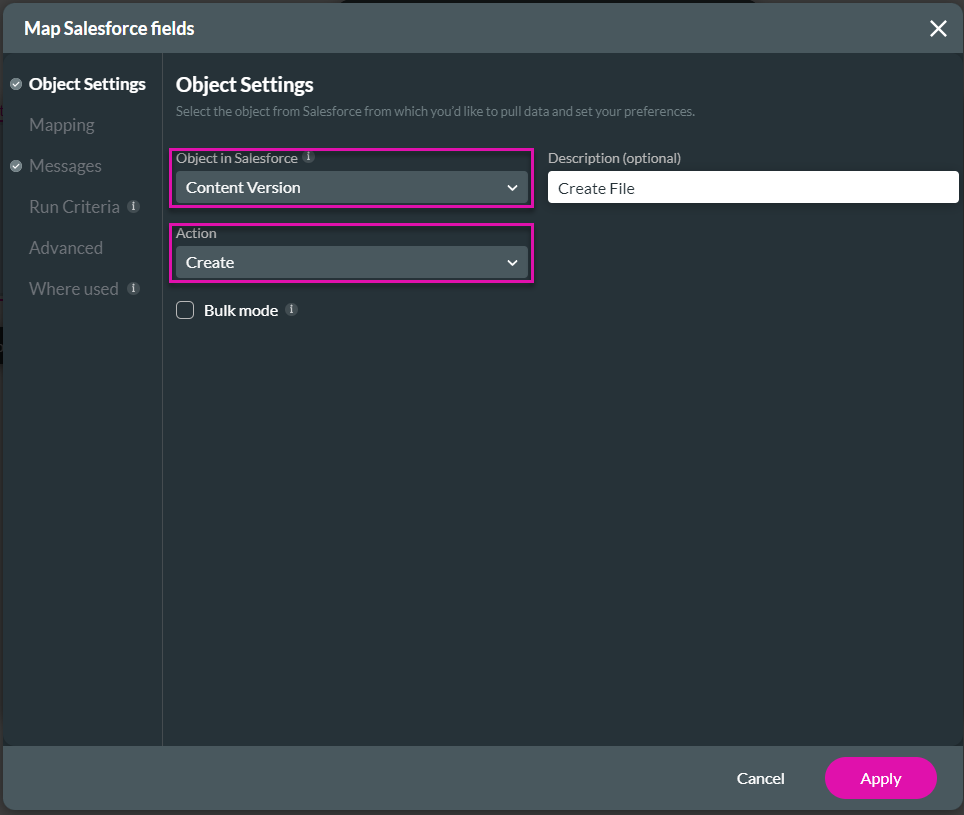
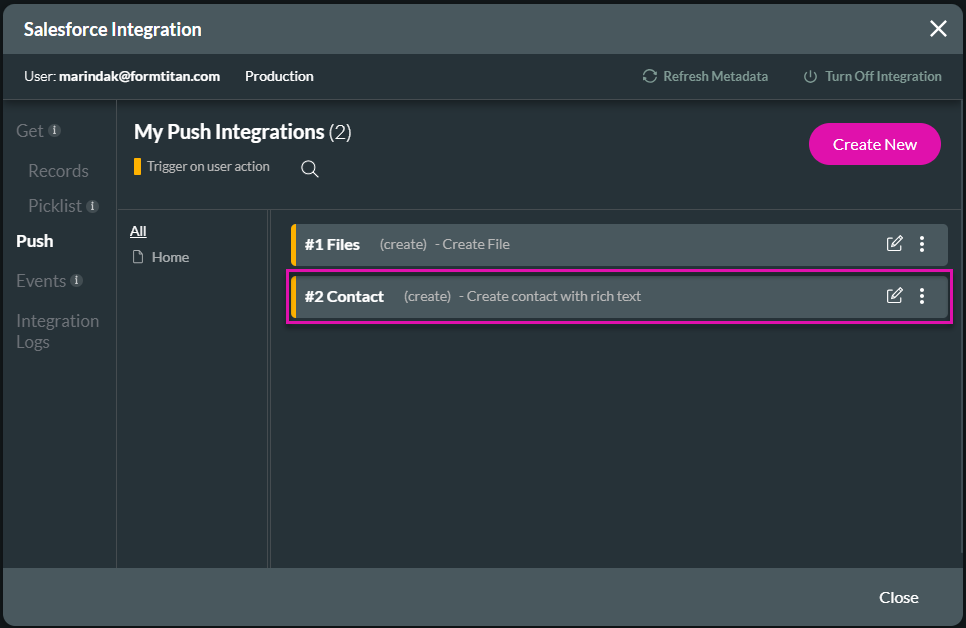
The Files - Create File integration is added.
5. Click the Close button.
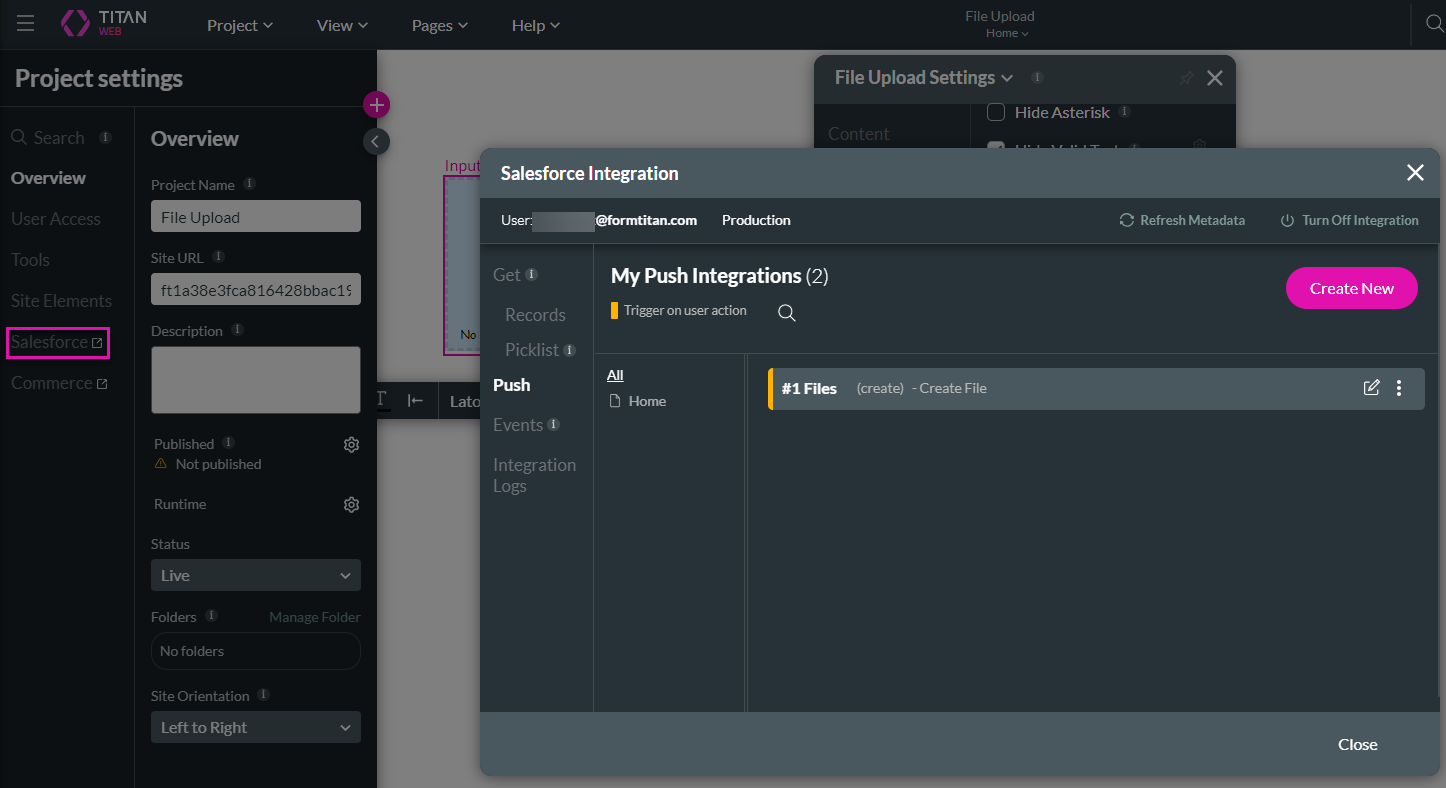
6. Configure a similar action for the On Delete Action if necessary. This action will be triggered when the user removes the file from the upload file element on the web page.
1. Open the Project Settings and click the Salesforce option.
2. Click the Create New button.
3. Select Content Version from the Salesforce object drop-down list. The Create action is the default.
4. Click the Apply button.
The Files - Create File integration is added.
5. Click the Close button.
6. Configure a similar action for the On Delete Action if necessary. This action will be triggered when the user removes the file from the upload file element on the web page.
04 Configure the On Attach Action
1. Select the file upload element and click the Gear icon to open the Settings screen.
2. Click the Interactivity option and scroll down the screen.
3. Click the On Attach Action checkbox. A drop-down list is added with the Salesforce actions that were set up.
4. Select the Salesforce action (Files - Create File) from the drop-down list.
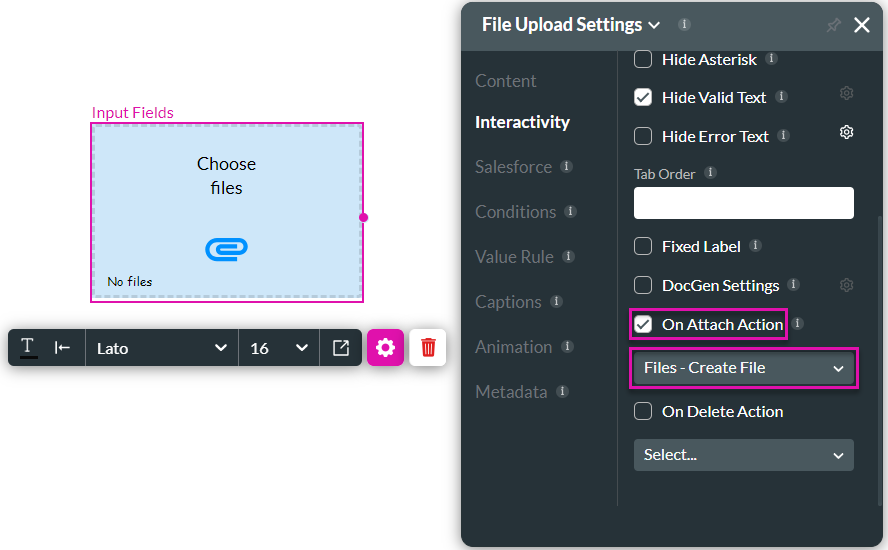
5. If necessary, click the On Delete Action checkbox and select the action from the drop-down list.
2. Click the Interactivity option and scroll down the screen.
3. Click the On Attach Action checkbox. A drop-down list is added with the Salesforce actions that were set up.
4. Select the Salesforce action (Files - Create File) from the drop-down list.
5. If necessary, click the On Delete Action checkbox and select the action from the drop-down list.
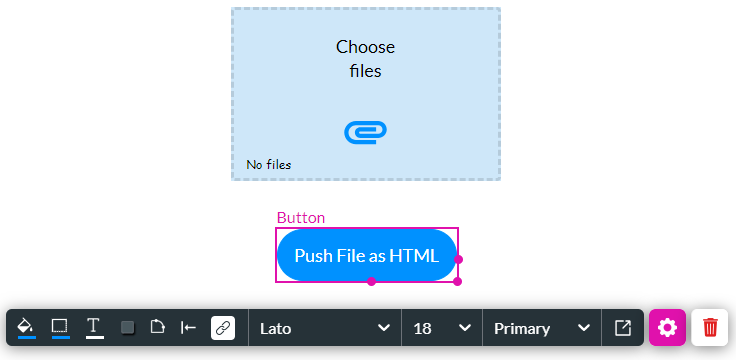
05 Push File Upload to Salesforce Rich Text Field
We added a button to the project.
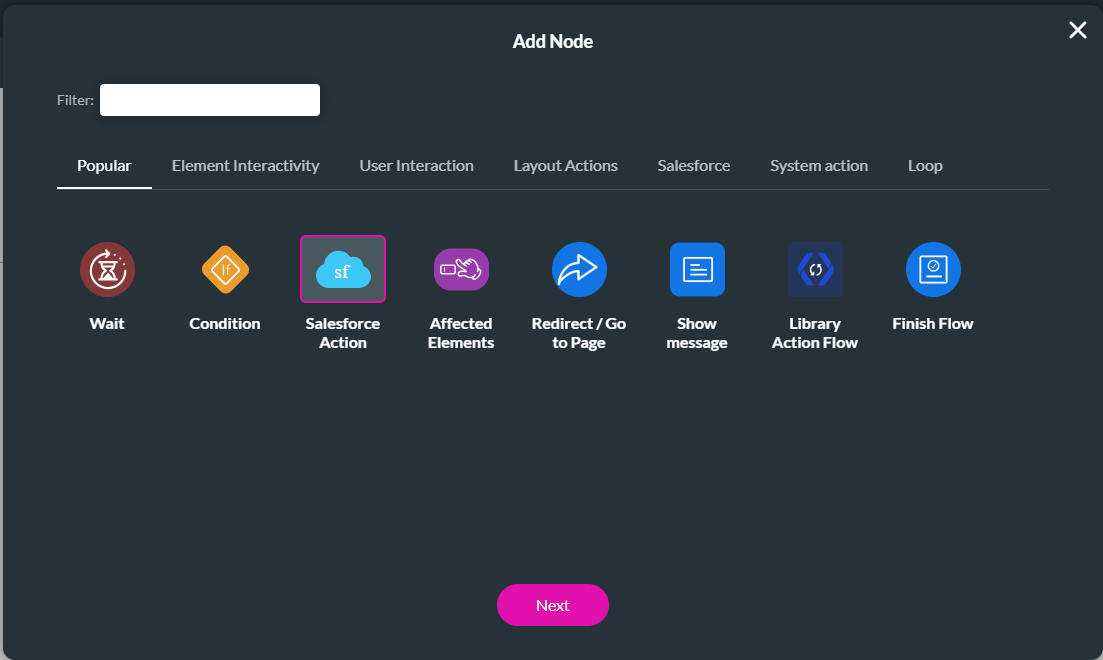
1. Select the button and click the On Click Action icon.
2. Click the + icon next to the Start node and click the Salesforce Action option.
3. Click the Next button.
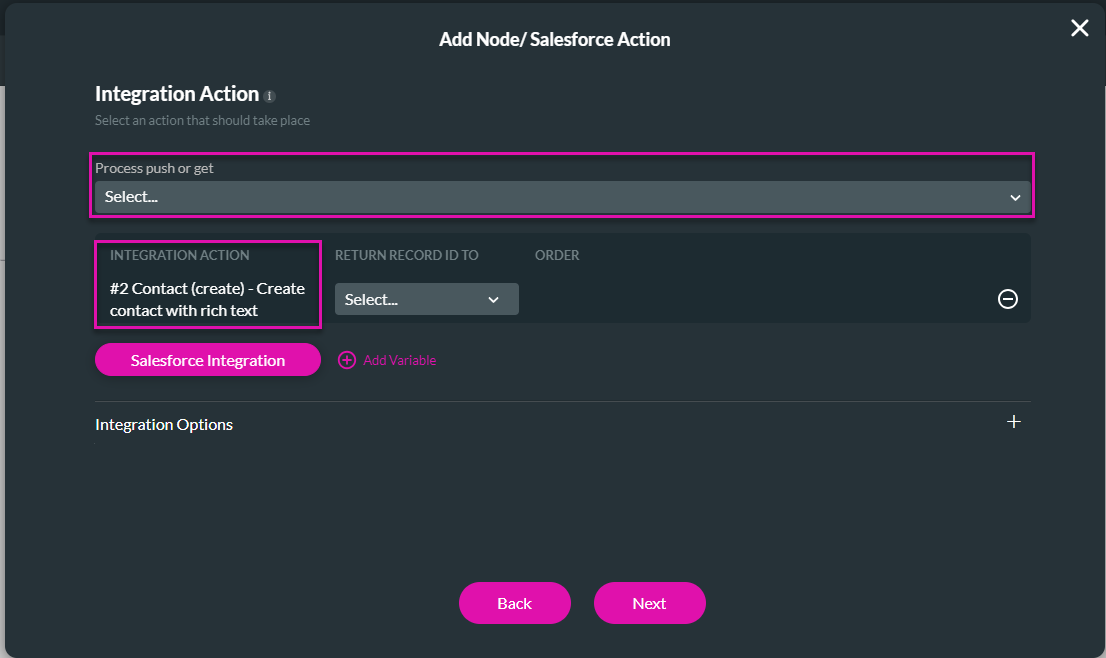
4. Click the Push option and click the Salesforce Integration button.
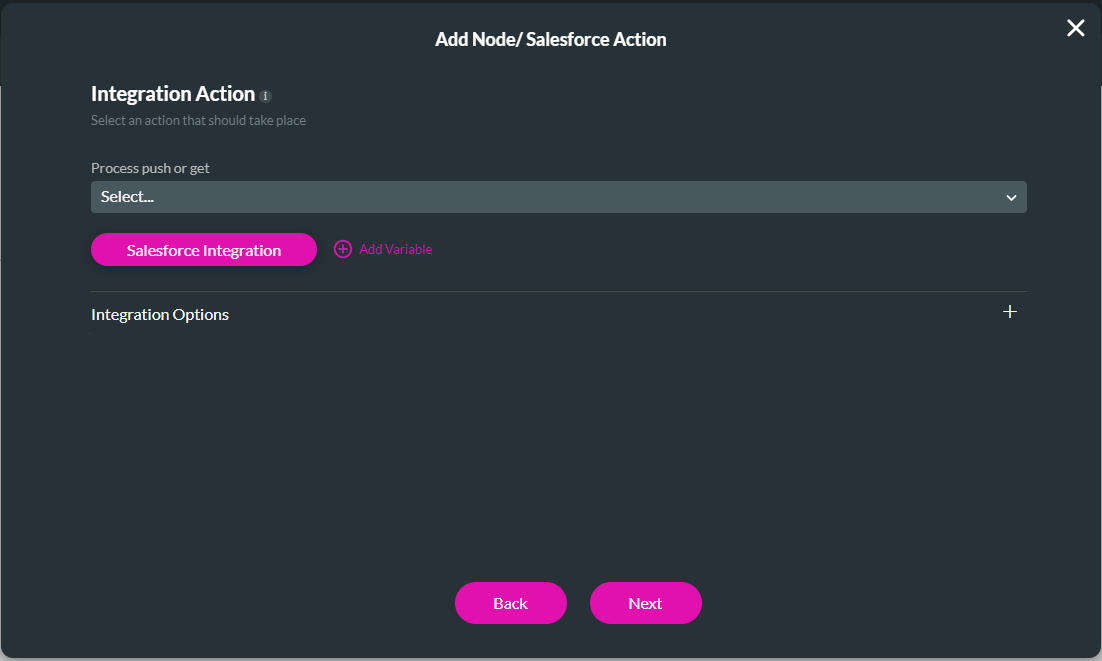
5. Click the Create New button.
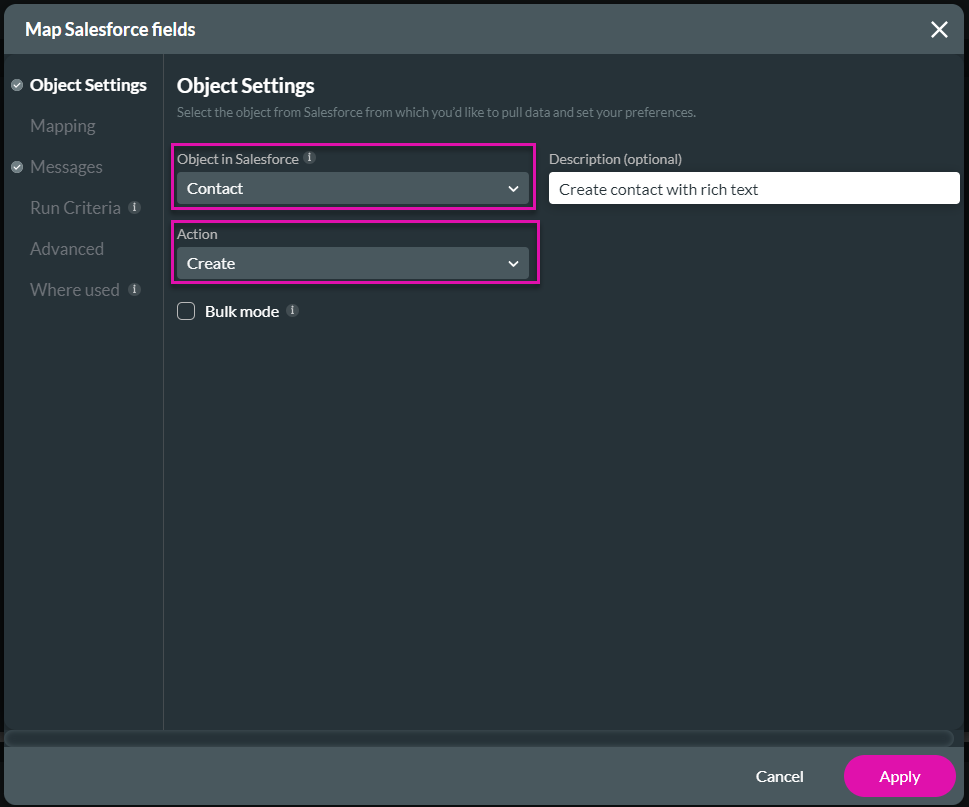
6. Select Contact from the Salesforce object drop-down list. The Create action is the default.
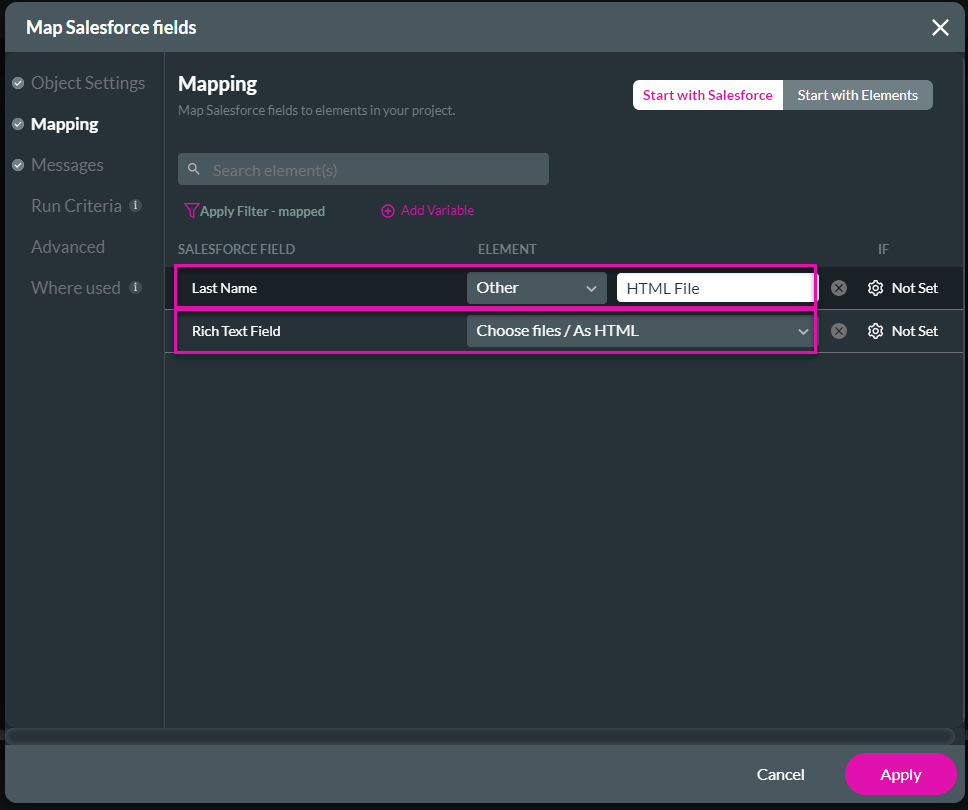
7. Do the mapping as follows:
9. Click the Close button.
10. Use the drop-down list to select the Contact (create) push integration.
11. Click the Next button.
12. Add a tab and click the Insert button.
13. Click the Apply button.
14. Save and preview the project.
15. Click the file upload and browse to an image file to upload.
16. Click the Open button on the standard Windows Open screen.
17. Click the Push File to HTML button.
18. Navigate to the Salesforce Integration logs in your project.
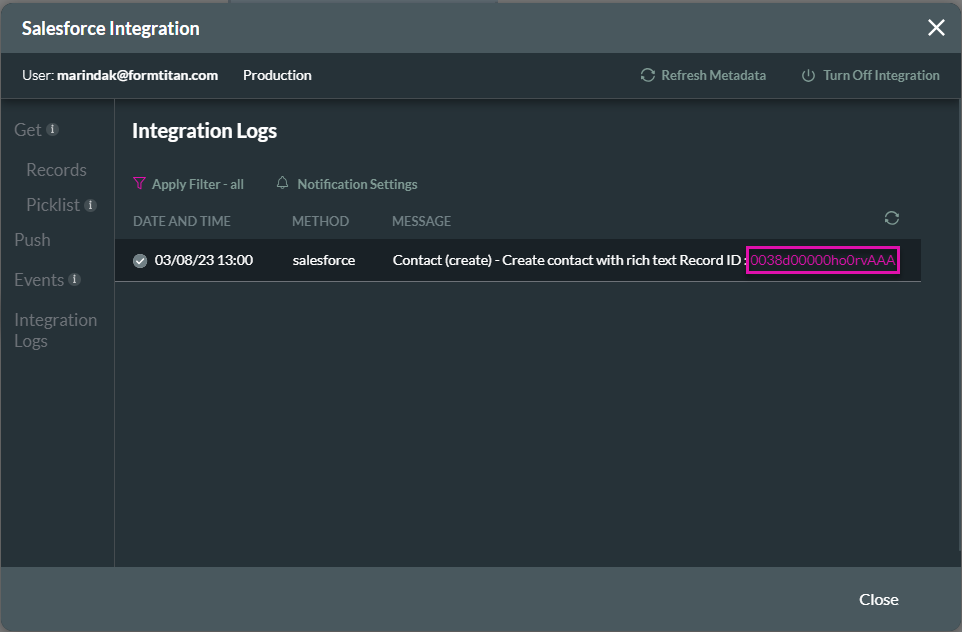
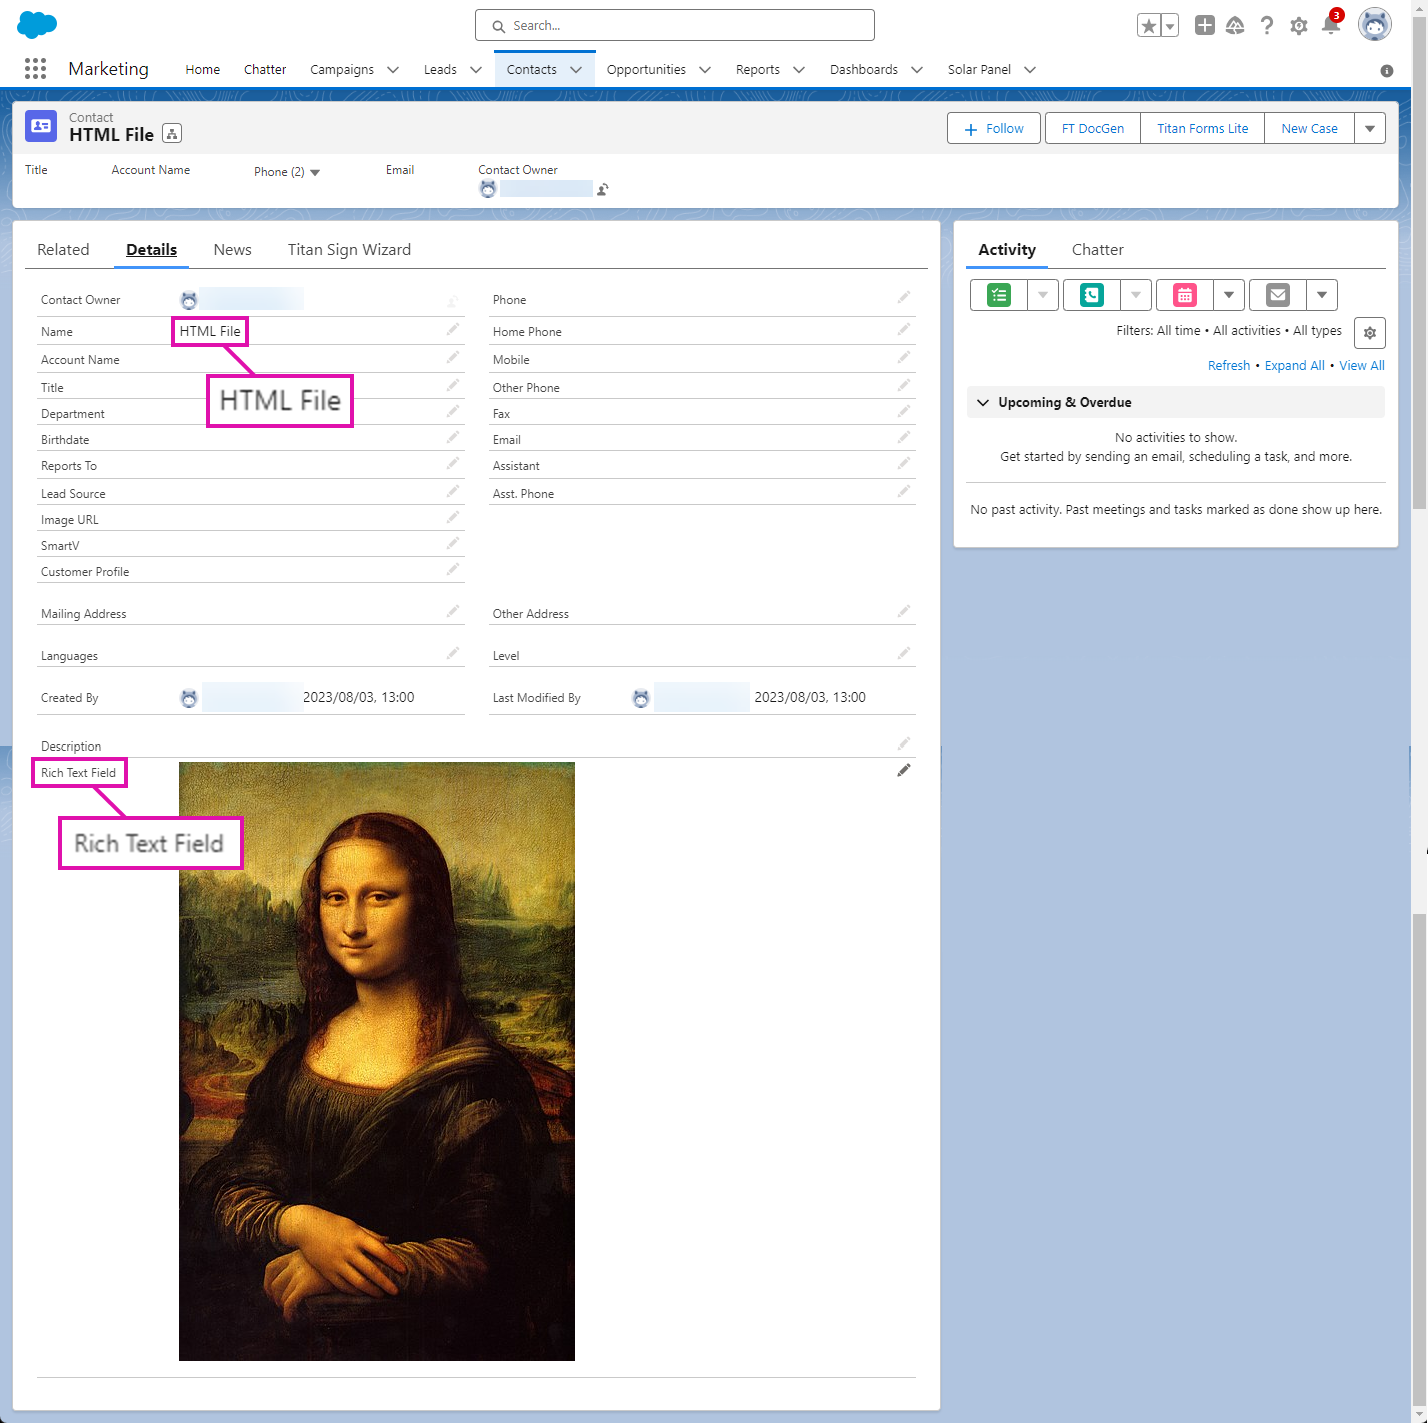
The Contact opens in Salesforce with the name “HTML File,” and the image is added to the Rich Text Field.
1. Select the button and click the On Click Action icon.
2. Click the + icon next to the Start node and click the Salesforce Action option.
3. Click the Next button.
4. Click the Push option and click the Salesforce Integration button.
5. Click the Create New button.
6. Select Contact from the Salesforce object drop-down list. The Create action is the default.
- You can select any standard or custom object with a rich text field.
7. Do the mapping as follows:
- Last Name Other HTML File. This will populate the last name field in the new Contact.
- Rich text Fields: Choose file/As HTML
9. Click the Close button.
10. Use the drop-down list to select the Contact (create) push integration.
11. Click the Next button.
12. Add a tab and click the Insert button.
13. Click the Apply button.
14. Save and preview the project.
15. Click the file upload and browse to an image file to upload.
16. Click the Open button on the standard Windows Open screen.
17. Click the Push File to HTML button.
18. Navigate to the Salesforce Integration logs in your project.
The Contact opens in Salesforce with the name “HTML File,” and the image is added to the Rich Text Field.
06 Set the Maximum Number of Files
1. Select the file upload element and click the Gear icon to open the Settings screen.
2. Add a number in the Max files field. The user can only add that number of files to the element. We suggest you not leave this field empty, but specify a number.
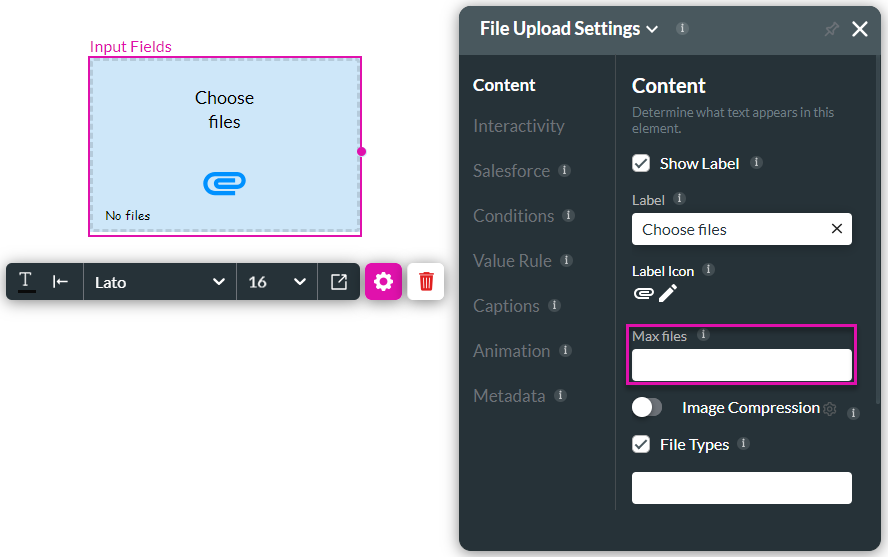
2. Add a number in the Max files field. The user can only add that number of files to the element. We suggest you not leave this field empty, but specify a number.
07 Set Value Rules
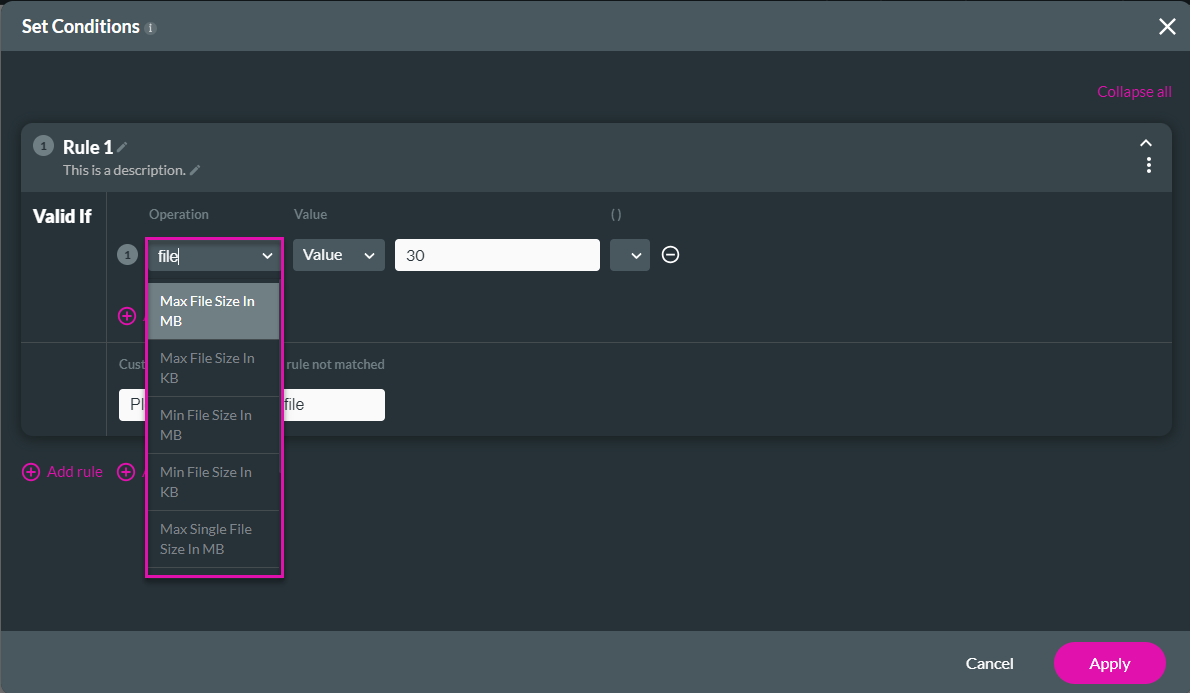
As Salesforce does not accept files larger than 30MB, it is best practice to limit the file size allowed accordingly.
1. On the Settings screen, click the Value Rule option.
2. Click the Set Value Rules button.
3. Use the drop-down list to select a file size option. You can choose any of the following:
5. Click the Apply button.
1. On the Settings screen, click the Value Rule option.
2. Click the Set Value Rules button.
3. Use the drop-down list to select a file size option. You can choose any of the following:
- Max File Size in MB or KB
- Min File Size in MB or KB
- Max Single File Size in MB or KB
- Min Single File Size in MB or KB
5. Click the Apply button.
08 Set File Types
1. On the Settings screen, type the file in the field. If you want the user to upload only image file types such as .jpg, .png, or .gif, separate the file name with a comma.

If the user attempts to upload a file that is not supported, there will be an error message.
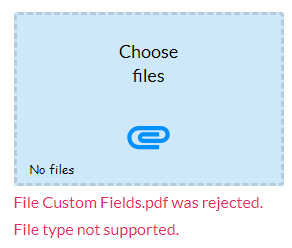
If the user attempts to upload a file that is not supported, there will be an error message.
09 Image Compression
1. On the Settings screen, click the Content option.
2. Use the toggle switch to enable image compression.
3. Click the Image Compression Gear icon. The Configure Image Compress screen opens.
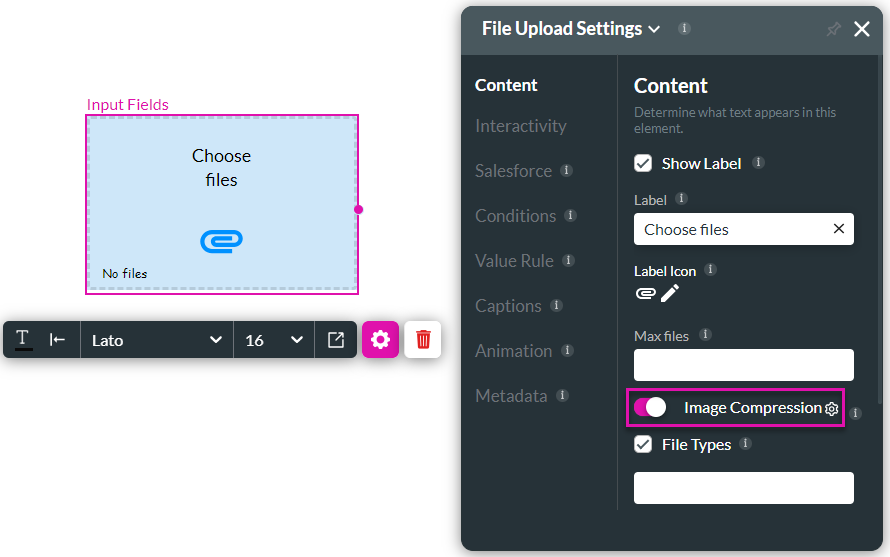
4. Add the following:
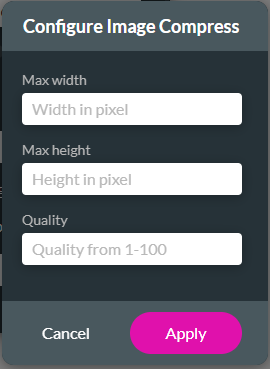
2. Use the toggle switch to enable image compression.
3. Click the Image Compression Gear icon. The Configure Image Compress screen opens.
4. Add the following:
- Max width
- Max height
- Quality. The quality size is between 1 and 100.