Update Salesforce Record using a Push (8 min)
01 Getting Started
02 Configuring a Push
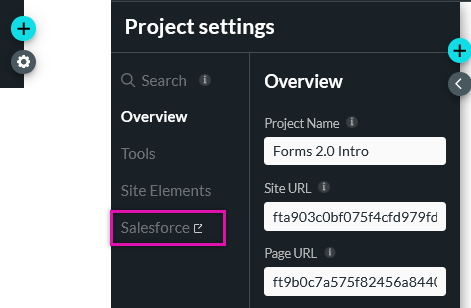
1. Click the Project Settings gear icon and select the Salesforce tab.
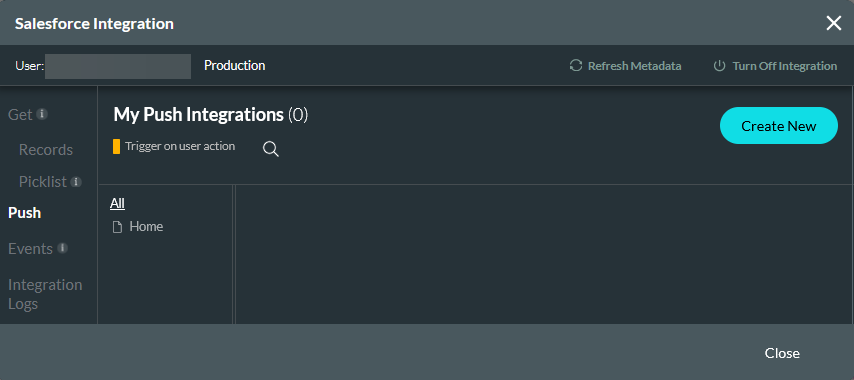
2. Select the Push tab and click Create New.
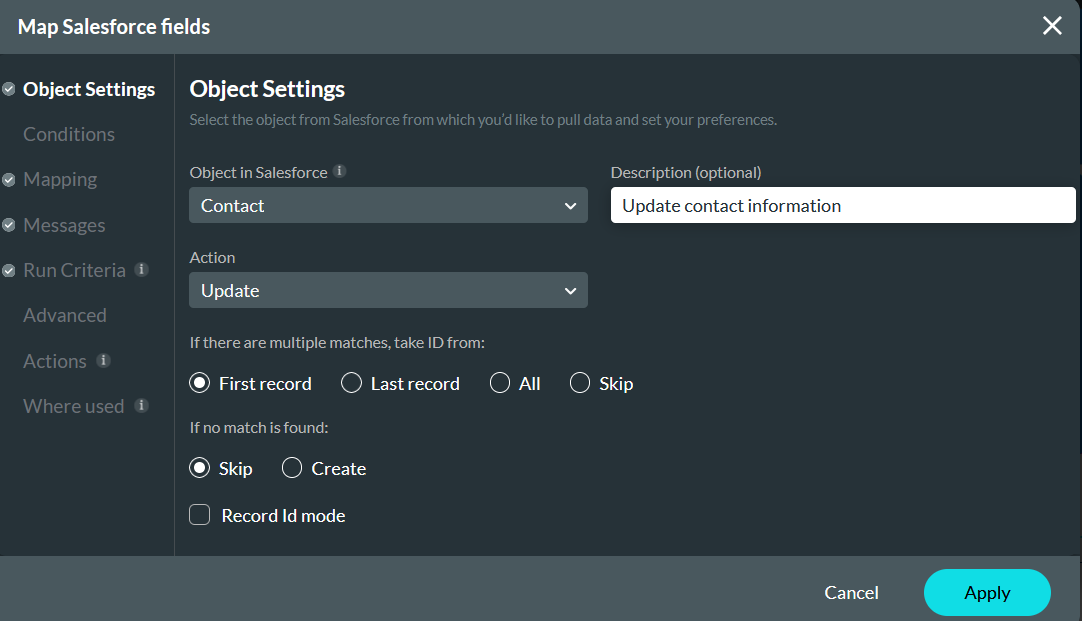
03 Object Settings
Configure the following:
- Object - Contact
- Action - Update
- Matching Criteria - First Record
- If No Match is Found - Skip
- Description - Update contact information
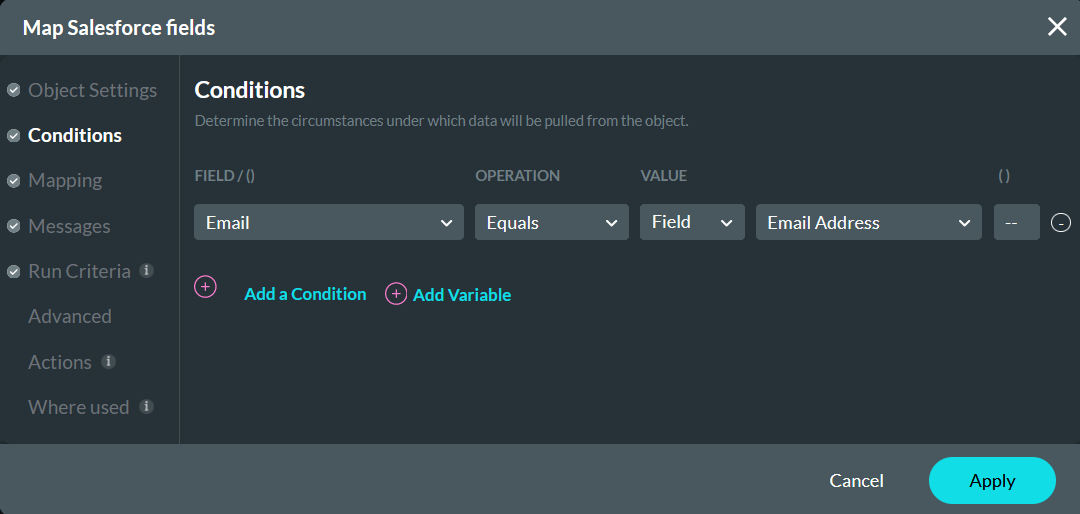
04 Conditions
Configuring a condition will ensure that the correct contact is updated with the new data. To verify the user we will use the email field so that when a user enters an email address it must match the current email address for the contact in Salesforce.
You can configure further conditions if required - for example, if more than one contact shares the same email address.
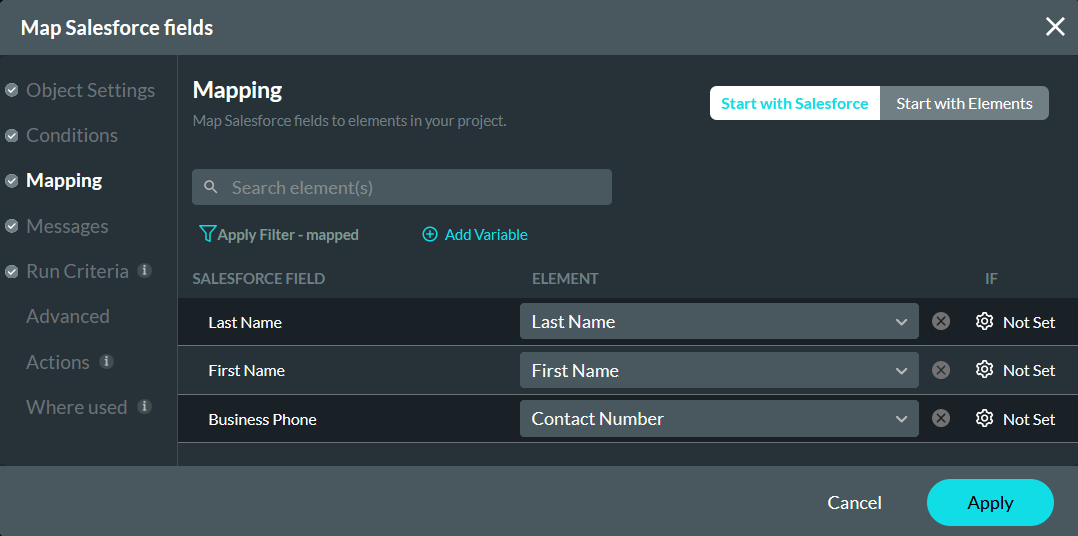
05 Mapping
Under the mapping tap, we will match Salesforce fields to the corresponding Form project elements. For example, any updates made to the contact's first or last name must be pushed to the corresponding Salesforce fields to ensure your data is kept up to date. Once this configuration step is completed, click Apply and Close the Salesforce Integration window.
06 Invoking the Push from a Button
Now that the push has been configured, we will need to assign it to an interactive element to invoke the push action.
1. Select the button you want to assign the action to and click the Interactivity icon in the button menu.

The On Click Action window opens.
2. Click the Start + icon, choose Salesforce Action as the node, and click Next.

3. Use the dropdown to select the configured Salesforce push. Click Next.
Note: The dropdown will display the description entered for the push. This is why we recommend you give each action created a description as it allows you to easily choose the correct action.

4. Enter a Tag and click Insert.
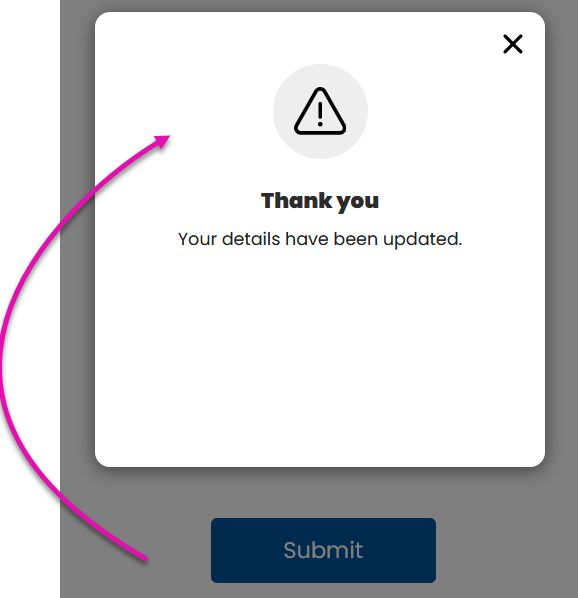
From here, you can choose to add another node to your On Click Action configuration - for example, a message that the user’s details have been updated.

The current configuration is now set up to do the following: when the user provides their details, their email address provided will be verified against the email field in Salesforce, and any changes made to the contact's first, name, last name, or contact number will be changed once the user clicks on the submit button. After the push is completed, a message is displayed.