Order Tracker (4:30 min)
Completion requirements
01 Getting Started
This tutorial covers the Order Tracker Widget.
02 Order Tracker
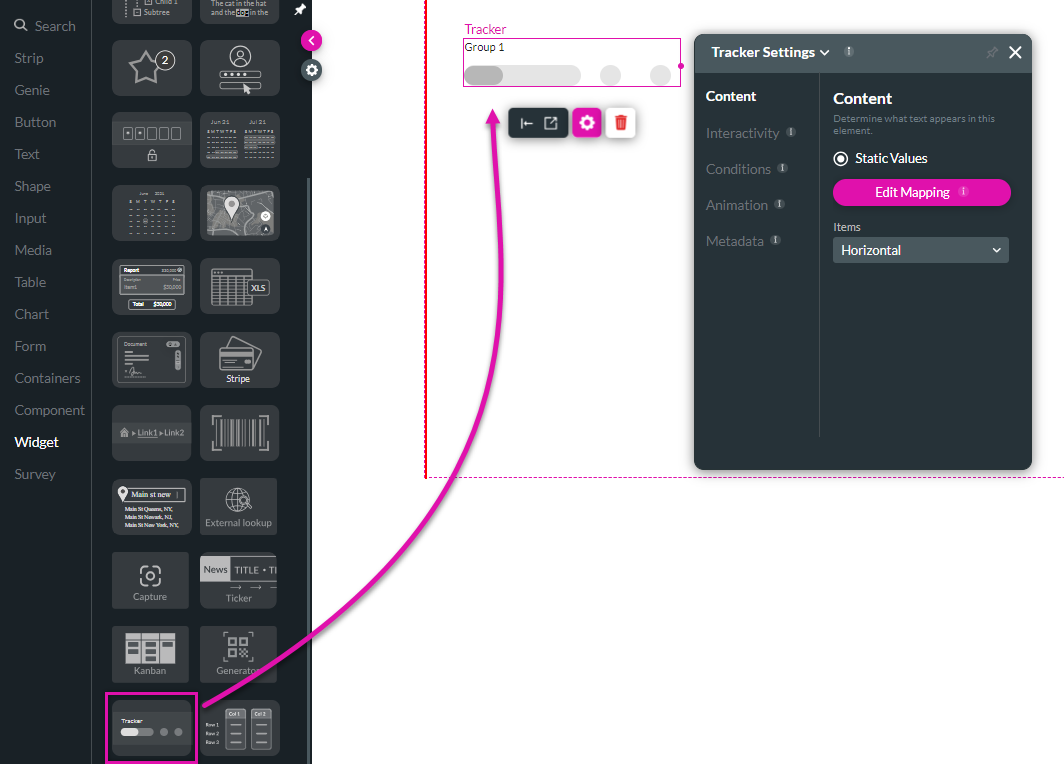
The Order Tracker allows users to locate their orders and explore their stages in the procurement lifecycle. When setting the widget, you can define the values for the tracker and the tracker layout.
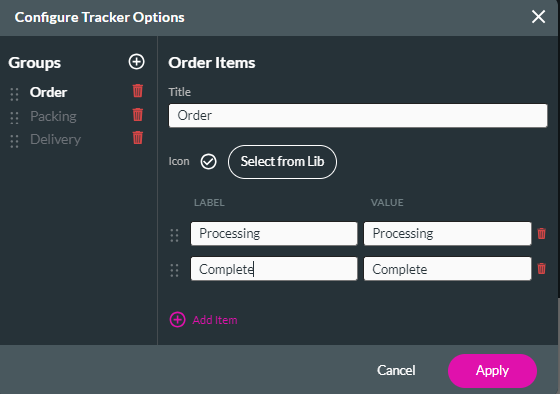
To configure the different stages and steps for the tracker. Click the Edit Mapping button and manually add your stages and the steps within those stages. You can also choose to change the icon as the tracker is updated.
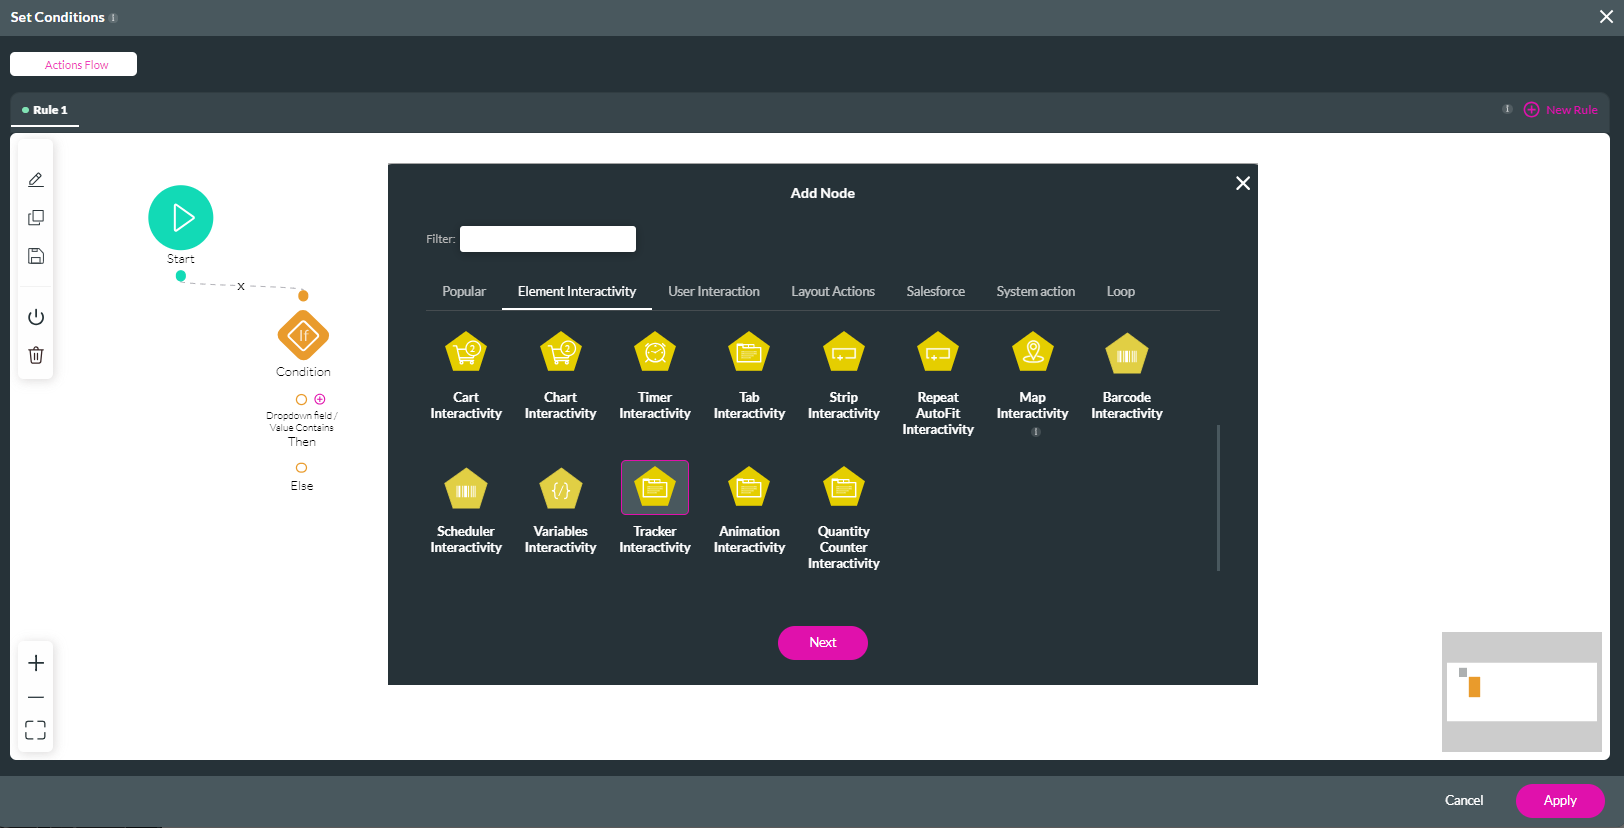
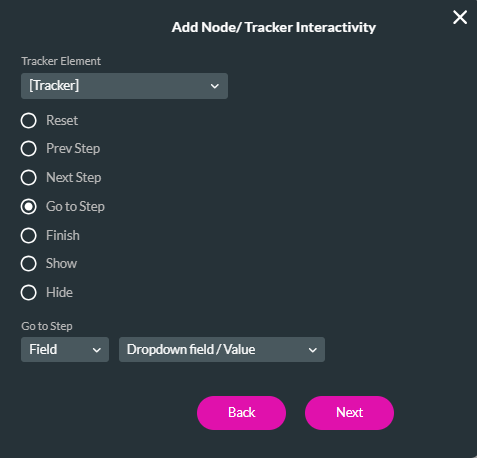
To our Action flow, we added a Tracker Interactivity action connected to the Condition’s Then node.
On the Tracker Interactivity action, we configured it to match the Tracker value to the Dropdown field value as follows:
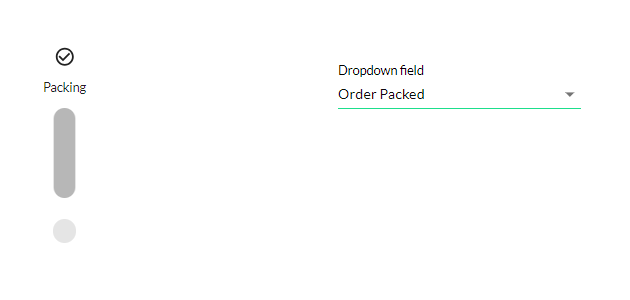
As the dropdown is updated, it will be reflected in the order tracker.
To configure the different stages and steps for the tracker. Click the Edit Mapping button and manually add your stages and the steps within those stages. You can also choose to change the icon as the tracker is updated.
You can choose from a variety of elements to affect the order tracker. When configuring these elements, you can choose between static and dynamic values. In the example below, we decided on static values. Dynamic values will sync directly from your Salesforce data.
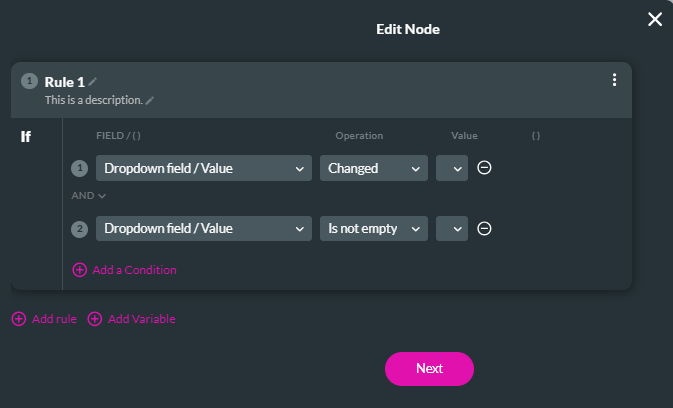
In our example, we created a dropdown field containing the same value for our project. We have configured a condition on this dropdown field to run whenever the dropdown value Changes and is not empty.
To our Action flow, we added a Tracker Interactivity action connected to the Condition’s Then node.
On the Tracker Interactivity action, we configured it to match the Tracker value to the Dropdown field value as follows:
As the dropdown is updated, it will be reflected in the order tracker.