Custom Theme (3:30 min)
Completion requirements
01 Getting Started
This tutorial covers custom themes, including:
- Custom theme overview.
- Creating and adding a custom theme.
- How to edit and delete custom themes.
02 Custom Theme Overview
The Theme is selected when creating your projects. To customize your projects to match your organization’s branding, you will need to update the project styling. Creating a custom theme is a great starting point.
To add a custom theme:
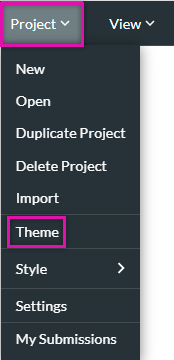
1. Expand the project dropdown and select Theme.
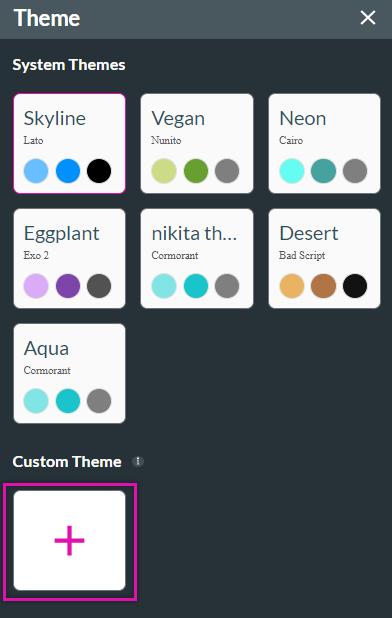
2. Click on the Custom Theme + icon. The Custom Theme window opens.
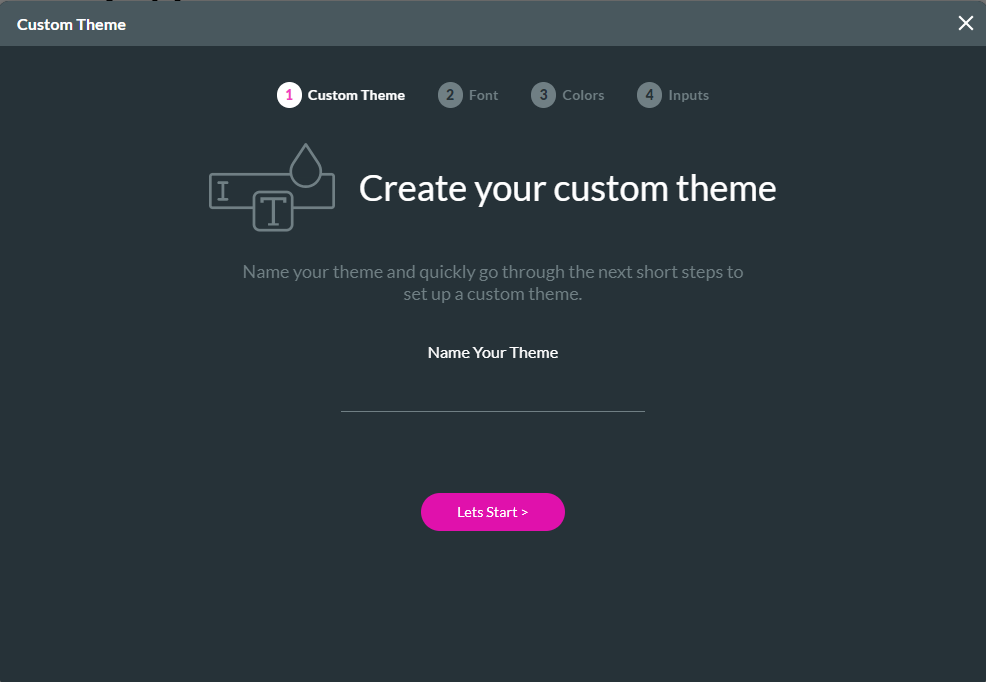
3. First, name your Theme and click Let’s Start.
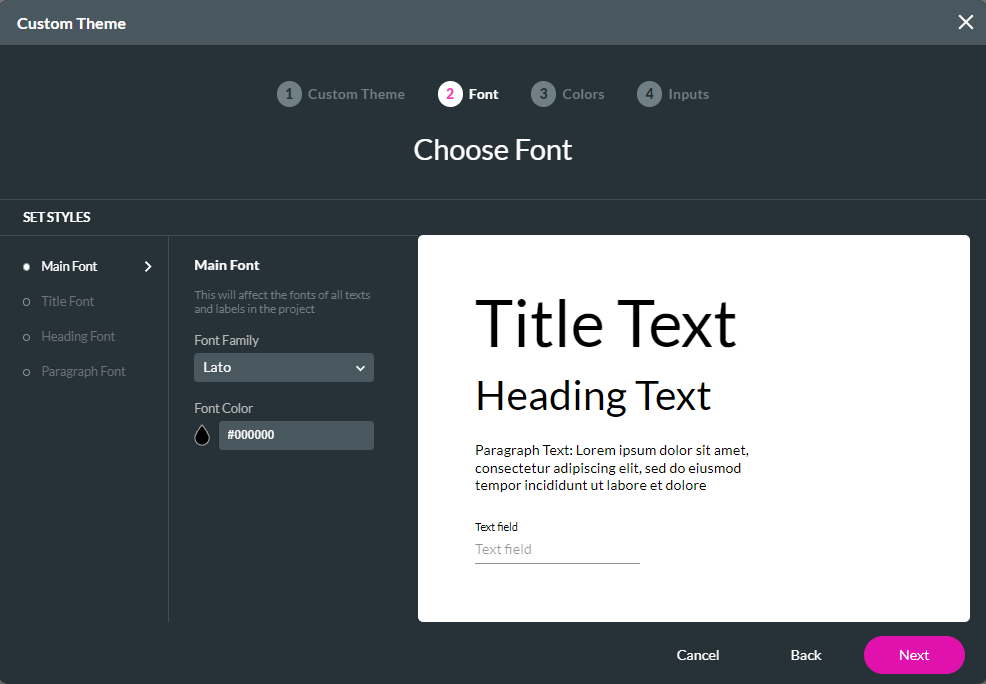
4. Choose your font style. Click Next.
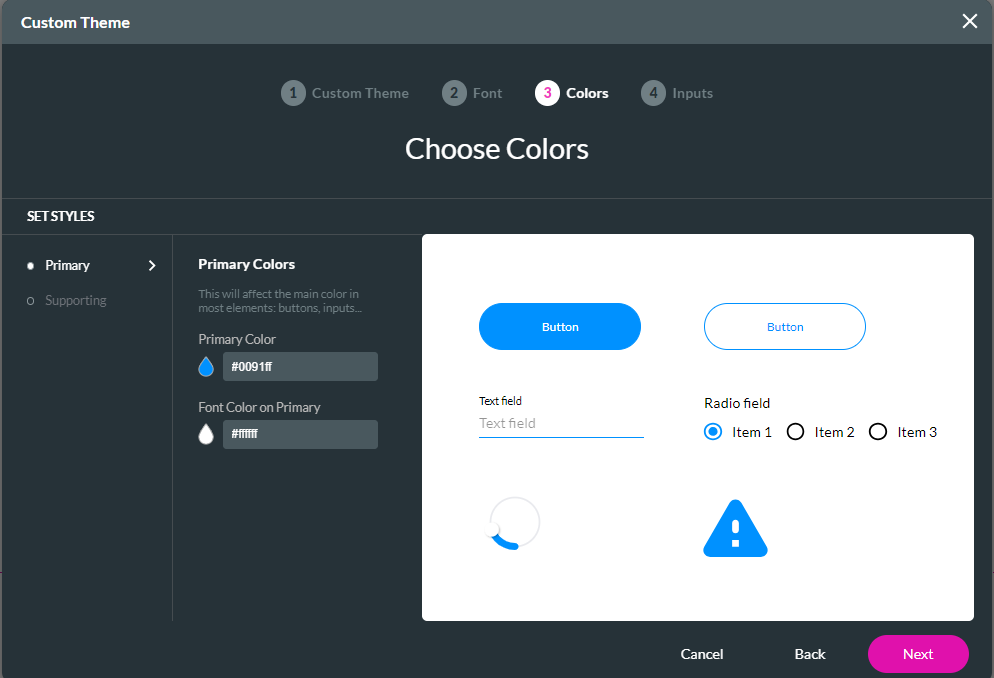
5. Choose your theme colors. Click Next.
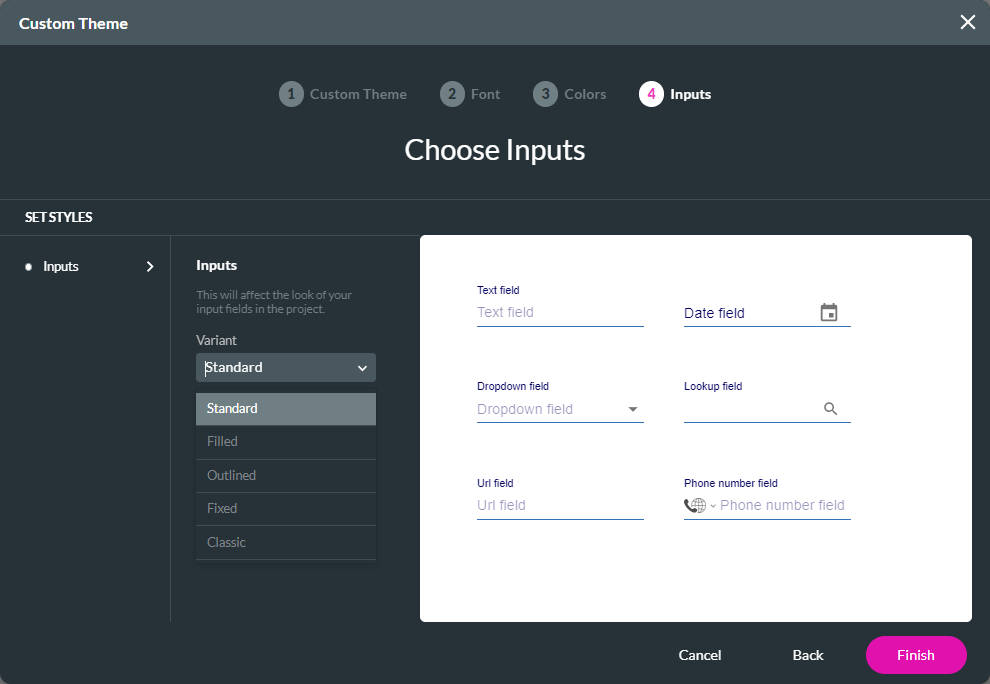
6. Choose how your input fields display. Click Finish.
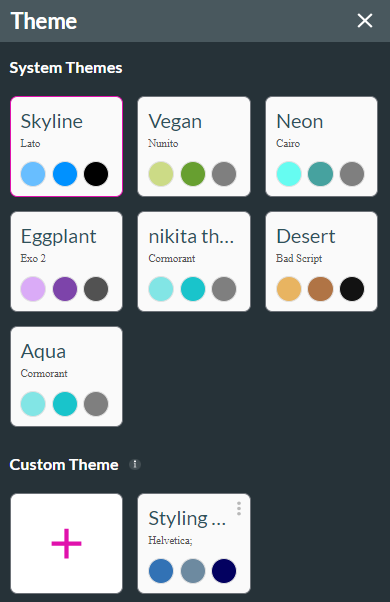
Your Theme will be added to the theme panel and displayed as an option when creating new projects.
To add a custom theme:
1. Expand the project dropdown and select Theme.

2. Click on the Custom Theme + icon. The Custom Theme window opens.
3. First, name your Theme and click Let’s Start.

4. Choose your font style. Click Next.
- Main font: Choose font family and color.
- Title/Heading/Paragraph font: Choose font family, size, and color.

5. Choose your theme colors. Click Next.
- Primary: Choose your primary color and font color.
- Secondary: Choose your supporting color and font color.

6. Choose how your input fields display. Click Finish.

Your Theme will be added to the theme panel and displayed as an option when creating new projects.

03 Editing and Removing Custom Themes
1. Navigate to the Theme Panel.
2. Click the kebab menu next to a custom theme.
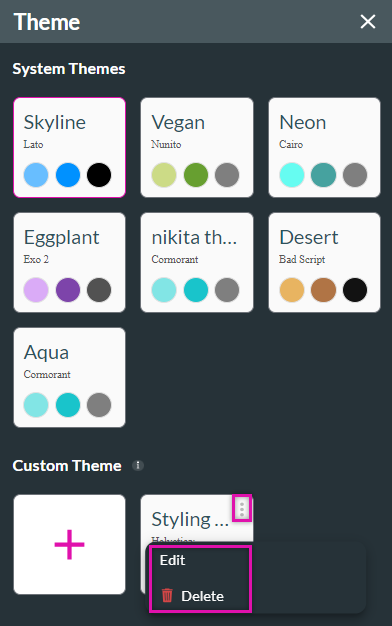
2. Click the kebab menu next to a custom theme.
- The edit option will open the custom theme window.
- The delete option will remove the theme from your project.
