Use Case 3 - Using the Work from Home Template (12 min)
Completion requirements
01 Introduction
This use-case demo will teach us to build a Web Survey using a template.
As with other TITAN products, your Web Survey License includes a bank of professional templates. Produced by TITAN UX experts, these templates provide a professional yet flexible design you can adjust to meet your needs while saving precious time. You can easily reword the template’s text, reorder the slides, customize elements, and match your company’s branding.
As with other TITAN products, your Web Survey License includes a bank of professional templates. Produced by TITAN UX experts, these templates provide a professional yet flexible design you can adjust to meet your needs while saving precious time. You can easily reword the template’s text, reorder the slides, customize elements, and match your company’s branding.
02 Select the Work from Home Template
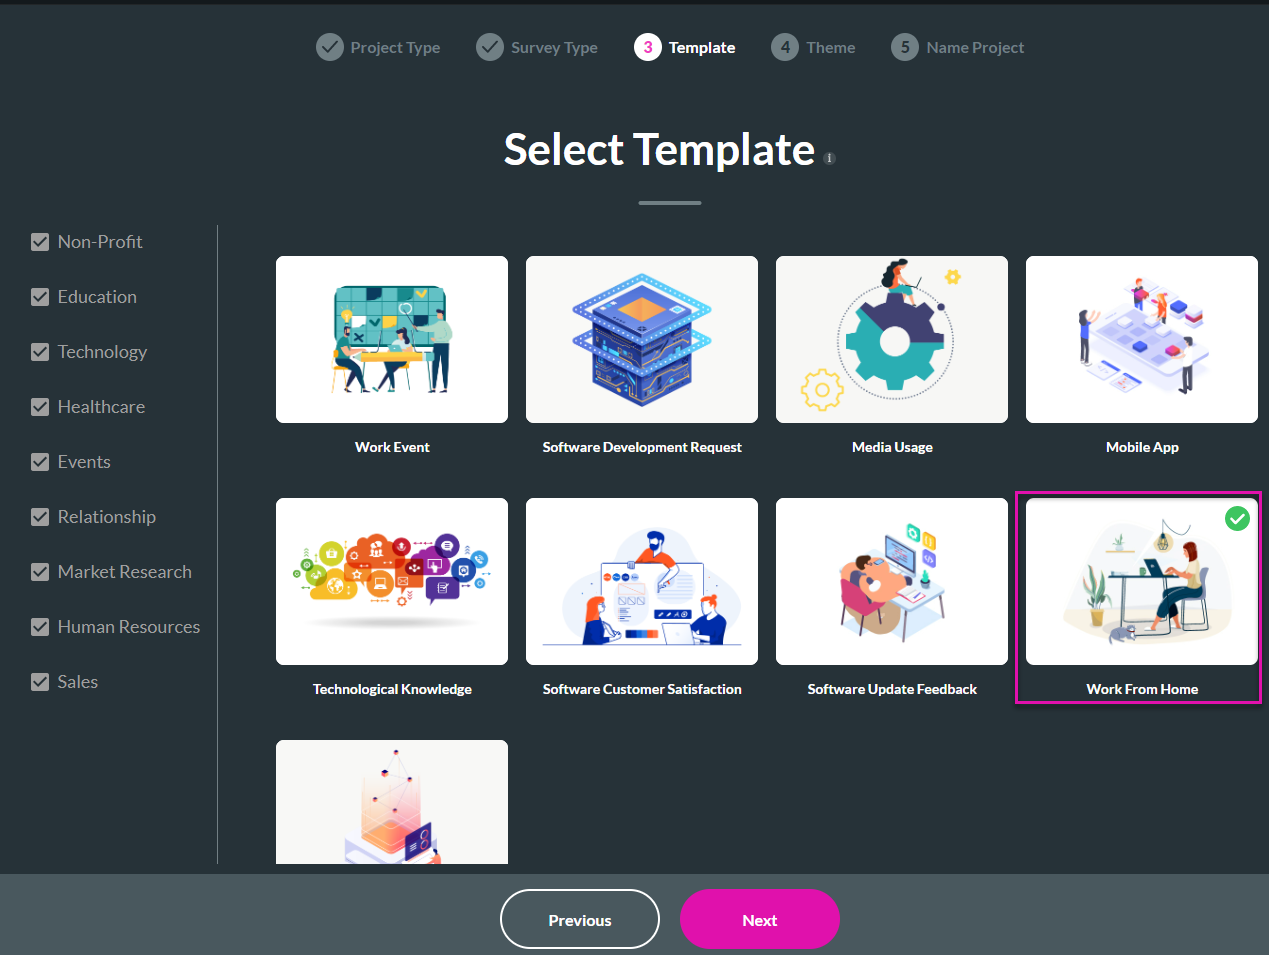
1. Open a new Titan Project, select Titan Survey, and then Web Survey. Under the Template section, choose the Work From Home template.
2. Select a theme and name your project, and you are ready to start customizing your Work from Home Survey.
2. Select a theme and name your project, and you are ready to start customizing your Work from Home Survey.
03 Styling
1. Now that you have created the survey, customize its look and feel to match your brand. Select the styling icon, navigate to the Web Survey drop-down, and set the font type and color, as well as the background color, for your survey.

2. You can also update the survey logo to match your company’s brand by clicking the logo box, choosing an image from your library, selecting an image from Salesforce, pasting an image URL, and then selecting Apply.
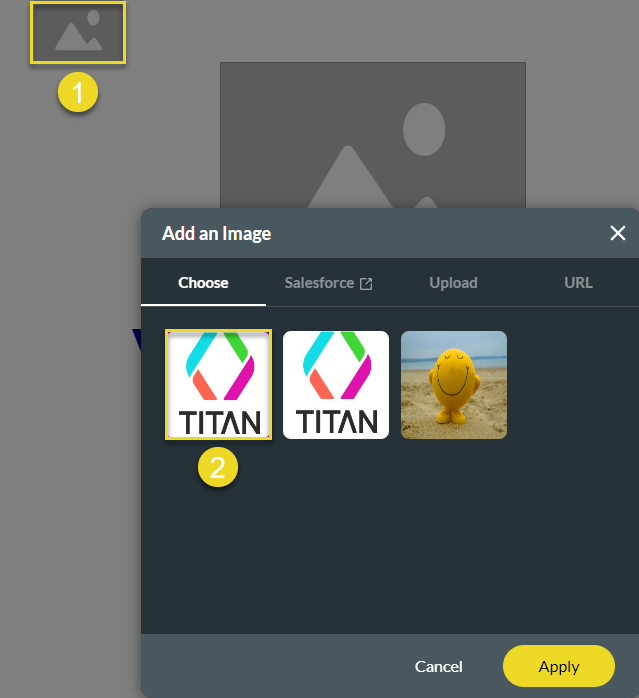
2. You can also update the survey logo to match your company’s brand by clicking the logo box, choosing an image from your library, selecting an image from Salesforce, pasting an image URL, and then selecting Apply.
04 Survey Settings
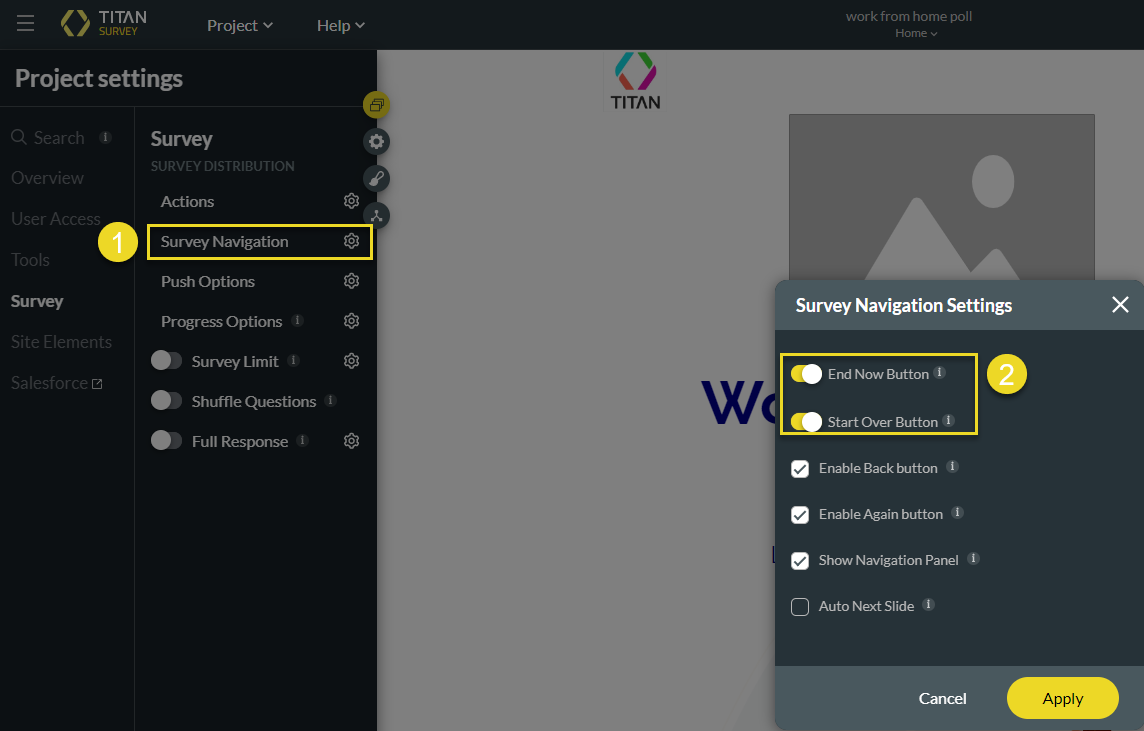
1. Next, you can configure survey settings by visiting Project settings > Survey > Survey Navigation gear icon and enabling the End Now and Start Now buttons. This enables submitters to end the survey at any point or start from the beginning.
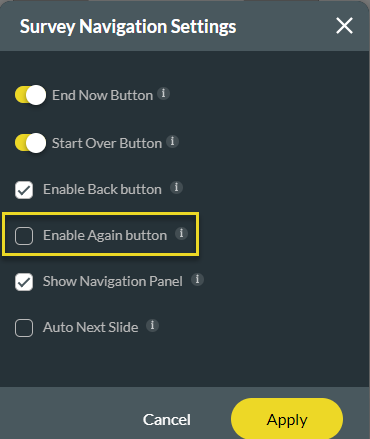
2. In the same place, you can choose to turn off the Enable Again button so that employees can only take this survey once.
3. You can configure your survey to push answers to Salesforce after each slide. To do so, visit Project settings > Survey > Push Options gear icon> select “Push answers every slide.” Then click Apply.
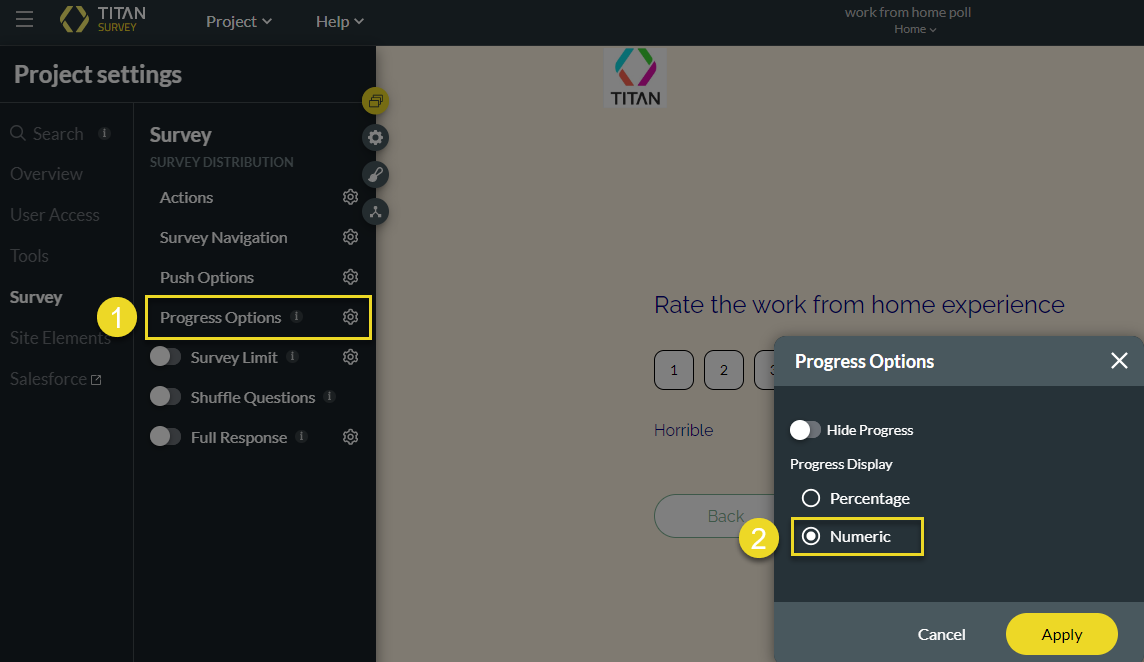
4. You can also change the progress display to numeric values by following Project settings > Survey> Progress Options gear icon> select Numeric.

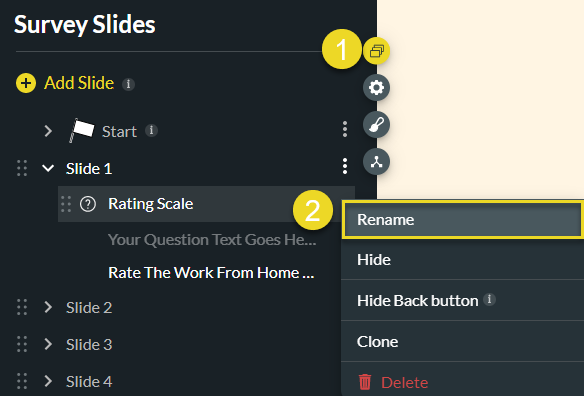
5. Rename slides to make them easier to navigate and build your survey. To do this, click the slide manager>slide kebab menu> Rename. Do this for all slides you wish to rename.
2. In the same place, you can choose to turn off the Enable Again button so that employees can only take this survey once.
3. You can configure your survey to push answers to Salesforce after each slide. To do so, visit Project settings > Survey > Push Options gear icon> select “Push answers every slide.” Then click Apply.
4. You can also change the progress display to numeric values by following Project settings > Survey> Progress Options gear icon> select Numeric.
5. Rename slides to make them easier to navigate and build your survey. To do this, click the slide manager>slide kebab menu> Rename. Do this for all slides you wish to rename.
05 First Slide
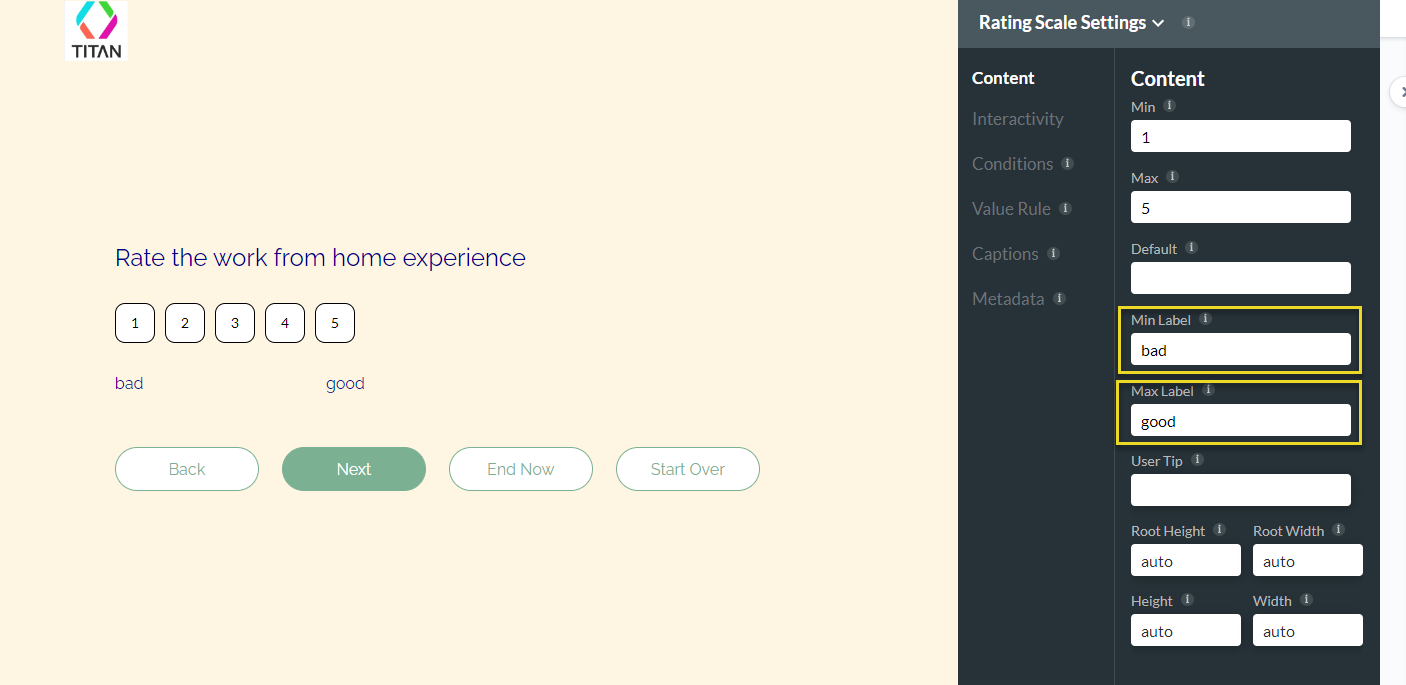
1. Perform custom actions on all your slides. For example, on your first slide, you can update labels in the Content section on the right of the screen.
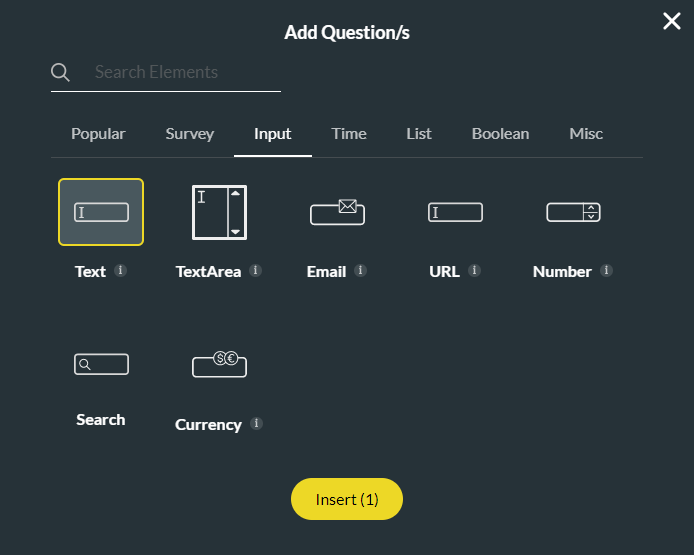
2. Choose to add the mandatory question to this slide by clicking the Add Question button > Input > Text and clicking Insert.
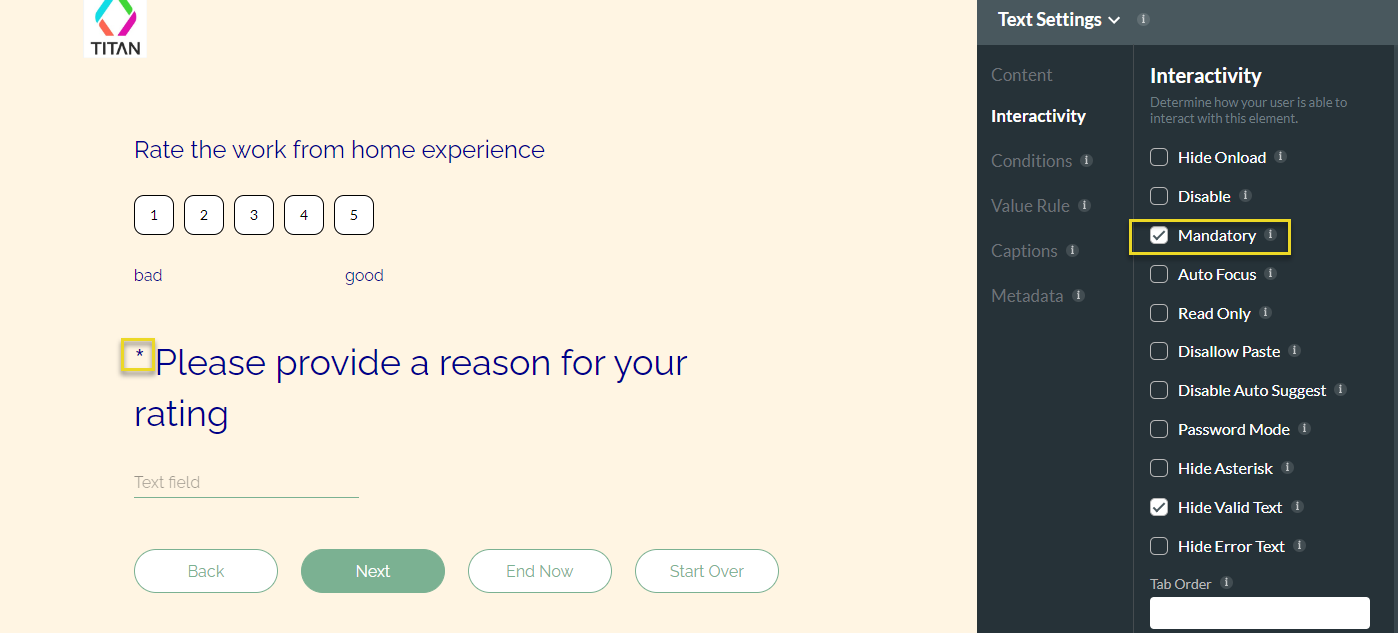
3. Add question text to this new question in the Content panel on the right of the screen. You can delete the description, given that the question is already straightforward. Then make this question mandatory by clicking the Text field and visiting Interactivity > checking Mandatory. An asterisk will appear next to the mandatory question.
2. Choose to add the mandatory question to this slide by clicking the Add Question button > Input > Text and clicking Insert.
3. Add question text to this new question in the Content panel on the right of the screen. You can delete the description, given that the question is already straightforward. Then make this question mandatory by clicking the Text field and visiting Interactivity > checking Mandatory. An asterisk will appear next to the mandatory question.
06 Second Slide
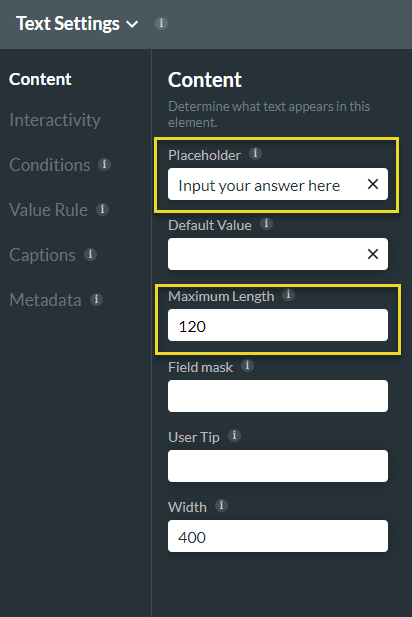
1. Navigate to the second slide. You can set the maximum character length for this question’s answer by visiting Content> Maximum Length. Also, under Content, you can update the Placeholder text.
2. Under Interactivity, you can disallow paste to prevent employees from copying and pasting from external locations. Also, under Interactivity, enable the transparent icon to allow the submitters to clear their input easily.
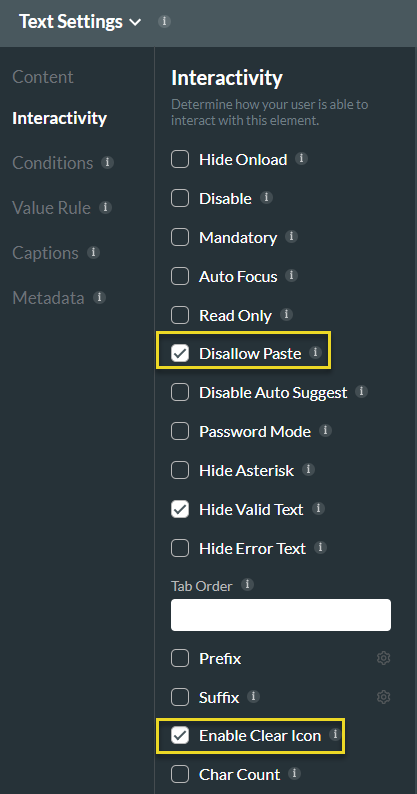
2. Under Interactivity, you can disallow paste to prevent employees from copying and pasting from external locations. Also, under Interactivity, enable the transparent icon to allow the submitters to clear their input easily.
07 Third Slide
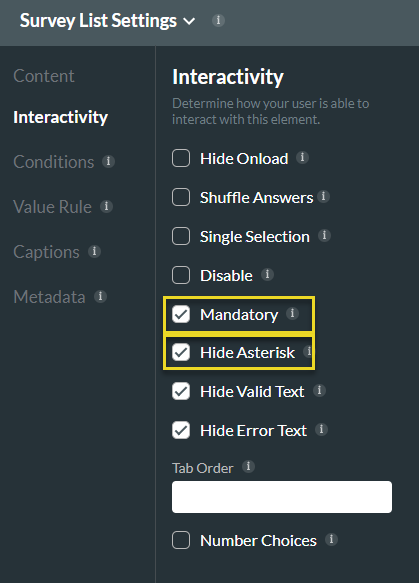
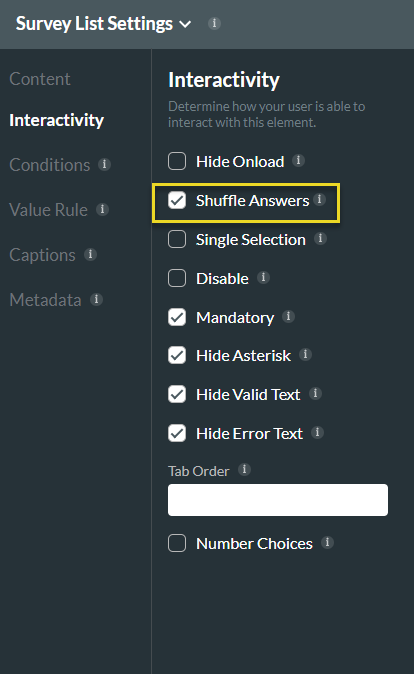
1. In your third slide, make the question mandatory by checking the Mandatory option under Interactivity. In the same place, you can also hide the asterisk that usually pops up for mandatory questions.
2. Under content, you can add a User Tip so the respondent knows they can select all applicable equipment.
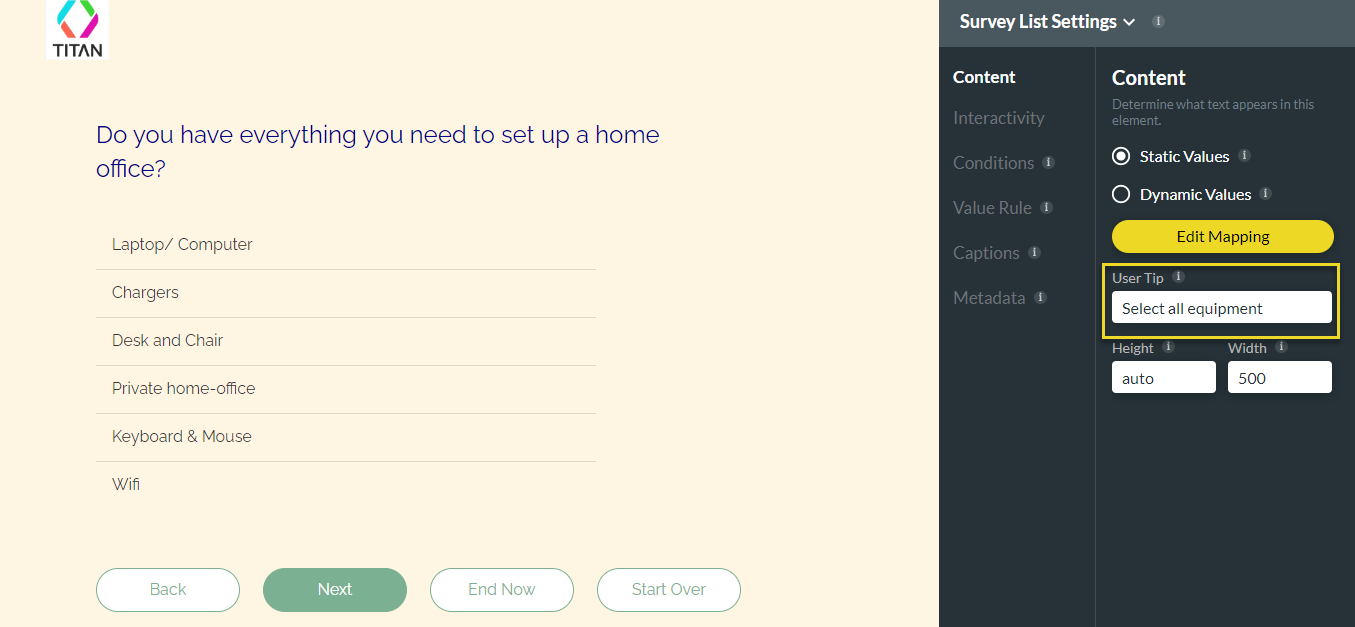
3. Finally, you can activate shuffling under the Interactivity panel so that all respondents see options in a different order.
2. Under content, you can add a User Tip so the respondent knows they can select all applicable equipment.
3. Finally, you can activate shuffling under the Interactivity panel so that all respondents see options in a different order.
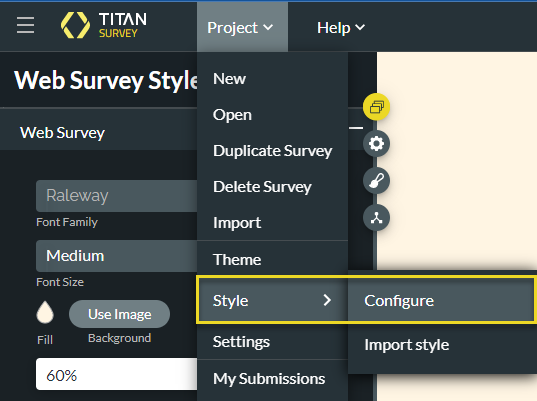
08 Fourth Slide
1. The Customize Styles menu can help make your fourth slide stand out from the others. Visit Project > Style > Configure.
2. In the Customize Styles menu, you can edit a number of styling options. For instance, you can increase the padding around the question and answers or add a border to the question.
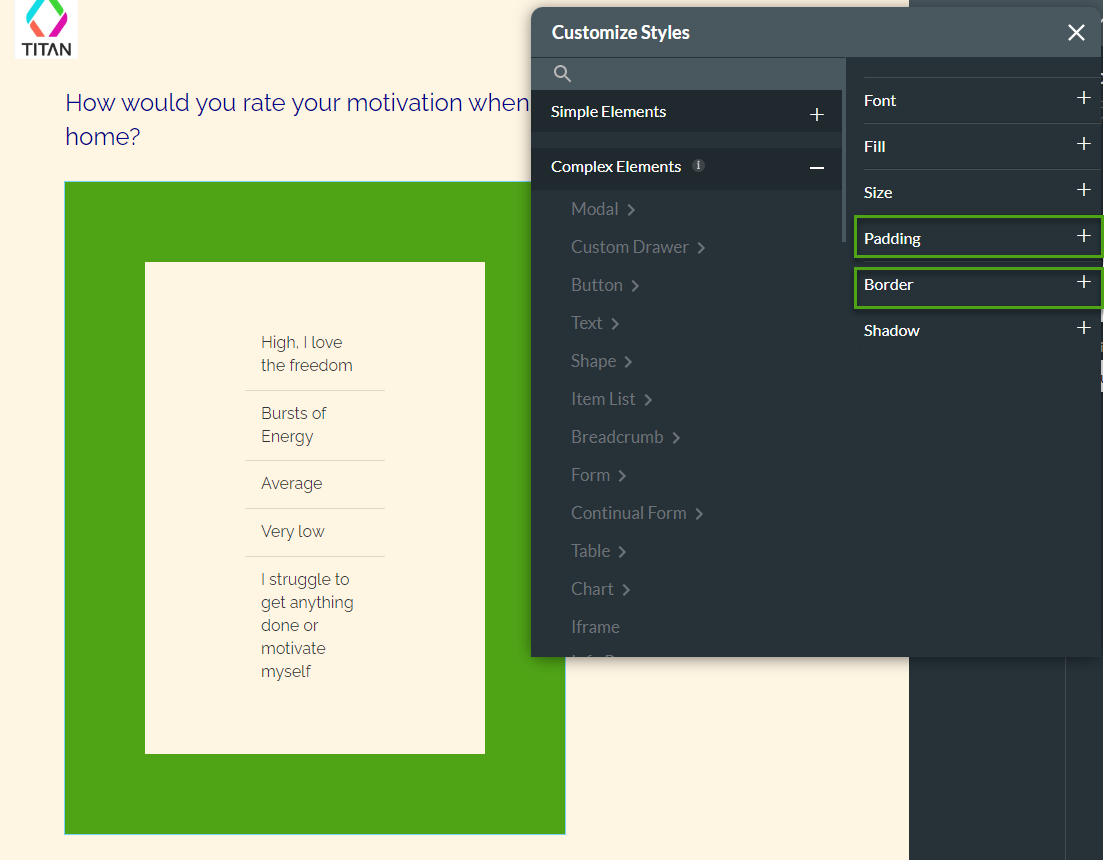
2. In the Customize Styles menu, you can edit a number of styling options. For instance, you can increase the padding around the question and answers or add a border to the question.
09 Fifth Slide
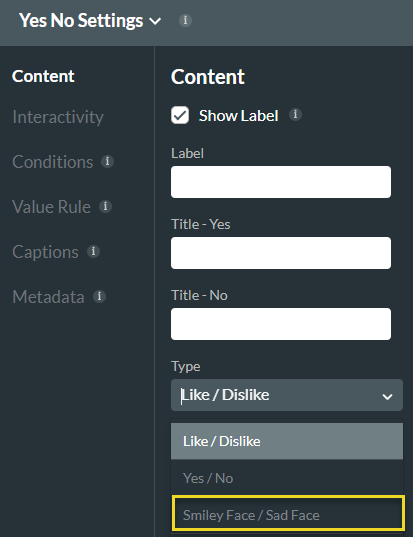
1. You can customize slide five by editing its styling and Content. Click Yes/No to open settings and visit Content> Type drop-down > select Smiley Face/ Sad Face instead of Yes/No responses.
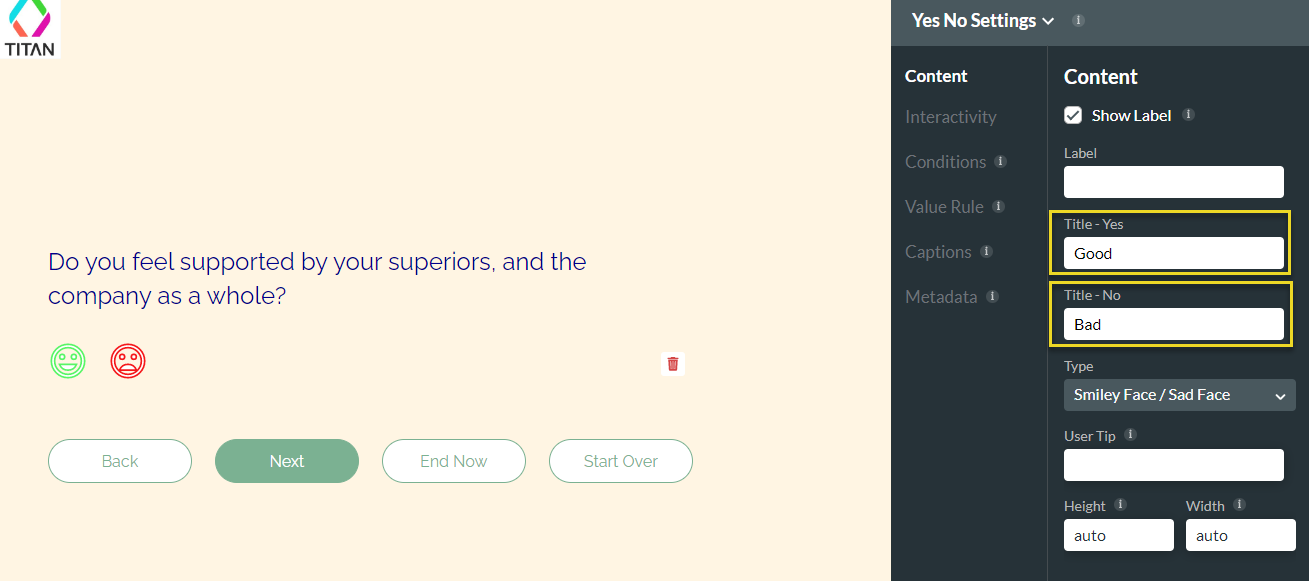
2. Also, under Content, you can change the titles of this Yes/No question type.
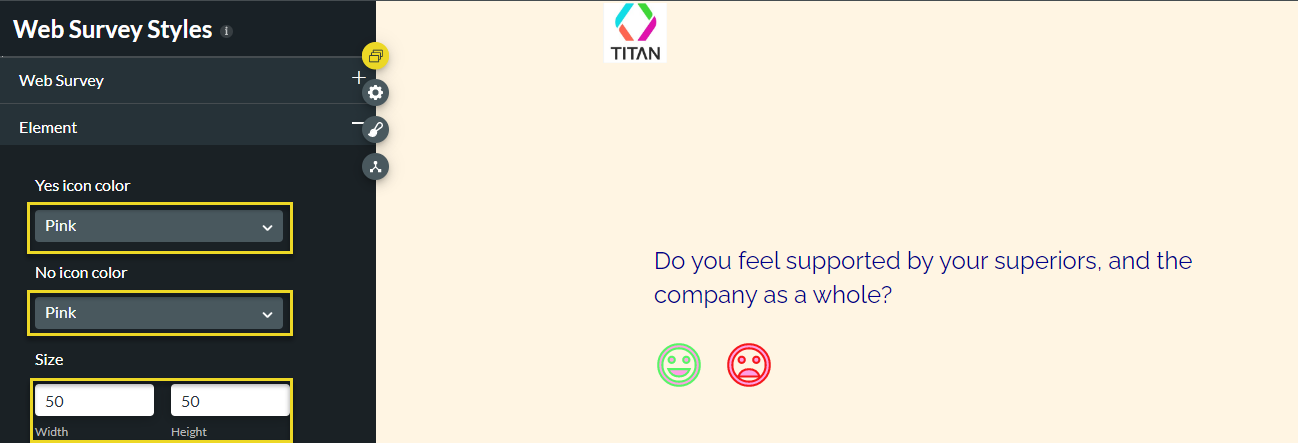
3. You can change the color and font of the icons by visiting the Survey styling > Element drop-down menu.
2. Also, under Content, you can change the titles of this Yes/No question type.
3. You can change the color and font of the icons by visiting the Survey styling > Element drop-down menu.
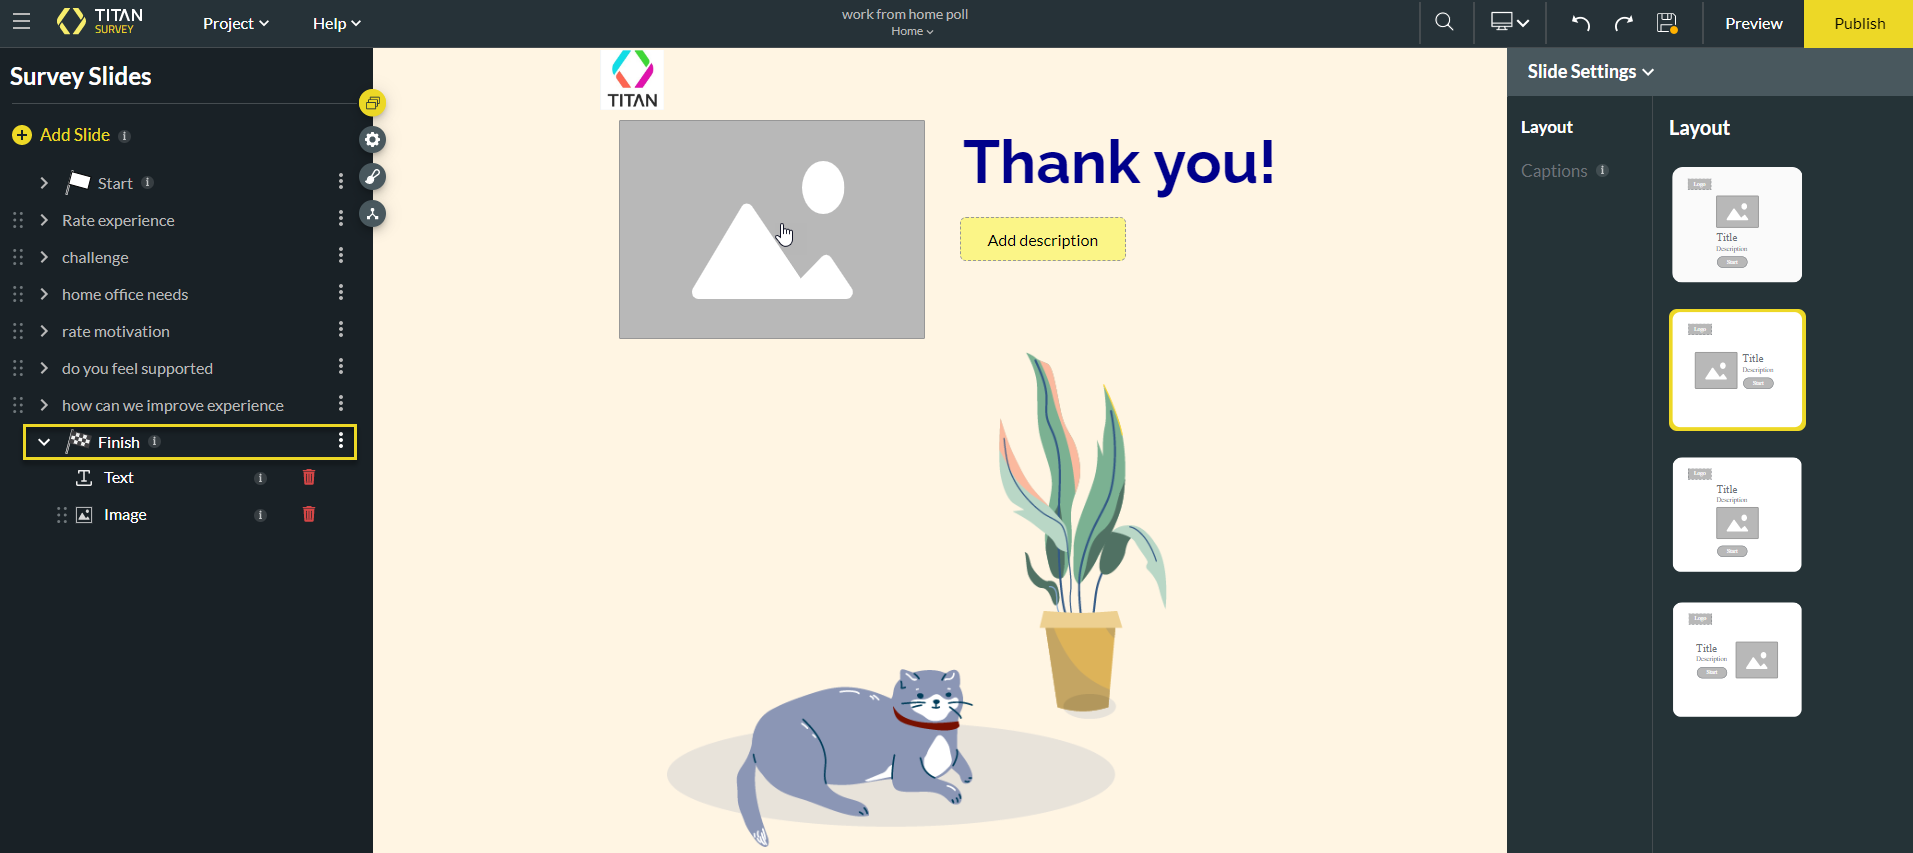
10 Finish Slide
1. Choose your desired layout for your Finish slide from the menu on the right.
11 Preview
1. You can preview the survey before publishing it by clicking the Preview button at the top right of the screen and then clicking Launch site.
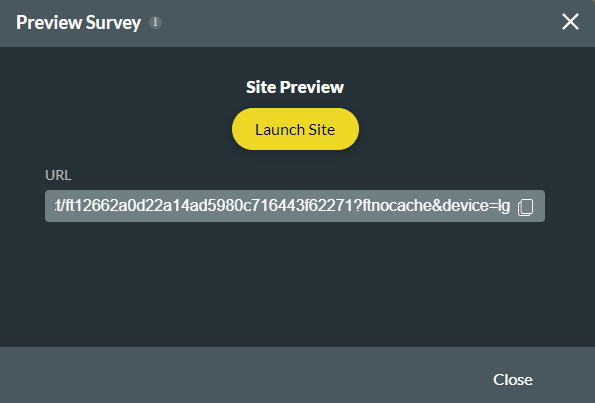
2. To change the device type and preview on mobile, edit the survey URL by replacing device=lg with device=ss.
2. To change the device type and preview on mobile, edit the survey URL by replacing device=lg with device=ss.
12 Distribution
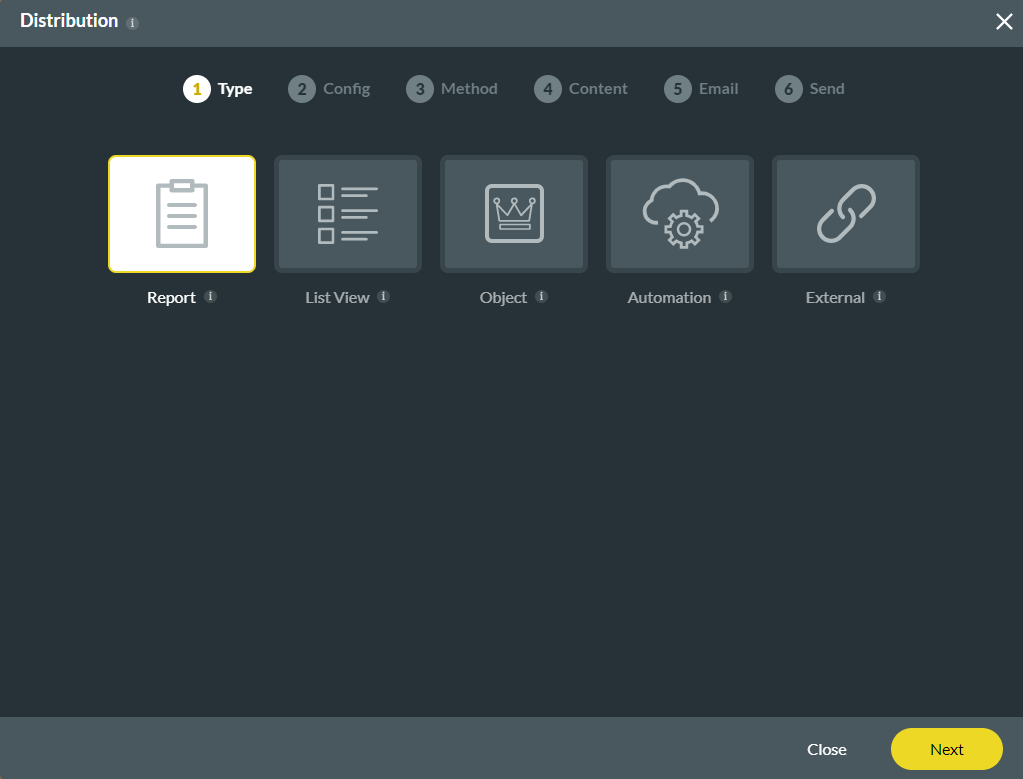
1. Now that your survey is ready, you can choose your distribution method. To do so, click Publish and select your Distribution method. The Report is selected below.
2. Under Config, set Salesforce Report and Object from the drop-downs.

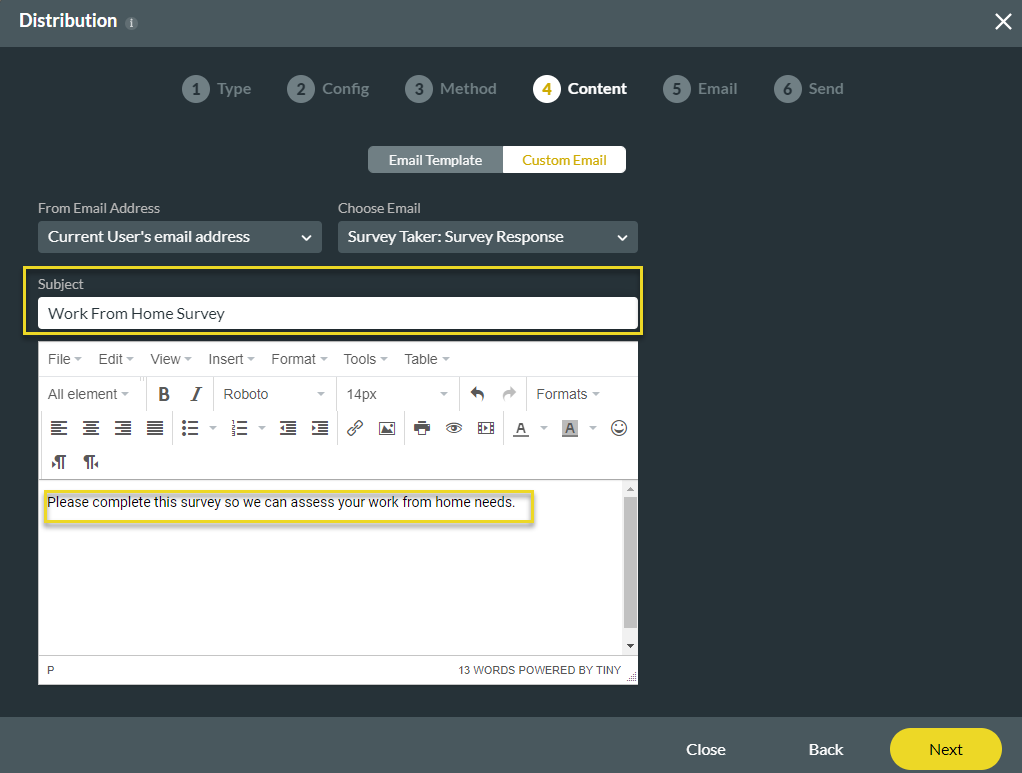
3. In this instance, select the Email method and then the Custom Email option. Here, you can add a Subject and body to the email being sent.
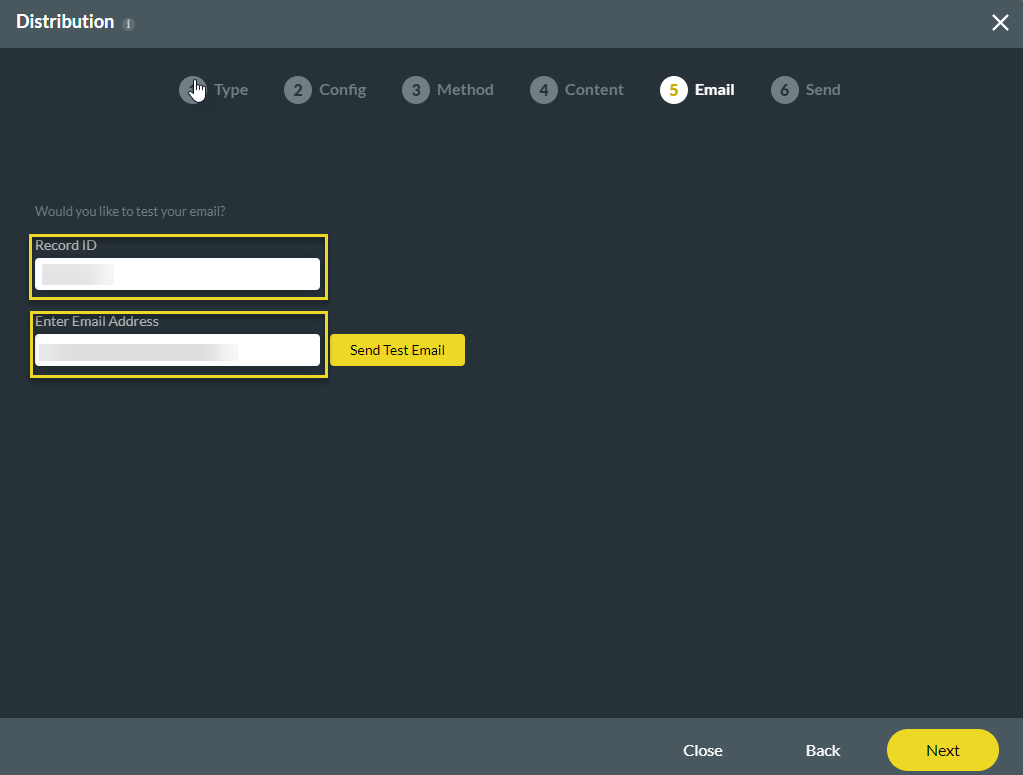
4. After clicking next, you can configure the test email fields and select Send Test Email to send a test email.
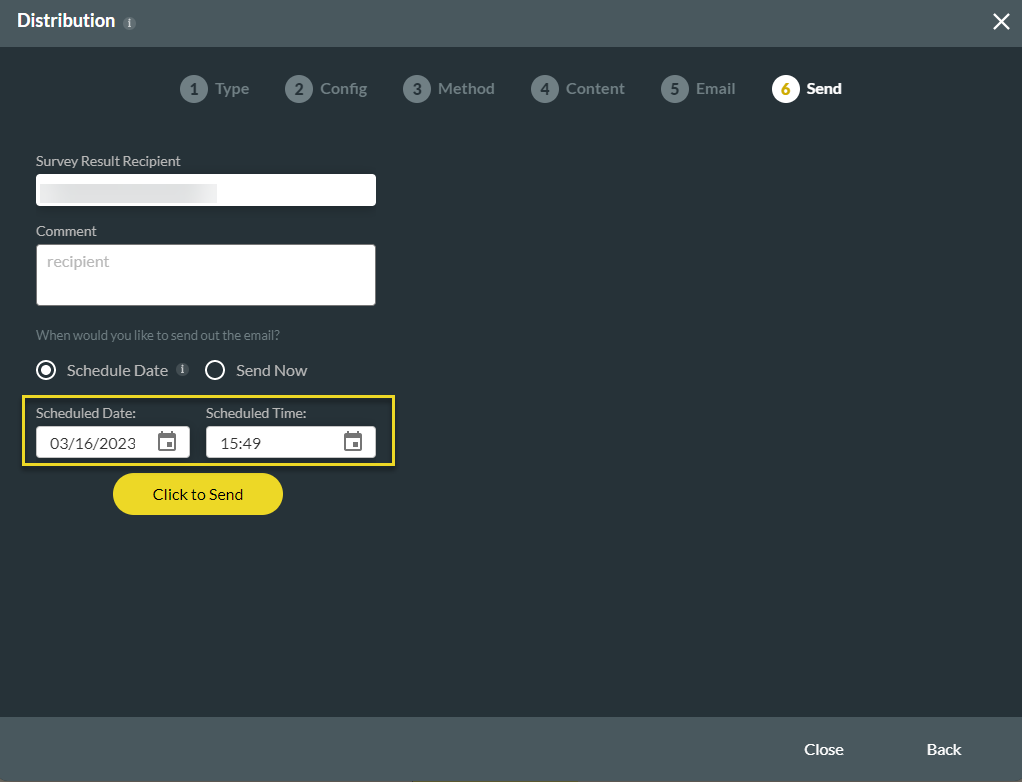
5. Schedule a distribution date to send at a scheduled time and then press Click to Send.
2. Under Config, set Salesforce Report and Object from the drop-downs.
3. In this instance, select the Email method and then the Custom Email option. Here, you can add a Subject and body to the email being sent.
4. After clicking next, you can configure the test email fields and select Send Test Email to send a test email.
5. Schedule a distribution date to send at a scheduled time and then press Click to Send.