Use Case 2 - Using the Employee Satisfaction Template (10 min)
Completion requirements
01 Introduction
This use-case demo will teach us how to build a Web Survey using a template.
Titan offers a bank of professional templates. Produced by TITAN UX experts, templates provide a professional yet flexible design you can adjust to meet your needs while saving precious time. You can easily reword the template’s text, reorder the slides, customize elements, and match your company’s branding.
Titan offers a bank of professional templates. Produced by TITAN UX experts, templates provide a professional yet flexible design you can adjust to meet your needs while saving precious time. You can easily reword the template’s text, reorder the slides, customize elements, and match your company’s branding.
02 Select the Employee Satisfaction Survey Template
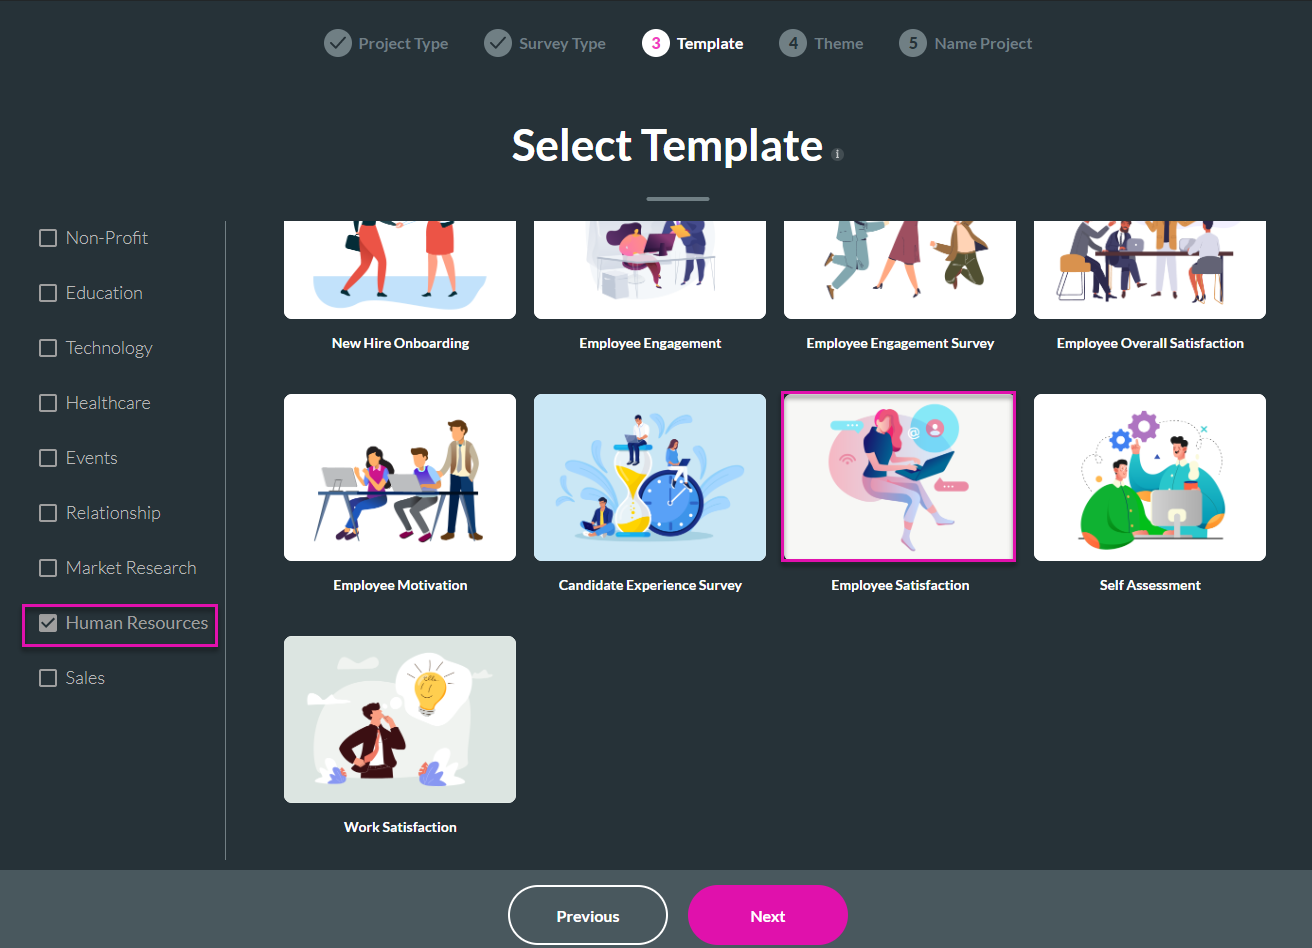
1. Open a new Titan Project, select Titan Survey, and then Web Survey. Under the template section, check the Human Resources category and select the Employee Satisfaction Survey template.
2. After clicking Next, select your Theme colors, give your Survey a name, and you are ready to begin.
2. After clicking Next, select your Theme colors, give your Survey a name, and you are ready to begin.
03 Customize the Start Slide
1. You can customize the Start Slide by uploading the company logo. Add a logo to your survey by clicking the empty logo box and choosing an image from your library, selecting an image from Salesforce, uploading an image, or pasting an image URL. After this, click Apply. You can similarly add an image to your Start Slide by clicking the empty image box and choosing your desired image.

04 Customize Question Slides
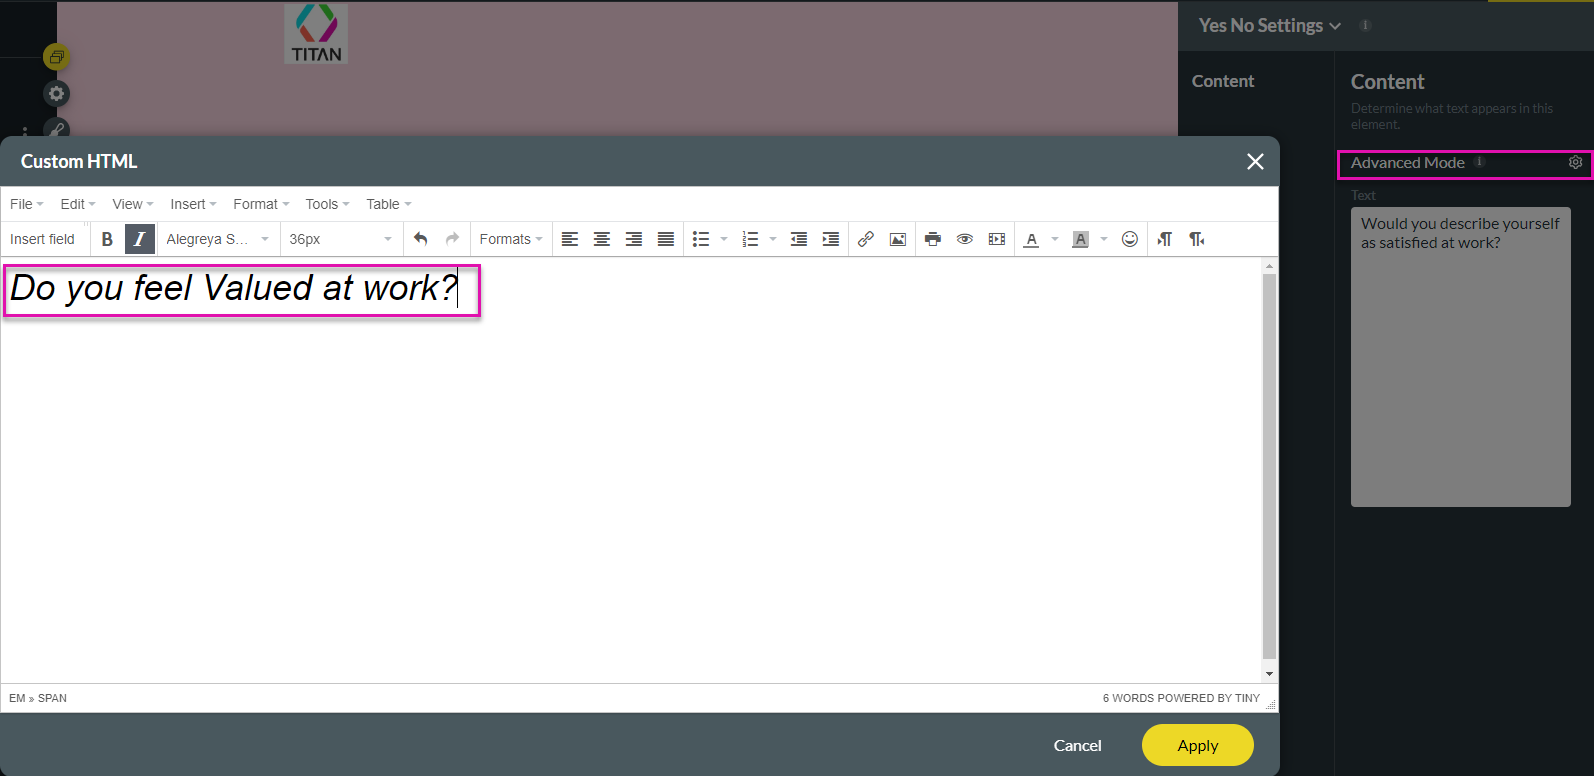
1. Customize the question text and description on your slides by selecting these fields and typing your text in the content section. You can also choose to enable Advanced Mode to tailor your text. If you choose Advanced mode, the Custom HTML screen will show. Enter your text, and once you are happy with the format, click Apply.
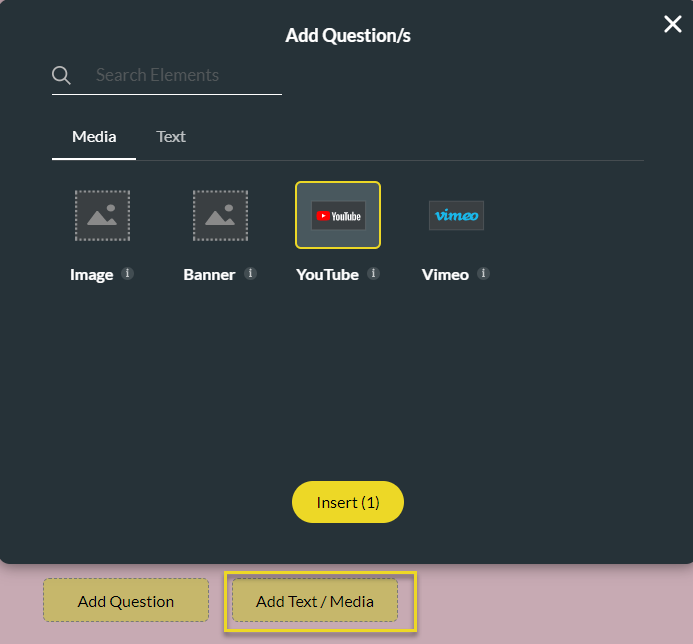
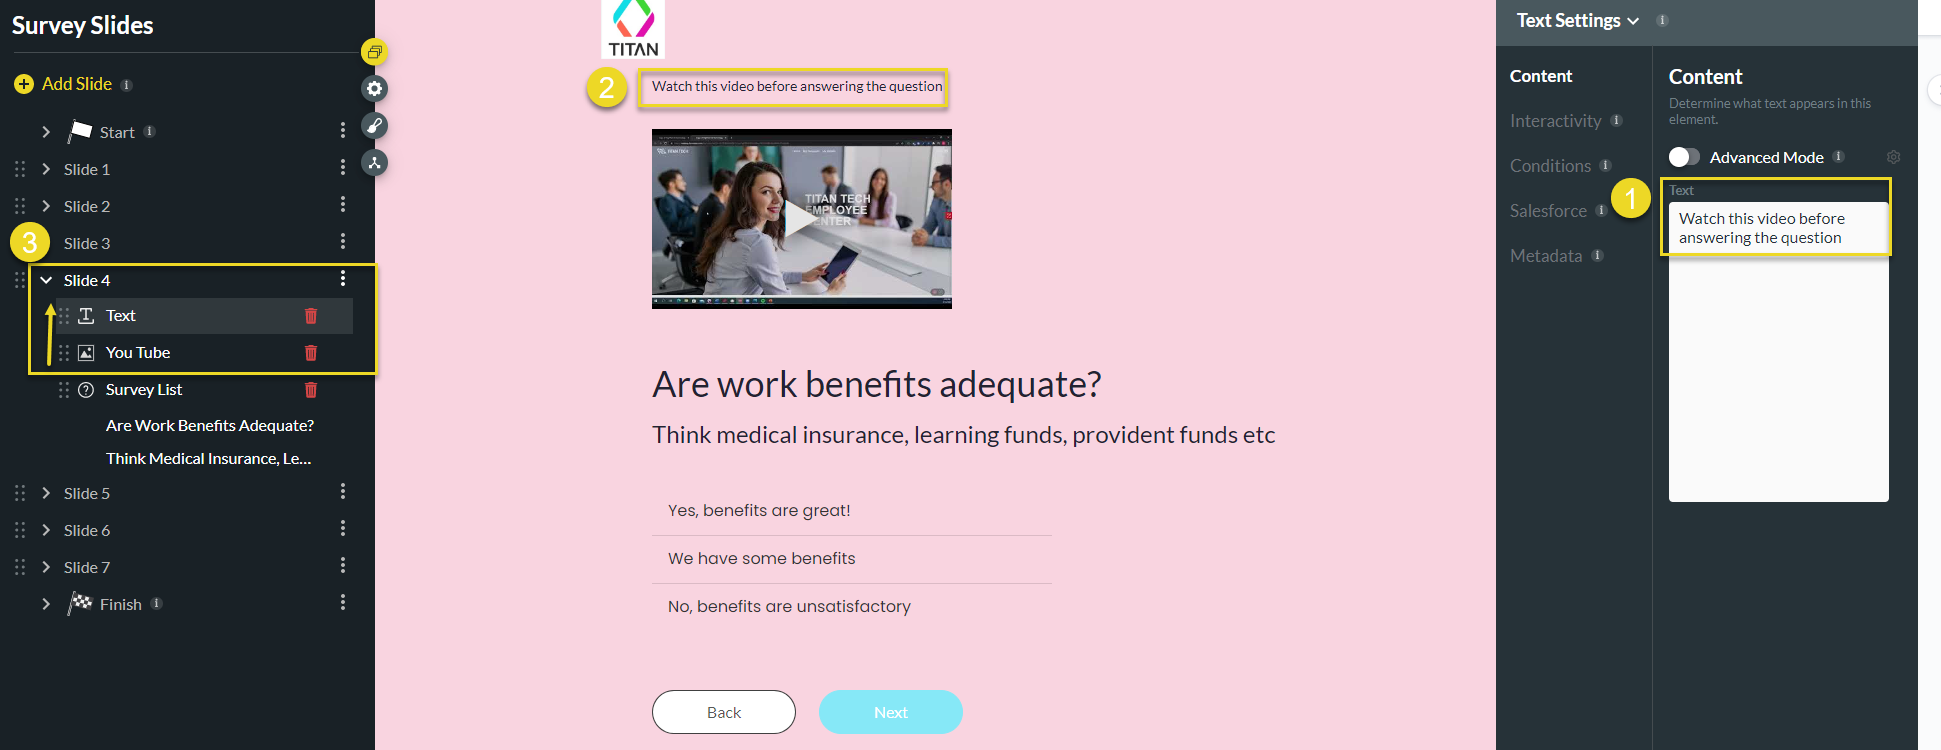
2. Next, navigate to another question slide and choose to add a video, which provides further context to the question. To do so, click the Add Text/Media button, and click on one of the video options. In this instance, YouTube is selected, and then click Insert.
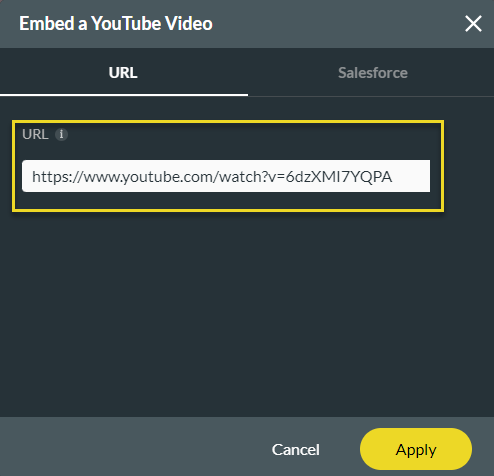
3. Next, add a YouTube URL or select a video from Salesforce. In the screenshot below, a YouTube URL is added.
4. You can drag and drop the video above the slide question using the slide manager on the left of the screen.

5. To add a caption to the video, click Add Text/Media again, select the Text category, and then the Caption option, before clicking Insert.
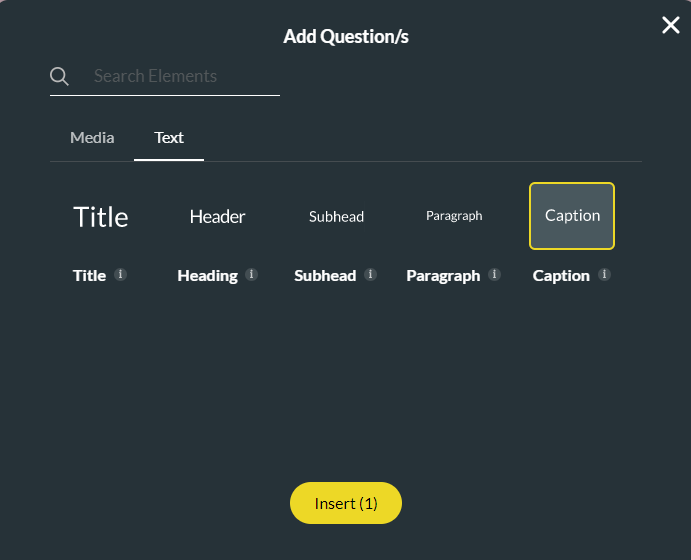
6. In the content section, add your caption text. To move the caption text above the video, drag it on top of the video in the slide panel.
2. Next, navigate to another question slide and choose to add a video, which provides further context to the question. To do so, click the Add Text/Media button, and click on one of the video options. In this instance, YouTube is selected, and then click Insert.
3. Next, add a YouTube URL or select a video from Salesforce. In the screenshot below, a YouTube URL is added.
4. You can drag and drop the video above the slide question using the slide manager on the left of the screen.
5. To add a caption to the video, click Add Text/Media again, select the Text category, and then the Caption option, before clicking Insert.
6. In the content section, add your caption text. To move the caption text above the video, drag it on top of the video in the slide panel.
05 Customizing Star Rating Question Types
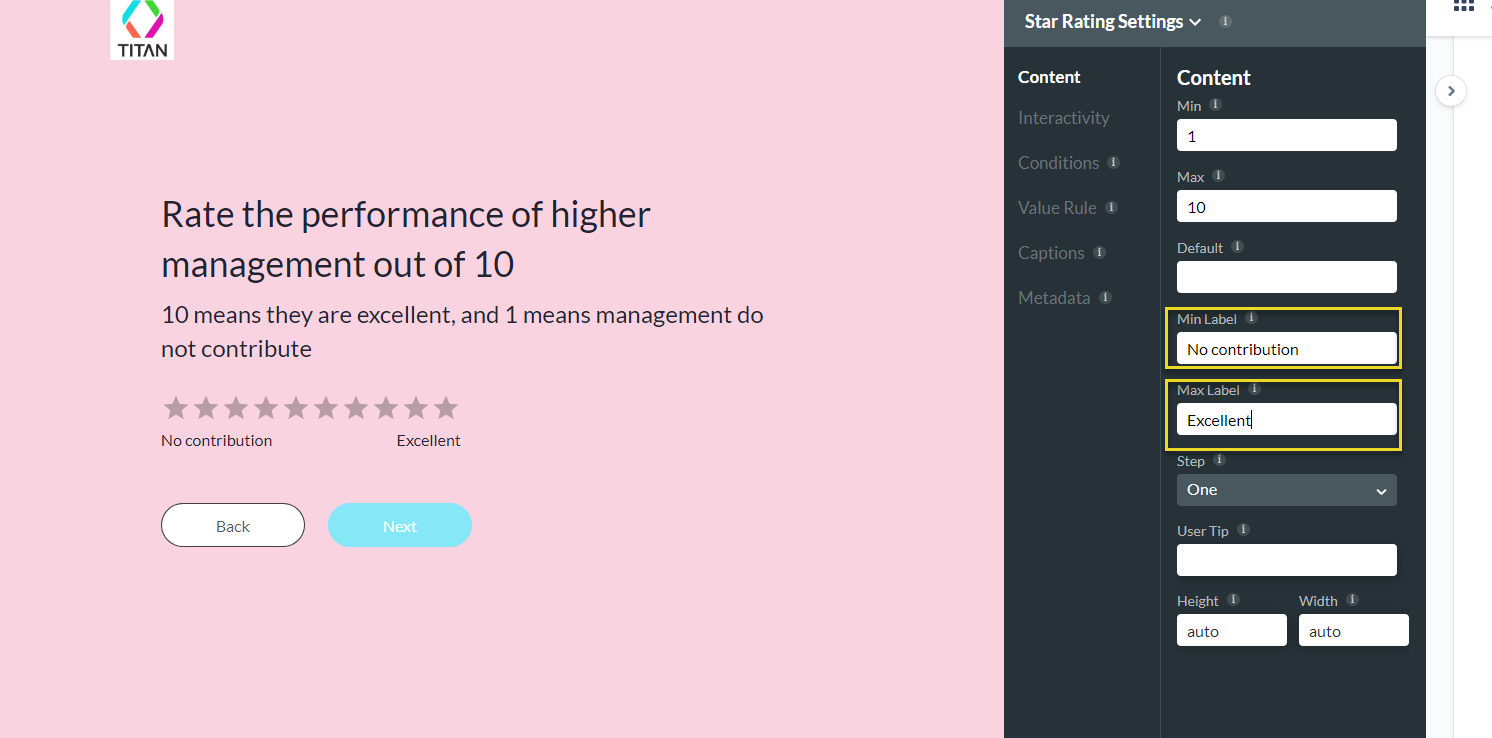
1. You can customize the data for the Star Rating questions. To do so, click on the star rating and the Content screen, and customize the Min and Max Label.
2. To make this question compulsory in the survey, click the Interactivity tab and check the mandatory box. An asterisk will appear next to the question to indicate it is compulsory.
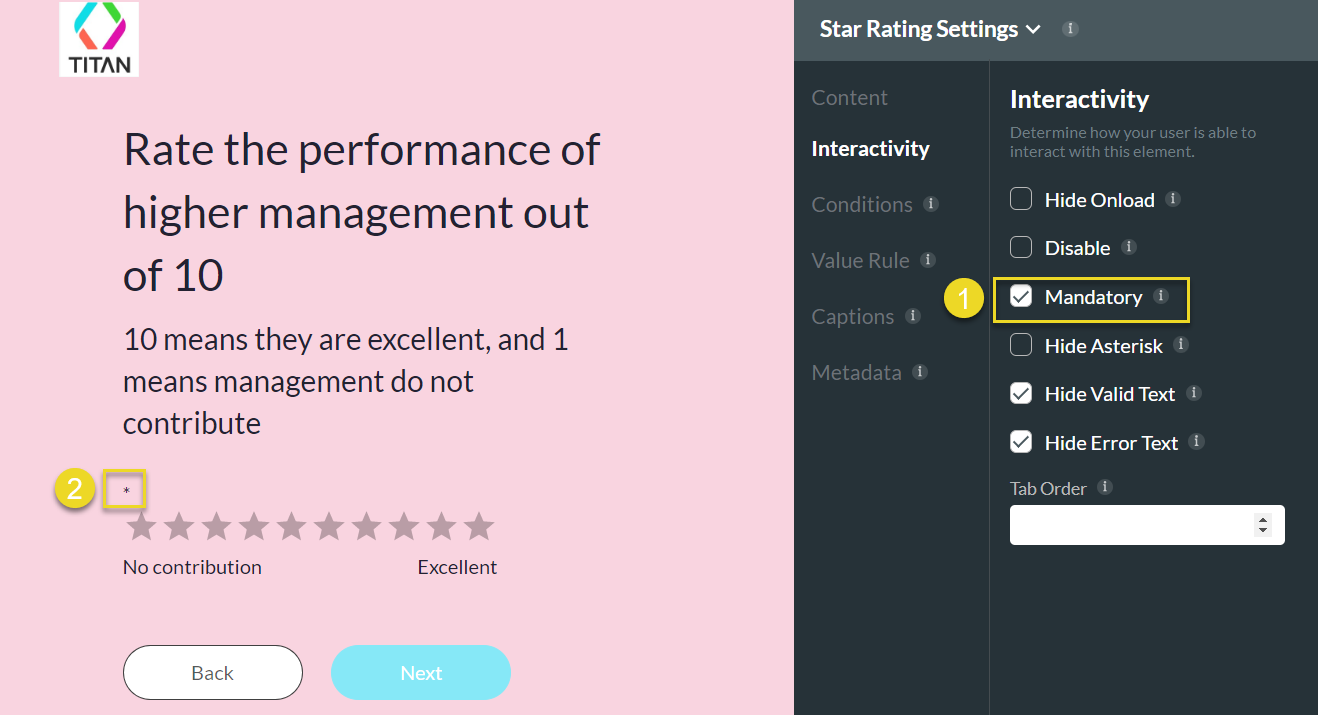
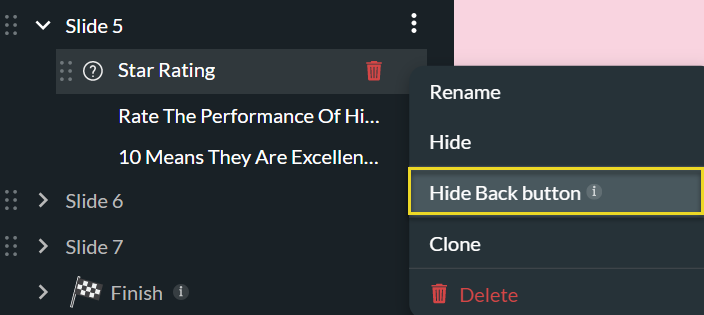
3. You can prevent respondents from moving back from this slide by hiding the back button. To do so, navigate to the slide's kebab menu and click the "Hide Back button" option.
2. To make this question compulsory in the survey, click the Interactivity tab and check the mandatory box. An asterisk will appear next to the question to indicate it is compulsory.
3. You can prevent respondents from moving back from this slide by hiding the back button. To do so, navigate to the slide's kebab menu and click the "Hide Back button" option.
06 Adding CES Question Types
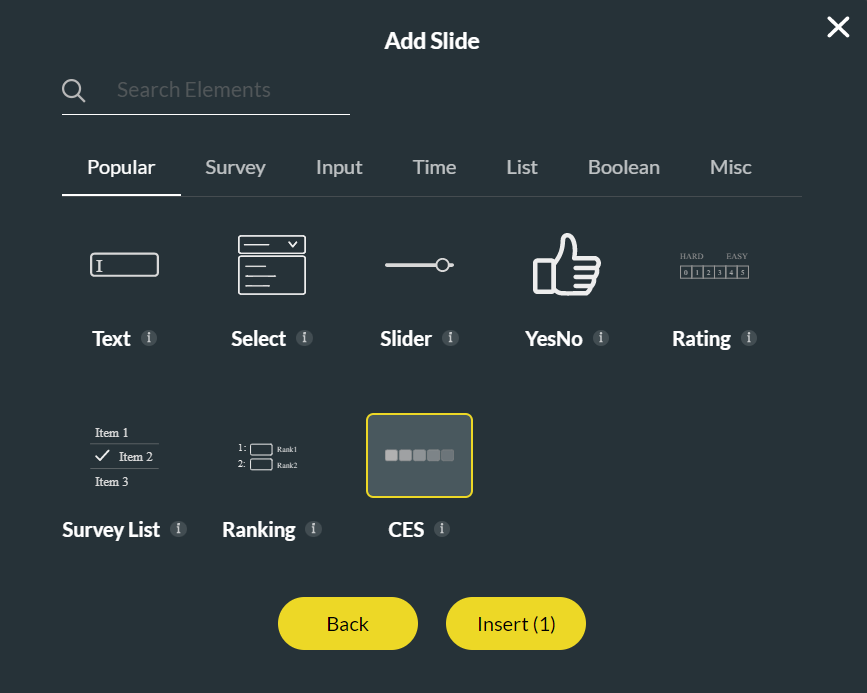
1. You can add a CES question slide to your template by clicking Add Slide > Question Type > Popular> CES. Then click Insert.
2. Add question text and a description by clicking the CES question text, then add its description by typing the text into the Content screen on the right of the page.
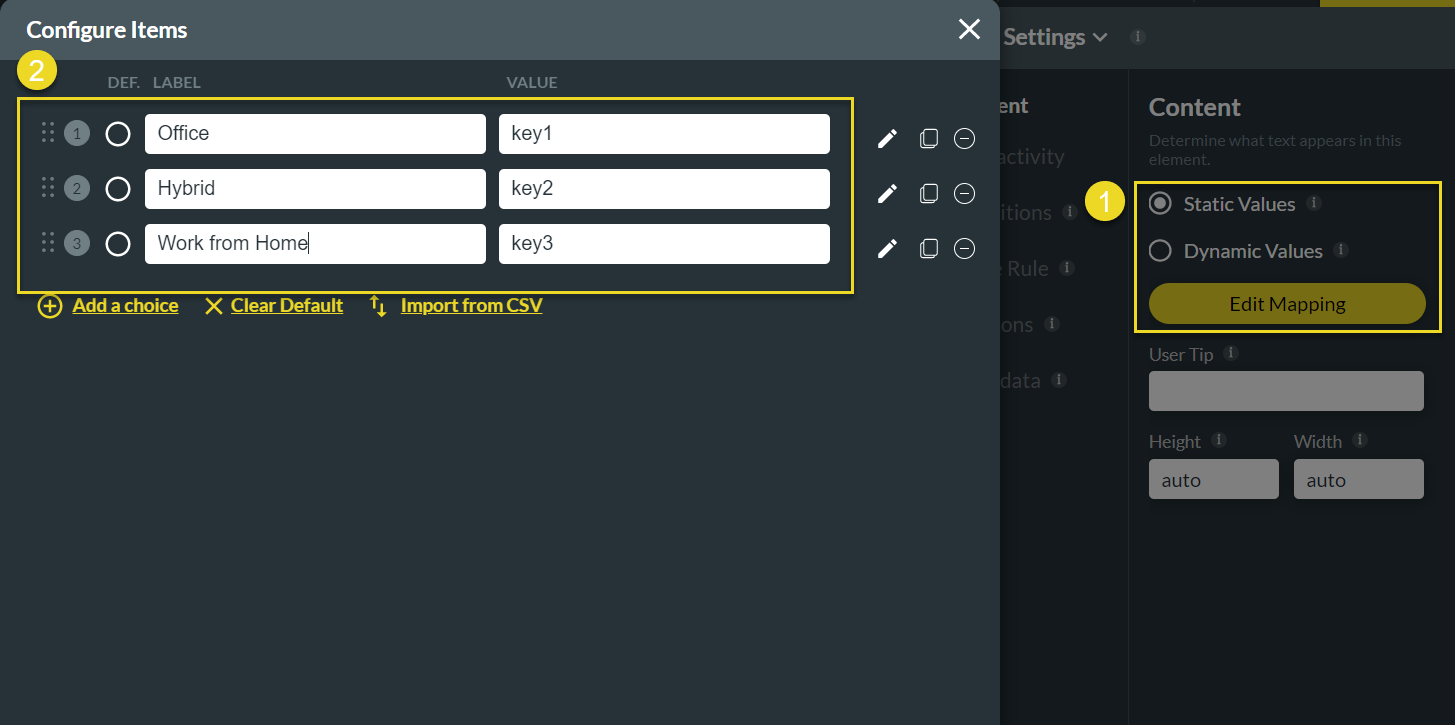
3. Select the item list and navigate the Content panel to add values to your CES question. Select Static Values > Edit Mapping and fill in your desired values.
4. Next, click the item list, select the Interactivity Tab, and choose the options to display vertically. This is an ideal layout choice if your project needs to work on mobile devices.

2. Add question text and a description by clicking the CES question text, then add its description by typing the text into the Content screen on the right of the page.
3. Select the item list and navigate the Content panel to add values to your CES question. Select Static Values > Edit Mapping and fill in your desired values.
4. Next, click the item list, select the Interactivity Tab, and choose the options to display vertically. This is an ideal layout choice if your project needs to work on mobile devices.
07 Inserting Matrix Question Types
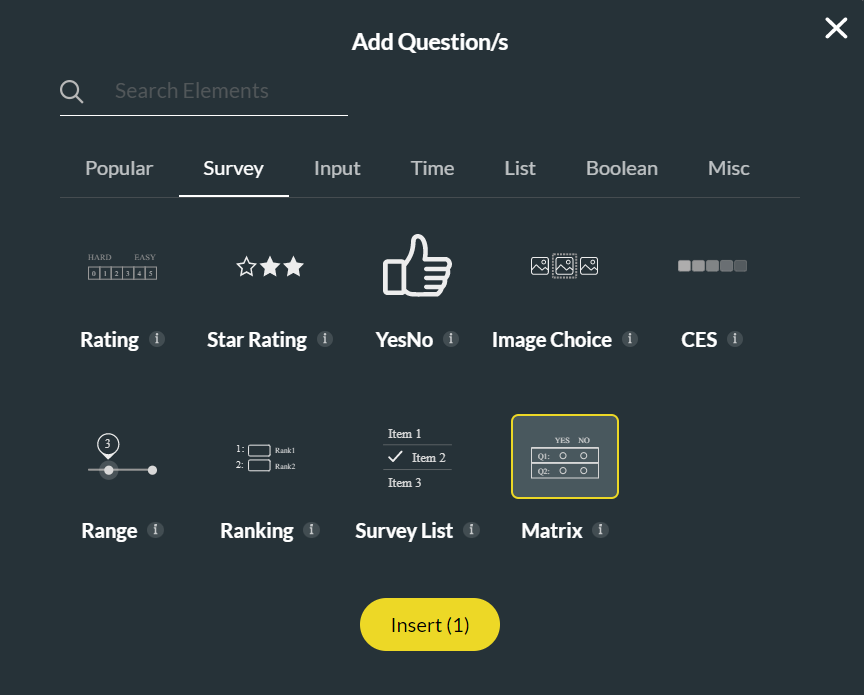
1. You can insert multiple questions with the same answers. The best way to achieve this is by inserting a Matrix question using the add slide button. To do so, click on Add a Slide > question > survey tab, select the Matrix question type, and insert it.
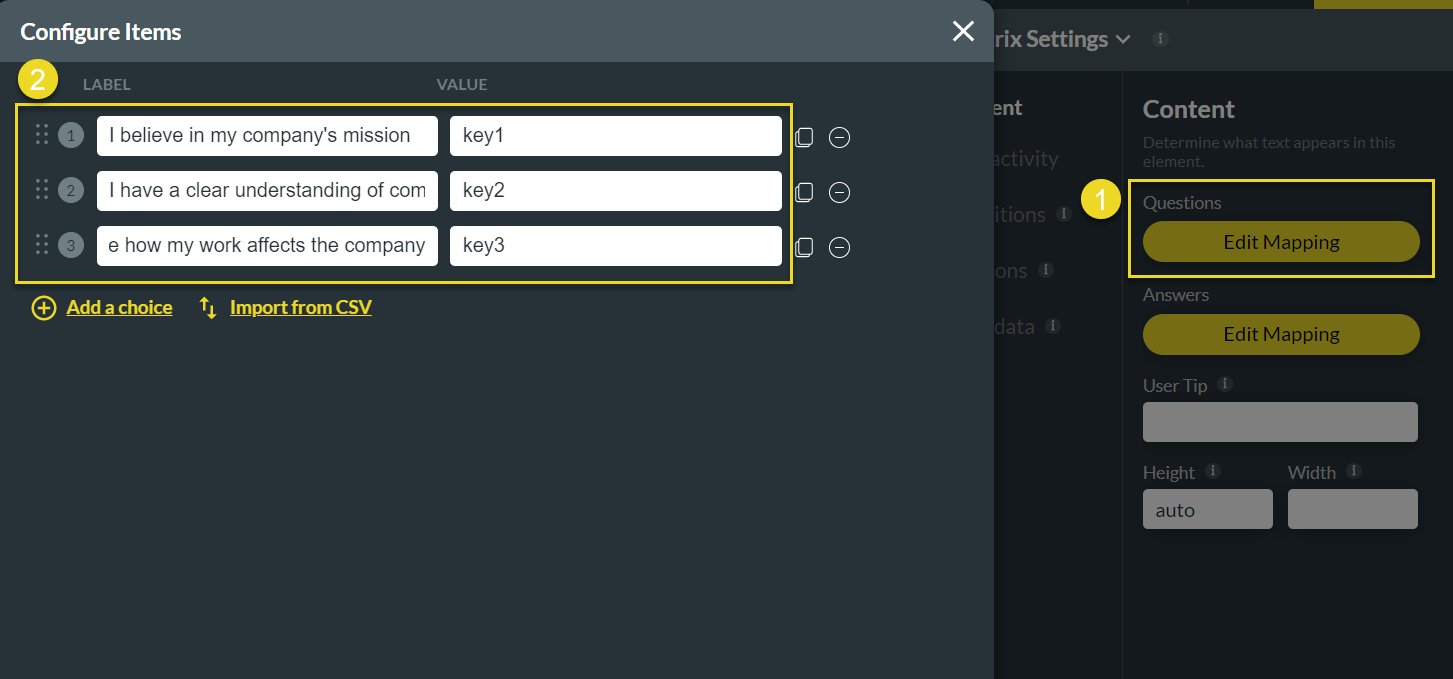
2. Next, configure the static question and answer values using the matrix settings menu. To edit the questions in the matrix, select the Edit Mapping option under "Questions", edit the questions, and click Apply.
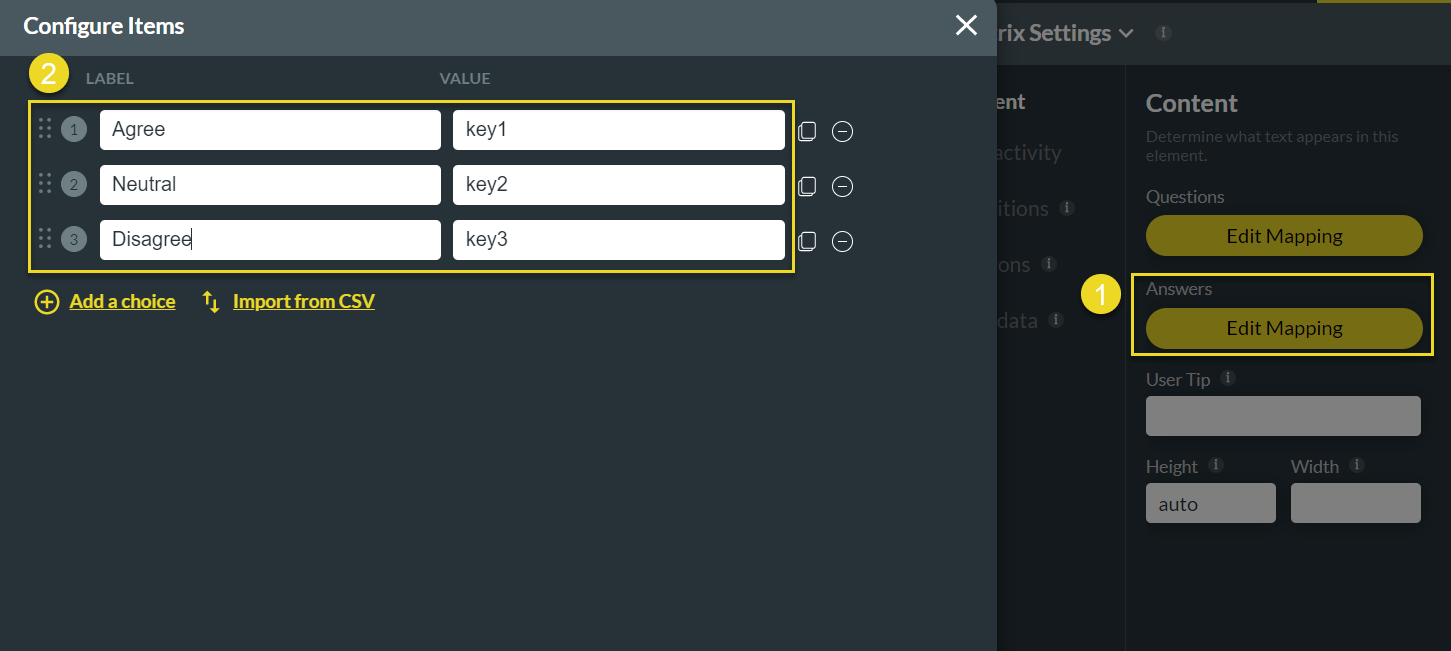
3. Edit Answers by filling in the answers in the fields and clicking Apply, similar to the Answers' Edit Mapping option.
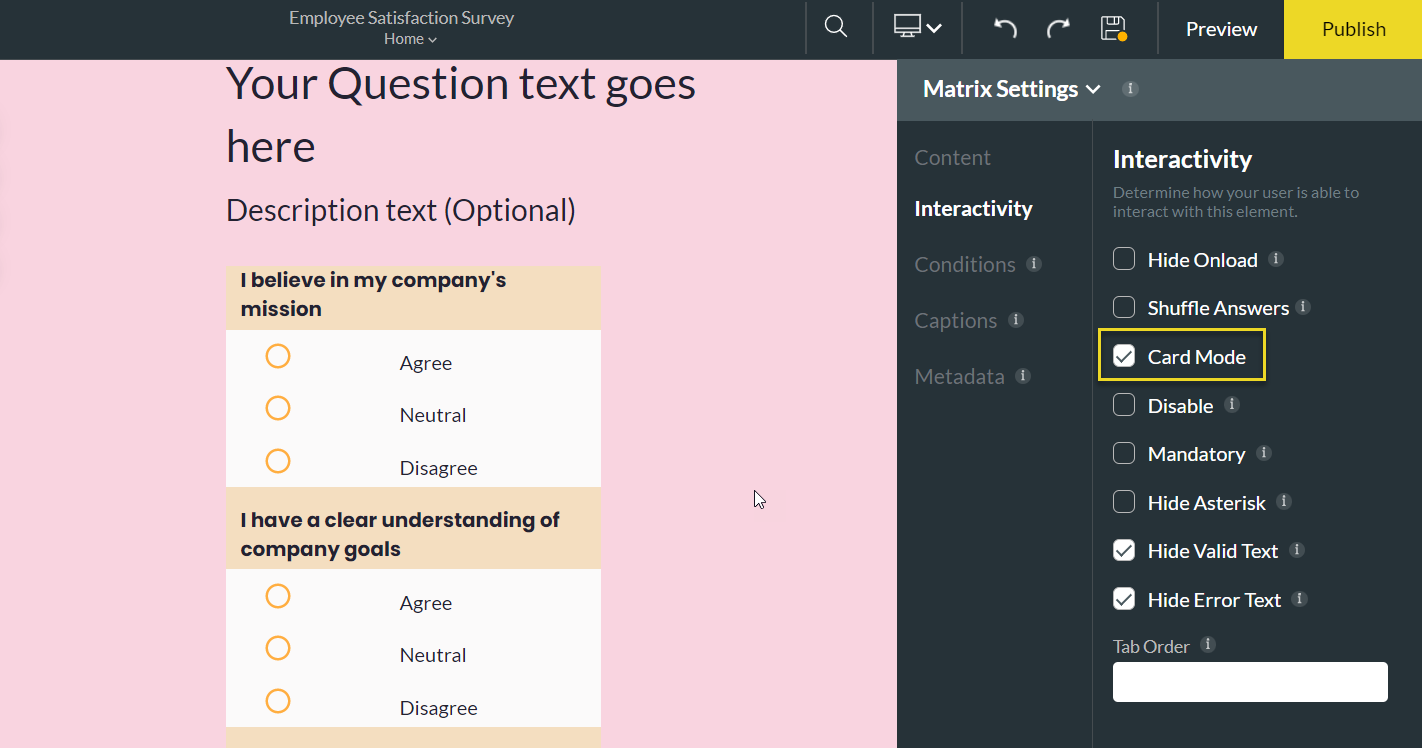
4. Under Interactivity, enable Card Mode to display each question separately. Card Mode is convenient when taking the survey on a mobile device.
2. Next, configure the static question and answer values using the matrix settings menu. To edit the questions in the matrix, select the Edit Mapping option under "Questions", edit the questions, and click Apply.
3. Edit Answers by filling in the answers in the fields and clicking Apply, similar to the Answers' Edit Mapping option.
4. Under Interactivity, enable Card Mode to display each question separately. Card Mode is convenient when taking the survey on a mobile device.
08 Finish Slide
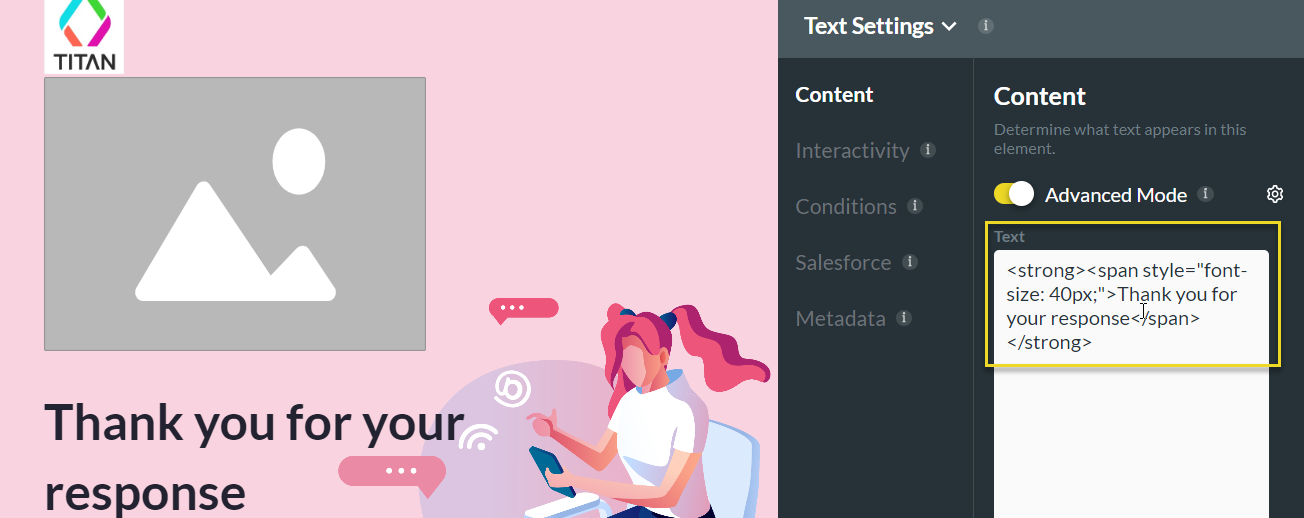
1. Customize the Finish slide by updating its text. To do so, select its text and edit it in the Content screen on the right of the page.
2. To customize the image, click on the Image container, and either select an image from your library, choose an image from Salesforce, or paste an image URL before clicking Apply.
2. To customize the image, click on the Image container, and either select an image from your library, choose an image from Salesforce, or paste an image URL before clicking Apply.
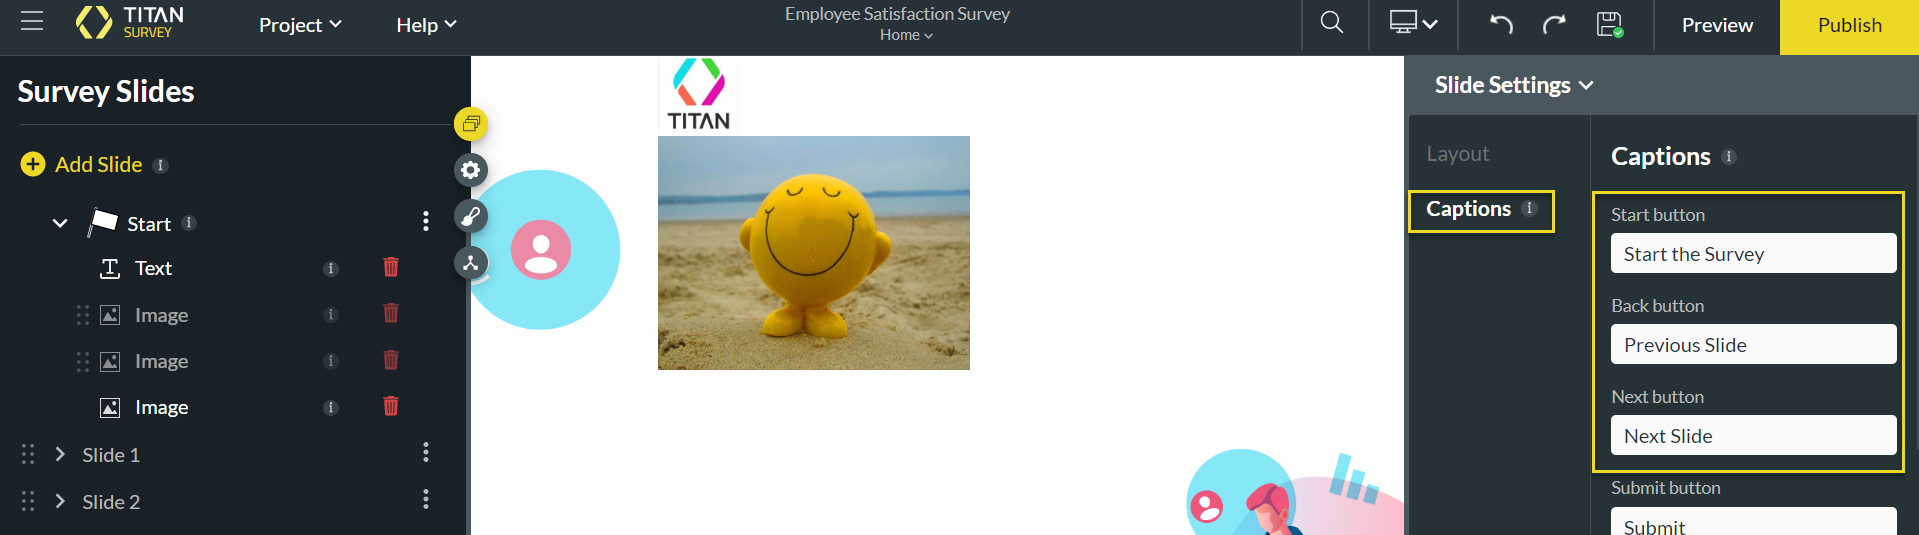
09 Customize Start Slide Captions:
1. Navigate to the Start Slide, select the Captions tab, and customize your caption text.
10 Survey Navigation
1. Configure survey navigation by visiting Project settings > Survey > Survey Navigation gear icon. Before clicking Apply, you can choose to enable the Start Over button and Auto Next Slide feature.
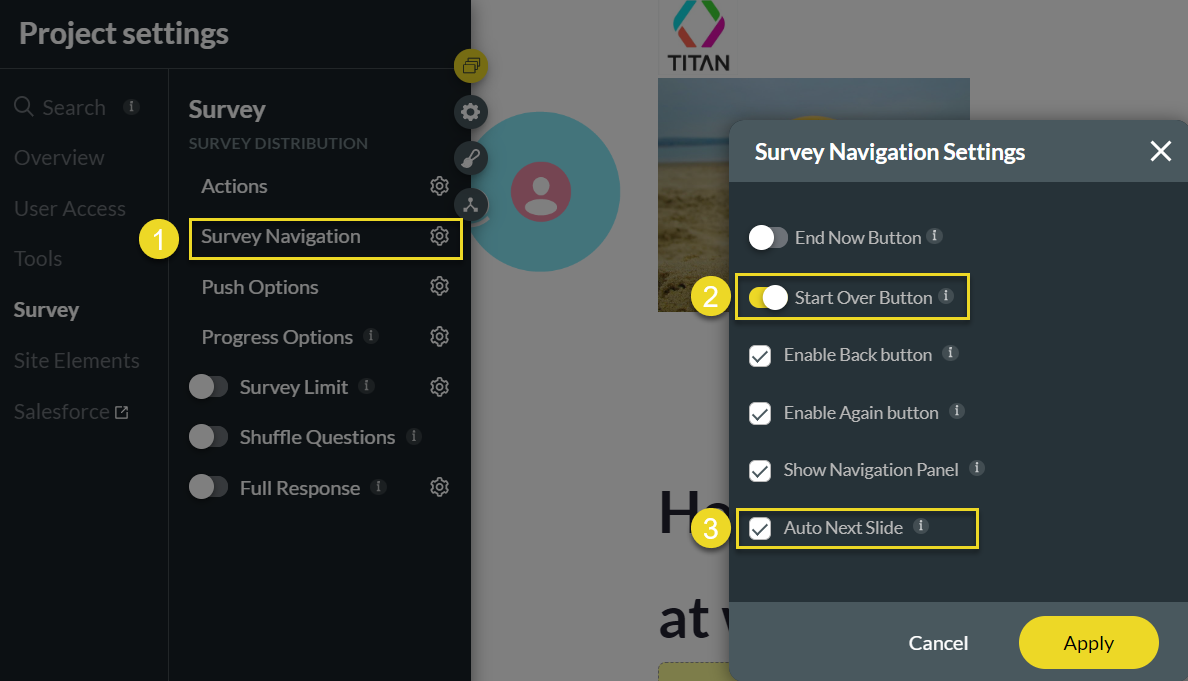
Employees can restart the survey from the beginning and move to the next slide without clicking a button.
Employees can restart the survey from the beginning and move to the next slide without clicking a button.
11 Distribute Survey
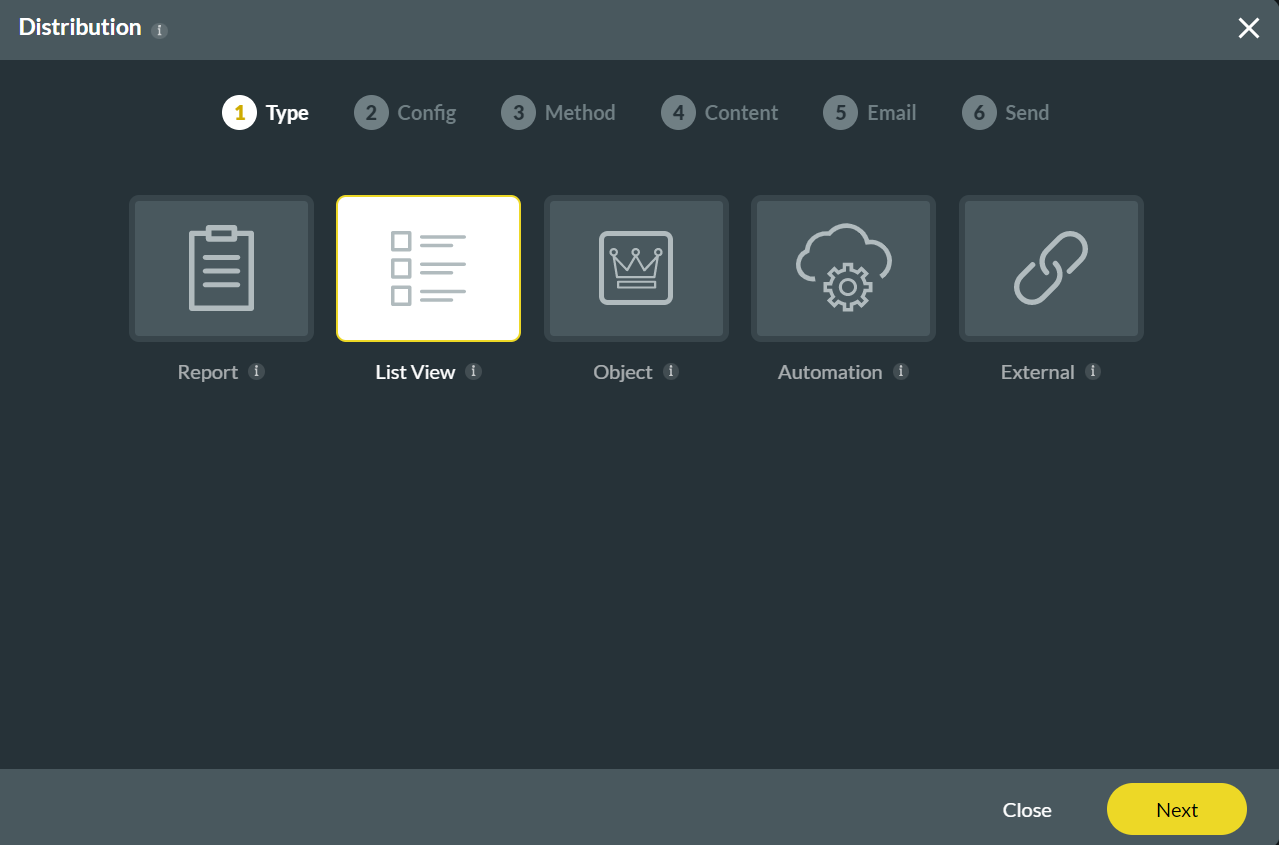
1. To distribute your Survey, click the Publish button and choose your Distribution type. In this instance, List View is selected.
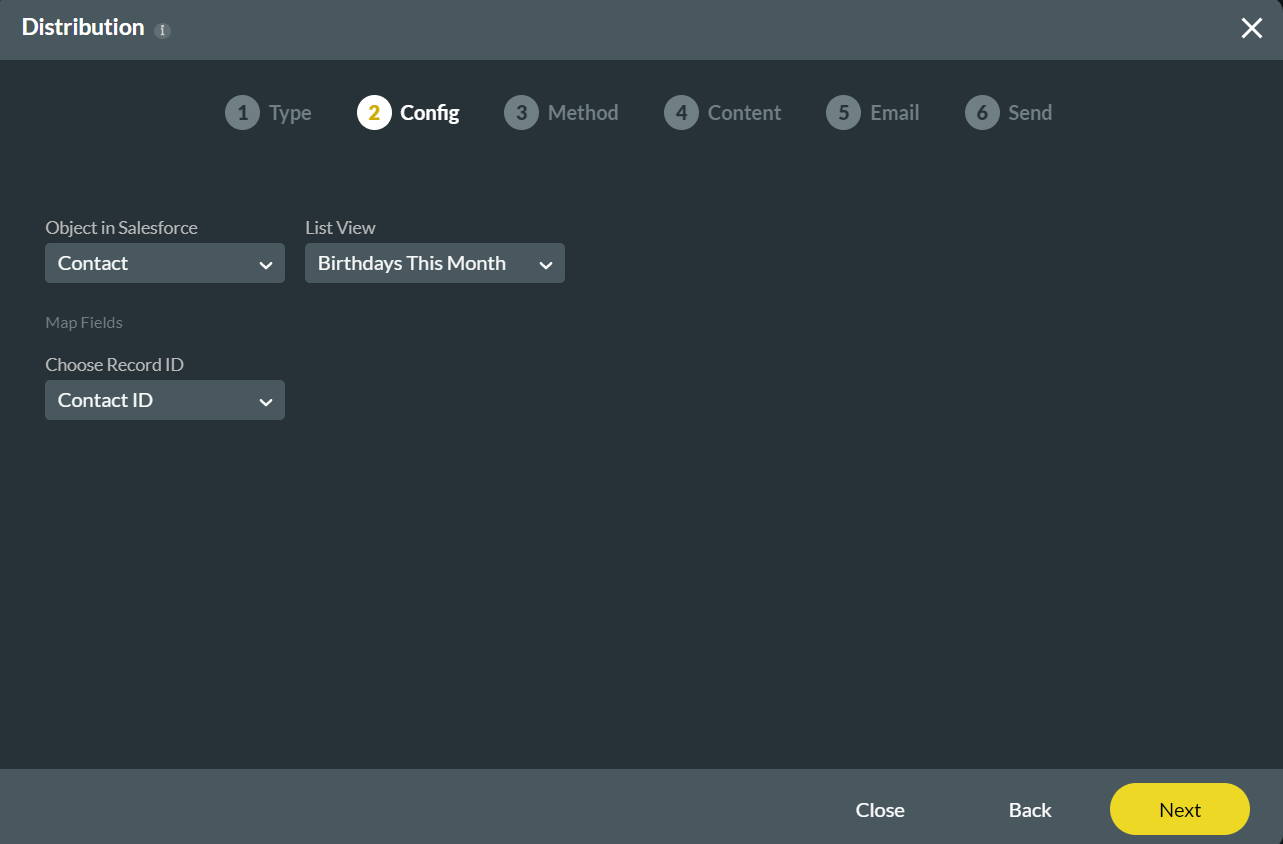
2. Set configuration for Object in Salesforce, List View, and Record ID fields.
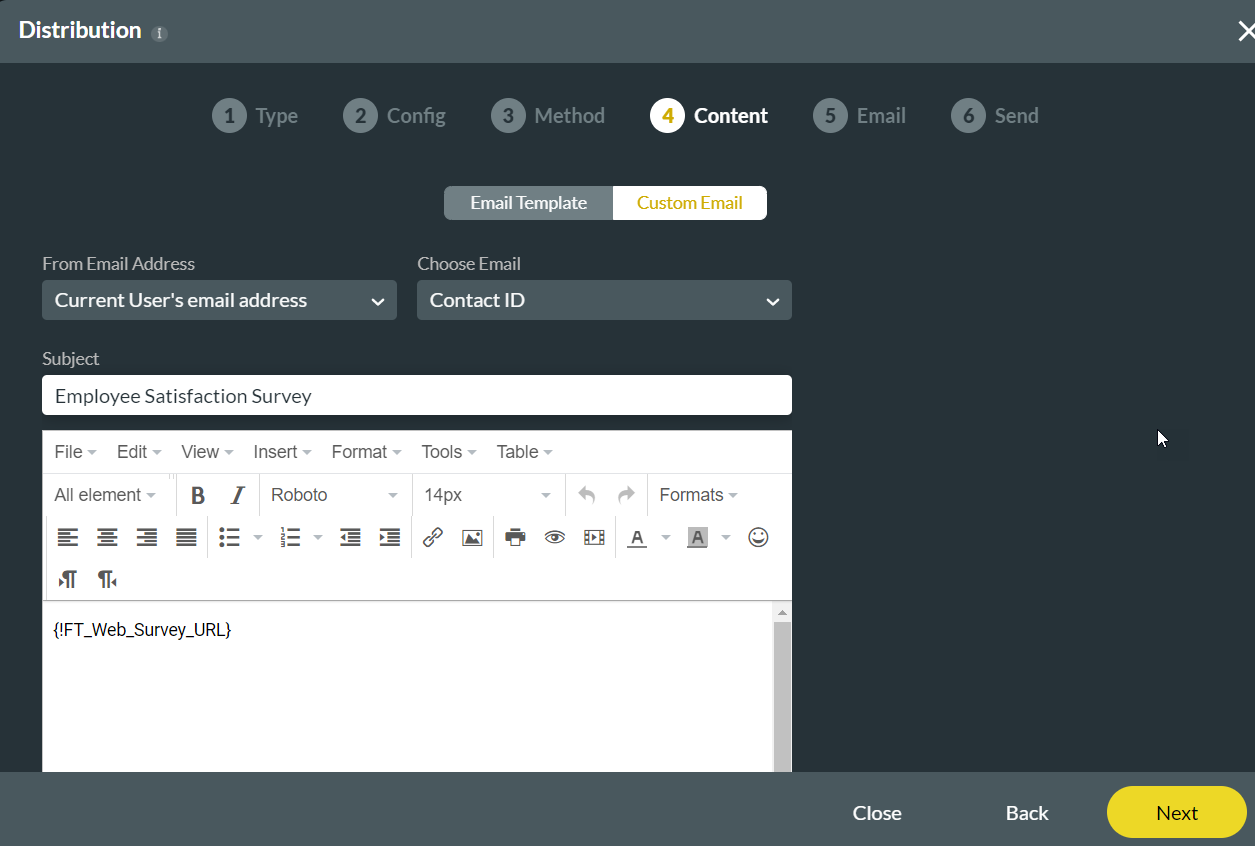
3. You can choose Mail as the distribution method and select the Custom Email option. Go ahead and configure the From Email Address and Choose Email fields. You can also give your email a subject and body text.
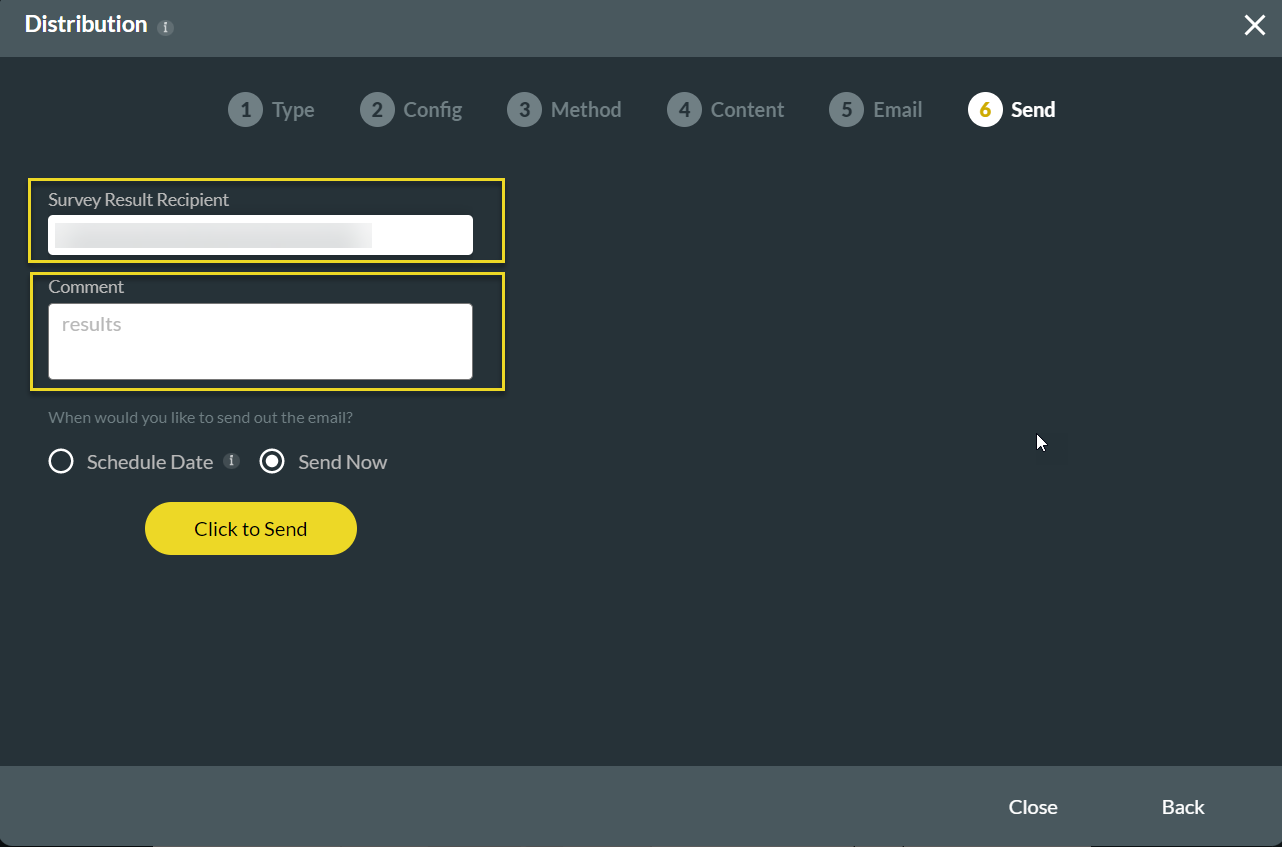
4. Add the Survey Results Recipient's email address and a comment before sending the Survey. Finally, choose to Survey now or later, and select the Click to Send button.
2. Set configuration for Object in Salesforce, List View, and Record ID fields.
3. You can choose Mail as the distribution method and select the Custom Email option. Go ahead and configure the From Email Address and Choose Email fields. You can also give your email a subject and body text.
4. Add the Survey Results Recipient's email address and a comment before sending the Survey. Finally, choose to Survey now or later, and select the Click to Send button.