Optimization and Validation (11 min)
01 Getting Started
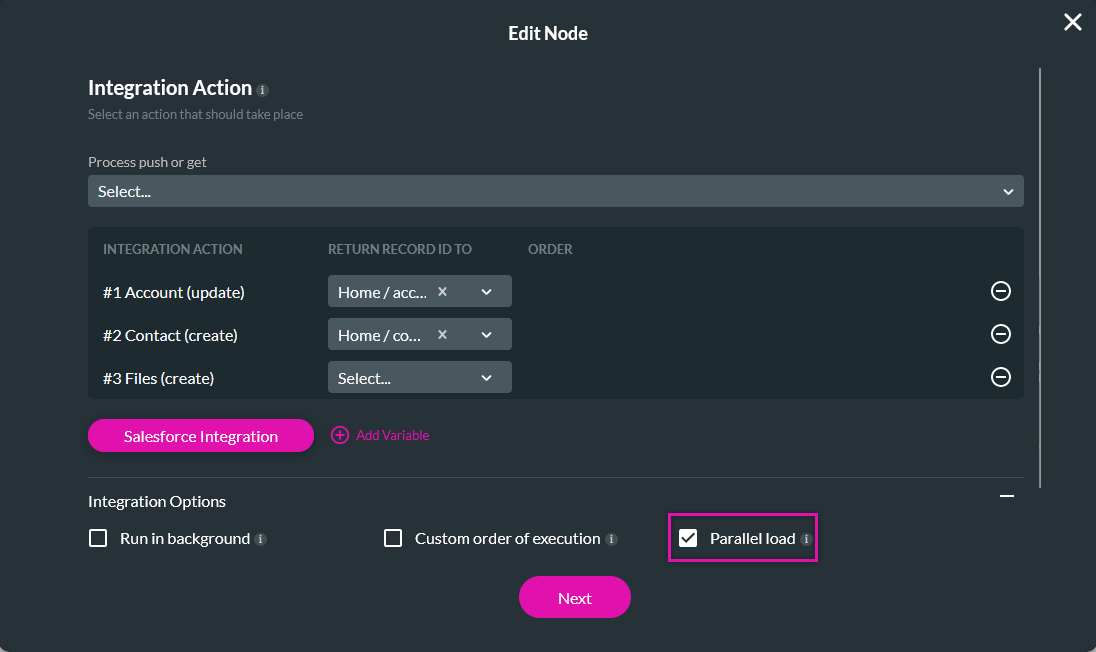
02 Parallel Load
If your actions are not dependent on one another, you can enable Parallel load, which will ensure all your actions are executed side by side. This will also optimize your project’s performance.
03 Validate
Validating your fields before triggering the Salesforce actions is best practice. This is an important step, especially if your actions are dependent on one another—for example, a contact will not be created if the Last Name is missing.
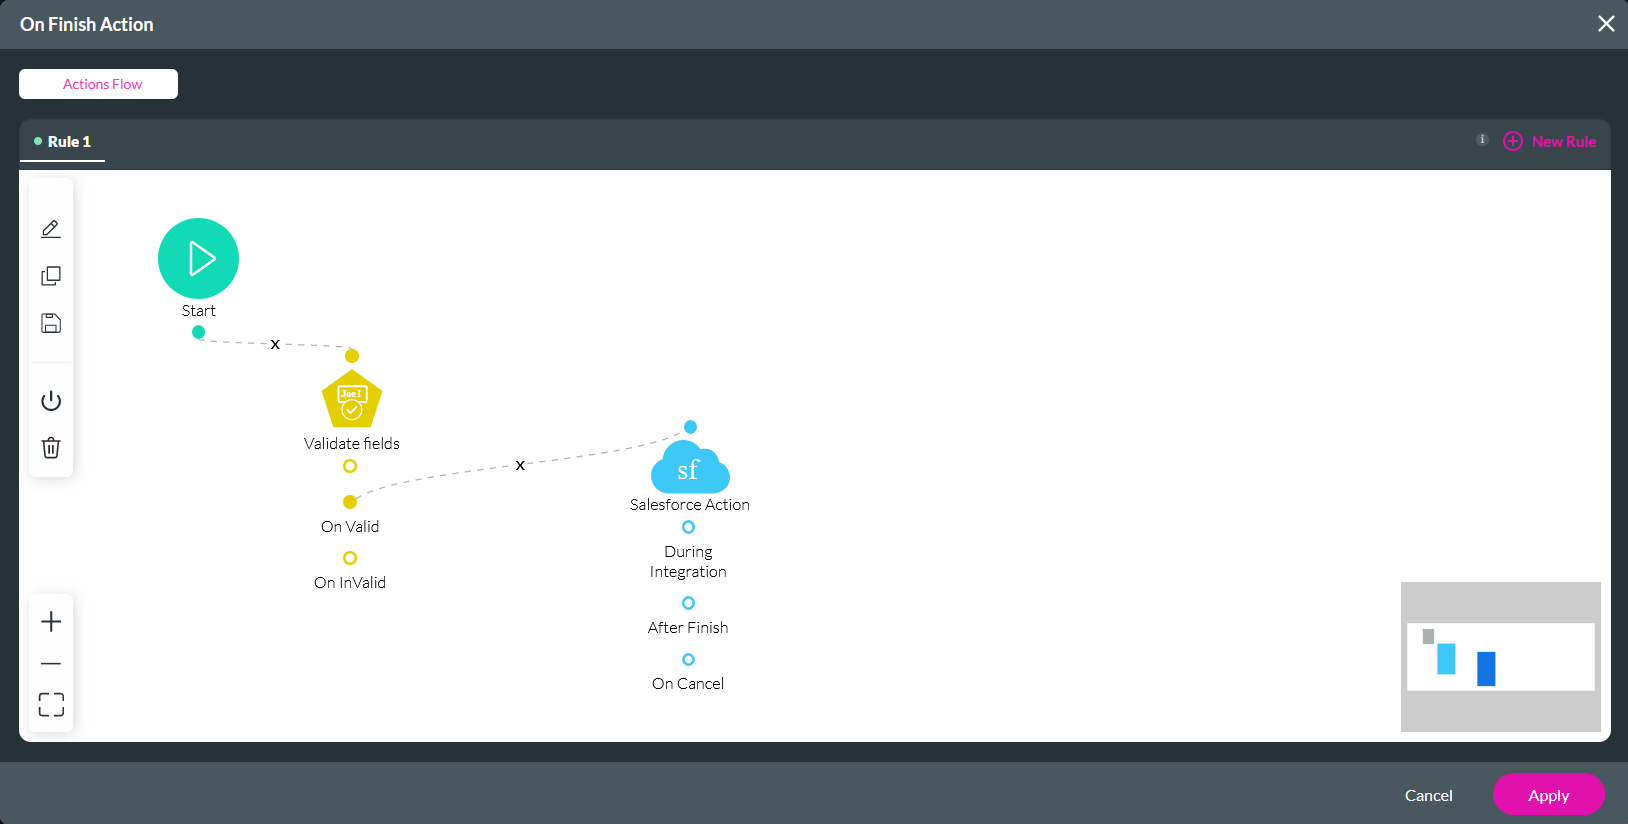
We suggest inserting a Validate Fields node before your Salesforce actions to do this.
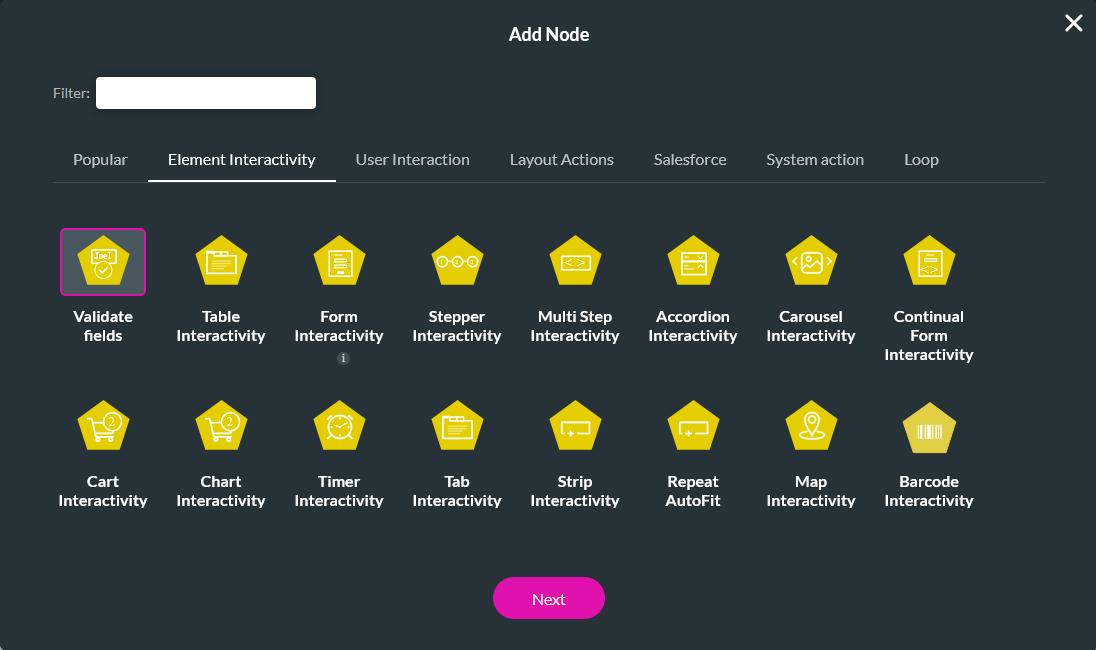
Once you have configured your Validate Fields node, link the Salesforce Actions to the On Valid node to trigger it only if the fields are valid.
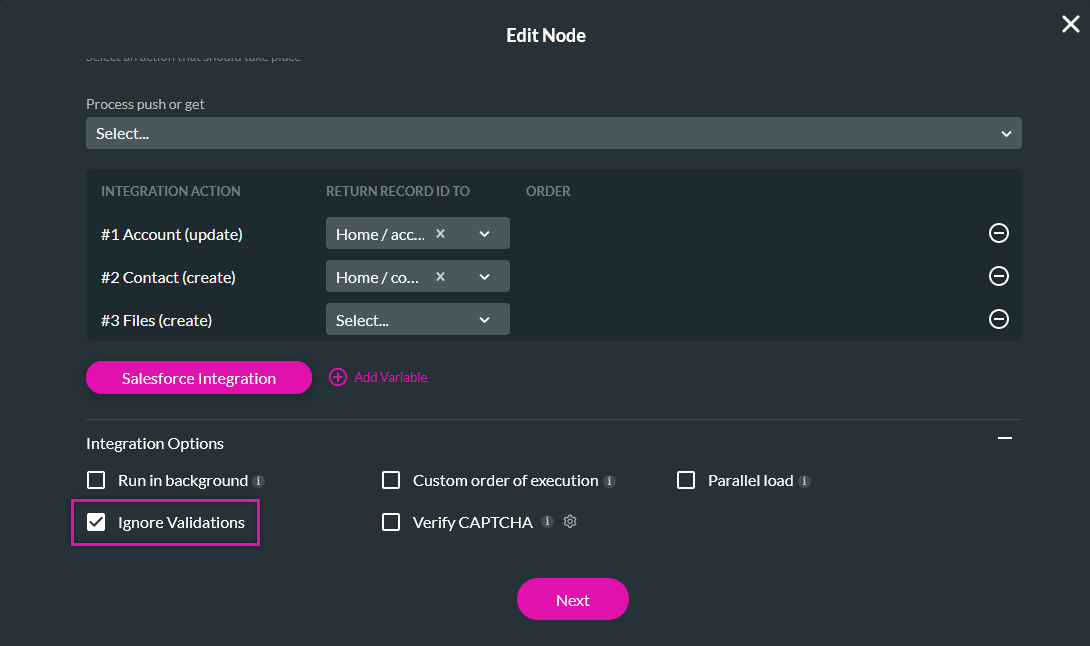
04 Ignore Validation
You can choose to ignore validation, this means that mandatory fields’ validation will be ignored upon running the Salesforce Get action.
05 Got Feedback?
06 Combining Nodes
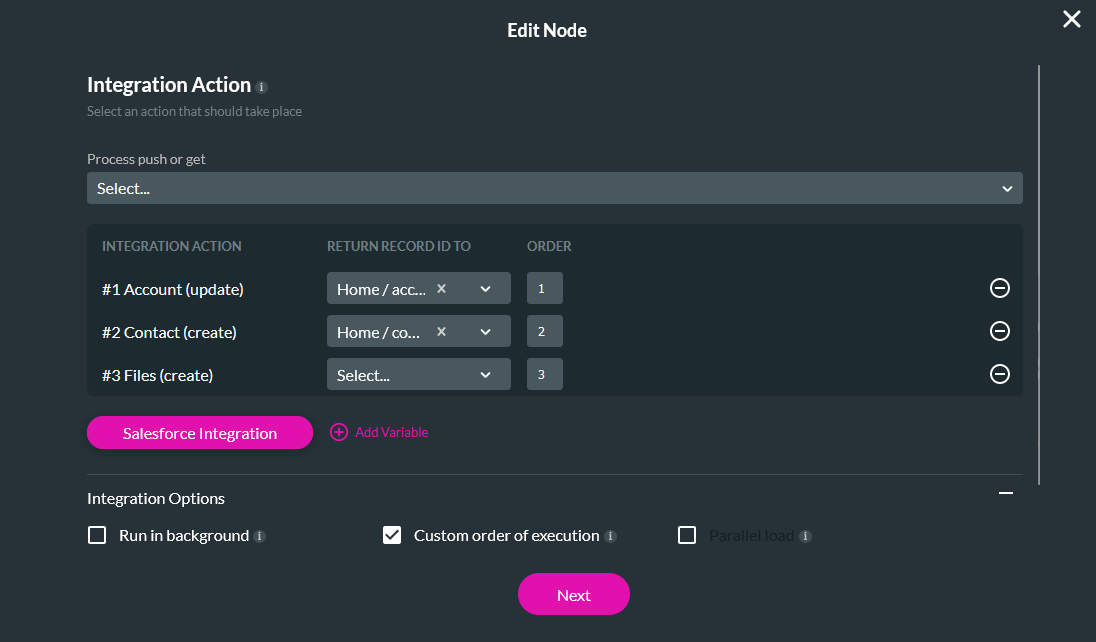
You can combine multiple Salesforce Actions nodes into one Integration Action on an Action Flow. This ensures that all the nodes will run in a single Salesforce Action instead of separate actions that can slow down your projects.
1. Use the dropdown to select all the nodes that will be combined.
2. Expand the Integration Options menu and enable Custom Order of Execution.
3. Using the Order fields, you can determine the execution order for each action.