Build a Web Survey in 10 minutes (12 min)
Completion requirements
01 Before We Begin
Could you build a professional Salesforce-integrated survey in less than 10 minutes?
Well, you can do it with the TITAN Survey!
We’ve prepared a proofread, digital copy of a survey in advance and a folder with all the logos and images we will need.
Our Survey includes questions and will help us gather customer feedback about our support services.
So, let’s see if we can build our Survey in less than 10 minutes.
Note: If you wish to practice, you can access a copy of the Survey and images used in this use case here.
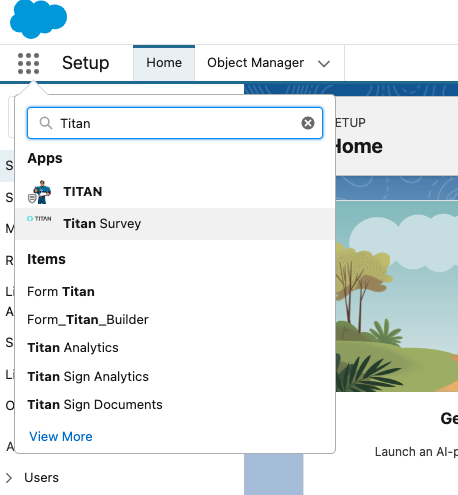
02 Install the Survey App in Salesforce
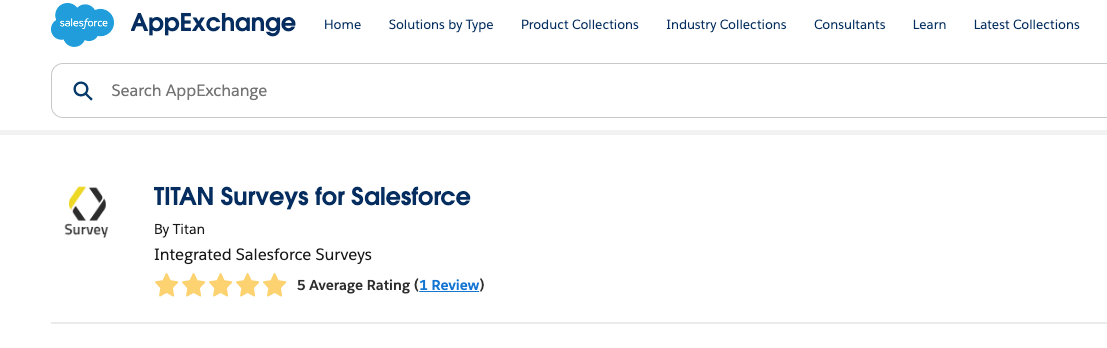
1. Navigate to the Salesforce AppExchange, search "Titan Survey", click enter, and select "Get it Now":
2. Follow the prompts to install the package, and you are all set!
Additional information about the Survey App installation is available on our support website at: https://support.titandxp.com/survey/finish-slide
2. Follow the prompts to install the package, and you are all set!
Additional information about the Survey App installation is available on our support website at: https://support.titandxp.com/survey/finish-slide
03 Open a New Survey Project
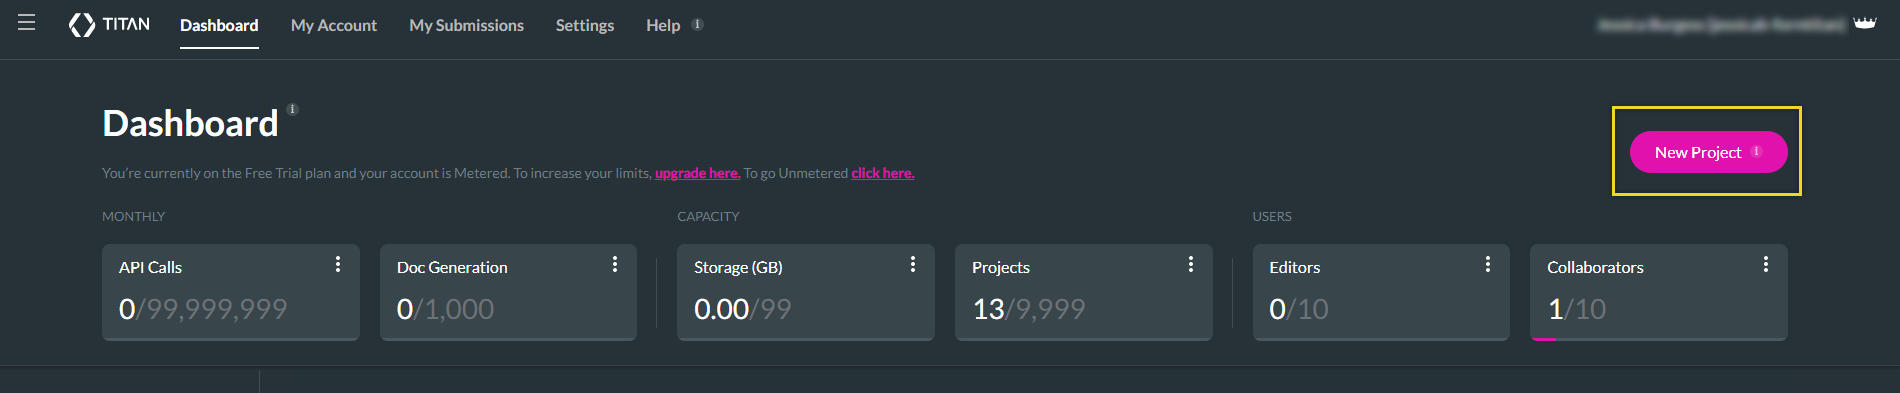
1. On the Titan Dashboard, select the New Project button. The Select Project Type screen opens.
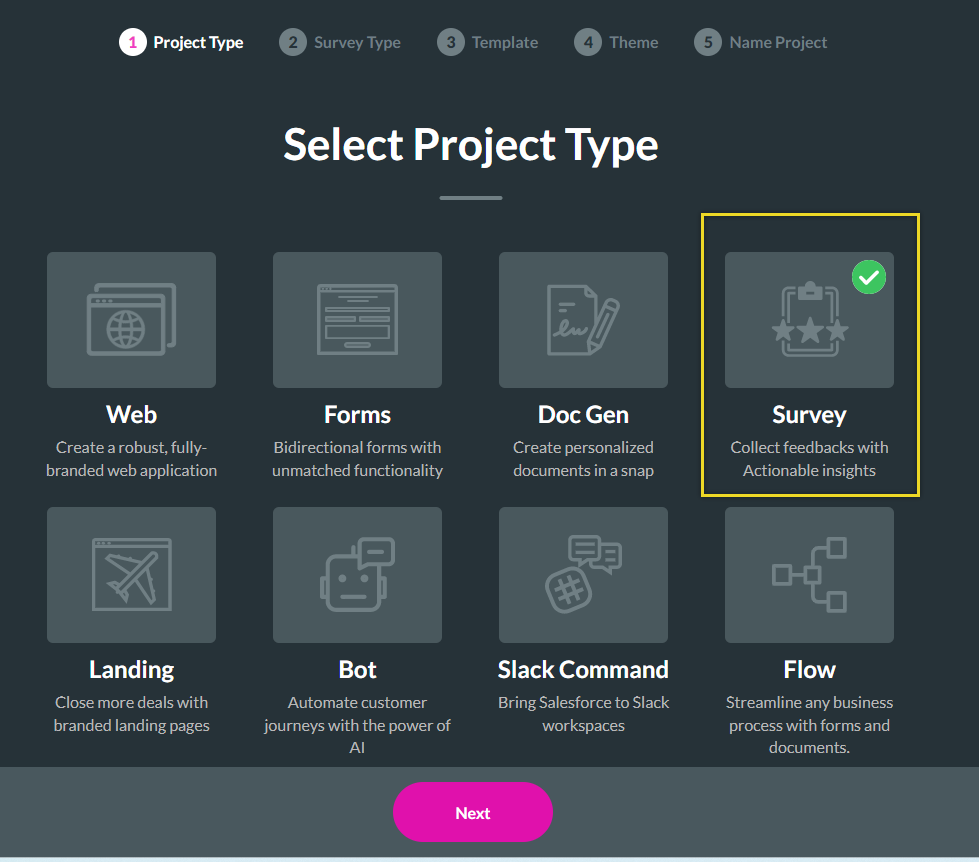
2. Select the Survey option and click on the Next button. The Select Survey Type screen opens.
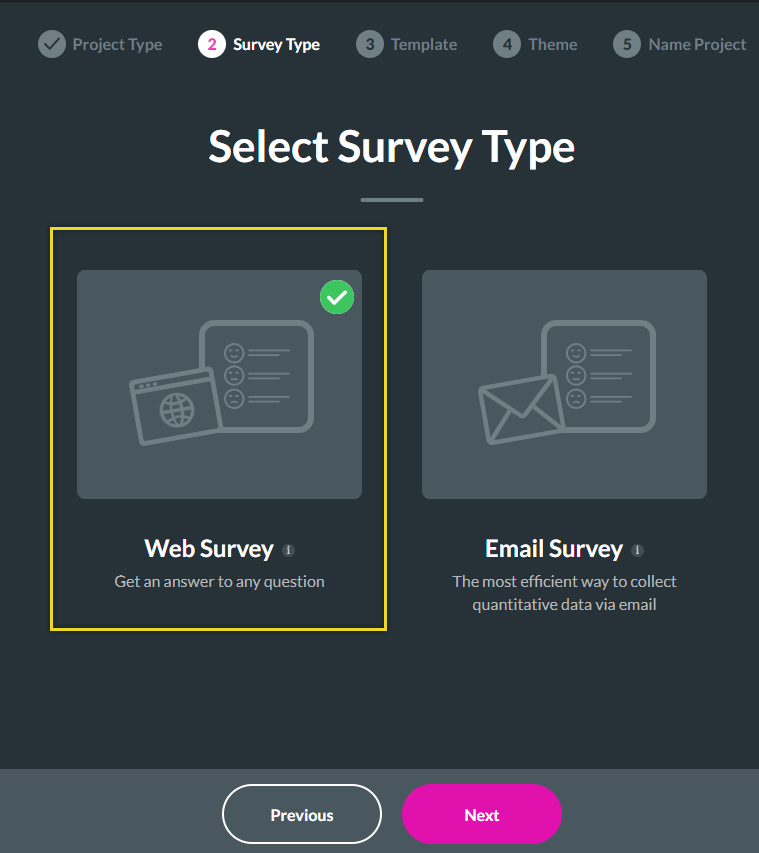
3. Select the Web Survey option and click on the Next button. The Select Template screen opens.
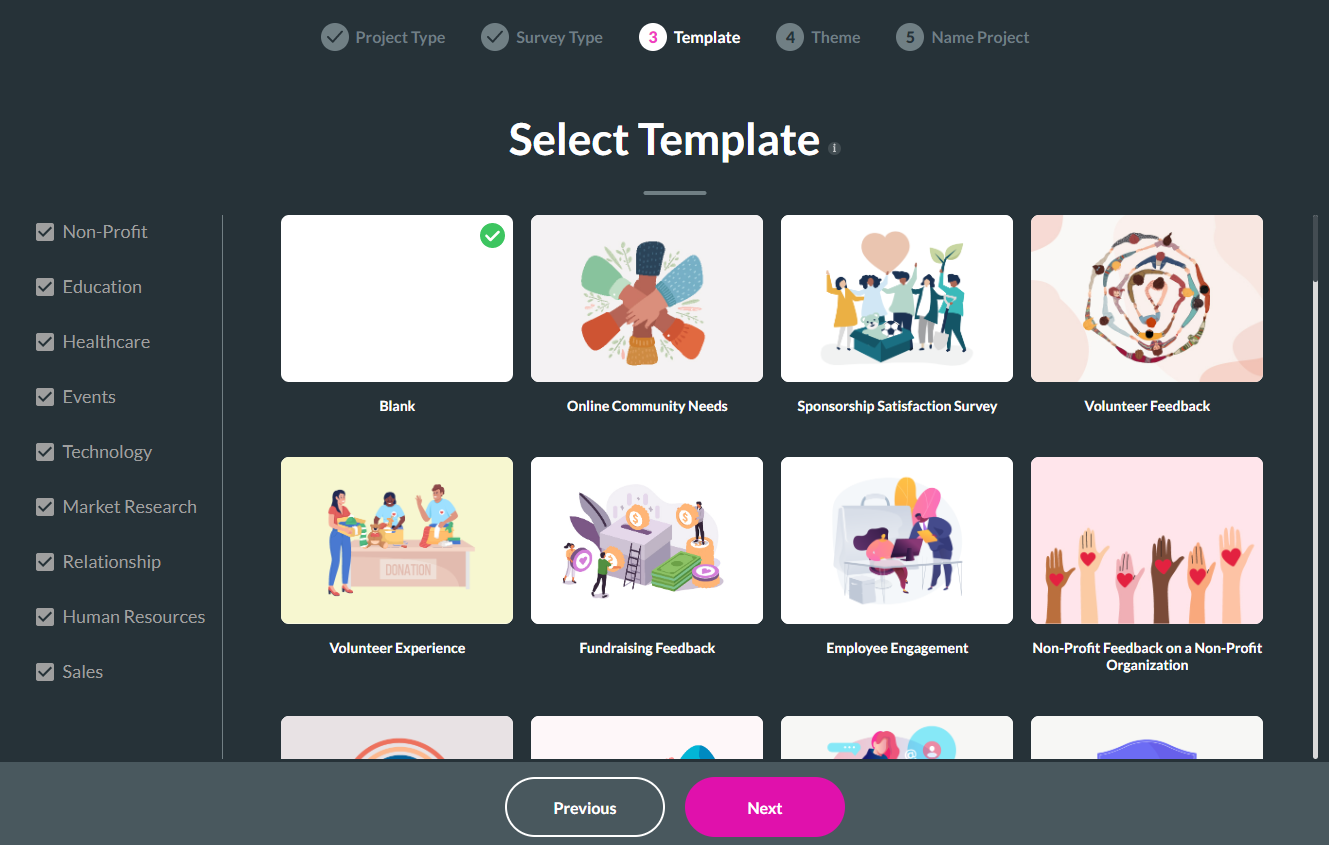
4. Select a template. The Blank template is selected by default. The templates can be selected by industry. Click on any template to select it and click the Next button. The Select Theme screen opens.
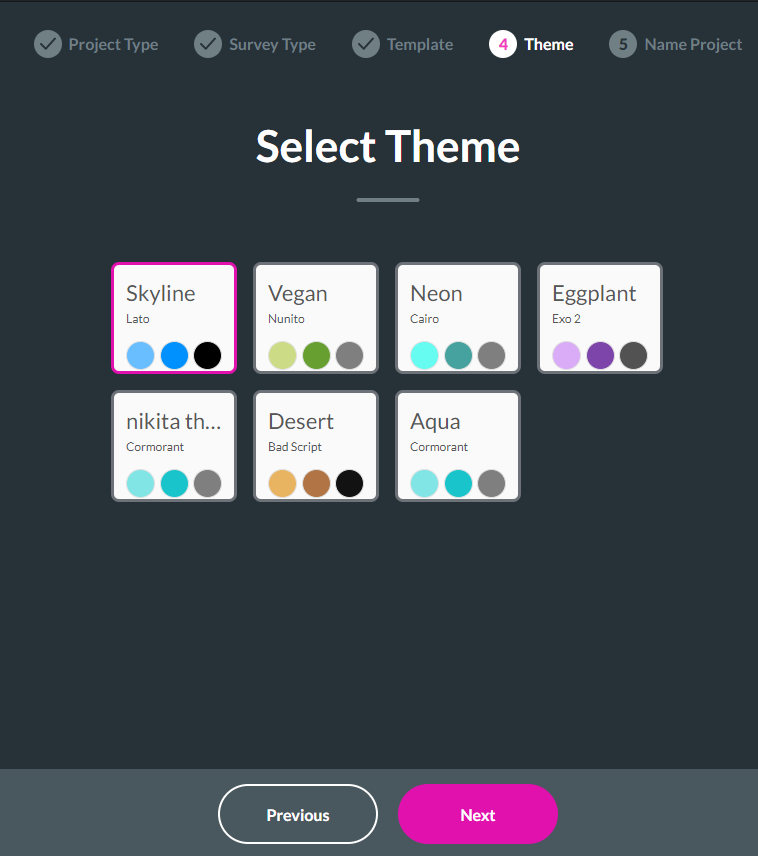
5. Click on the desired theme. Select the Next button.
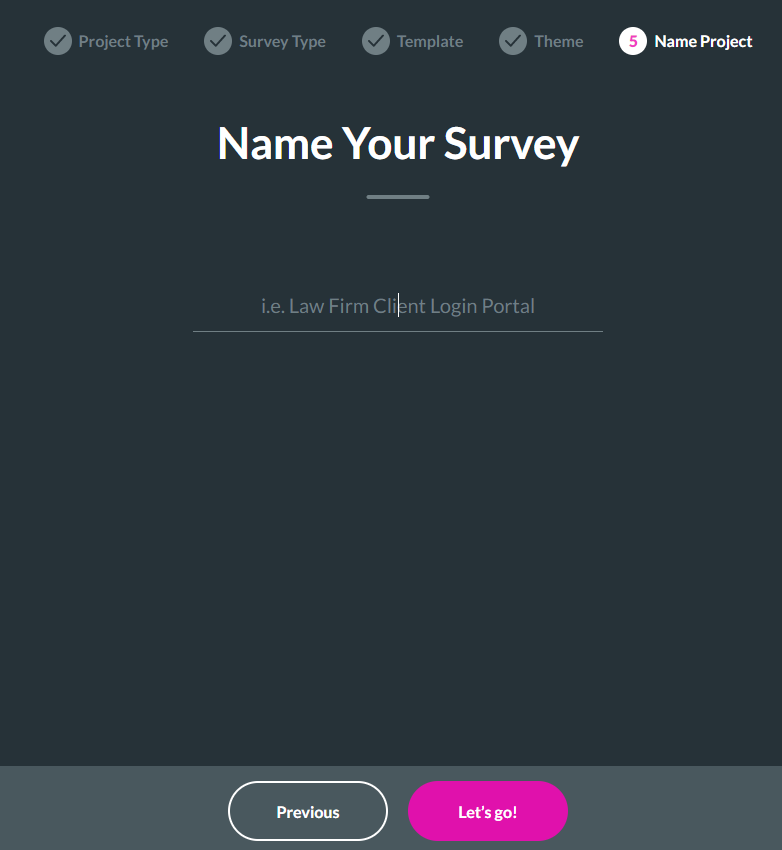
6. It’s now time to give our survey a name. Type a unique name for your survey. Select the Let’s go! Button.
2. Select the Survey option and click on the Next button. The Select Survey Type screen opens.
3. Select the Web Survey option and click on the Next button. The Select Template screen opens.
4. Select a template. The Blank template is selected by default. The templates can be selected by industry. Click on any template to select it and click the Next button. The Select Theme screen opens.
5. Click on the desired theme. Select the Next button.
6. It’s now time to give our survey a name. Type a unique name for your survey. Select the Let’s go! Button.
04 Configure the Start and Finish Slides
The start and finish slides are automatically added to all surveys.
1. Select a layout from the Layout List.
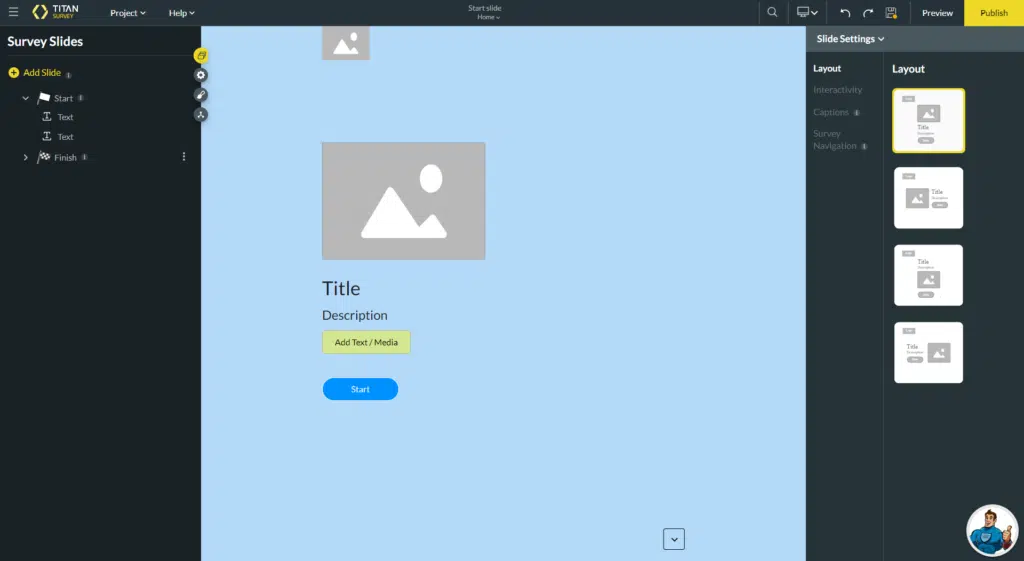
2. Click on the Title or Description and type your title or description in the text field. You can also use the Custom HTML option.
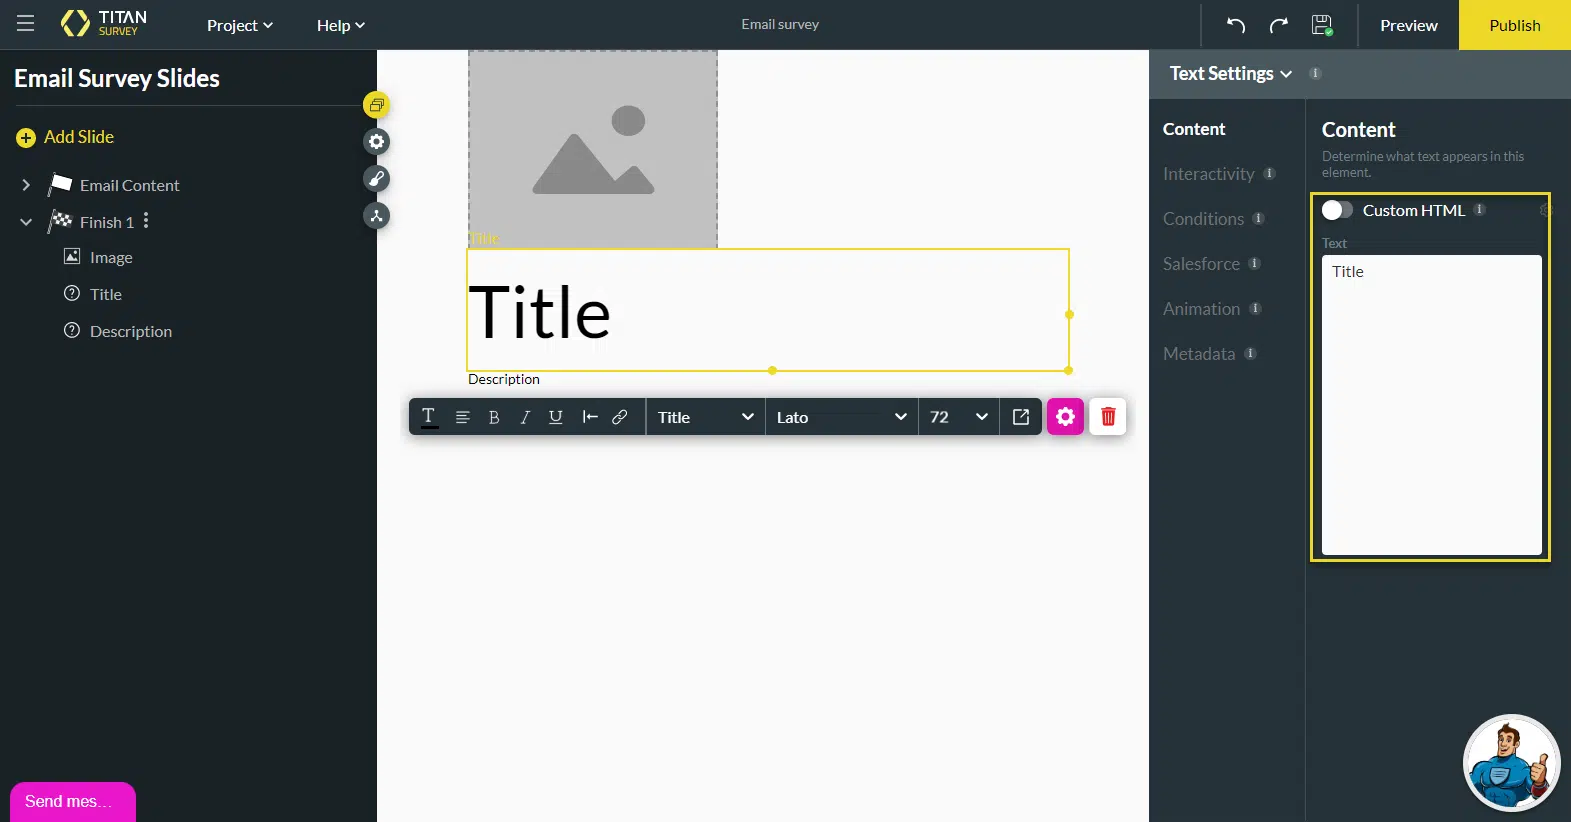
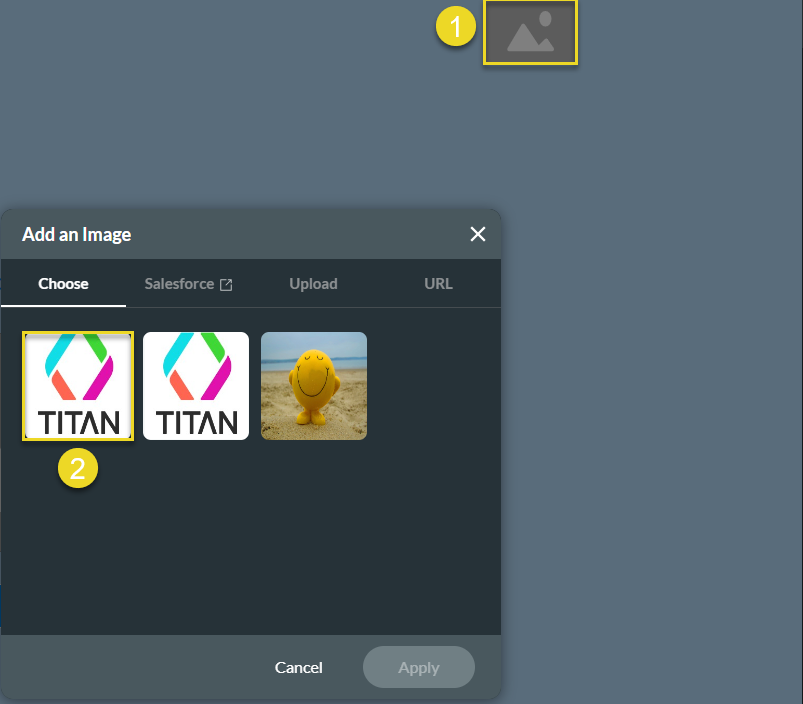
3. Next, add a logo to your survey by clicking the empty logo box and either choosing an image from your library, selecting an image from Salesforce, uploading an image, or pasting an image URL. Below, the Titan logo has been chosen from the image library. After this, click Apply. You can add an image to your Start Slide in the same way by first clicking the empty image box and then choosing your desired image.
The same steps apply to the Finish Slide.
1. Select a layout from the Layout List.
2. Click on the Title or Description and type your title or description in the text field. You can also use the Custom HTML option.
3. Next, add a logo to your survey by clicking the empty logo box and either choosing an image from your library, selecting an image from Salesforce, uploading an image, or pasting an image URL. Below, the Titan logo has been chosen from the image library. After this, click Apply. You can add an image to your Start Slide in the same way by first clicking the empty image box and then choosing your desired image.
The same steps apply to the Finish Slide.
05 Adding a Survey List Question
1. Once the Start Slide has been set up, you can start creating slides. To do so, click the Add Slide option on the left of the screen and choose from the Question, Information, and End Slide types. The Question Slide has been selected below.

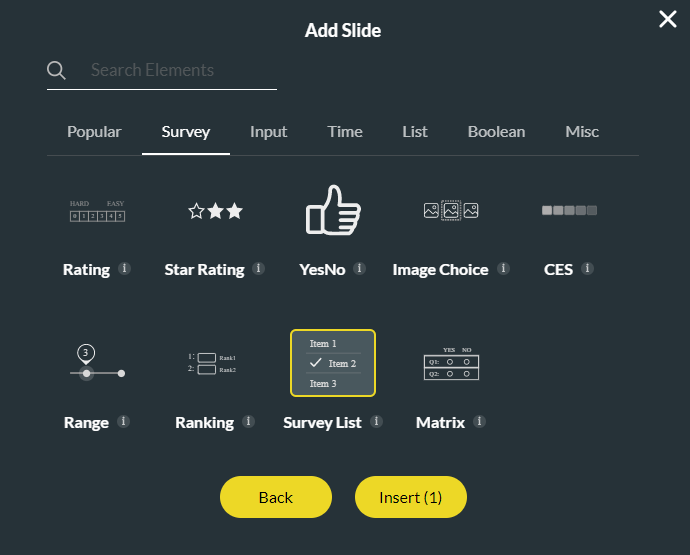
2. Next, select a question type from the Popular, Survey, Input, Time, List, Boolean, and Misc categories. The Survey List question type has been chosen below.
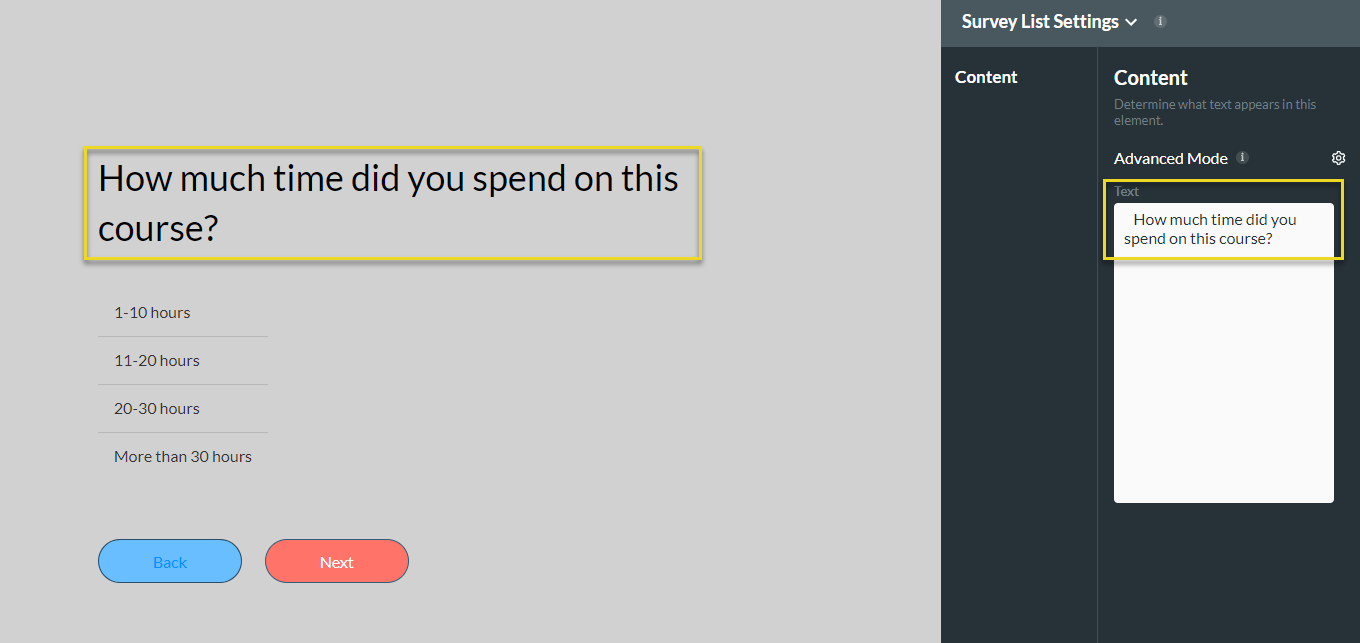
3. Your Survey List question will appear on your slide after clicking Insert. You can edit the question text by selecting this field and typing your text in the Content section. As with the Start Slide, you can enable Advanced Mode to tailor your text. The question description was deleted in the example below by hovering over it and clicking the trash icon. This is because the question is already clear enough.
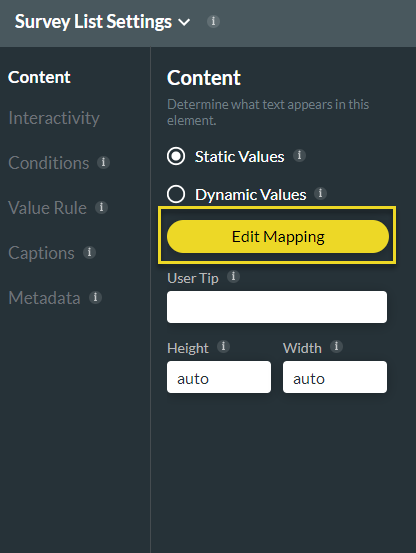
4. To customize this question type further, click the Edit Mapping button under Survey List Settings (where static values are automatically selected) on the right of the screen.
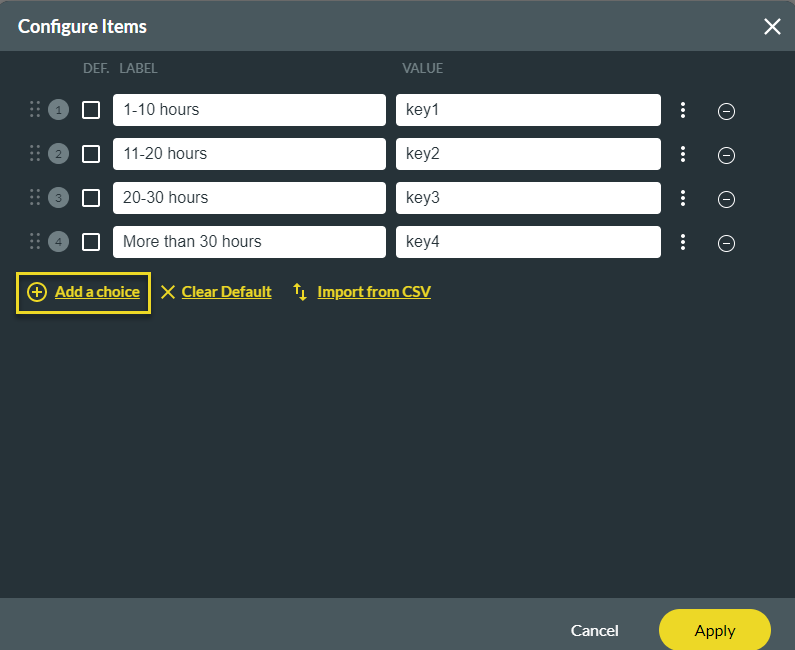
5. Next, add desired answers to the screen. You also have the option to click “Add a choice” and add the answer to the screen.
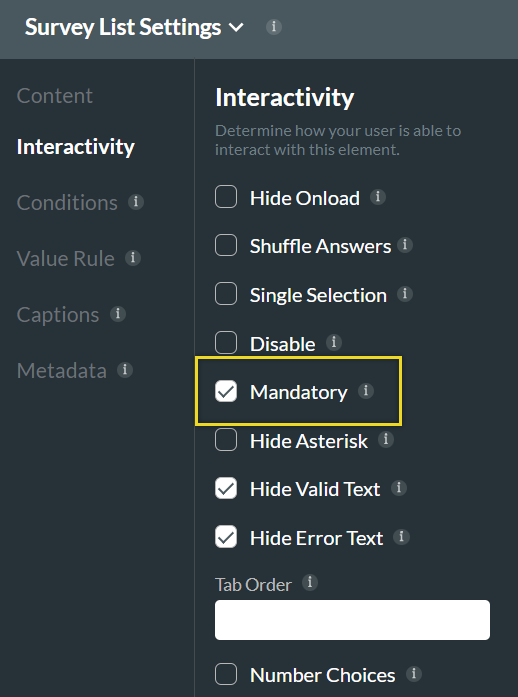
6. To make the question mandatory. Click the interactivity tab in the element settings menu and enable the compulsory checkbox.
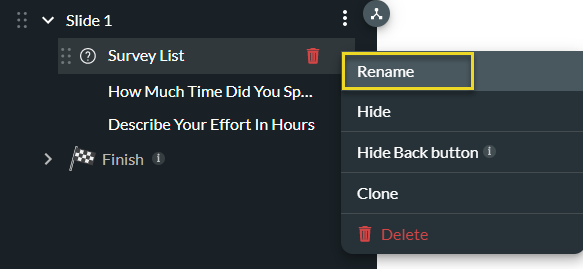
7. You can also choose to rename your slide by navigating to the slide’s kebab menu, clicking Rename, and typing in a new slide name. Respondents won’t see this name, but it will help you navigate your survey builder.
2. Next, select a question type from the Popular, Survey, Input, Time, List, Boolean, and Misc categories. The Survey List question type has been chosen below.
3. Your Survey List question will appear on your slide after clicking Insert. You can edit the question text by selecting this field and typing your text in the Content section. As with the Start Slide, you can enable Advanced Mode to tailor your text. The question description was deleted in the example below by hovering over it and clicking the trash icon. This is because the question is already clear enough.
4. To customize this question type further, click the Edit Mapping button under Survey List Settings (where static values are automatically selected) on the right of the screen.
5. Next, add desired answers to the screen. You also have the option to click “Add a choice” and add the answer to the screen.
6. To make the question mandatory. Click the interactivity tab in the element settings menu and enable the compulsory checkbox.
7. You can also choose to rename your slide by navigating to the slide’s kebab menu, clicking Rename, and typing in a new slide name. Respondents won’t see this name, but it will help you navigate your survey builder.
06 Adding a Matrix Question
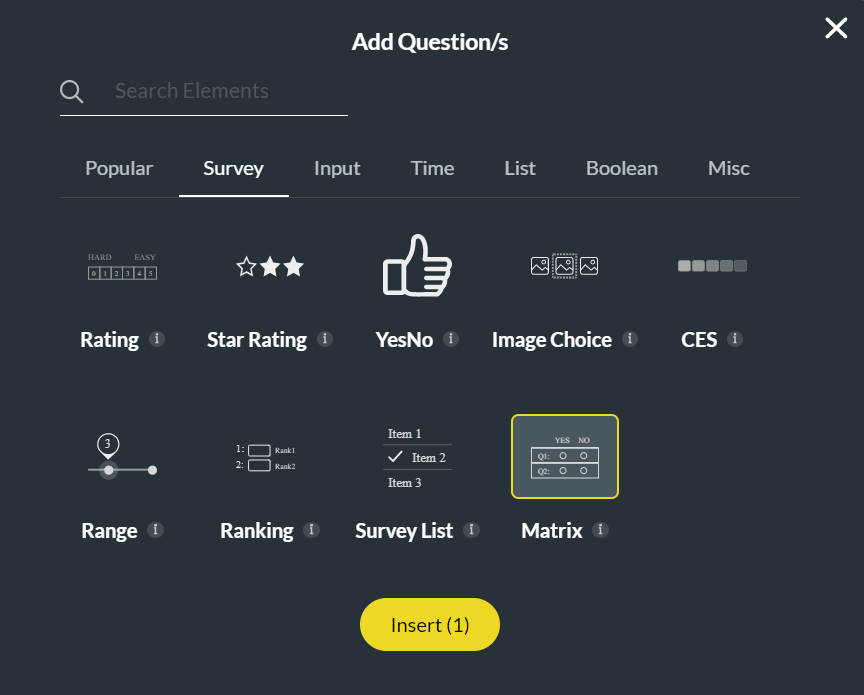
1. You can insert multiple questions with the same answers. The best way to achieve this is by inserting a Matrix question using the add slide button. To do so, click on Add a Slide > question > survey tab, select the Matrix question type, and insert it.
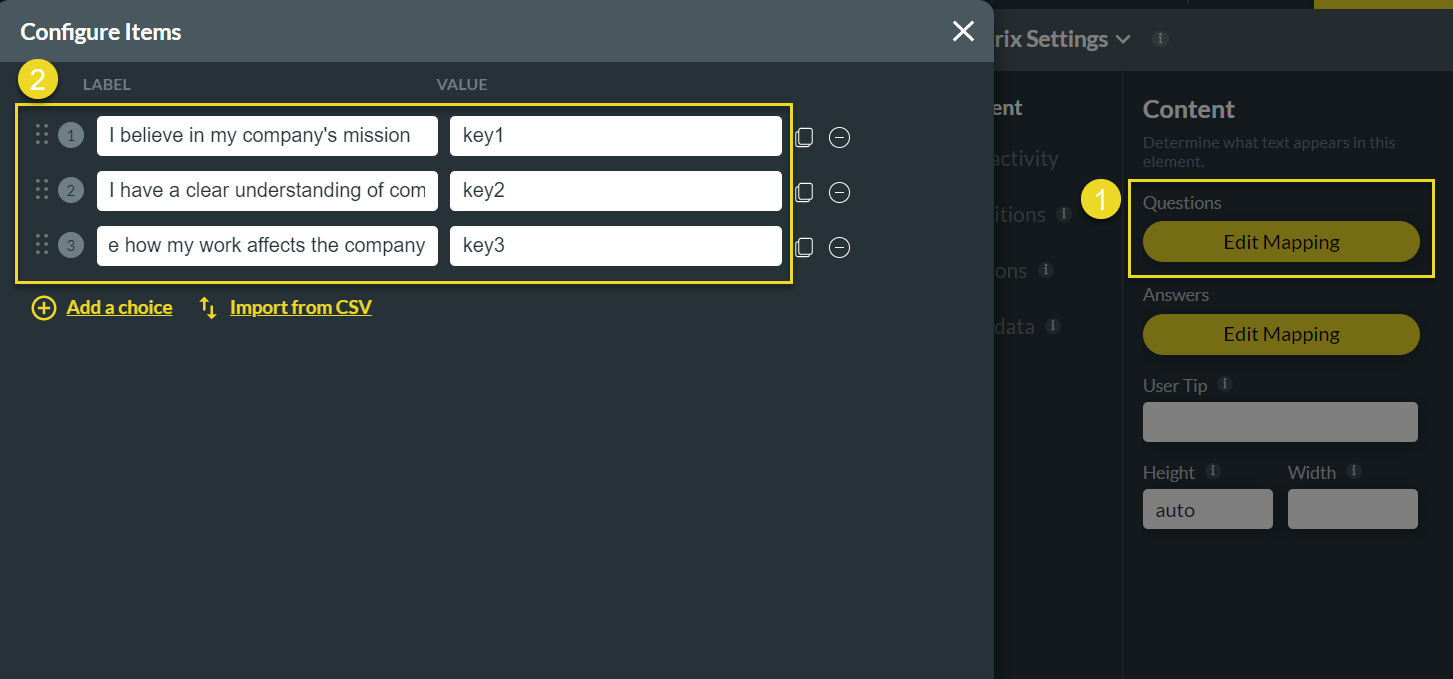
2. Next, configure the static question and answer values using the matrix settings menu. To edit the questions in the matrix, select the Edit Mapping option under "Questions", edit the questions, and click Apply.
3. Edit Answers similarly by selecting the Answers' Edit Mapping option, filling answers into the fields, and clicking Apply.

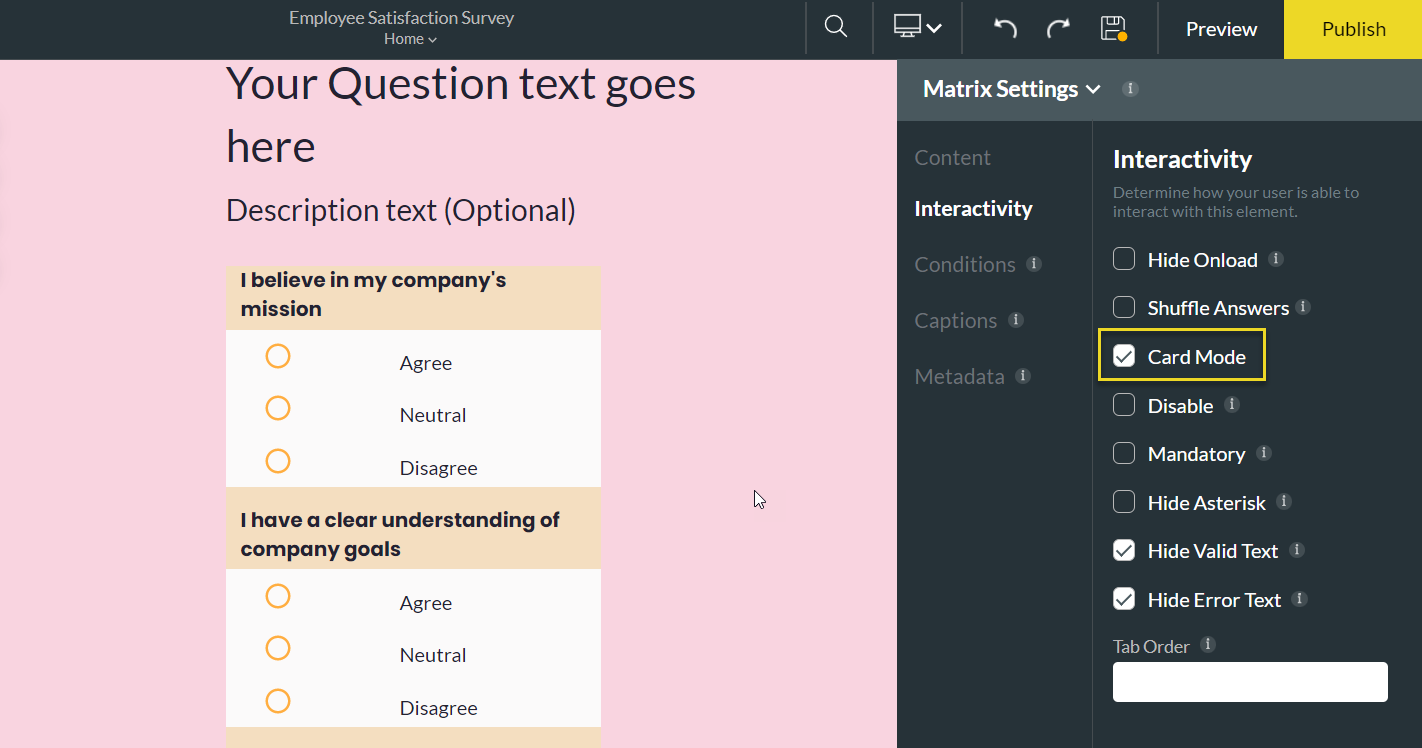
4. Enable Card Mode under Interactivity to display each question separately. Card Mode is particularly useful when viewing the survey on a mobile device.
2. Next, configure the static question and answer values using the matrix settings menu. To edit the questions in the matrix, select the Edit Mapping option under "Questions", edit the questions, and click Apply.
3. Edit Answers similarly by selecting the Answers' Edit Mapping option, filling answers into the fields, and clicking Apply.
4. Enable Card Mode under Interactivity to display each question separately. Card Mode is particularly useful when viewing the survey on a mobile device.
07 Adding a Text Area Question
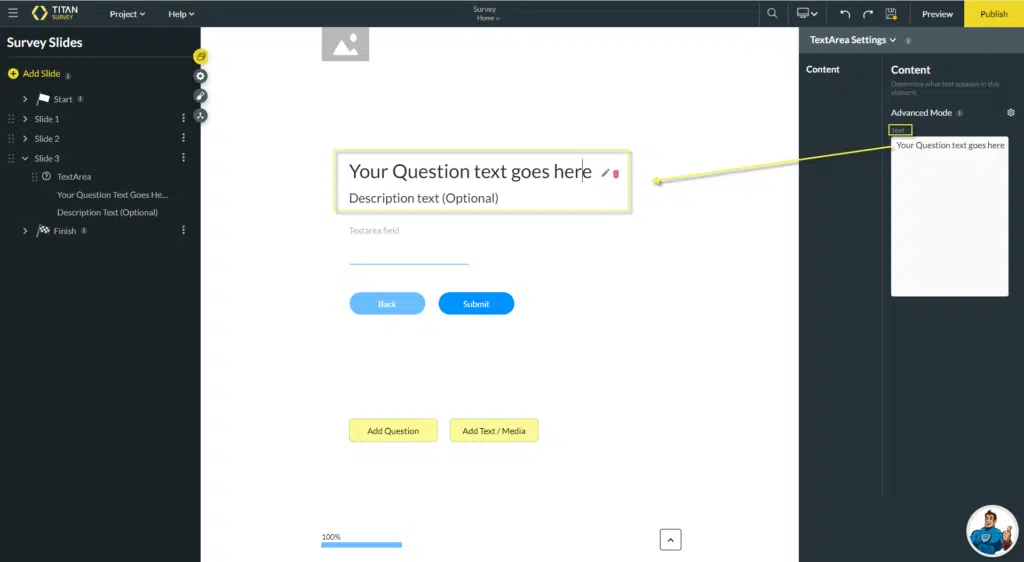
1. You can insert a larger text area for longer responses. Click on Add a Slide > question > input tab, select the Text Area question type, and insert it.
2. Type your question in the text field and add a description.
2. Type your question in the text field and add a description.
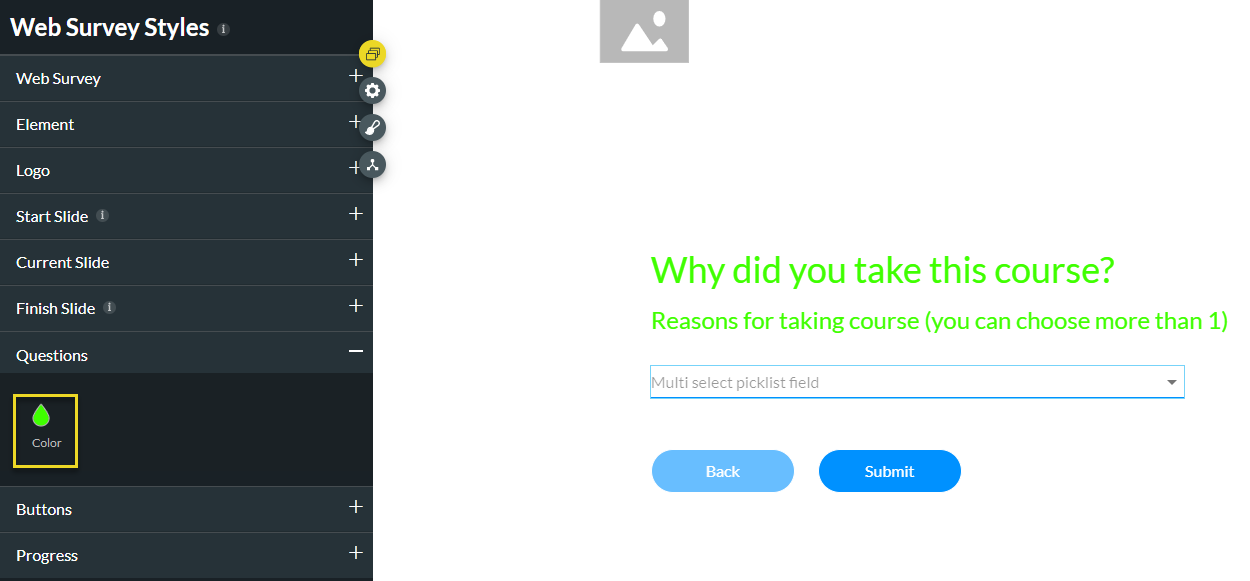
08 General Styling
1. Once you have set up your desired slides, you are ready to set up the styling parameters of your survey. To do so, click the survey styles icon, then the questions drop-down, and set a font color for all your survey questions.
2. Next, set the background color for all slides in the Web Survey drop-down.
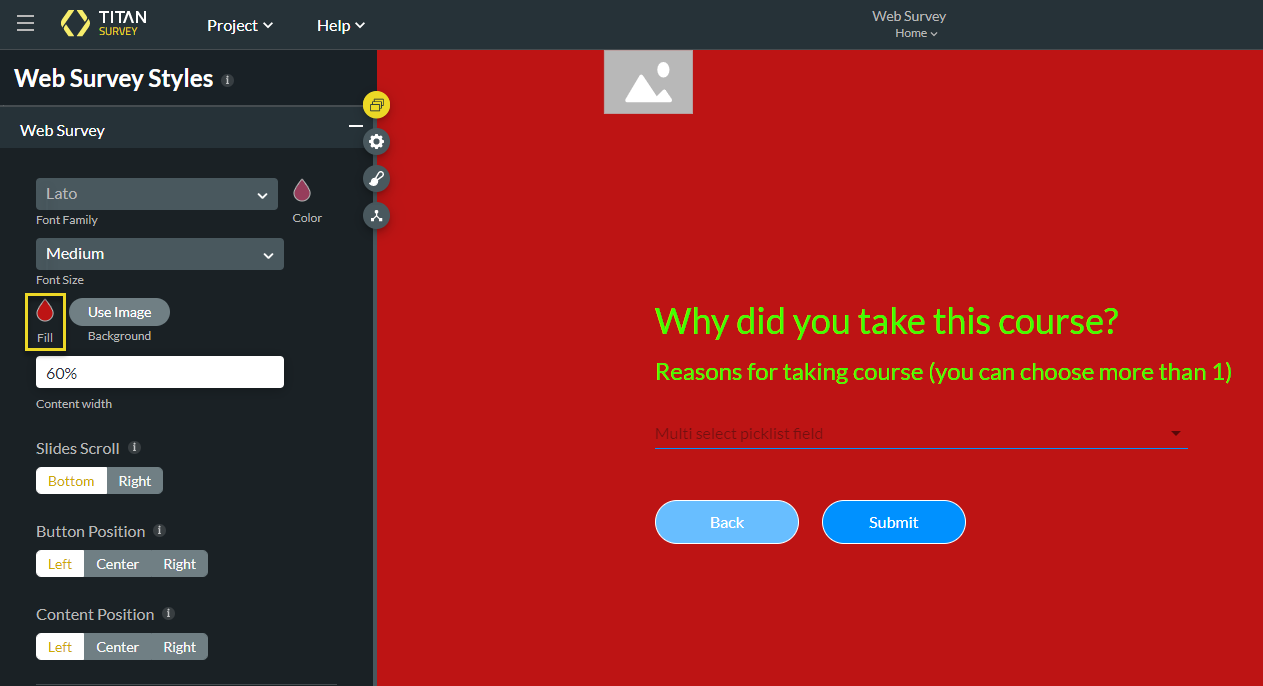
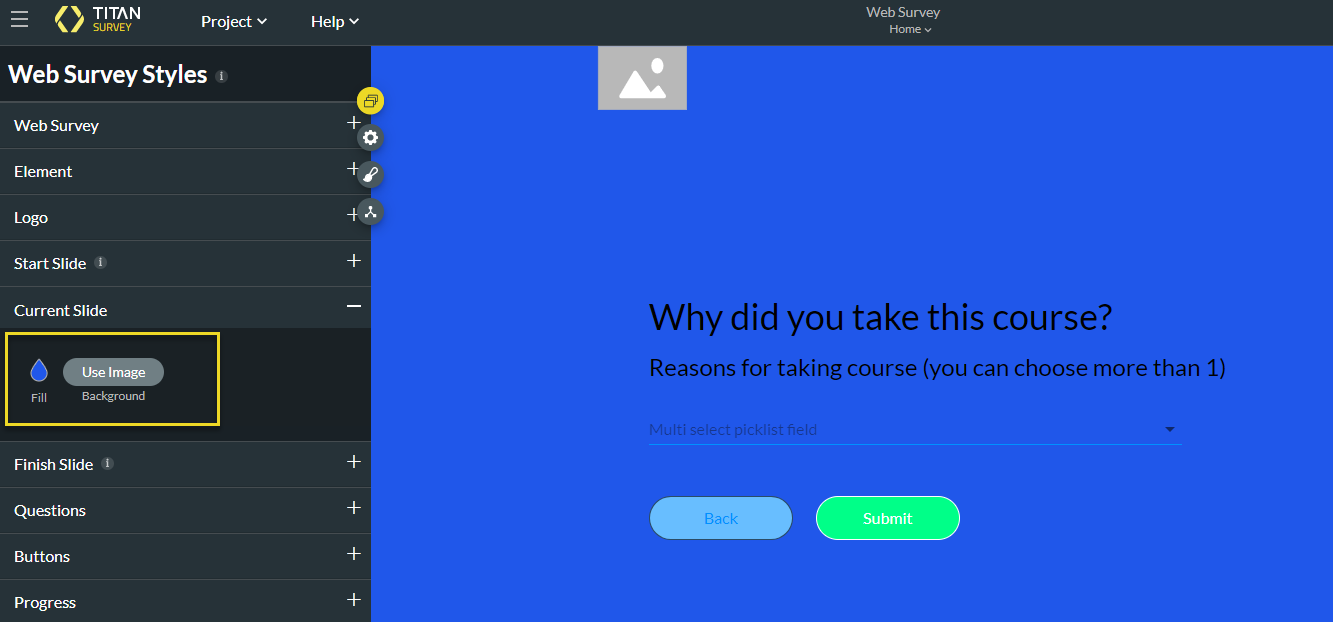
3. The Web Survey will customize styling for your whole survey, while selecting the Current Slide drop-down enables you to set it for the current slide. The Current Slide option has fewer styling options and only allows you to set a fill color or background image.
2. Next, set the background color for all slides in the Web Survey drop-down.
3. The Web Survey will customize styling for your whole survey, while selecting the Current Slide drop-down enables you to set it for the current slide. The Current Slide option has fewer styling options and only allows you to set a fill color or background image.
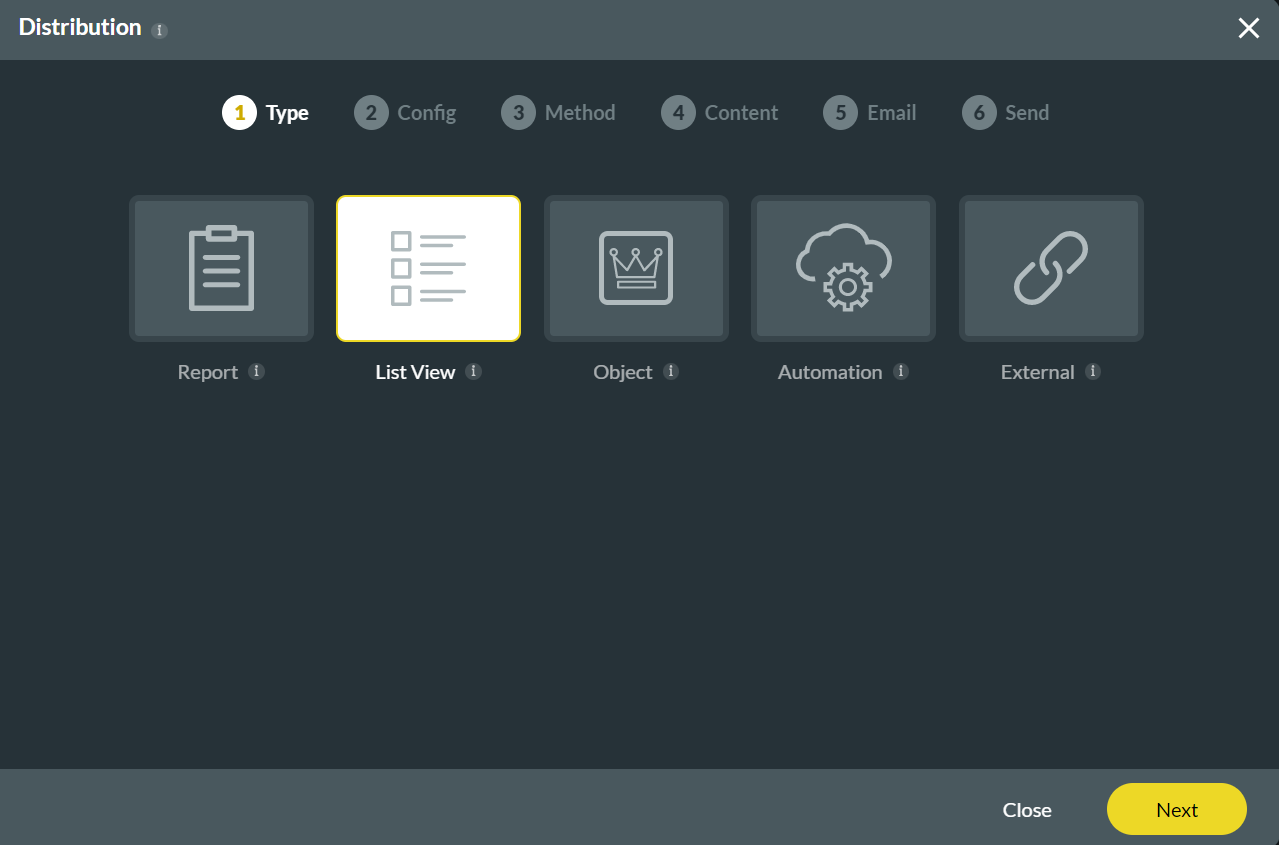
09 Distributing our Survey
1. To distribute your Survey, click the Publish button and choose your Distribution type. In this instance, List View is selected.
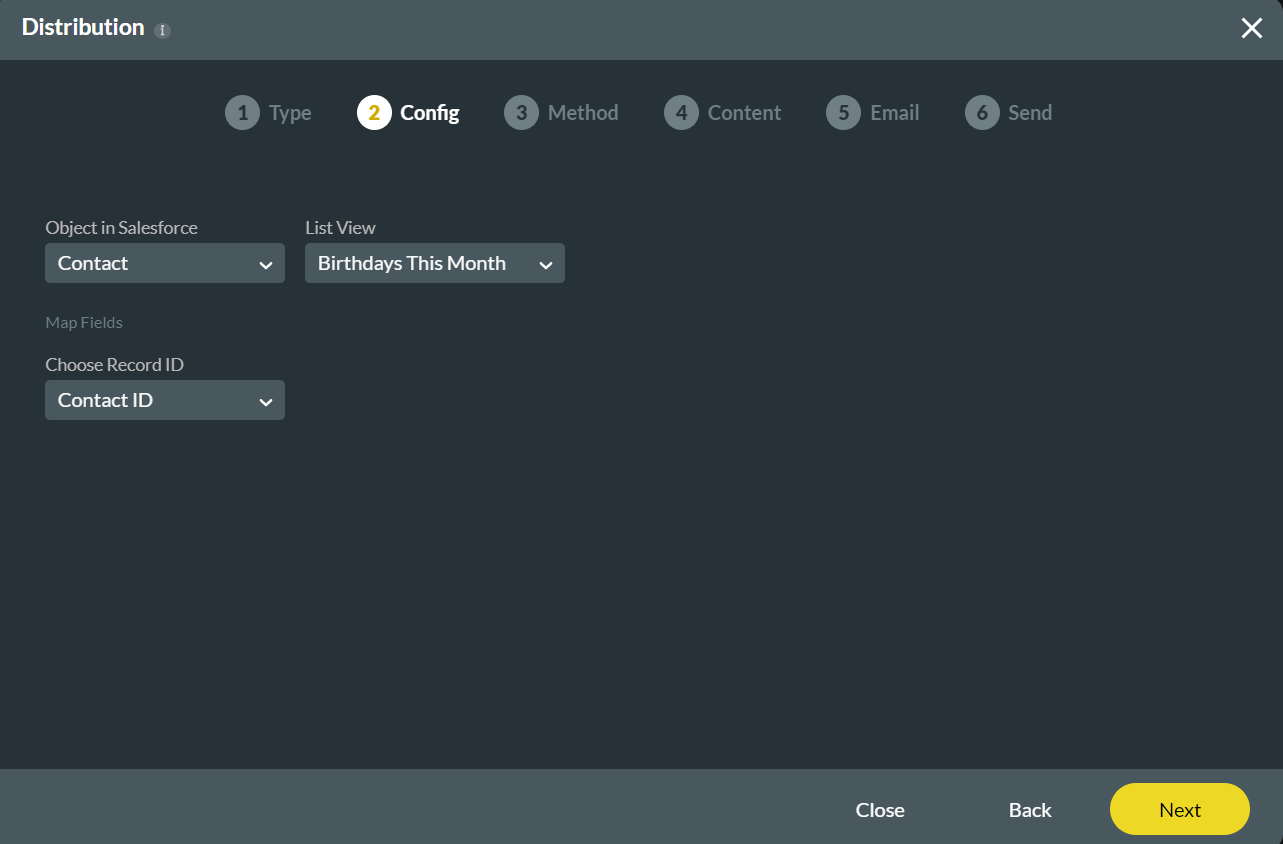
2. Set configuration for the Object in Salesforce, List View, and Record ID fields.
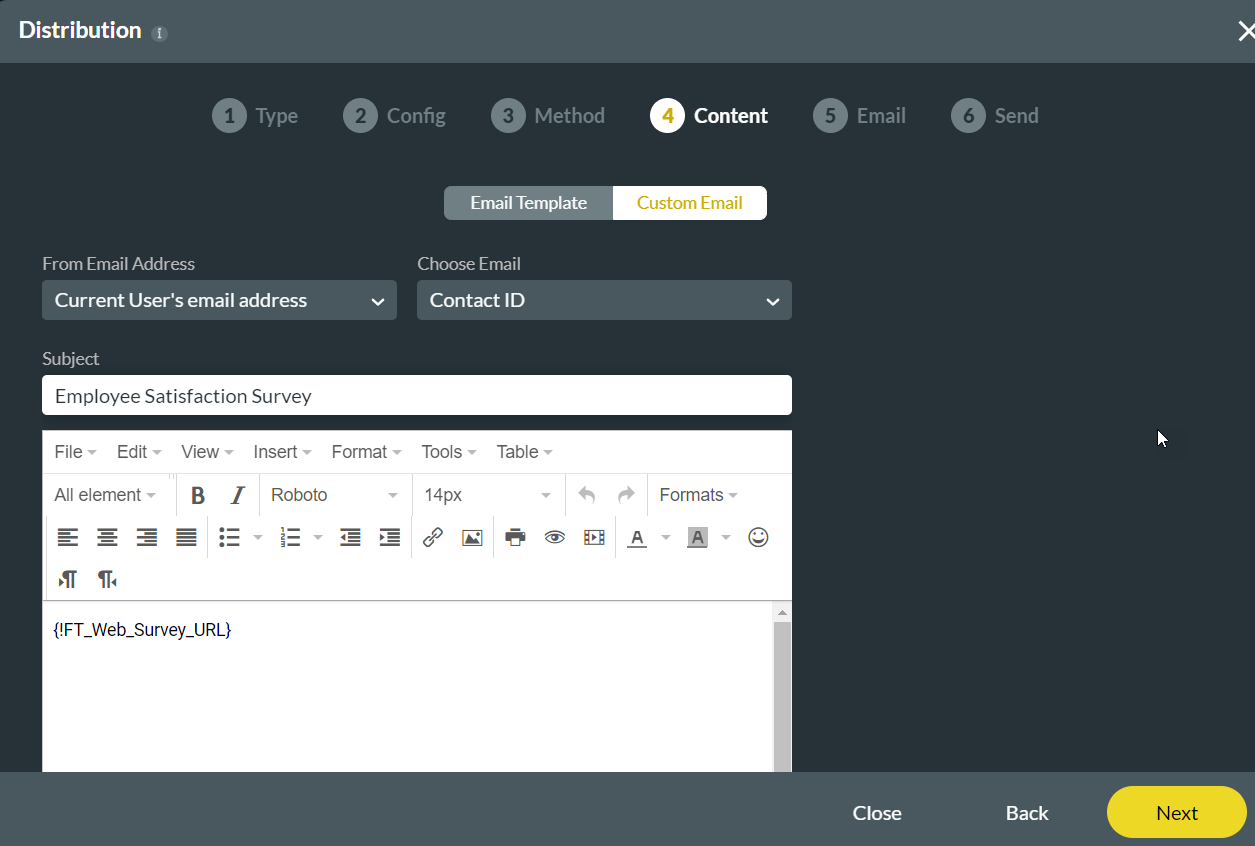
3. You can choose Mail as the distribution method and select the Custom Email option. Go ahead and configure the From Email Address and the Choose Email fields. You can also give your email a subject and body text.
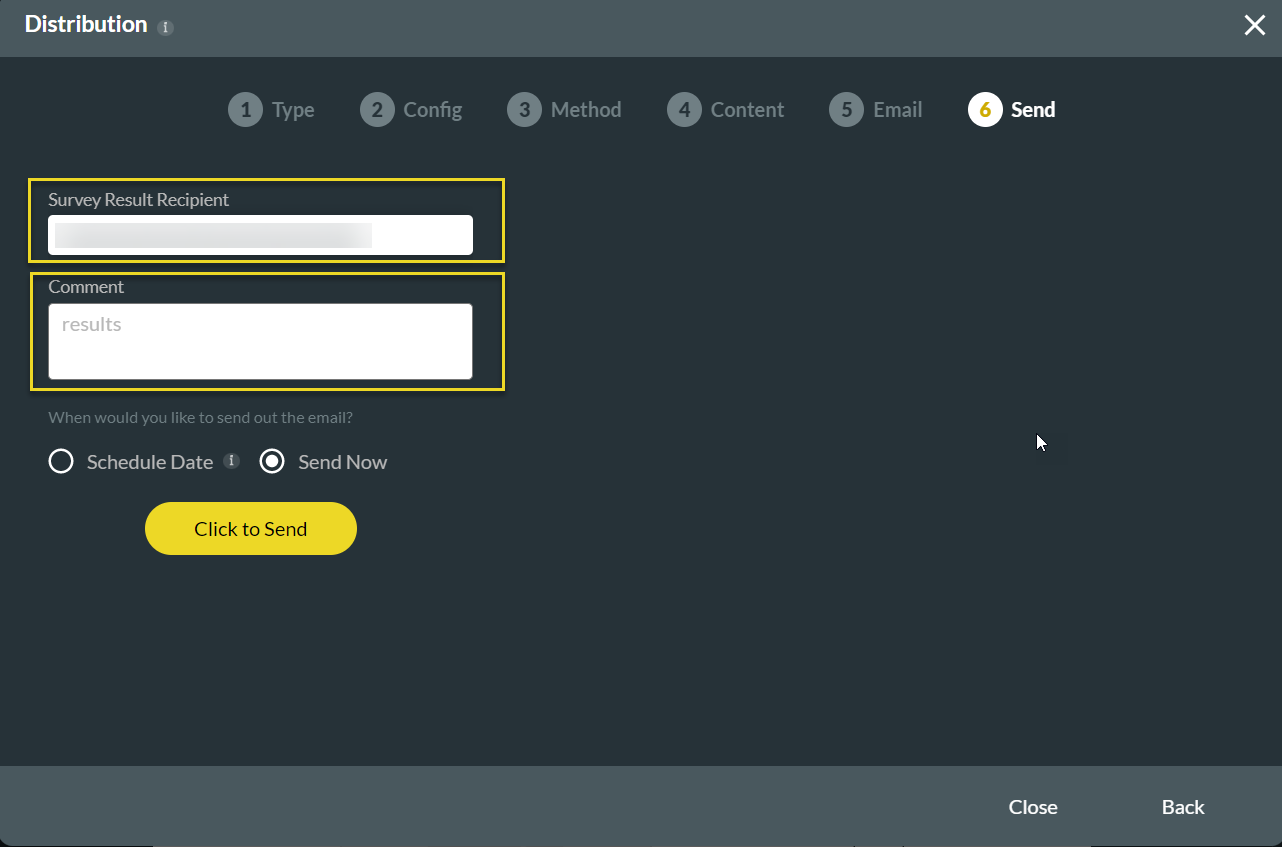
4. Add the Survey Results Recipient's email address and a comment before sending the Survey. Finally, choose to send the Survey now or later, and select the Click to Send button.
2. Set configuration for the Object in Salesforce, List View, and Record ID fields.
3. You can choose Mail as the distribution method and select the Custom Email option. Go ahead and configure the From Email Address and the Choose Email fields. You can also give your email a subject and body text.
4. Add the Survey Results Recipient's email address and a comment before sending the Survey. Finally, choose to send the Survey now or later, and select the Click to Send button.
10 Reviewing Survey Data
The Salesforce Data Collected from Surveys includes:
1. Get the TITAN Surveys for Salesforce app from the AppExchange store.
2. Log into your Salesforce account and search for the Titan Survey app.
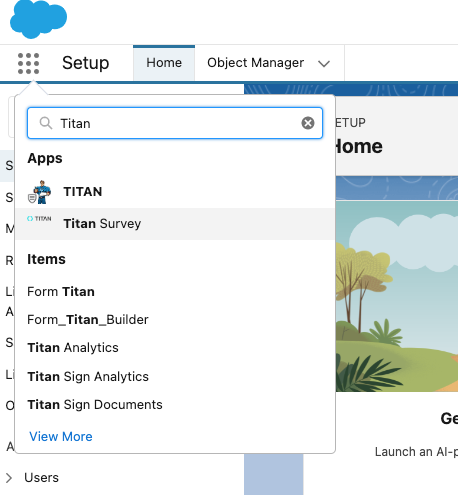
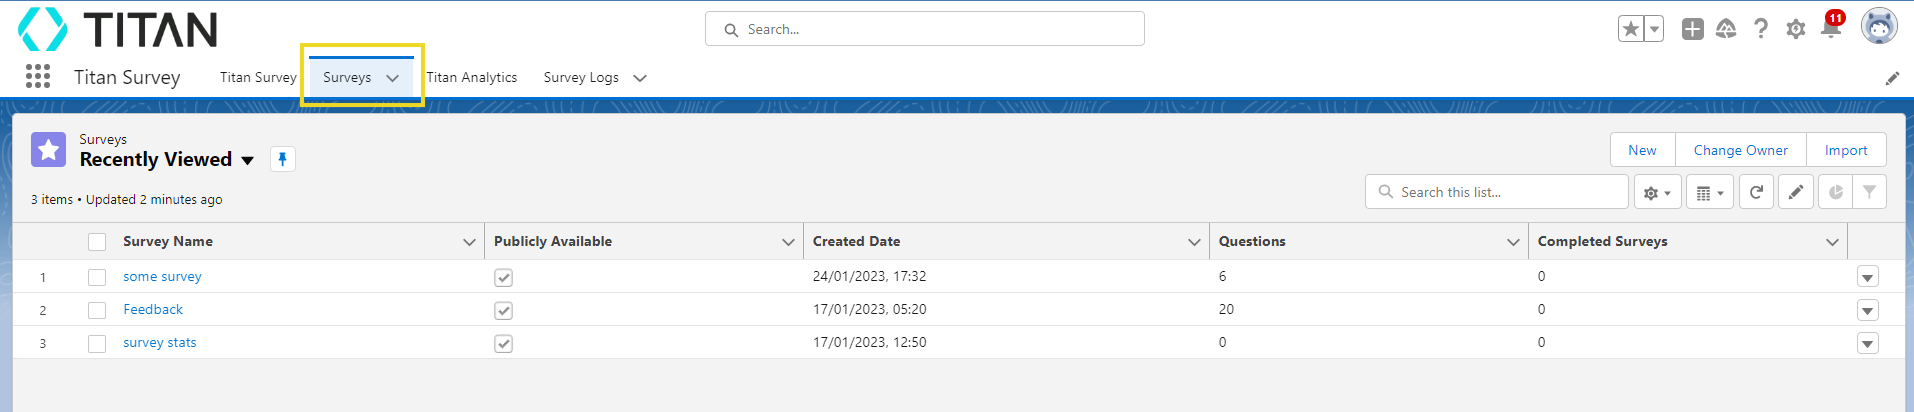
3. Use the Surveys tab drop-down arrow to choose a specific project.

Alternatively, select the Surveys tab to view all projects and key figures.
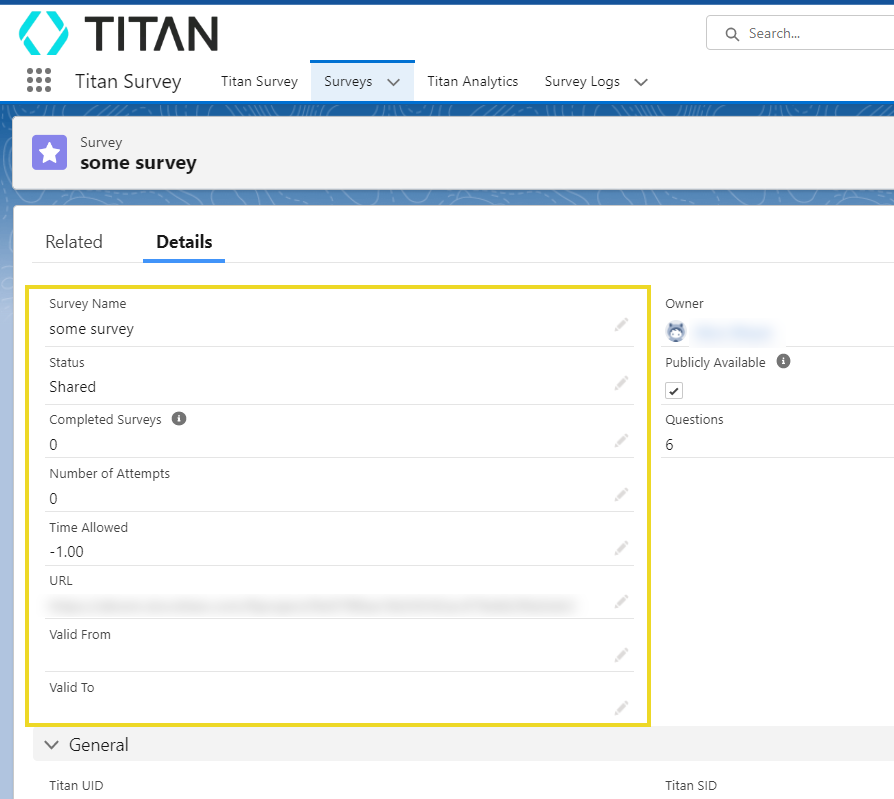
1. Select a project to view all the details regarding the survey.
2. View details of your survey by selecting the Details tab.
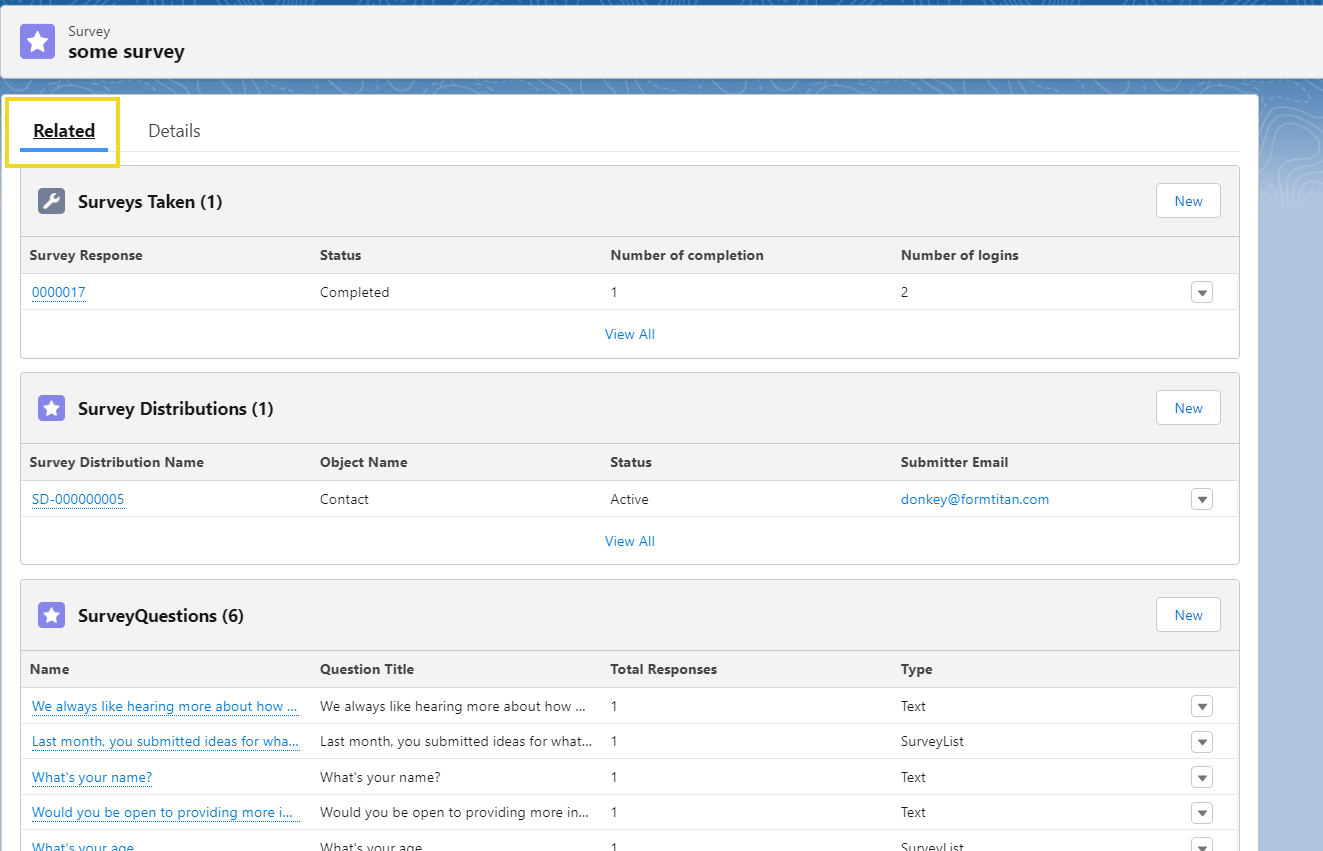
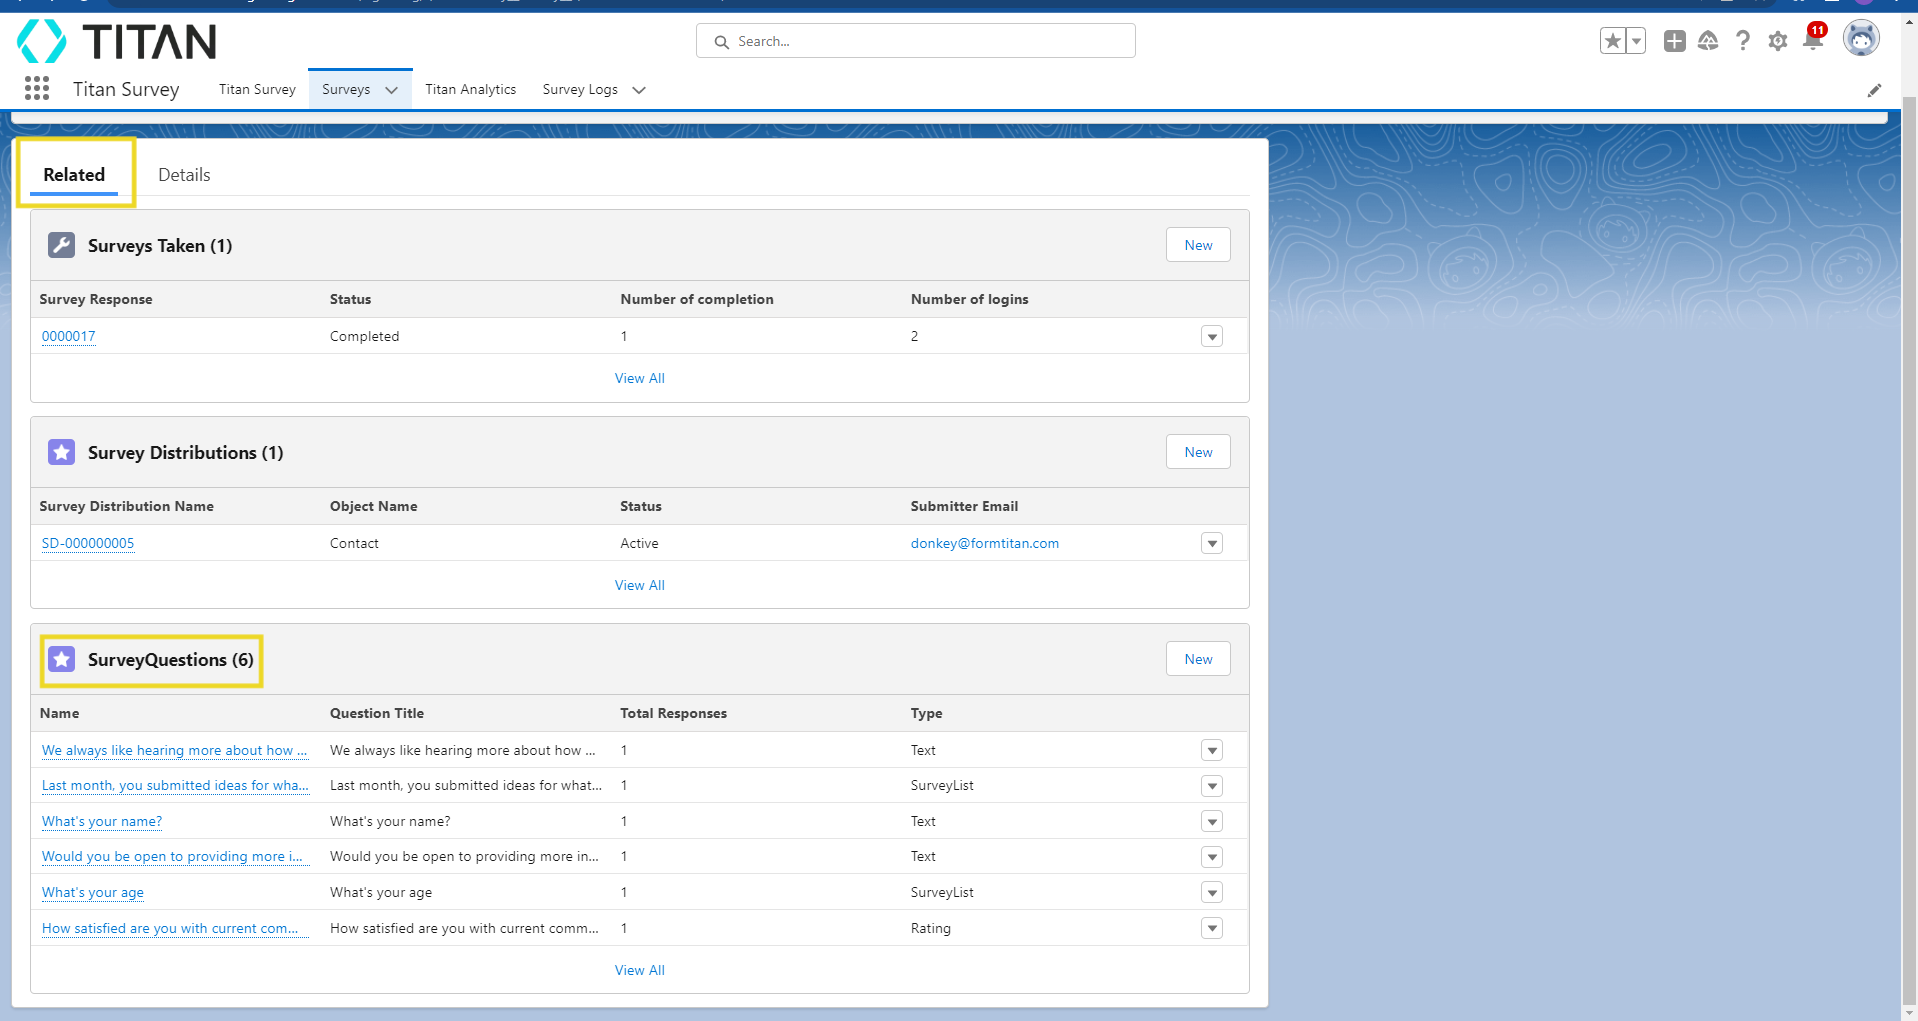
3. Choose the Related tab to view the number of surveys taken, details regarding survey distribution, and a list of your questions in the survey.
View your Survey Taken Data in Salesforce
1. Navigate to the Related tab for your chosen survey and select the Surveys Taken link.
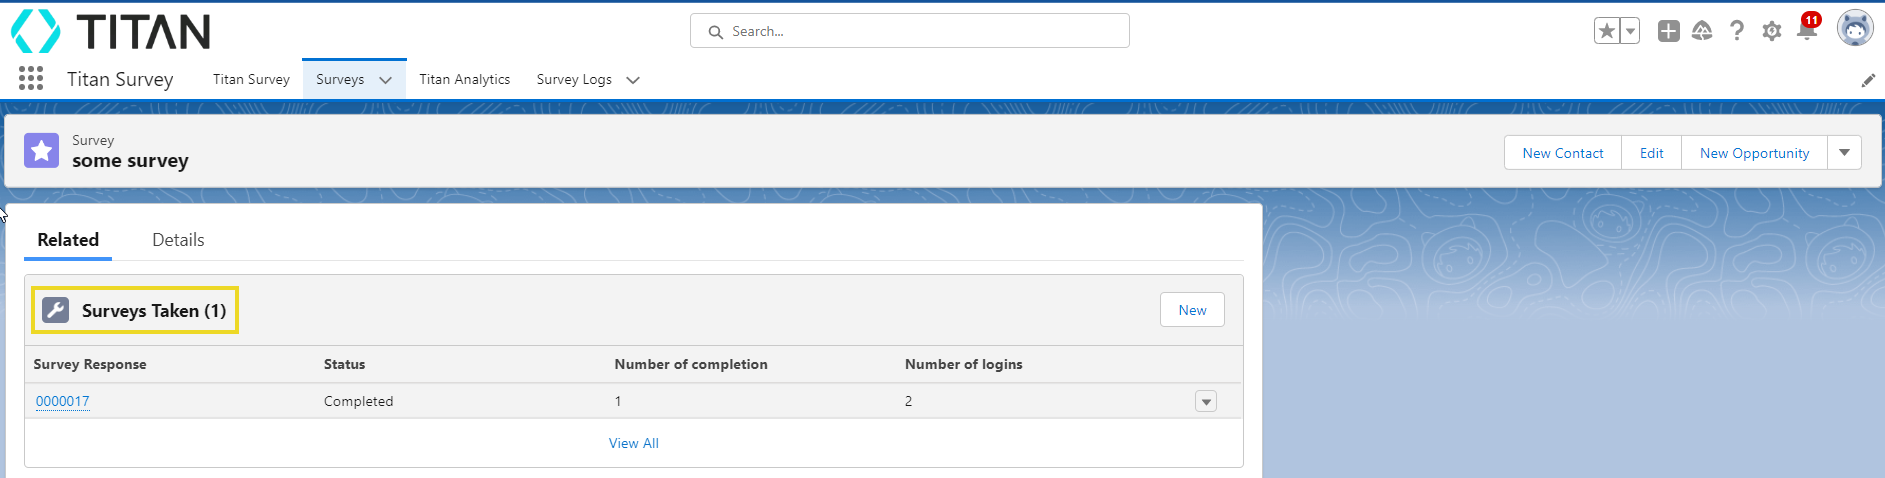
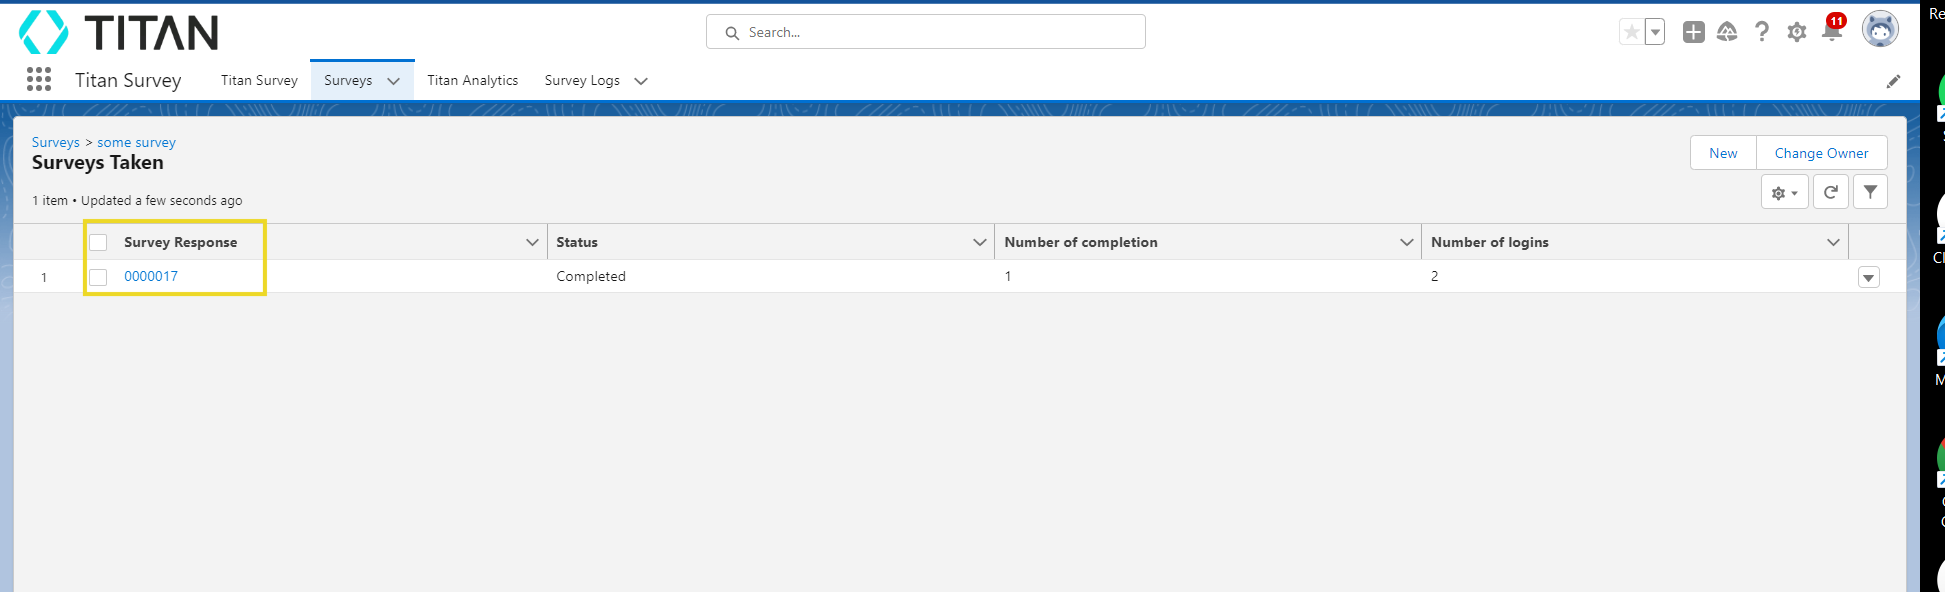
2. The Surveys Taken page opens up and displays all your survey responses with key data regarding the survey status, the number of completed surveys, and the number of logins to your survey.
3. Obtain a detailed breakdown of each response by choosing one of the records.
4. Selecting the Details tab will provide information regarding the respondent's responses.

View your Survey Distributions Data in Salesforce
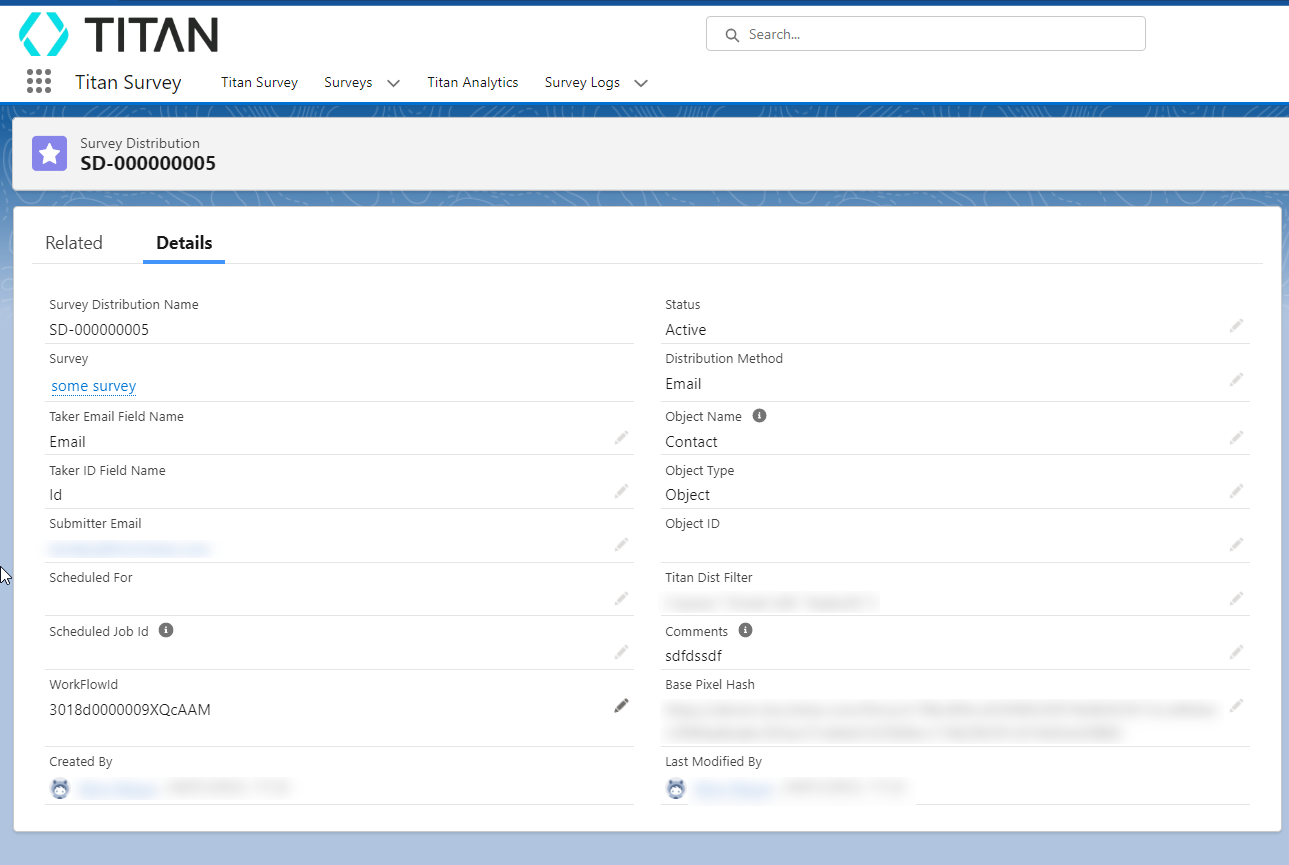
1. Select the Survey Distributions link under the Related tab to explore the distribution data.

2. The Details tab will display distribution data in an easy-to-view dashboard collected from your survey.
View your Survey Questions Data in Salesforce
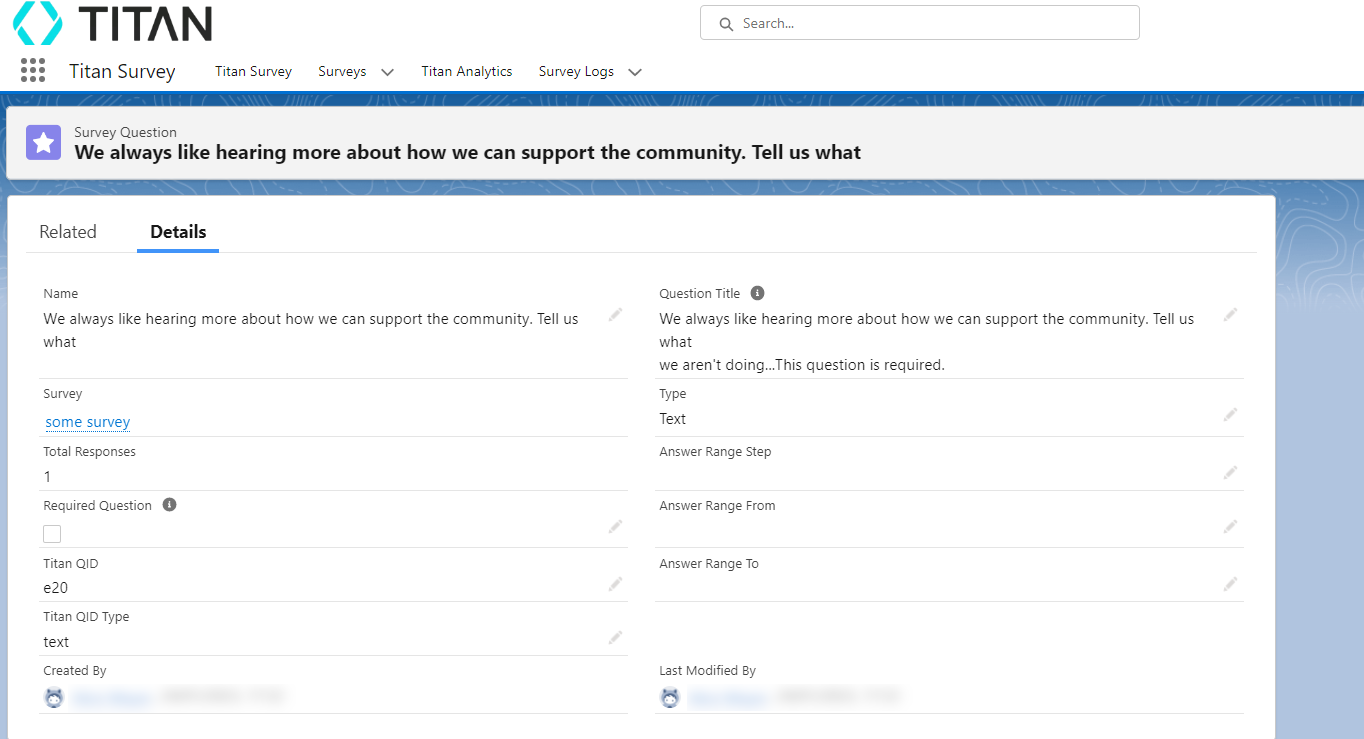
1. Select the Survey Questions link under the Related tab to explore the question data from your survey.
- Taken Surveys Data - includes all data that provides insight into each survey taker's responses.
- Survey Distribution Data shows data related to the survey's duration.
- Survey Questions Data - lists a breakdown of the questions found in the survey.
1. Get the TITAN Surveys for Salesforce app from the AppExchange store.
2. Log into your Salesforce account and search for the Titan Survey app.
3. Use the Surveys tab drop-down arrow to choose a specific project.
Alternatively, select the Surveys tab to view all projects and key figures.
1. Select a project to view all the details regarding the survey.
2. View details of your survey by selecting the Details tab.
3. Choose the Related tab to view the number of surveys taken, details regarding survey distribution, and a list of your questions in the survey.
View your Survey Taken Data in Salesforce
1. Navigate to the Related tab for your chosen survey and select the Surveys Taken link.
2. The Surveys Taken page opens up and displays all your survey responses with key data regarding the survey status, the number of completed surveys, and the number of logins to your survey.
3. Obtain a detailed breakdown of each response by choosing one of the records.
4. Selecting the Details tab will provide information regarding the respondent's responses.
View your Survey Distributions Data in Salesforce
1. Select the Survey Distributions link under the Related tab to explore the distribution data.
2. The Details tab will display distribution data in an easy-to-view dashboard collected from your survey.
View your Survey Questions Data in Salesforce
1. Select the Survey Questions link under the Related tab to explore the question data from your survey.
2. Choose a specific question to get a more detailed breakdown.