Push to Salesforce (7 min)
Completion requirements
01 Getting Started
In this tutorial, we will discuss pushing your Titan Sign document to Salesforce and updating data on Salesforce records. First, we will show you how to run a push action to push your document to Salesforce. We will associate this push with the Opportunity we are triggering from. Once the document has been signed, we will also update the stage of that Opportunity.
02 Push Document to Salesforce
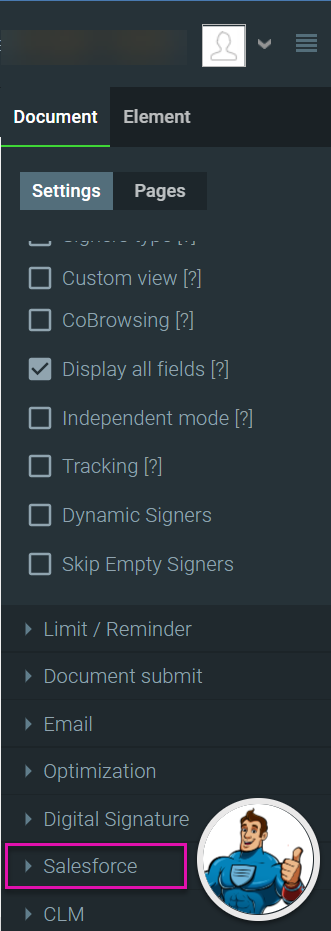
1. First, navigate to Document> Settings > Salesforce:
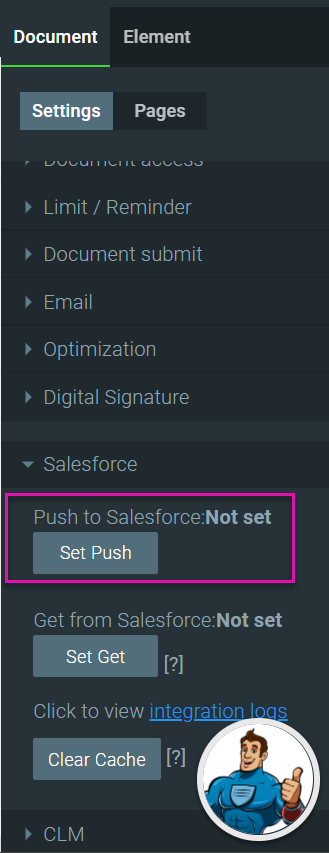
2. Next, click on “Set Push”:
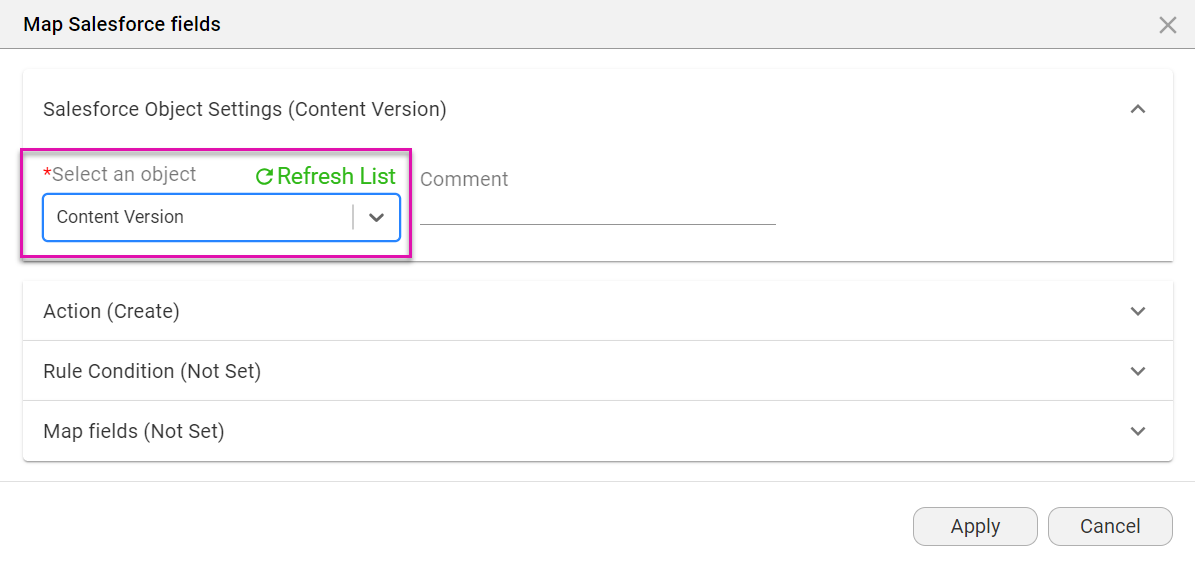
3. After this, add a file (Content Version) as your object:
4. Next, set up mapping. In this case, we will map three essential fields:


After you have mapped these fields, click Apply and Finish.

2. Next, click on “Set Push”:

3. After this, add a file (Content Version) as your object:

4. Next, set up mapping. In this case, we will map three essential fields:
- Version Data: To push your signed Document, choose “Your Document.”

- First Publish Location (here, it will be the Record ID from which the signing process is triggered): In this instance, we will be triggering the process from an Opportunity:

- Title (this is the name of your file): You can select a field from your project, run a get and bring in data from Salesforce, name the file, or set up a custom name, among other options. In this instance, we have selected “Other” and chosen the static name “Opportunity Quote”:

After you have mapped these fields, click Apply and Finish.
03 Push to Update Record in Salesforce
This Push lets you update the record in Salesforce to which you are pushing the file.
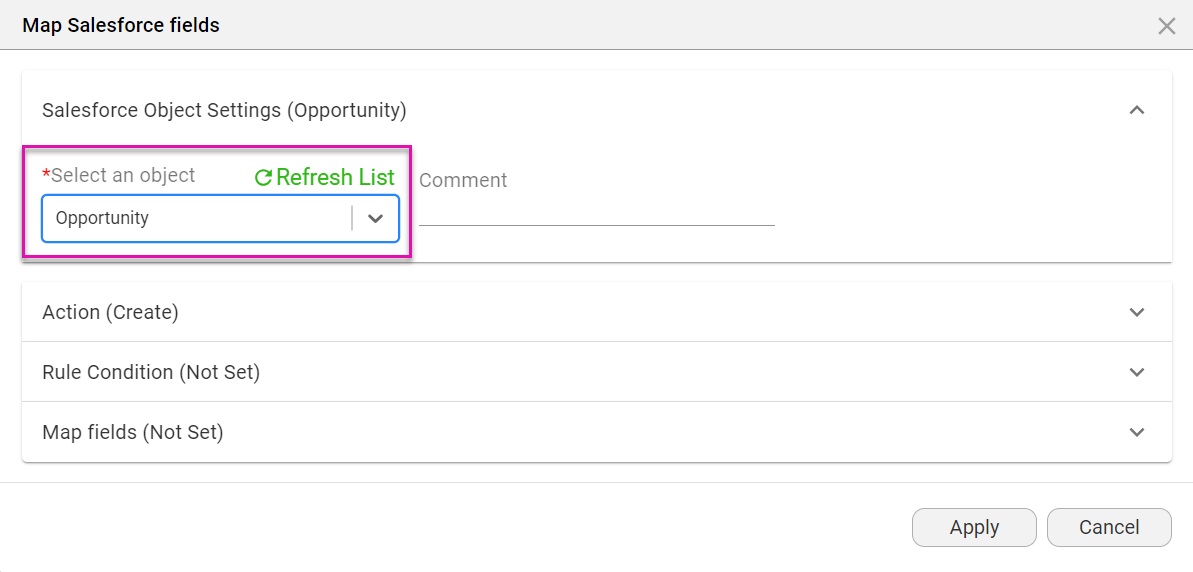
1. Navigate back to Document > Settings > Salesforce > Set Push. Choose to add an object; in this instance, we will choose Opportunity:
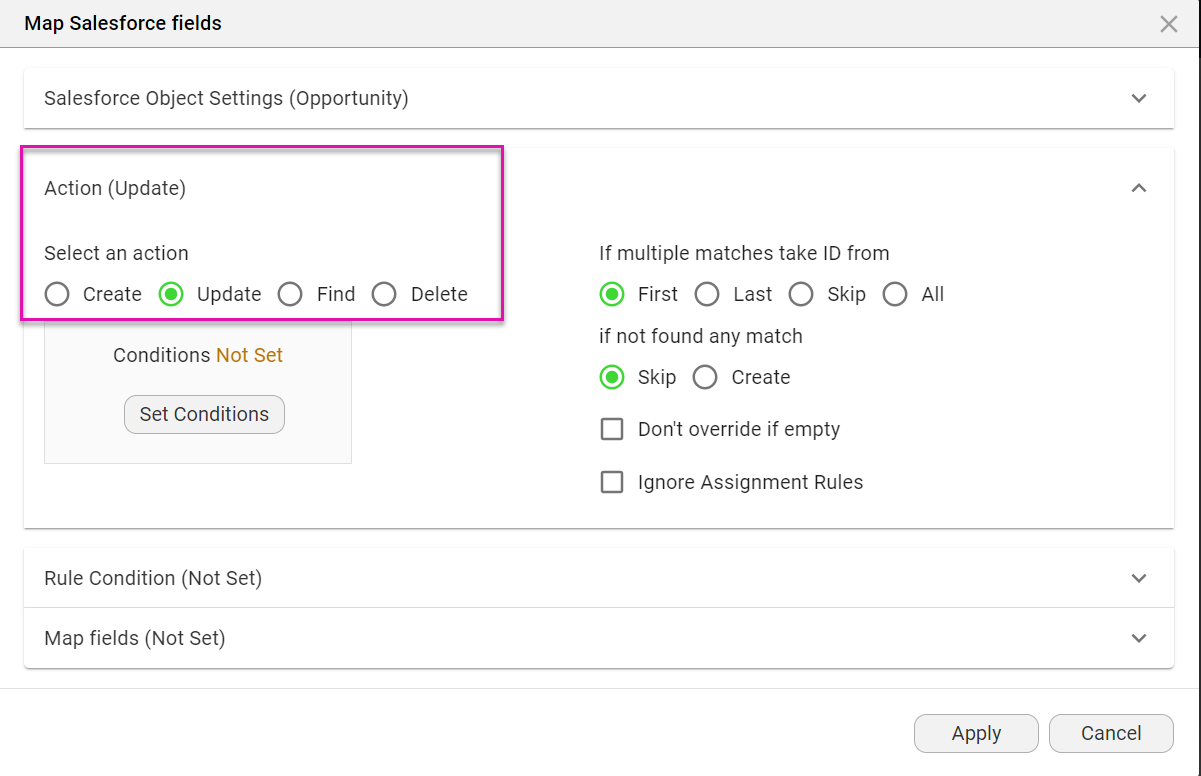
2. Choose Update as your action; you could also choose to create, find, or delete a record:
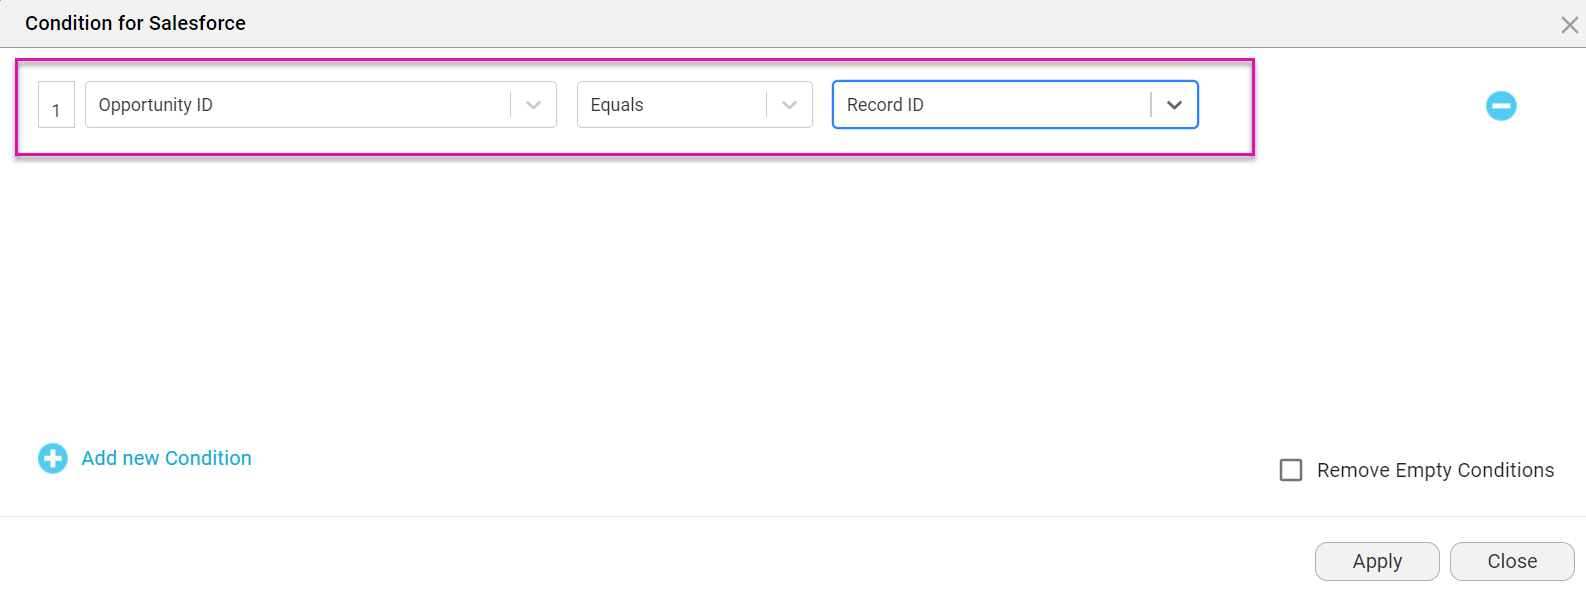
3. Next, set conditions. Here, we will choose Opportunity ID to equal Record ID:
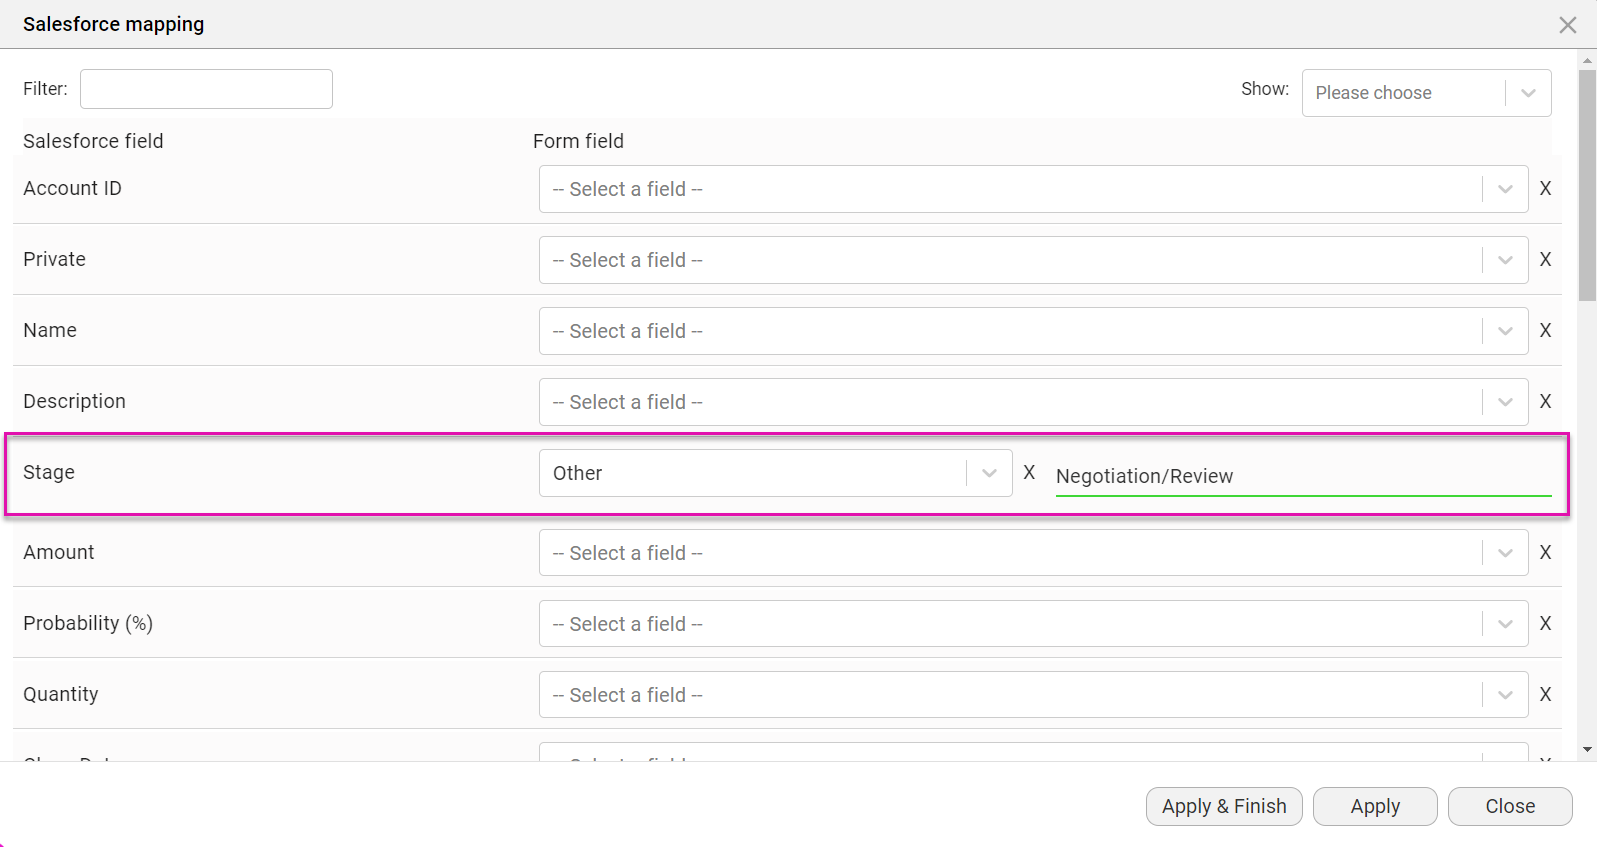
4. After this, you can map the relevant fields. In this instance, we have chosen to map the stage of our Opportunity. Here, we want to map the stage as in Negotiation/ Review once the document is signed:
Note: You can update as many different records as you like, both custom and standard.
1. Navigate back to Document > Settings > Salesforce > Set Push. Choose to add an object; in this instance, we will choose Opportunity:

2. Choose Update as your action; you could also choose to create, find, or delete a record:

3. Next, set conditions. Here, we will choose Opportunity ID to equal Record ID:

4. After this, you can map the relevant fields. In this instance, we have chosen to map the stage of our Opportunity. Here, we want to map the stage as in Negotiation/ Review once the document is signed:

Note: You can update as many different records as you like, both custom and standard.
04 When Will These Push Actions Run?
Your push actions will run once the document has been signed and submitted.
Before triggering this process, ensure the relevant permissions are in place by navigating to Titan Dashboard > My Account > Users and checking your Collaborator permissions. Ensure that the relevant collaborator can sign and void the document.
1. Navigate to Salesforce and your Opportunity.
2. Click the FT Document Generation button.
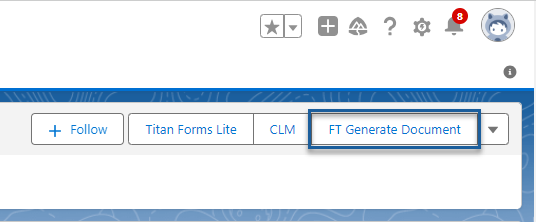
3. Click the Sign icon. You will see the message: “Processing your request, please wait...”You will see the message when the document is seen: “Good Job! Your request has been submitted successfully.”
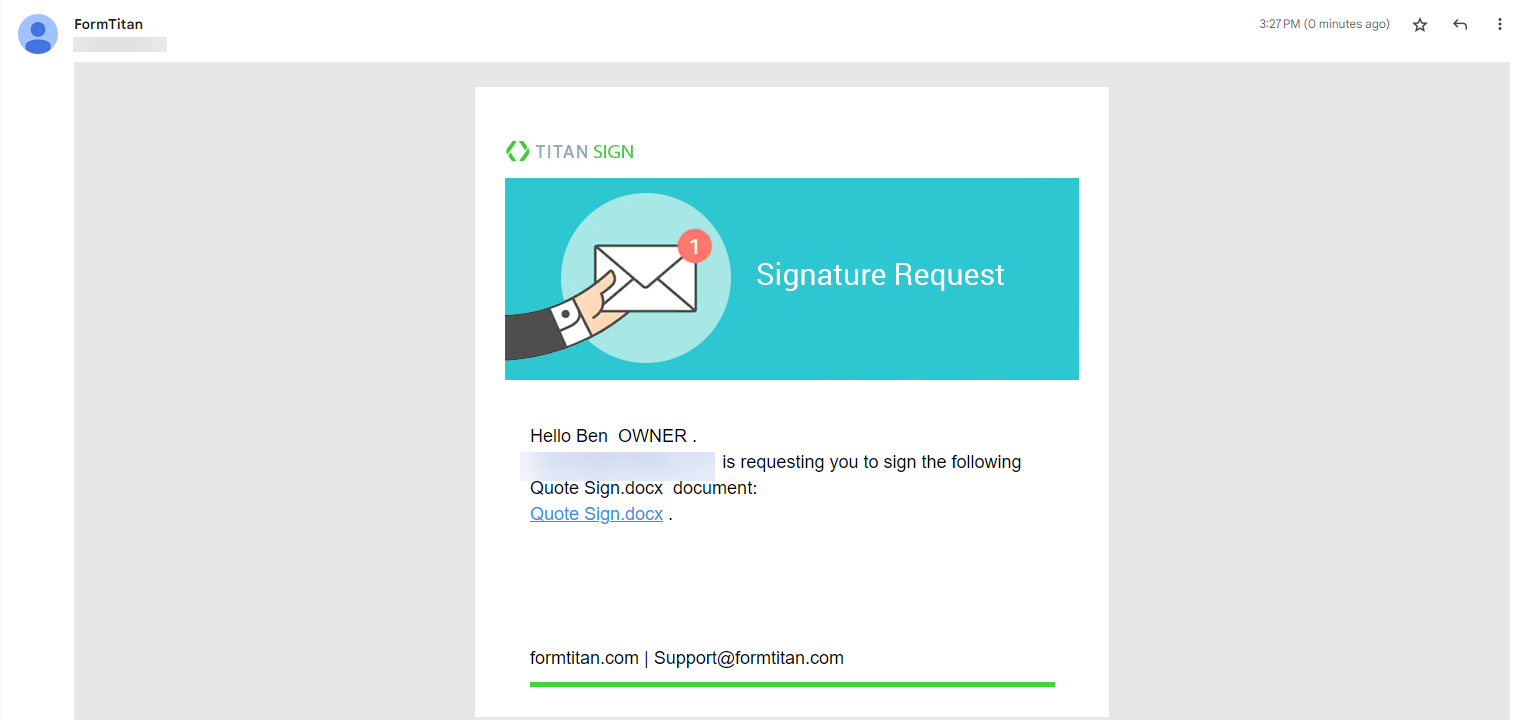
4. Next, the collaborator will receive an email with a signature request. The document can be signed by clicking on the document link:
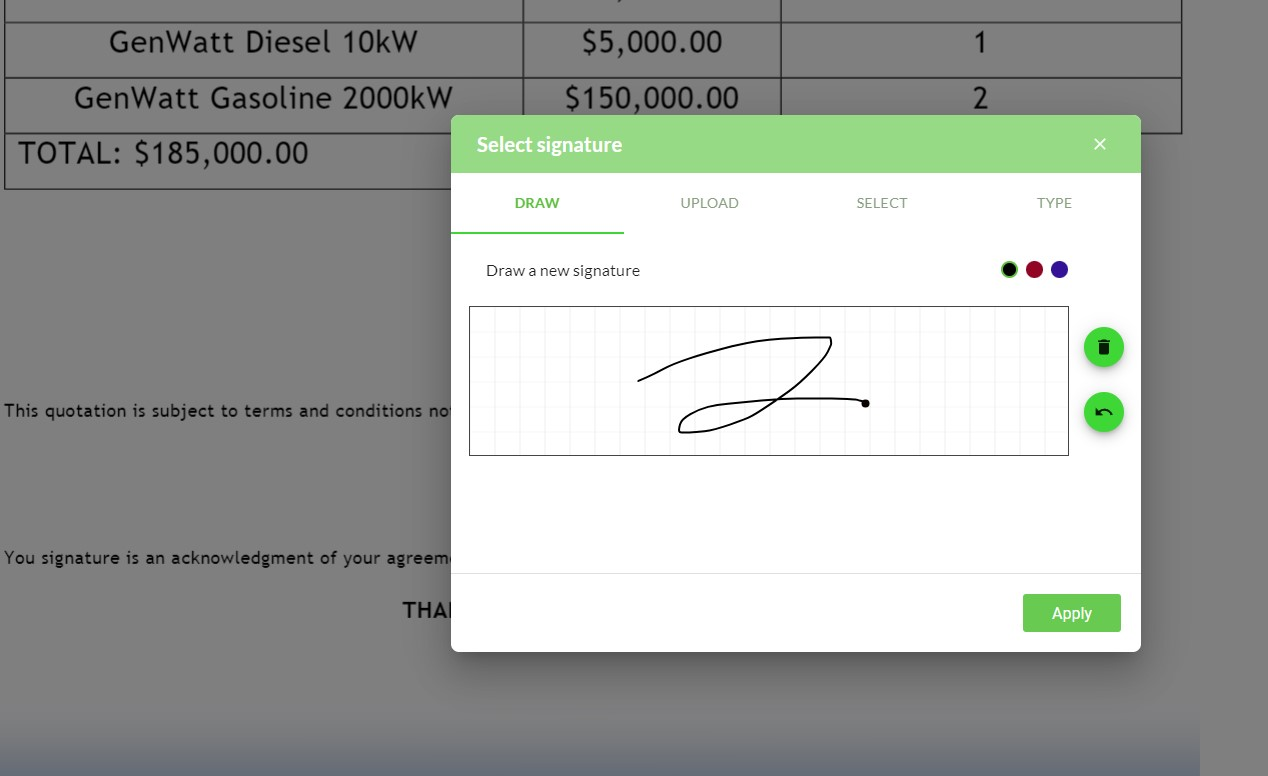
5. In the document, the signer must click sign now, and then enter their signature:
6. After clicking the Finish Sign button, you (as the document owner) will receive an email notifying you that the document has been signed, along with the signed copy.
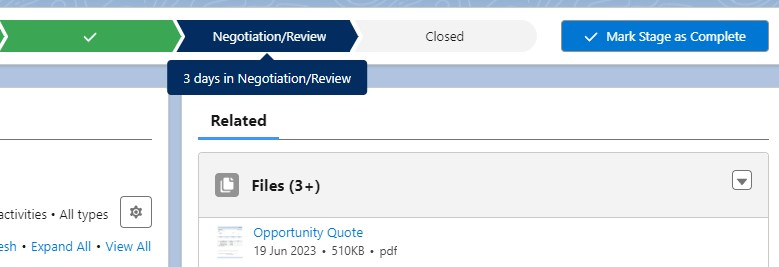
7. If you navigate back to Salesforce, you will see that your opportunity quote is associated with the record you updated and that your document stage is now in Negotiation/ Review:
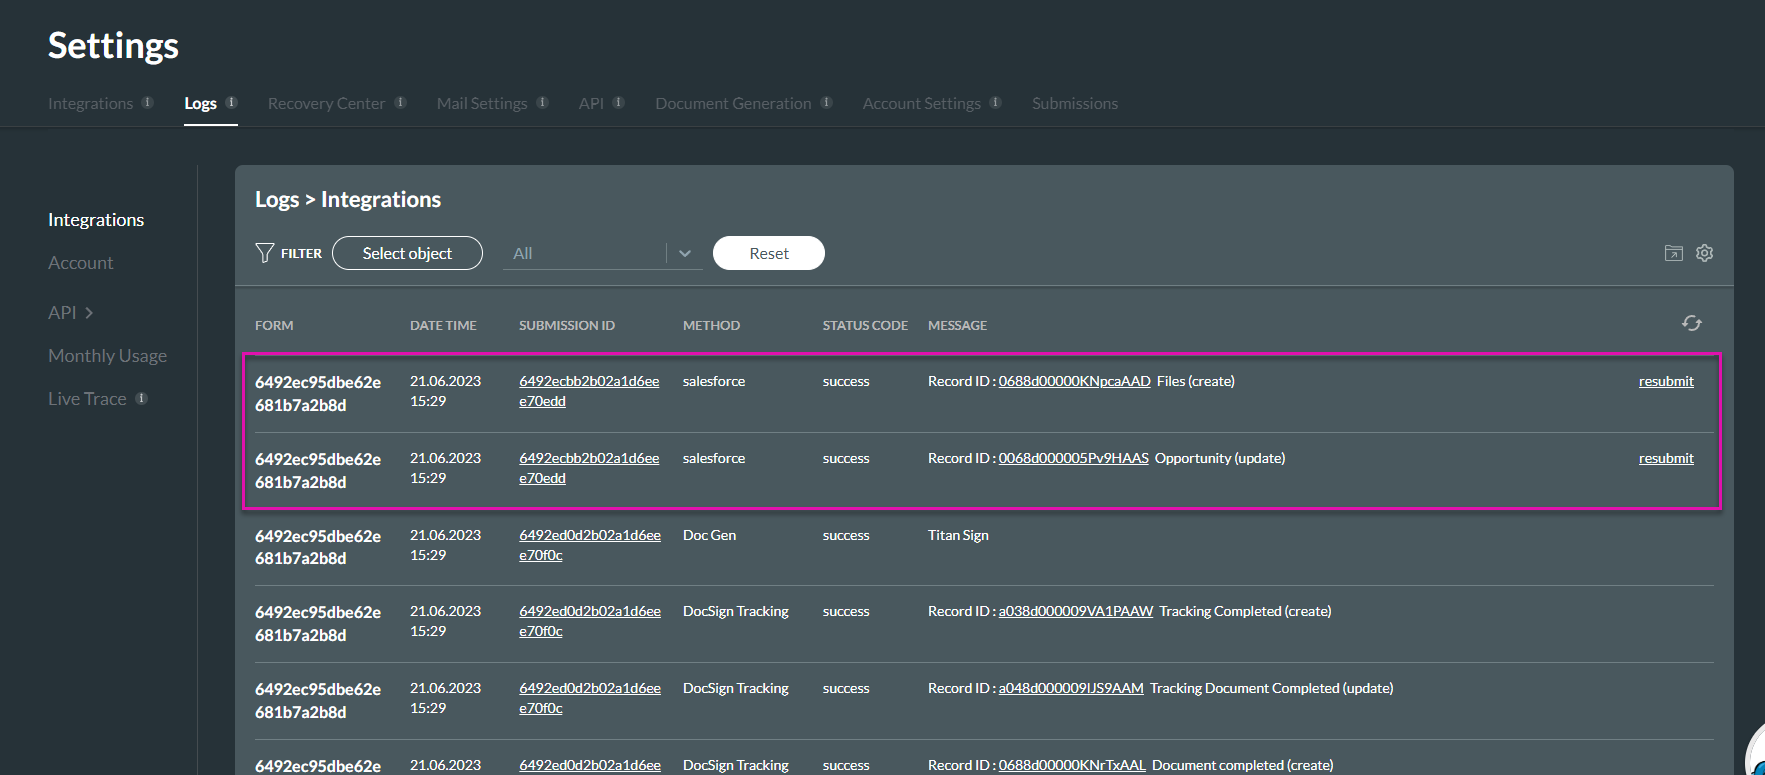
8. You can also check Titan integration logs by visiting Settings > Logs > Integrations. Here, you will see that you pushed a file to Salesforce and updated an Opportunity:
Before triggering this process, ensure the relevant permissions are in place by navigating to Titan Dashboard > My Account > Users and checking your Collaborator permissions. Ensure that the relevant collaborator can sign and void the document.
1. Navigate to Salesforce and your Opportunity.
2. Click the FT Document Generation button.

3. Click the Sign icon. You will see the message: “Processing your request, please wait...”You will see the message when the document is seen: “Good Job! Your request has been submitted successfully.”
4. Next, the collaborator will receive an email with a signature request. The document can be signed by clicking on the document link:

5. In the document, the signer must click sign now, and then enter their signature:

6. After clicking the Finish Sign button, you (as the document owner) will receive an email notifying you that the document has been signed, along with the signed copy.
7. If you navigate back to Salesforce, you will see that your opportunity quote is associated with the record you updated and that your document stage is now in Negotiation/ Review:

8. You can also check Titan integration logs by visiting Settings > Logs > Integrations. Here, you will see that you pushed a file to Salesforce and updated an Opportunity:
