Dynamic - Type Overview (4 min)
Completion requirements
01 Getting Started
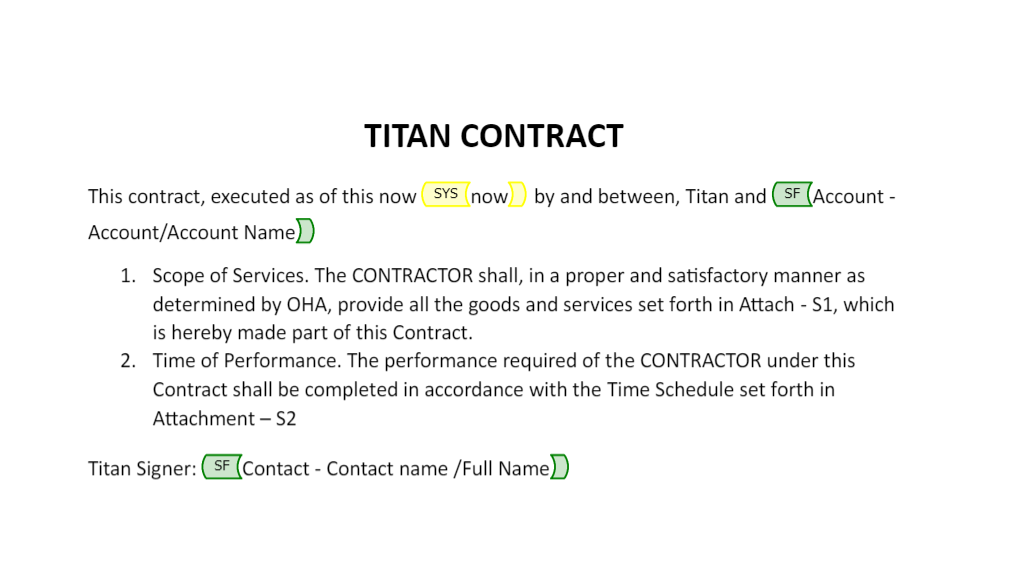
This tutorial covers dynamic Word documents. When you create a template using the Titan Word Add-In, you can insert merge fields to pull data dynamically from Salesforce. Once you have completed your document configuration, you can upload it to a Titan Sign project. Once your configured document is saved in Titan Sign, it can be generated dynamically from your Salesforce account.
02 Uploading a Document
1. Drag and drop your document into the upload field.
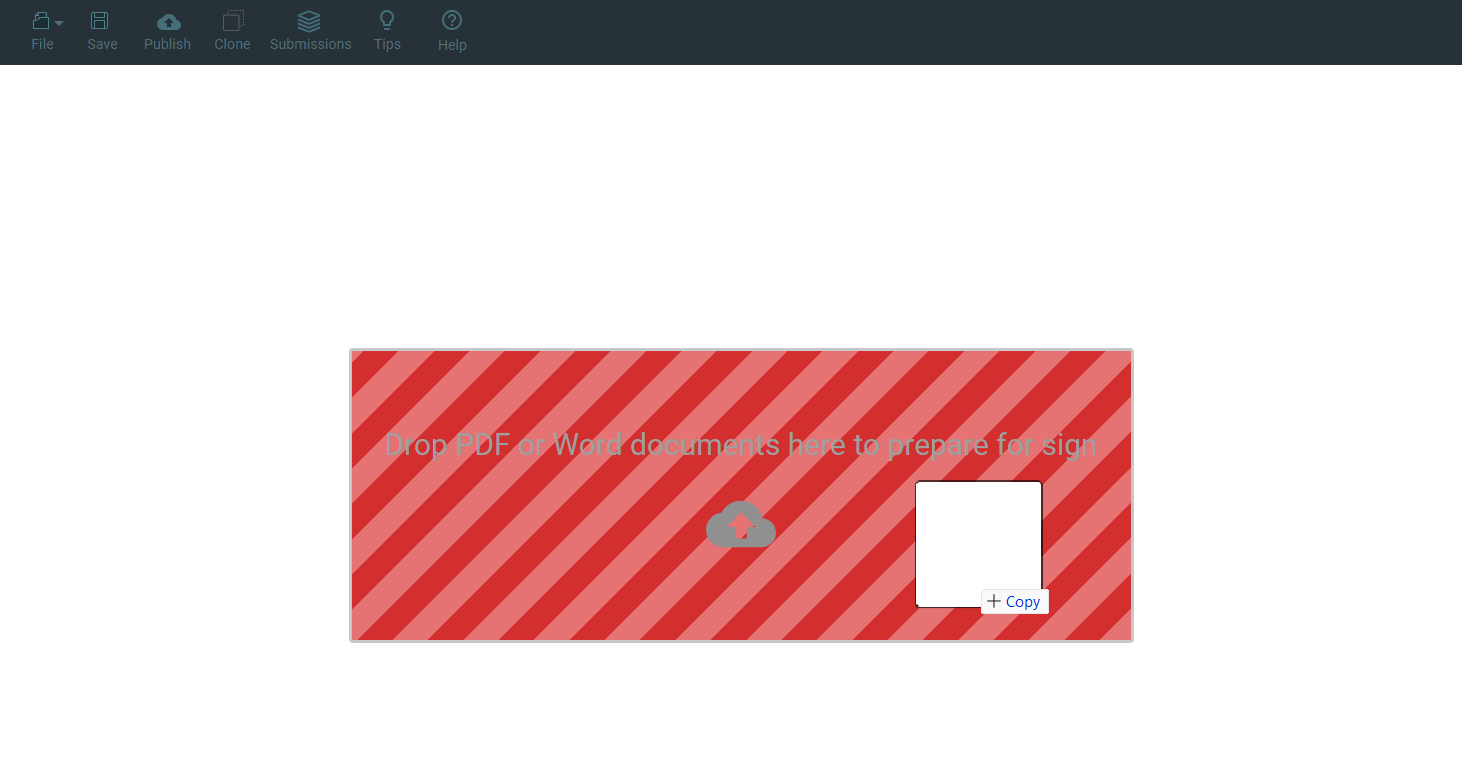
Your document will be uploaded to the server and will display.
Add elements to your document, and drag and drop items from the element menu.
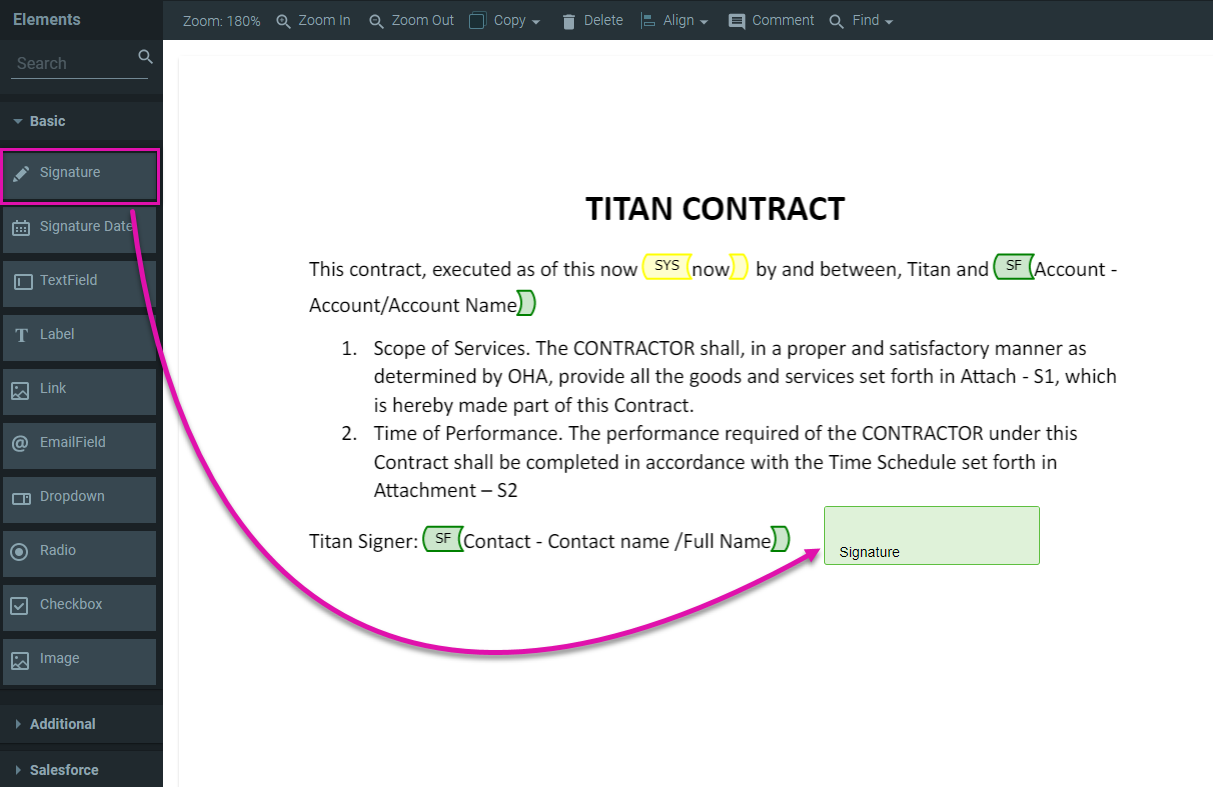
Having a combination of Merge Fields and Elements means that some data will be dynamically pulled from Salesforce, as well as data that the end user provides.
Your document will be uploaded to the server and will display.
Add elements to your document, and drag and drop items from the element menu.
Having a combination of Merge Fields and Elements means that some data will be dynamically pulled from Salesforce, as well as data that the end user provides.
03 Document Access
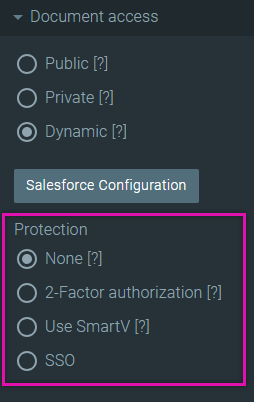
When creating a dynamic document, the document access must be set to dynamic because the document must be triggered from a record in Salesforce.
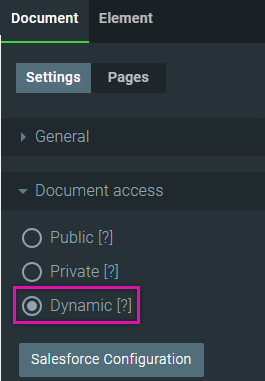
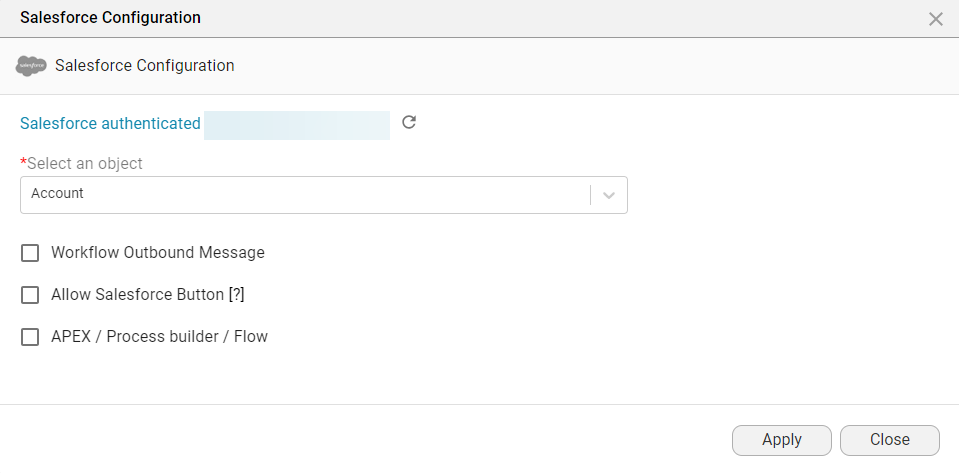
1. To configure the record in Salesforce, click the Salesforce Configuration button. The Salesforce Configuration screen opens.
2. Use the dropdowns to select the object in Salesforce, such as the Account. This will be the trigger from Salesforce, such as a button or a flow, that will generate this document. Once your configuration is complete, click Apply.
There are several options for protection:
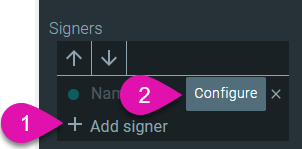
3. To configure a signer, click Add Signer and select Configure. The Get from Salesforce Screen opens.
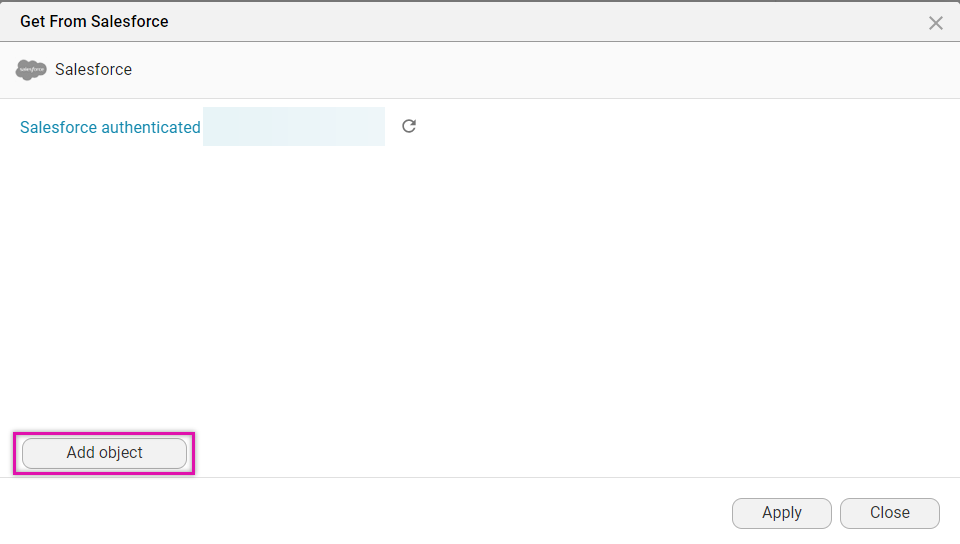
4. Click the Add Object button. The Map Salesforce screen opens.
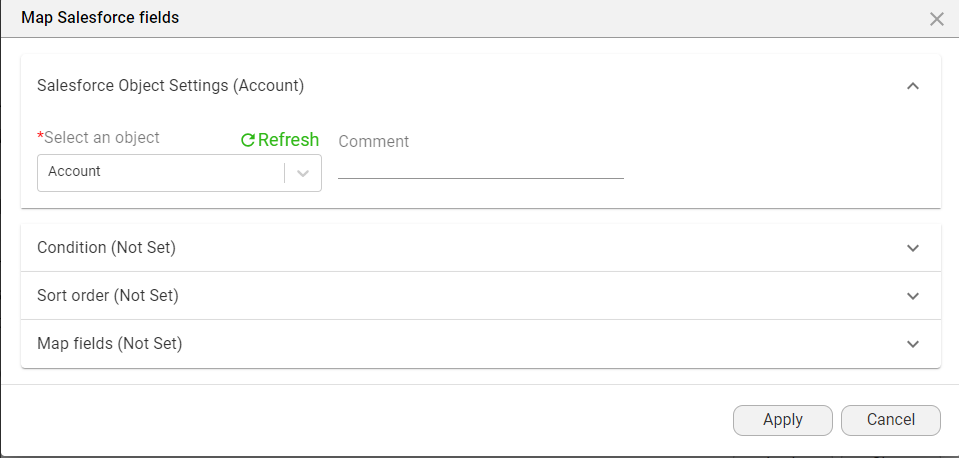
5. Use the dropdowns to configure the Object in Salesforce- for example, the Account.
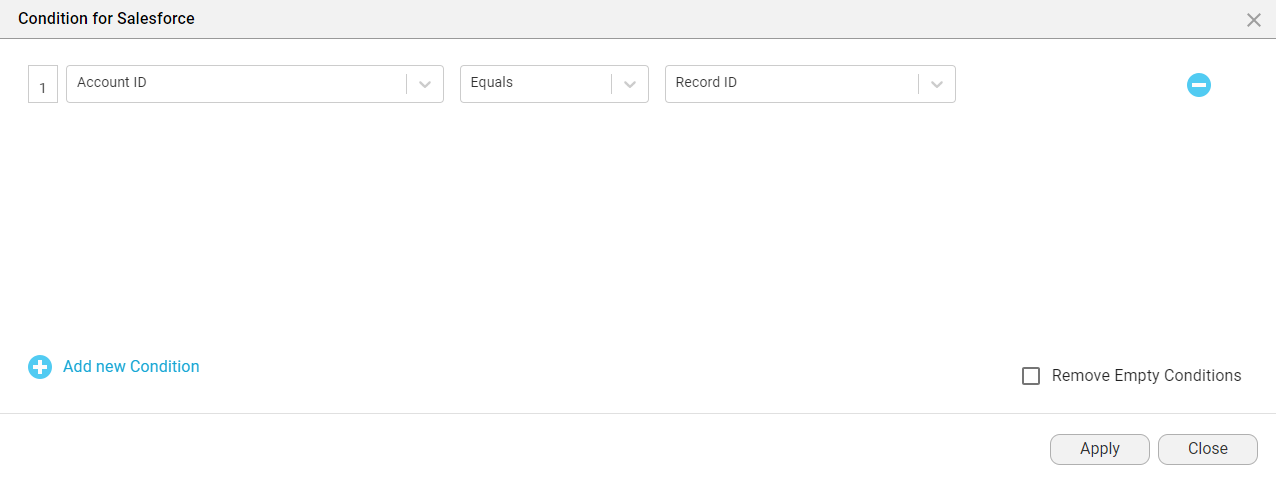
6. Click the conditions dropdown and select the Set Conditions button. Use the dropdowns to set your condition criteria. For example, the Account ID must Equal the Record ID from which the document is triggered.
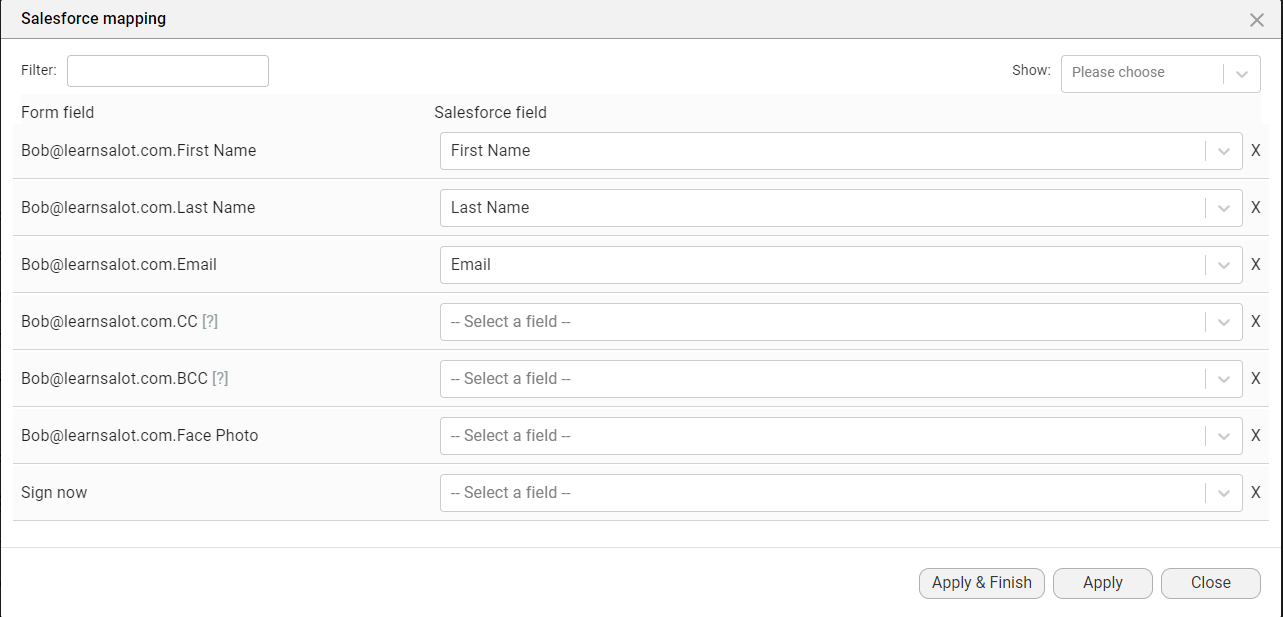
7. Click the Map Fields dropdown and select the Set Mapping button. Use the dropdowns to link your form fields to Salesforce fields. For example, the first name in the form is the first name in Salesforce.
If you use a template containing dynamic Salesforce data, the document's structure can change depending on the Salesforce data.
1. To configure the record in Salesforce, click the Salesforce Configuration button. The Salesforce Configuration screen opens.
2. Use the dropdowns to select the object in Salesforce, such as the Account. This will be the trigger from Salesforce, such as a button or a flow, that will generate this document. Once your configuration is complete, click Apply.
There are several options for protection:
- 2 Factor Authentication: This sends a code via email to authenticate login details.
- Use Smart V: Smart validation adds a double verification to your documents. You can add a one-time password or two-factor authentication (2FA).
- SSO (Single Sign On) allows users to securely access multiple applications or systems using a single set of login credentials.
- These options will be covered in detail in the advanced course.
3. To configure a signer, click Add Signer and select Configure. The Get from Salesforce Screen opens.
4. Click the Add Object button. The Map Salesforce screen opens.
5. Use the dropdowns to configure the Object in Salesforce- for example, the Account.
6. Click the conditions dropdown and select the Set Conditions button. Use the dropdowns to set your condition criteria. For example, the Account ID must Equal the Record ID from which the document is triggered.
7. Click the Map Fields dropdown and select the Set Mapping button. Use the dropdowns to link your form fields to Salesforce fields. For example, the first name in the form is the first name in Salesforce.
If you use a template containing dynamic Salesforce data, the document's structure can change depending on the Salesforce data.