Modal (6 min)
01 Getting Started
02 Modals
Modals are content windows that overlay the main content. The main content will be disabled while the Modal is displayed.
To insert a Modal:
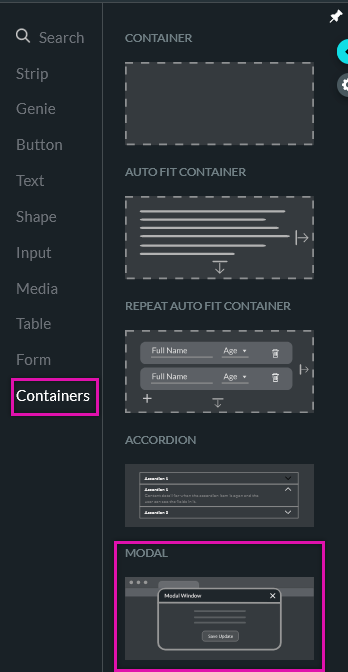
1. Navigate to the elements menu and select the Containers tab.
2. Drag-and-drop the Modal container onto the canvas.
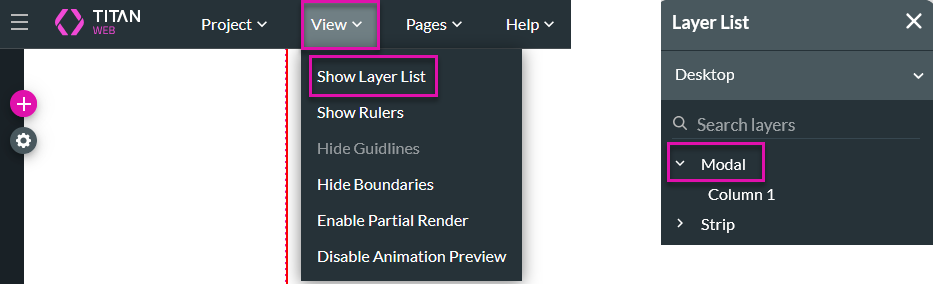
We recommend displaying your layer list to navigate to your Modals quickly.
1. Click the View tab in the top menu ribbon.
2. Select Show Layer List.
Your Modal will be displayed in the layer list. You can show and hide your Modal when working on your project using the layer list.
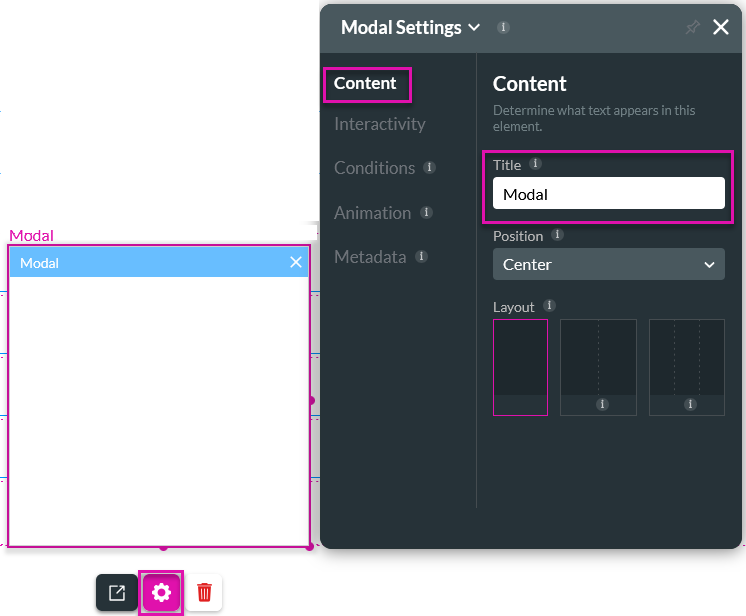
To change the name of your Modal:
1. Select the Modal and click the gear icon. The Settings Menu opens.
2. In the Content tab, input your Modal name in the Title field.
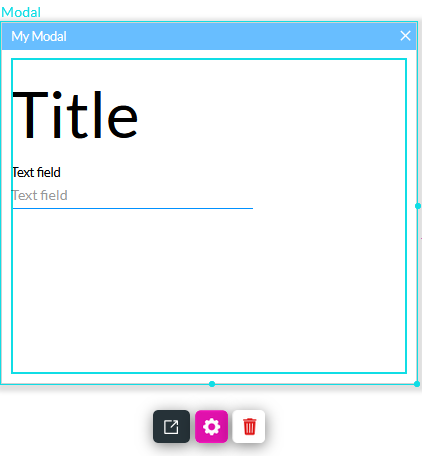
The Modal comes with an automatic autofit container to organize your content. This container automatically aligns elements added to the Modal. You can add any element to your Modal using the element menu.
03 Show and Hide Modals
You can configure whether your modal shows or hides using an interactive element. We have used buttons to demonstrate this.
1. Click the Interactivity icon in the button menu.
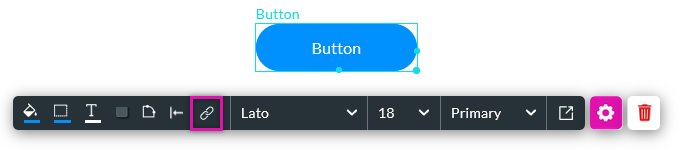
The On Click Action window opens.
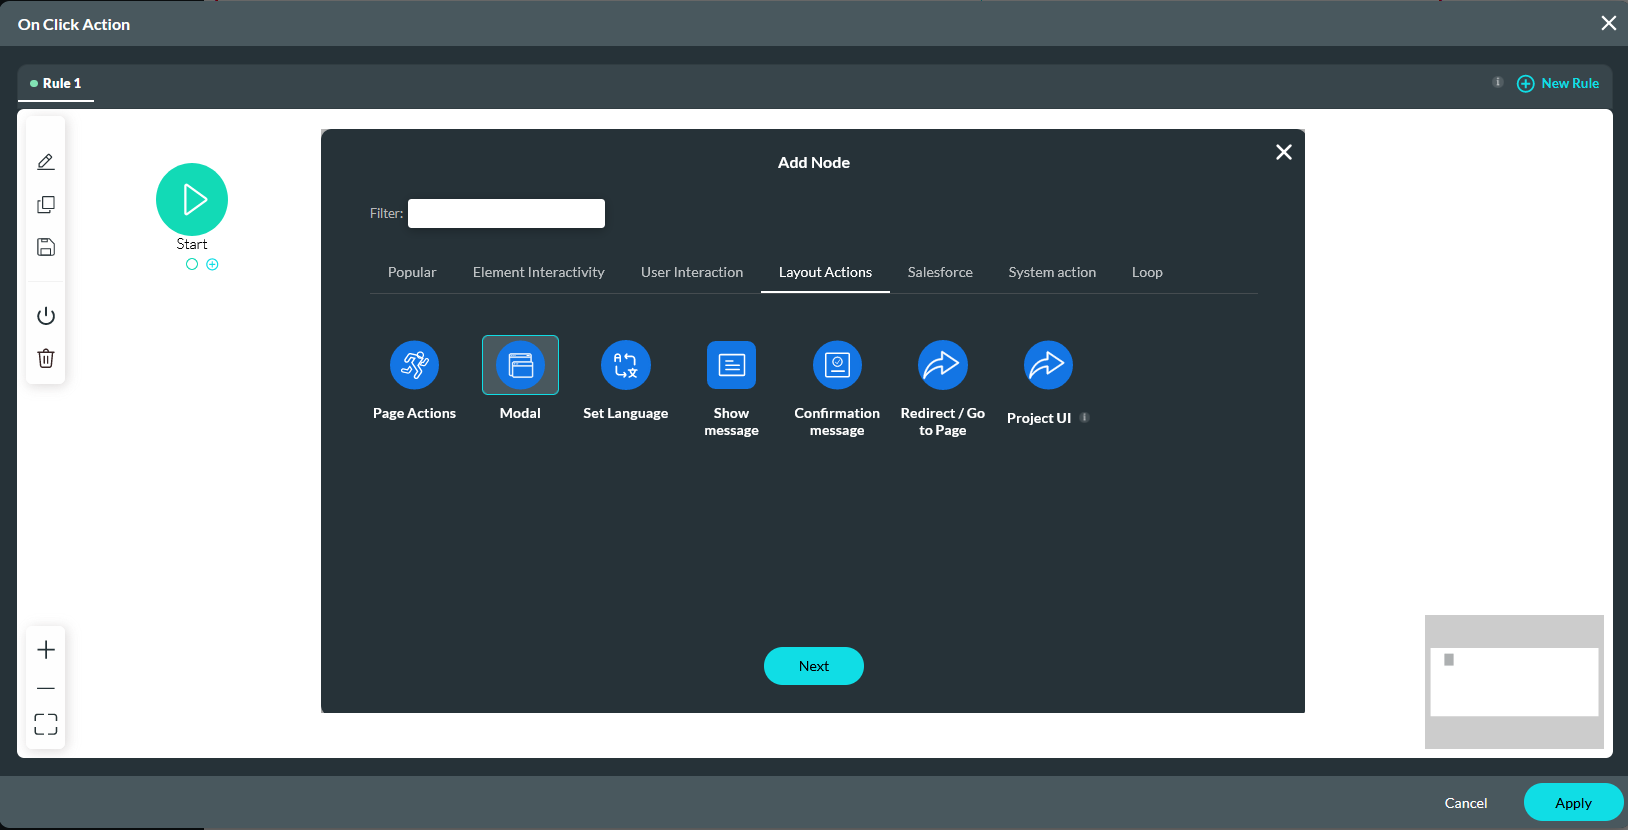
2. Select the Start + icon, choose Modal as the node, and click Next.
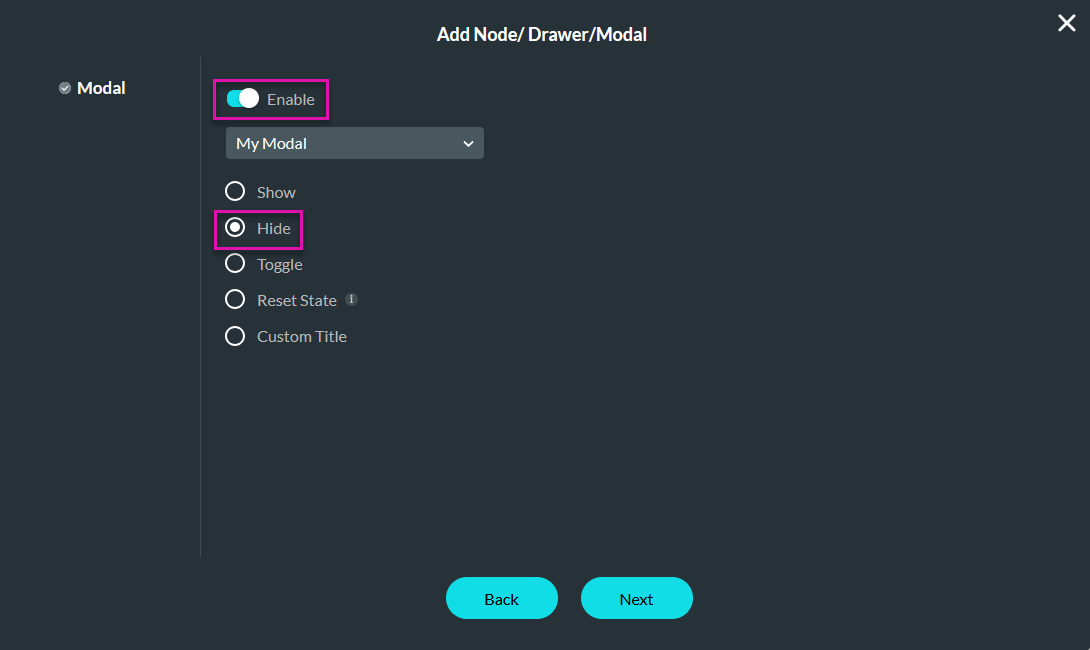
3. Turn the Enable toggle switch on.
4. Choose your Modal using the dropdown.
5. Select Hide or any action you want to affect the modal when the user clicks the button. Click Next.
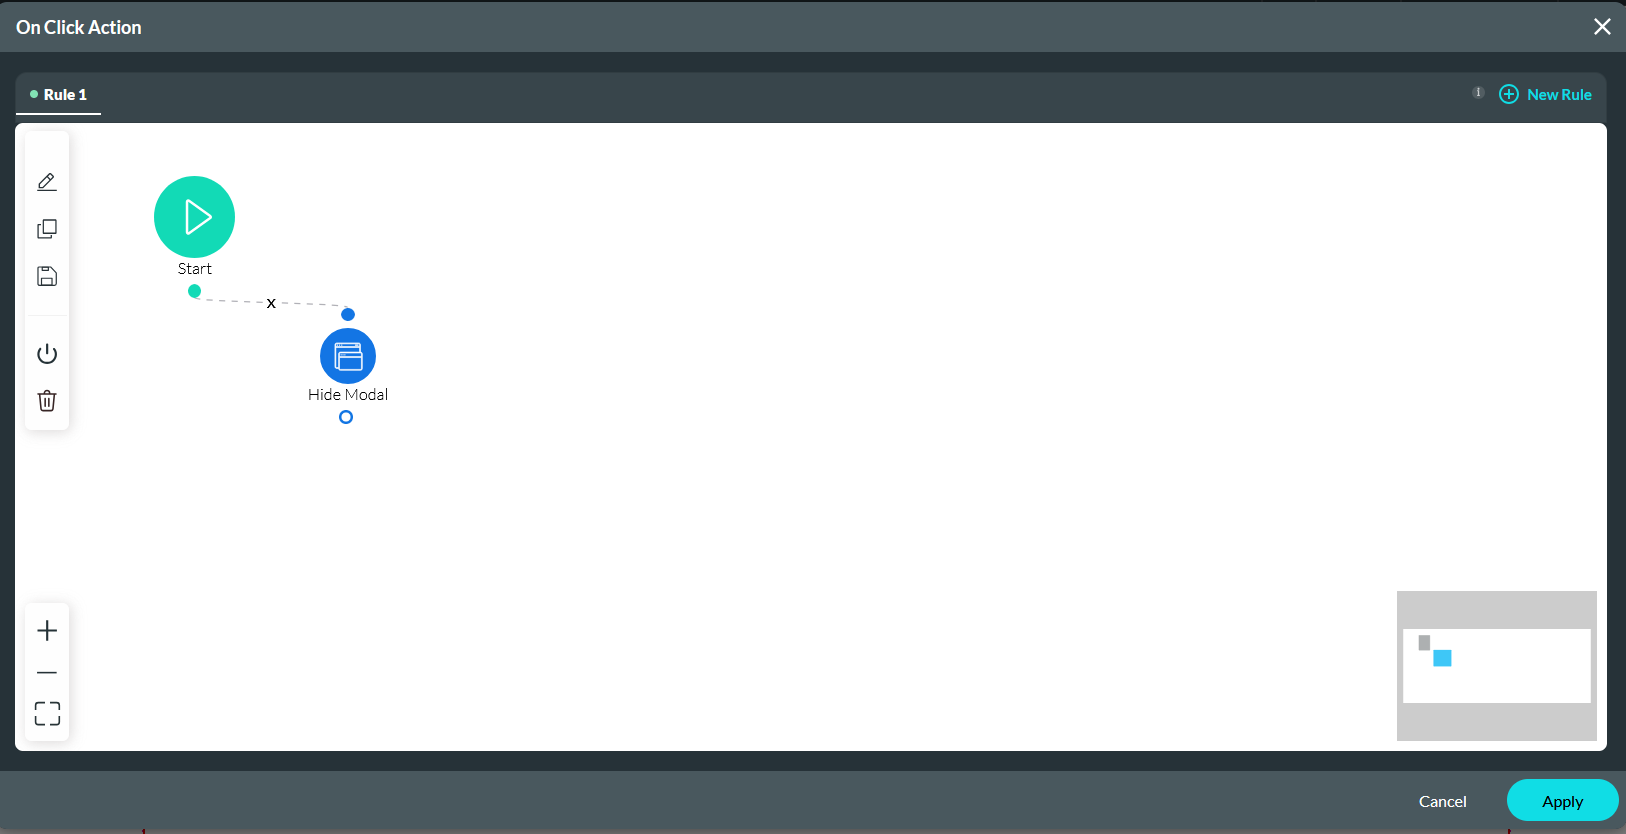
6. Enter a Tag Name. Click Insert and Apply.
You must insert an interactive element into your main project to display the modal.
1. Click the Interactivity icon in the button menu.

The On Click Action window opens.
2. Select the Start + icon, choose Modal as the node, and click Next.
3. Turn the Enable toggle switch on.
4. Choose your Modal using the dropdown.
5. Select Show or any action you want to affect the modal when the user clicks the button. Click Next.
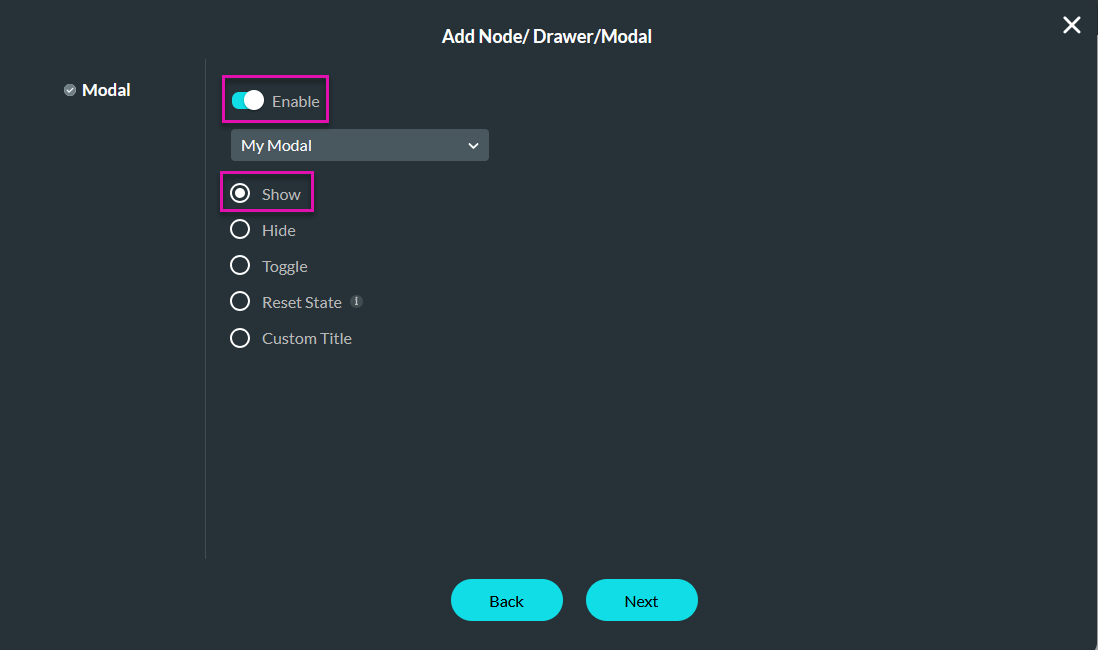
6. Enter a Tag name. Click Insert and Apply. 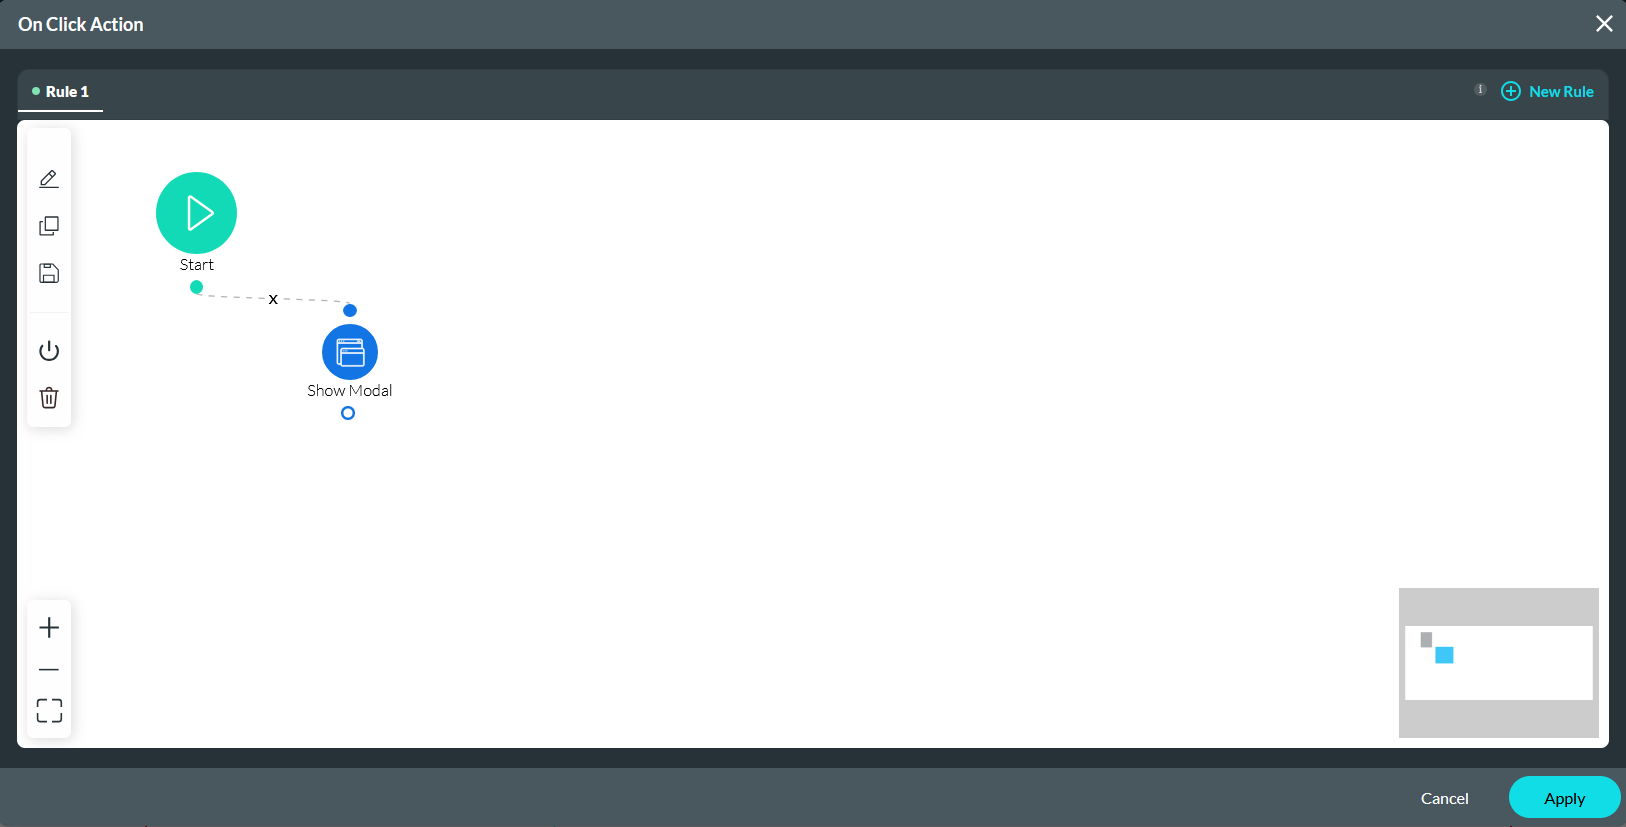
When the user clicks the project button, the modal is displayed. To hide it, the user clicks the button inside the modal.