Set Variable (6 min)
Completion requirements
01 Getting Started
This tutorial covers how to use the set variables node in Titan Flow. This node allows you to change the value of the variables in your flow.
02 Setup
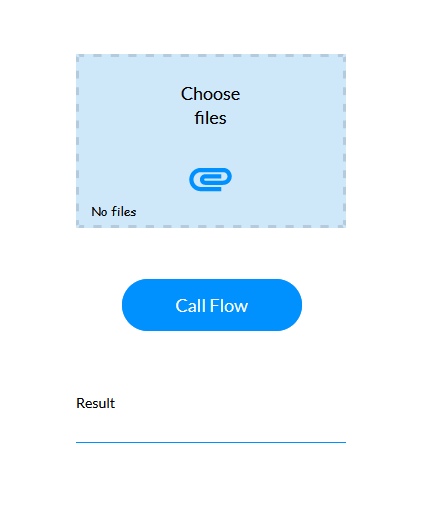
A web project was created with a file upload element, a button element, and a text input field. The project will operate as follows: a file will be uploaded, the flow will be triggered to scan the file for viruses, and the scan results will be displayed in the text input field.

03 Set Variables
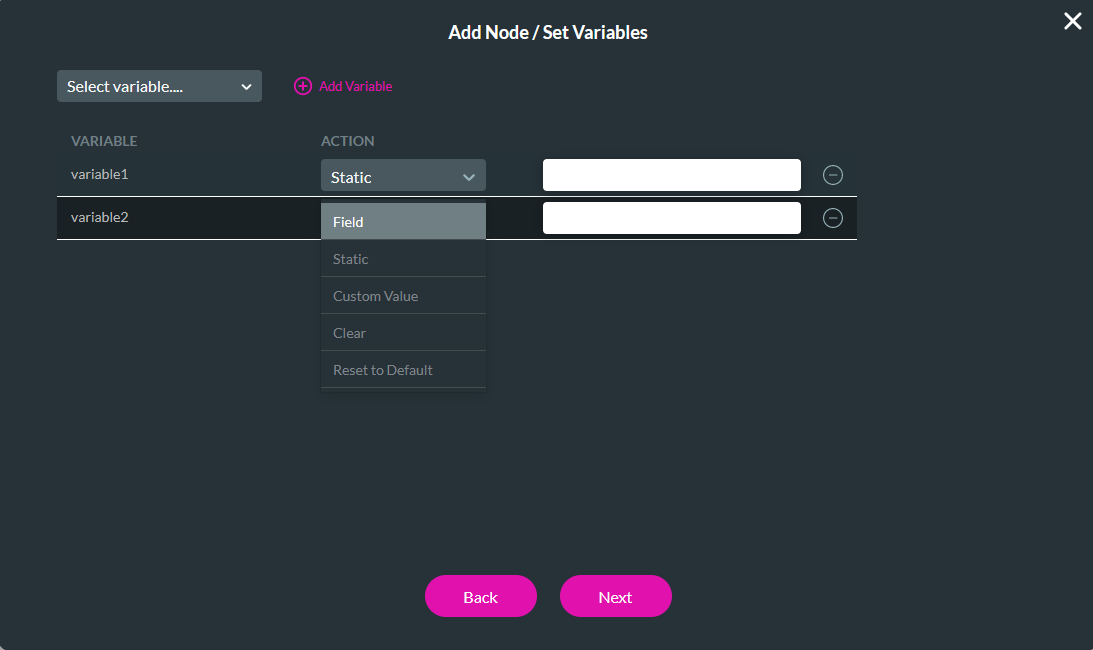
Before we get started, here is a brief overview of how the Set Variables node works. You will need to create project variables that will be affected.
1. Use the Select Variable dropdown to select the variable.
2. Expand the Action dropdown to select the action to run on your variable.
1. Use the Select Variable dropdown to select the variable.
2. Expand the Action dropdown to select the action to run on your variable.

04 Variables
Navigate to your Titan Flow project.
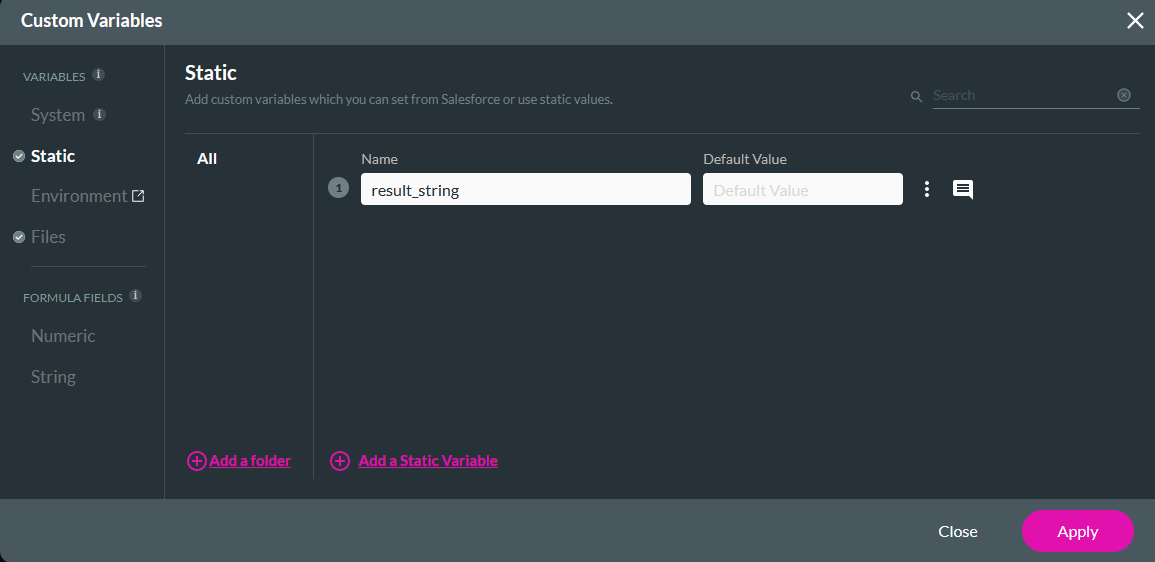
Create the following Variables:
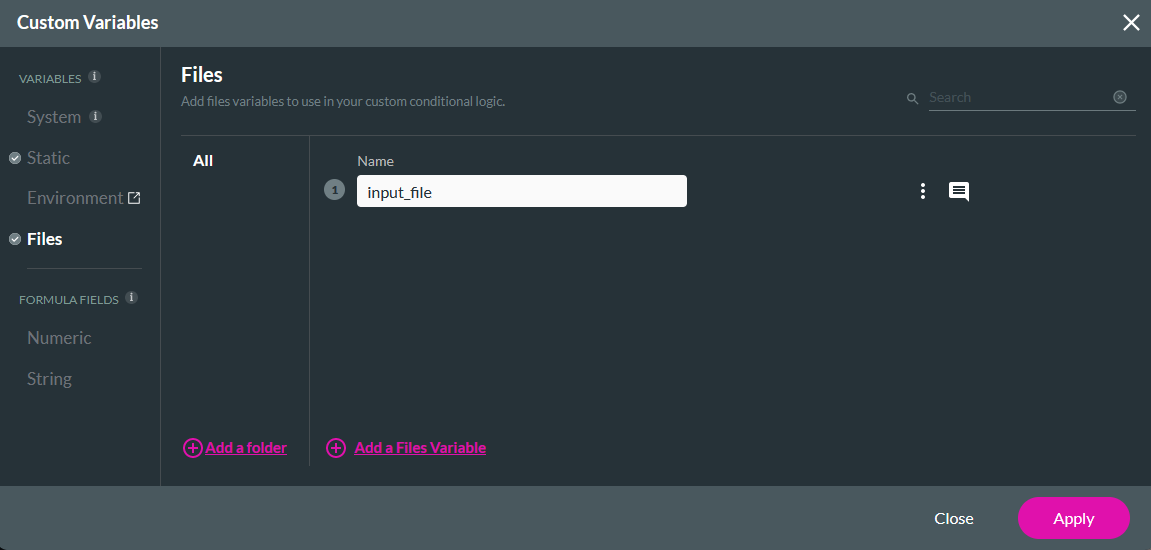
Create the following Variables:
- Static: result_string

- Files: input_file

05 Virus Scan
1. Select the Any + icon, choose Condition as the node, and click Next.
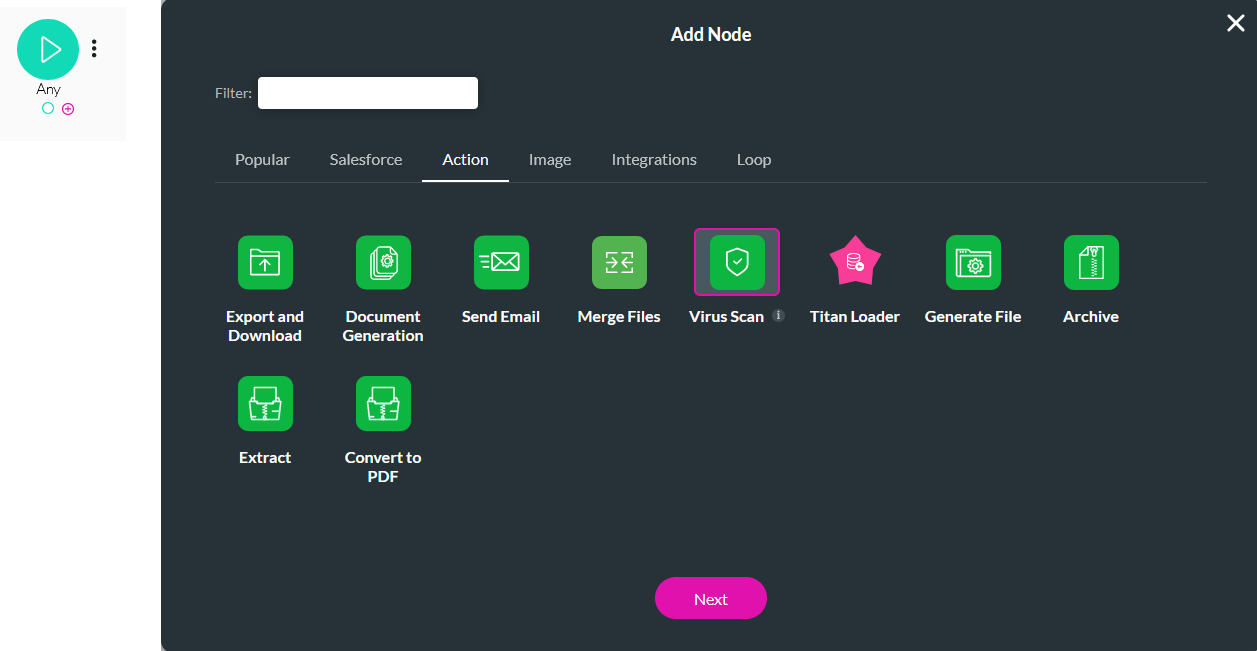
2. Select input_variable and click Next.

3. Enter a Tag name and click Insert.

2. Select input_variable and click Next.

3. Enter a Tag name and click Insert.
06 On Success and On Fail
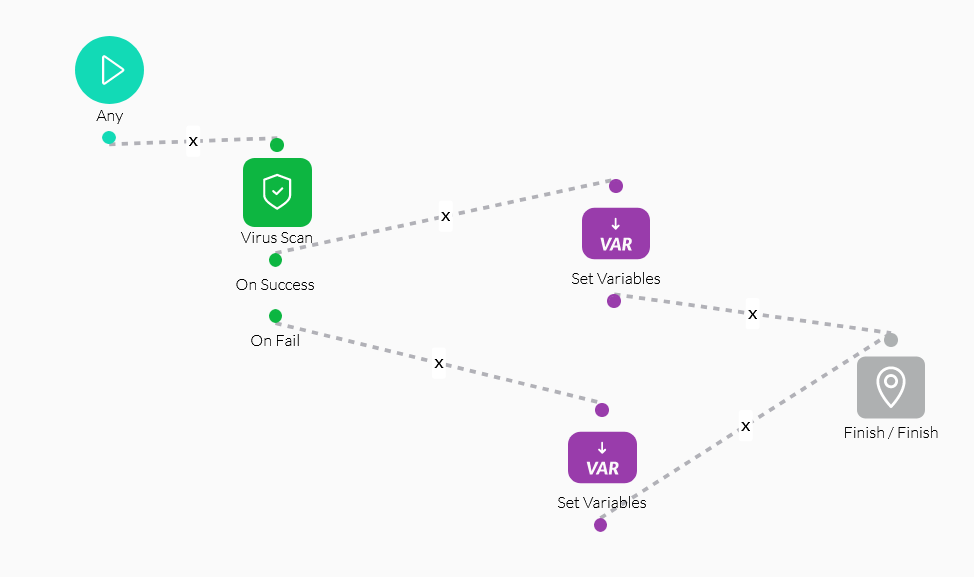
1. Select the On Success + icon, choose Set Variables as the node, and click Next.
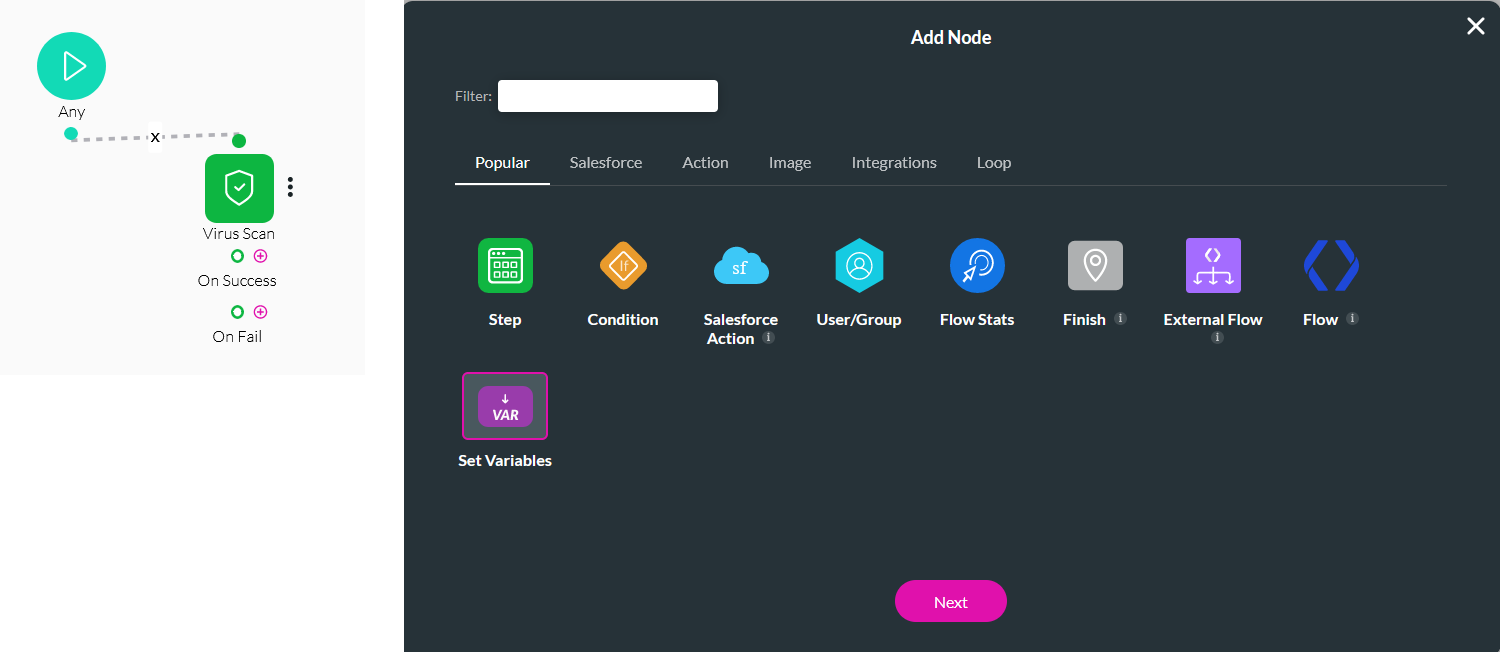
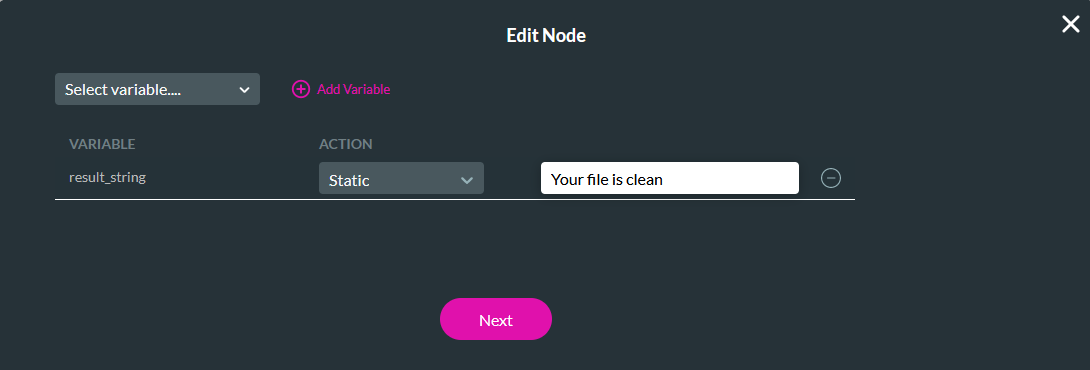
2. Choose the result_string variable using the dropdown, set the action as Static, and add the message “Your file is clean”. Click Next.
3. Enter a Tag name and click Insert.
Repeat the same steps for the On Fail node; however, when configuring the node, change the message to “Your file is infected!”
A Finish flow was configured to pass the result to the Web project. Save and publish the flow.

2. Choose the result_string variable using the dropdown, set the action as Static, and add the message “Your file is clean”. Click Next.

3. Enter a Tag name and click Insert.
Repeat the same steps for the On Fail node; however, when configuring the node, change the message to “Your file is infected!”

A Finish flow was configured to pass the result to the Web project. Save and publish the flow.

07 Invoking the Flow
A web project was created with a file uploader element and a button. The button was configured to invoke the created Flow when clicked.
1. Select the button and click the Interactivity icon in the menu.

2. Select the Start + icon, choose Flow as the node, and click Next.
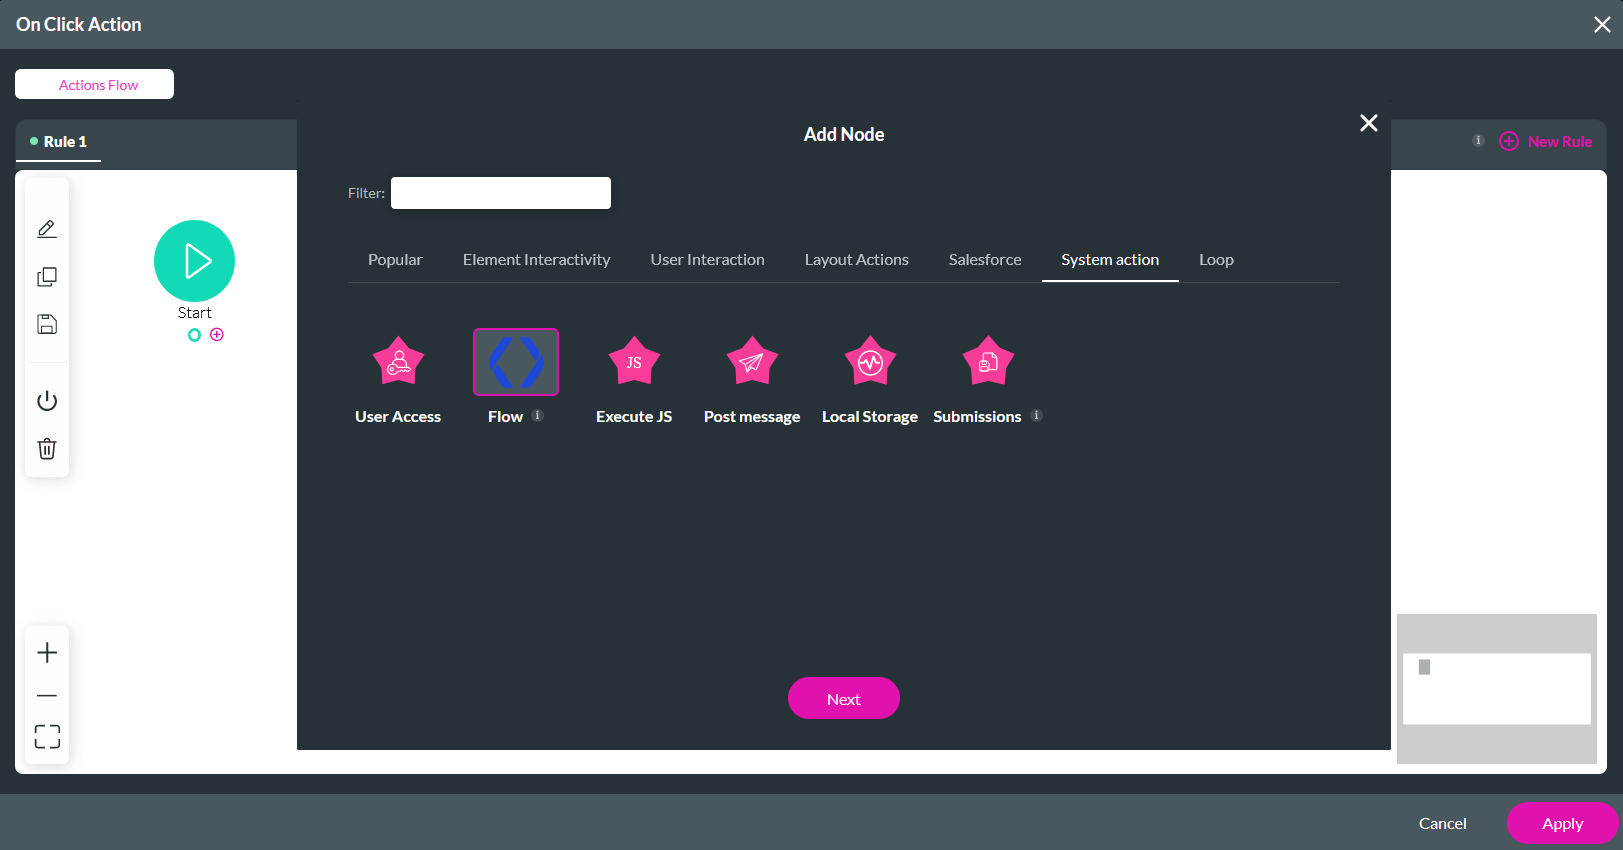
3. Use the dropdown to select your Flow, disable Run in the Background if you want your screen to freeze when the Flow is triggered, and add a custom message.
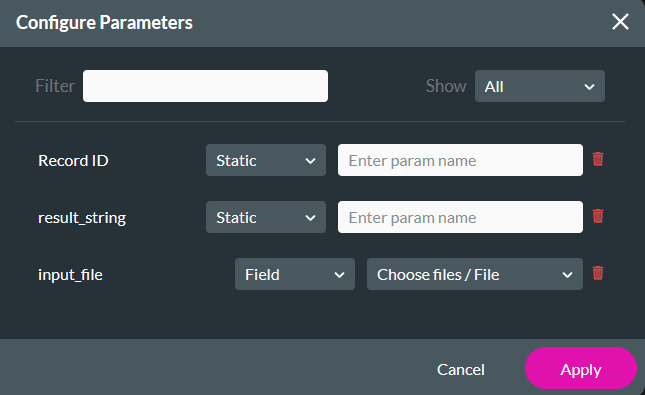
4. Configure the following in the Configure Parameters window and click Apply.
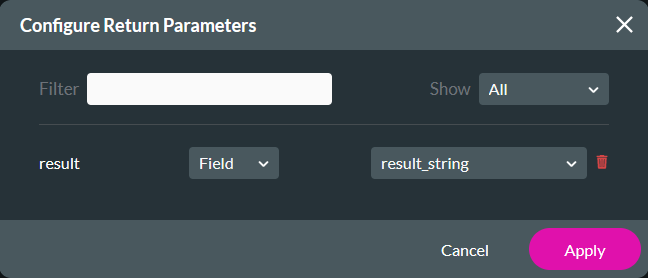
7. Configure the following in the Return Parameters window and click Apply.
1. Select the button and click the Interactivity icon in the menu.

2. Select the Start + icon, choose Flow as the node, and click Next.

3. Use the dropdown to select your Flow, disable Run in the Background if you want your screen to freeze when the Flow is triggered, and add a custom message.
4. Configure the following in the Configure Parameters window and click Apply.
- input_file - Field: Choose files / File
7. Configure the following in the Return Parameters window and click Apply.
- result - Field: result_string
8. Click Next, enter a Tag name, and select Insert.
08 Preview
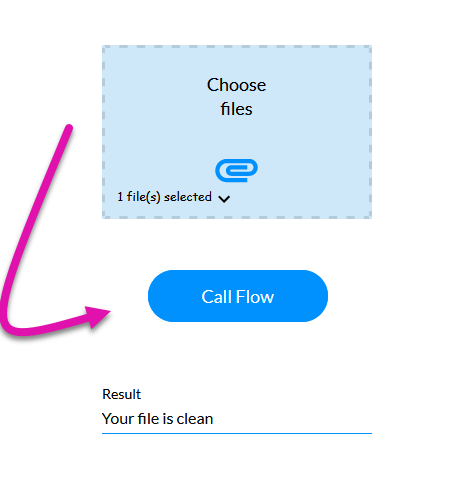
When a file is added to the file uploader and the flow is invoked, the result of the file scan is displayed in the text input field.
