Salesforce Actions (9 min)
01 Getting Started
This tutorial covers Salesforce Actions in Titan Flow.
For demonstration purposes, a ContactID will be received as the flow input, an image associated with that contact will be found, the image will then be compressed and reuploaded to the same contact, and finally, the original image will be deleted.
02 Variables
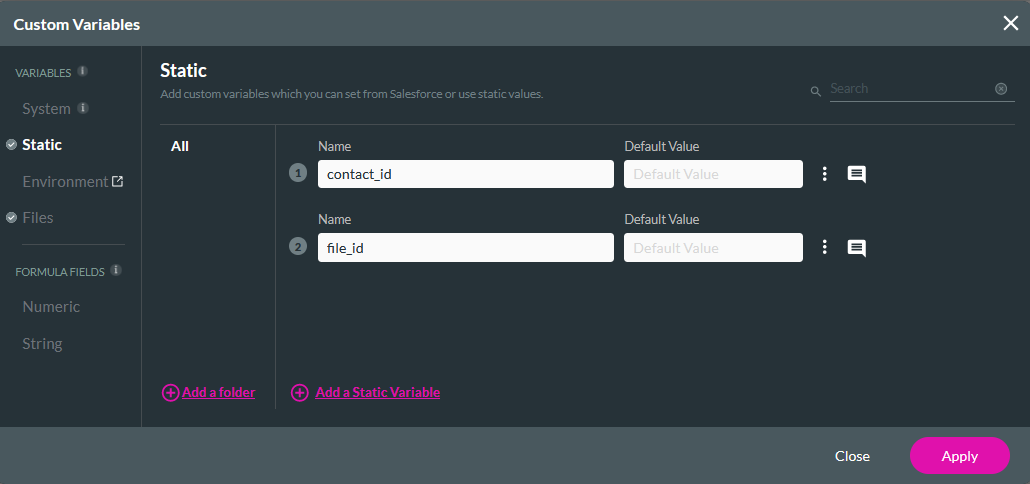
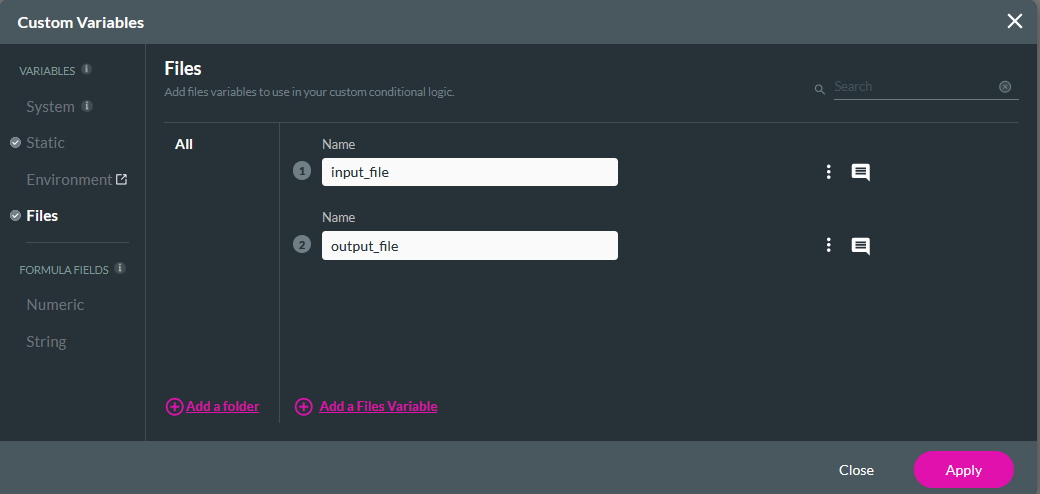
Create the following Variables:
- Static: contact_id and file_id
- Files: input_file and output_file
03 Salesforce Get Action
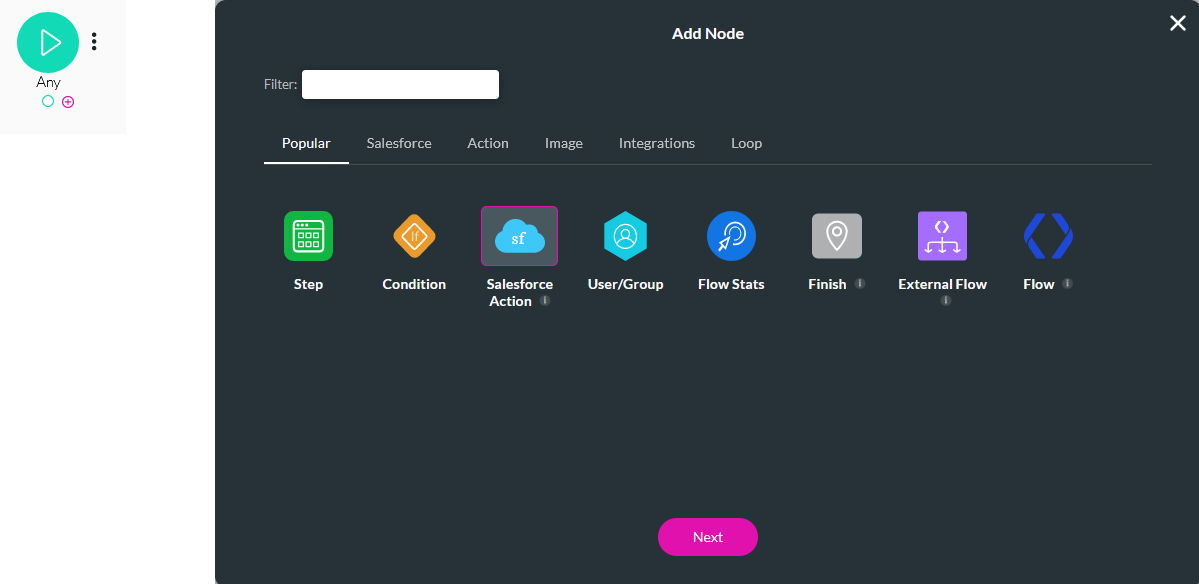
1. Select the Any + icon, choose Salesforce Action as the node, and click Next.
2. Click the Salesforce Integration button.
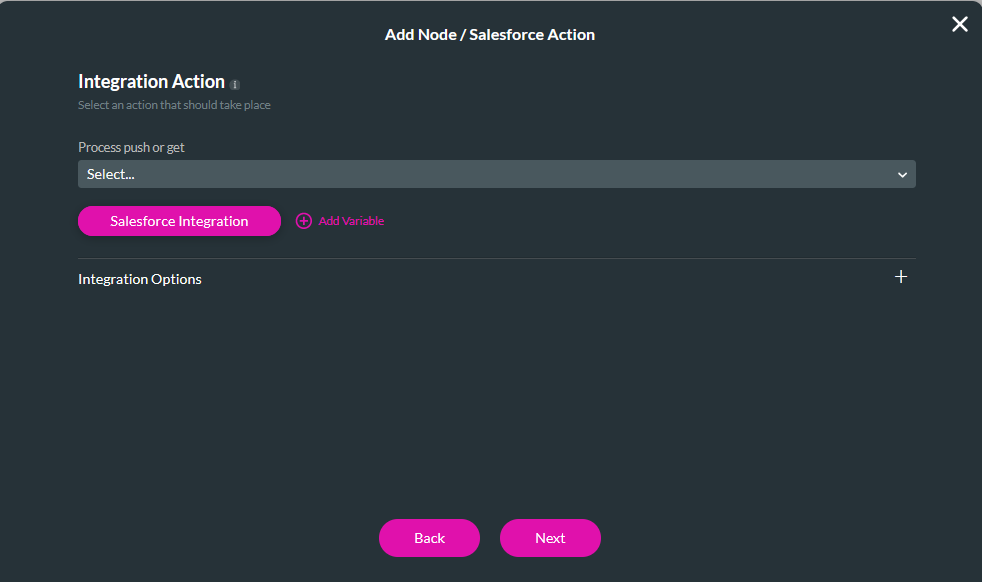
3. In the Get Records tab, click Create New.
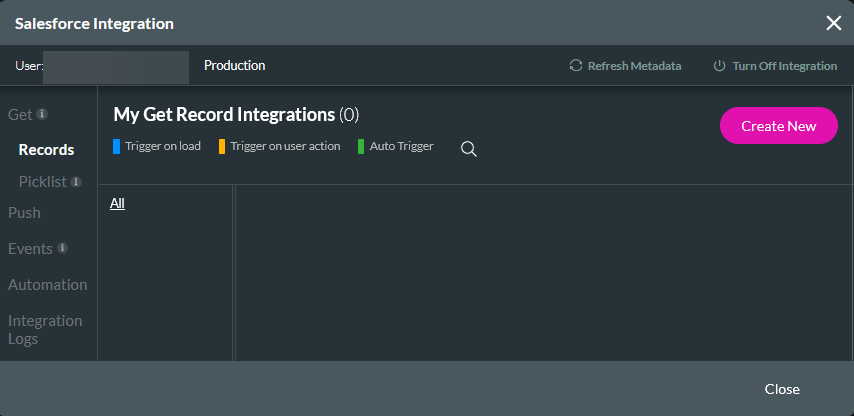
4. In the Object Settings tab, configure Content Version as the Salesforce Object and User Action as the Trigger, add a description, and choose how many records to pull.
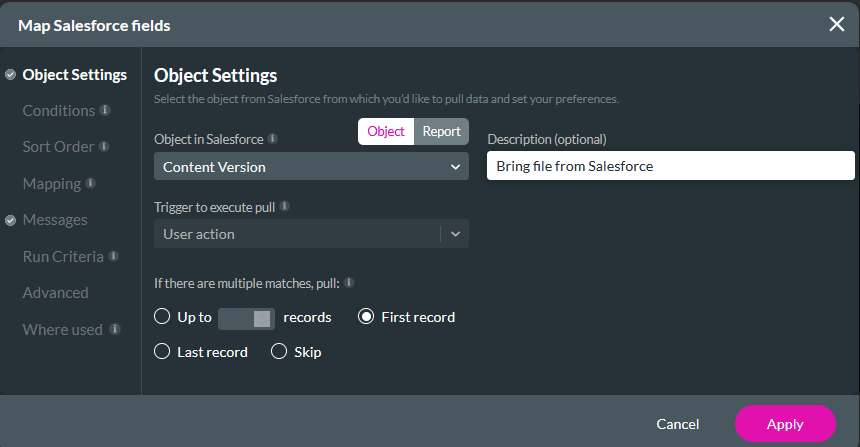
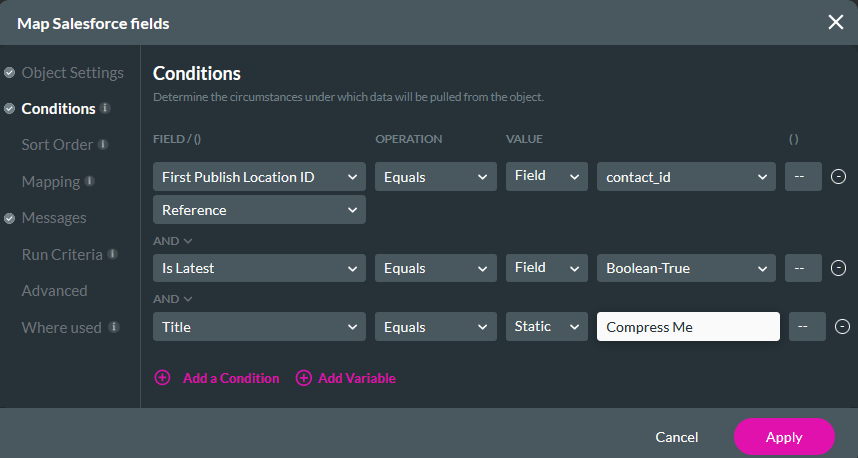
5. In the Conditions tab, the following three conditions were configured: the First Publish Location ID equals the contact_id variable, Is Latest equals True, and the Title contains a specific phrase - for example, Compress me.
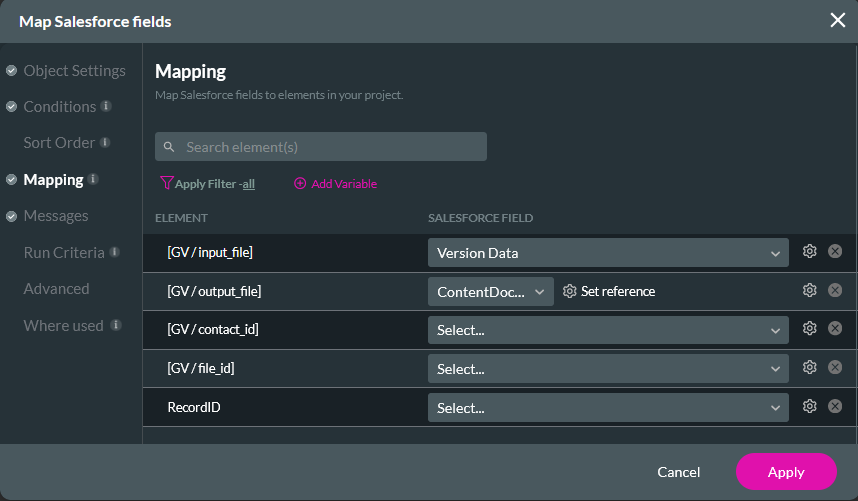
6. In the Mapping tab, map the input_file variable to Version Data, and the output_file variable to Content Document. Click Apply and close the Salesforce Integration window.
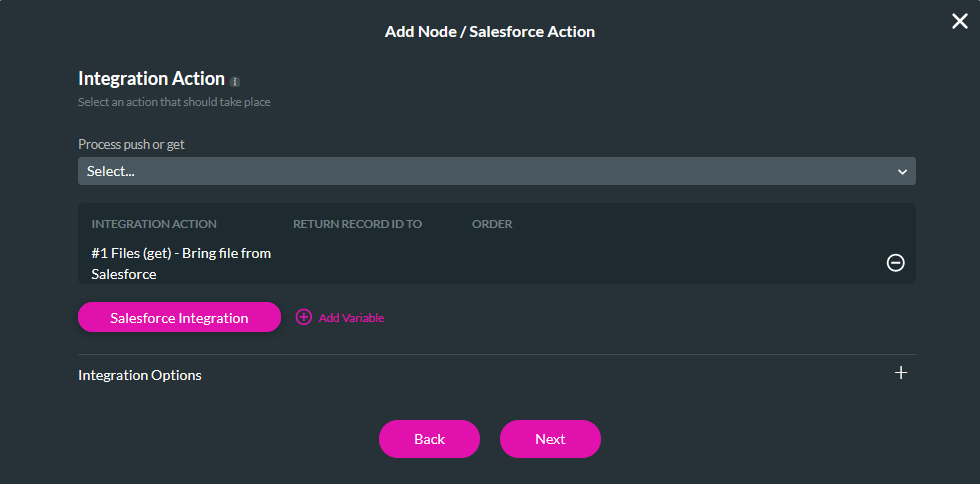
7. Use the dropdown to select the created Get Record action and click Next.
8. Enter a Tag and click Insert.
04 Image Compression
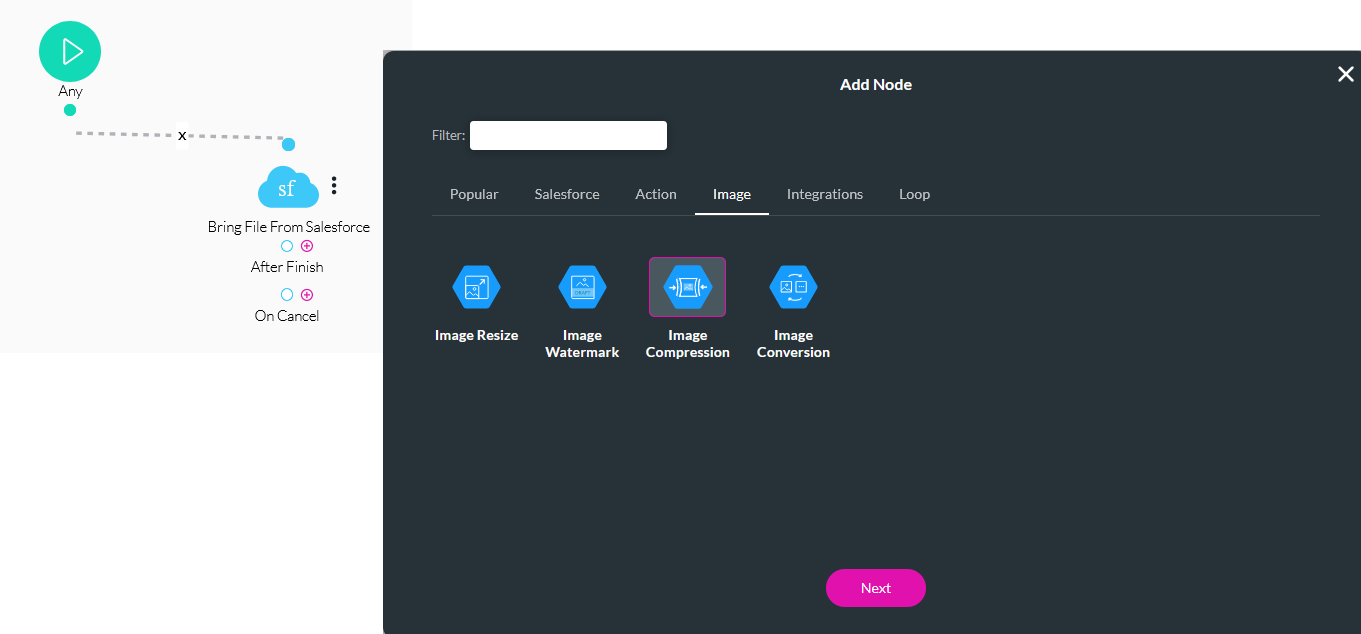
1. Select the After Finish + icon, choose Image Compression as the node, and click Next.
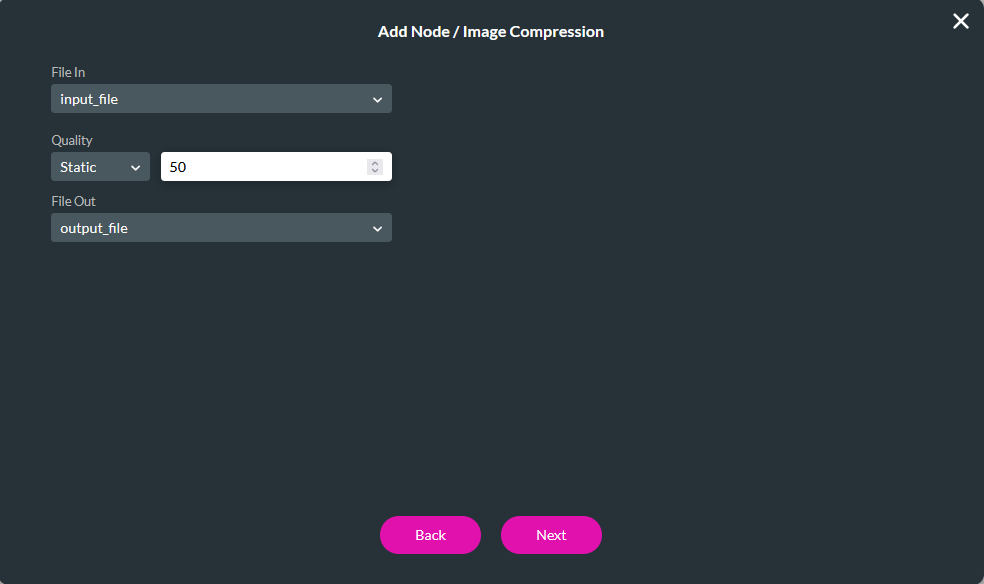
2. Configure the following and click Next.
- File In - input_file
- Quality - Static/50
- File Out - output_file
3. Enter a Tag and click Insert.
05 Salesforce Push Actions
1. Select the Image Compression + icon, choose Salesforce Action as the node, and click Next.
2. Click the Salesforce Integration button. Two new Salesforce push actions will be configured below.
For the first push, configure the following:
- Object Settings: Files are the Salesforce Object, Create is the Action, and a description is added.
- Mapping: Version Data—output_file and First Publish Location ID—contact_id. If necessary, you can choose to map a title.
For the second push, configure the following:
- Object Settings: Content Document is the Salesforce Object, Delete is the Action, and a description is added.
- Conditions: ContentDocumentID equals the file_id variable.
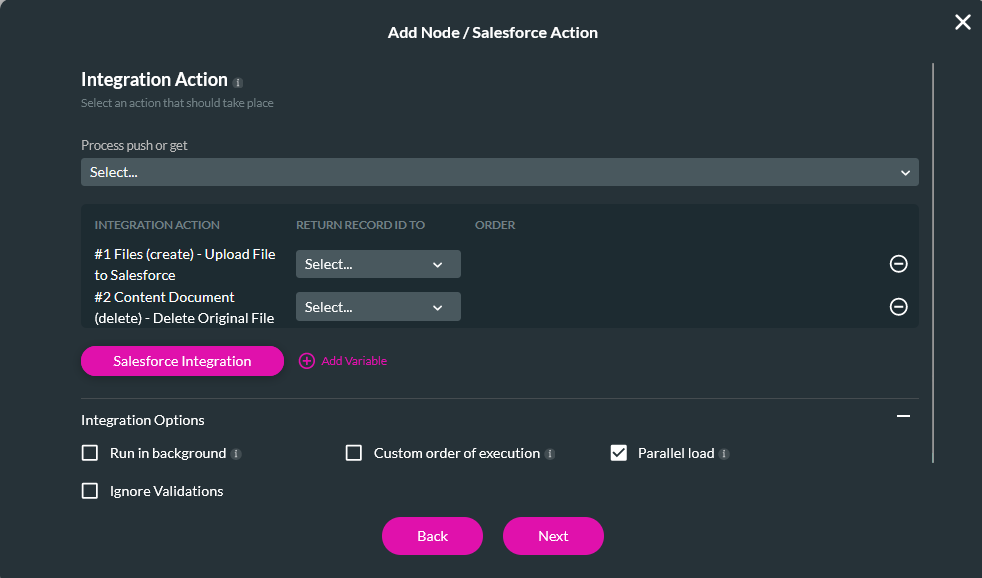
3. In the Integration Action window, use the dropdowns to select both push actions and enable Parallel Load. Click Next.
4. Add a Tag and click Insert.
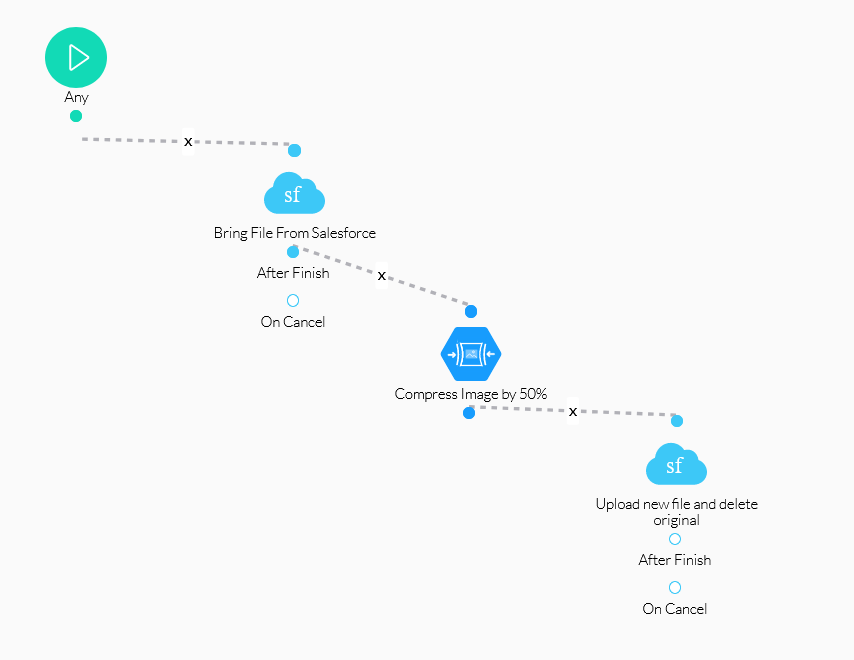
Your Flow should display as follows. Once the configuration is complete, save and publish the Flow.
06 Invoking the Flow
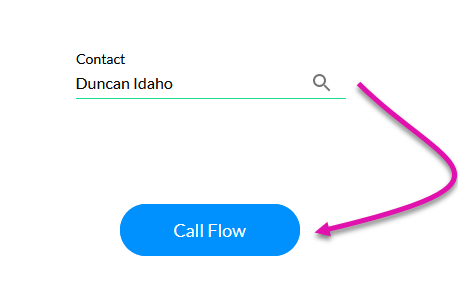
A web project was created with a Lookup field configured to search Contacts and a button. The button was configured to invoke the created Flow when clicked.
1. Select the button and click the Interactivity icon in the menu.
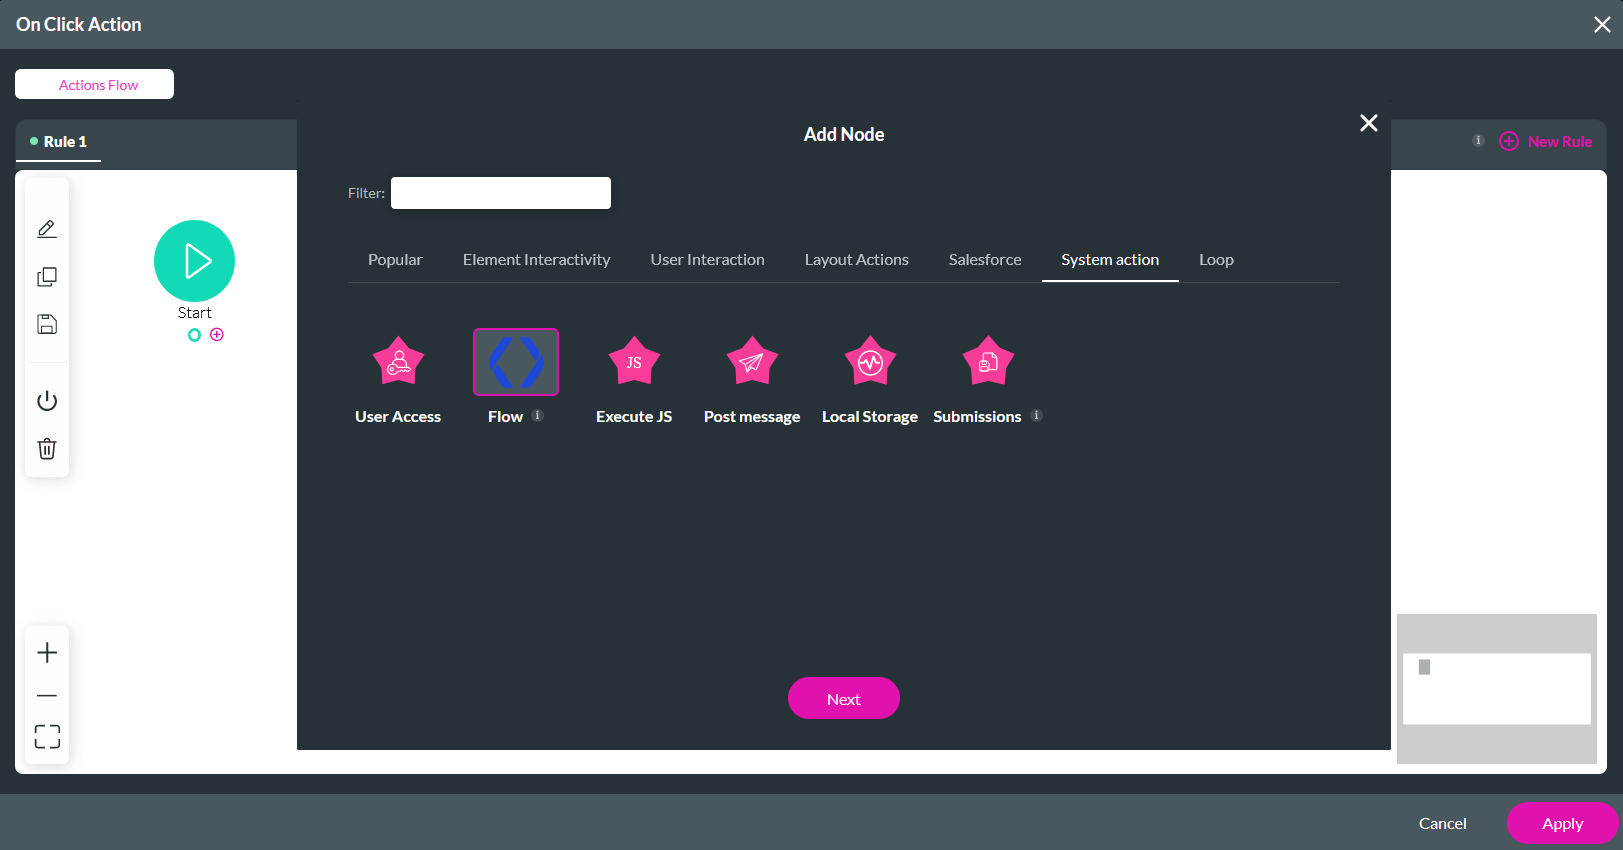
2. Select the Start + icon, choose Flow as the node, and click Next.
3.
Use the dropdown to select your Flow, disable Run in the Background if you want your screen to freeze when the Flow is
triggered, and add a custom message.
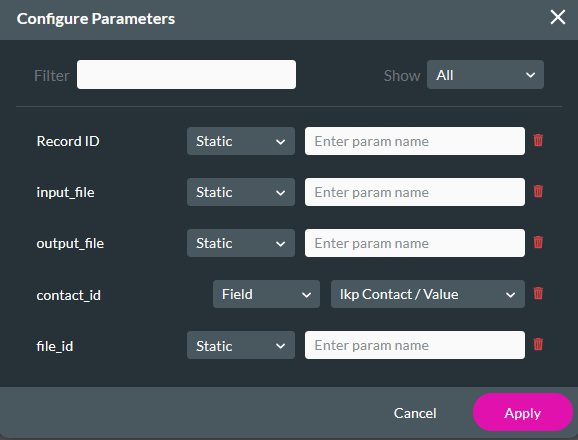
4. Click Configure Parameters.
- contact_id - field: Lookup Contact/Value
07 Preview
When a contact is looked up in Salesforce, a file meeting the set conditions will be compressed and reuploaded to Salesforce. The original file will also be deleted.
