Images (8 min)
01 Getting Started
This tutorial covers image actions in Titan Flow, including:
- Image resize
- Image watermark
- Image compression
- Image conversion
02 Setup
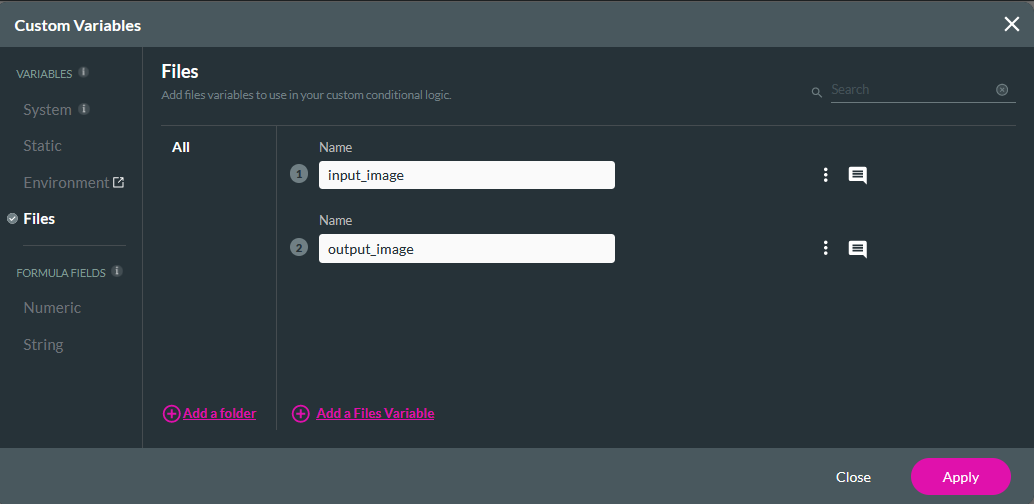
A simple project was created with two file variables: input_image and output_image.
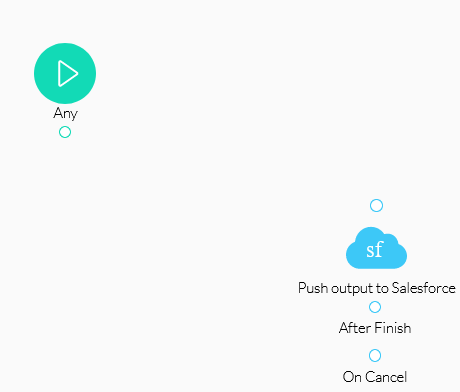
A Salesforce Action was configured to upload the processed image to Salesforce.
03 Image Resize
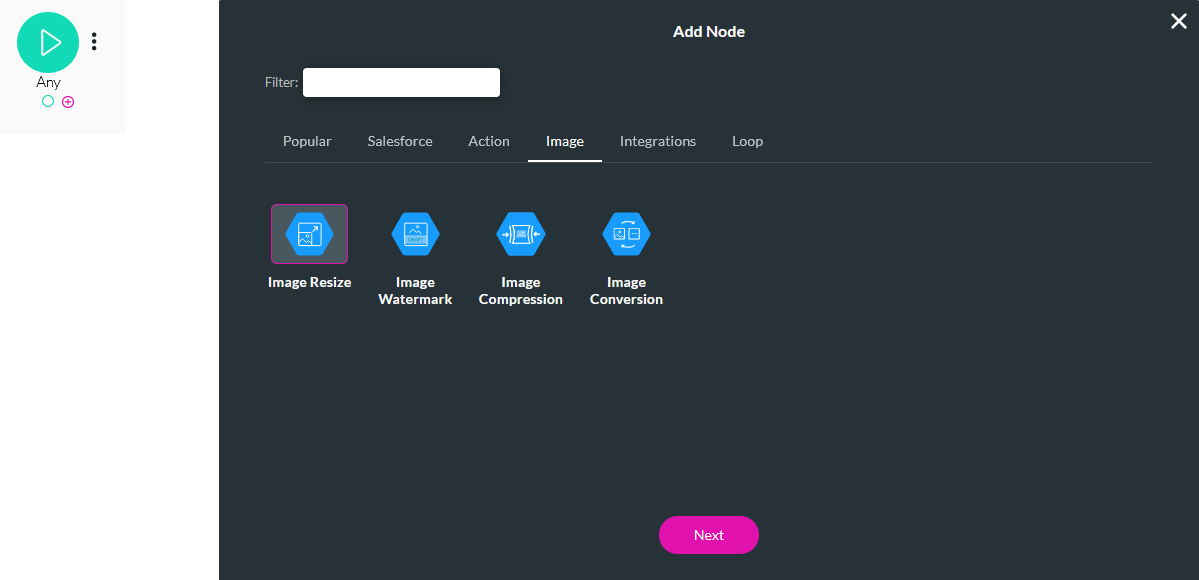
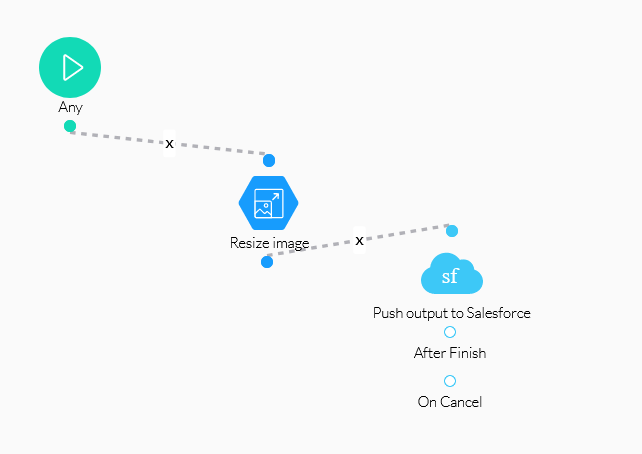
1. Select the Any + icon, choose Image Resize as the node, and click Next.
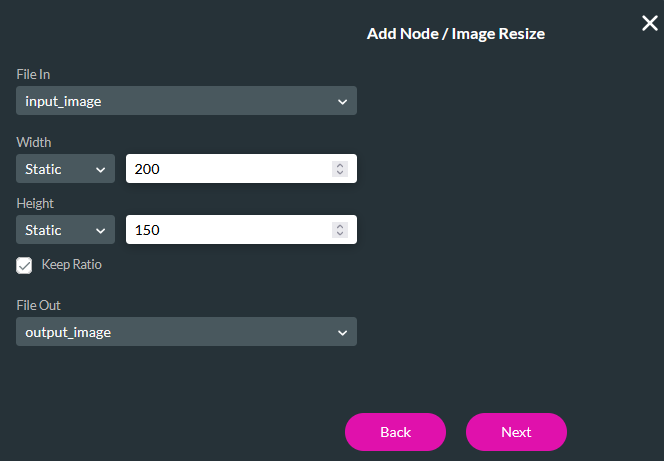
2. Configure the following and click Next.
- File In - input_image
- Width - Static/200
- Height - Static/150
- Keep Ratio - Enabled. This ensures the image will not become distorted when compressed.
- File Out - output_image
3. Enter a Tag name and click Insert.
You can link this node to the Salesforce Action. Ensure you save and publish your Flow.
04 Invoking the Flow
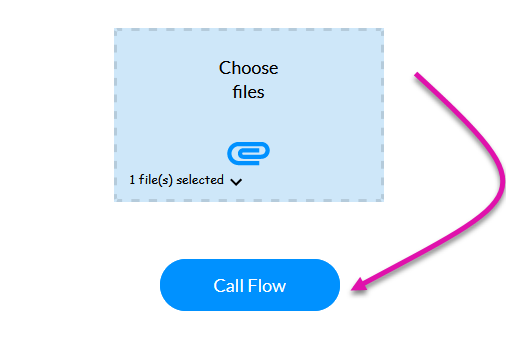
A web project was created with a file uploader element and a button. The button was configured to invoke the created Flow when clicked.
1. Select the button and click the Interactivity icon in the menu.
2. Select the Start + icon, choose Flow as the node, and click Next.
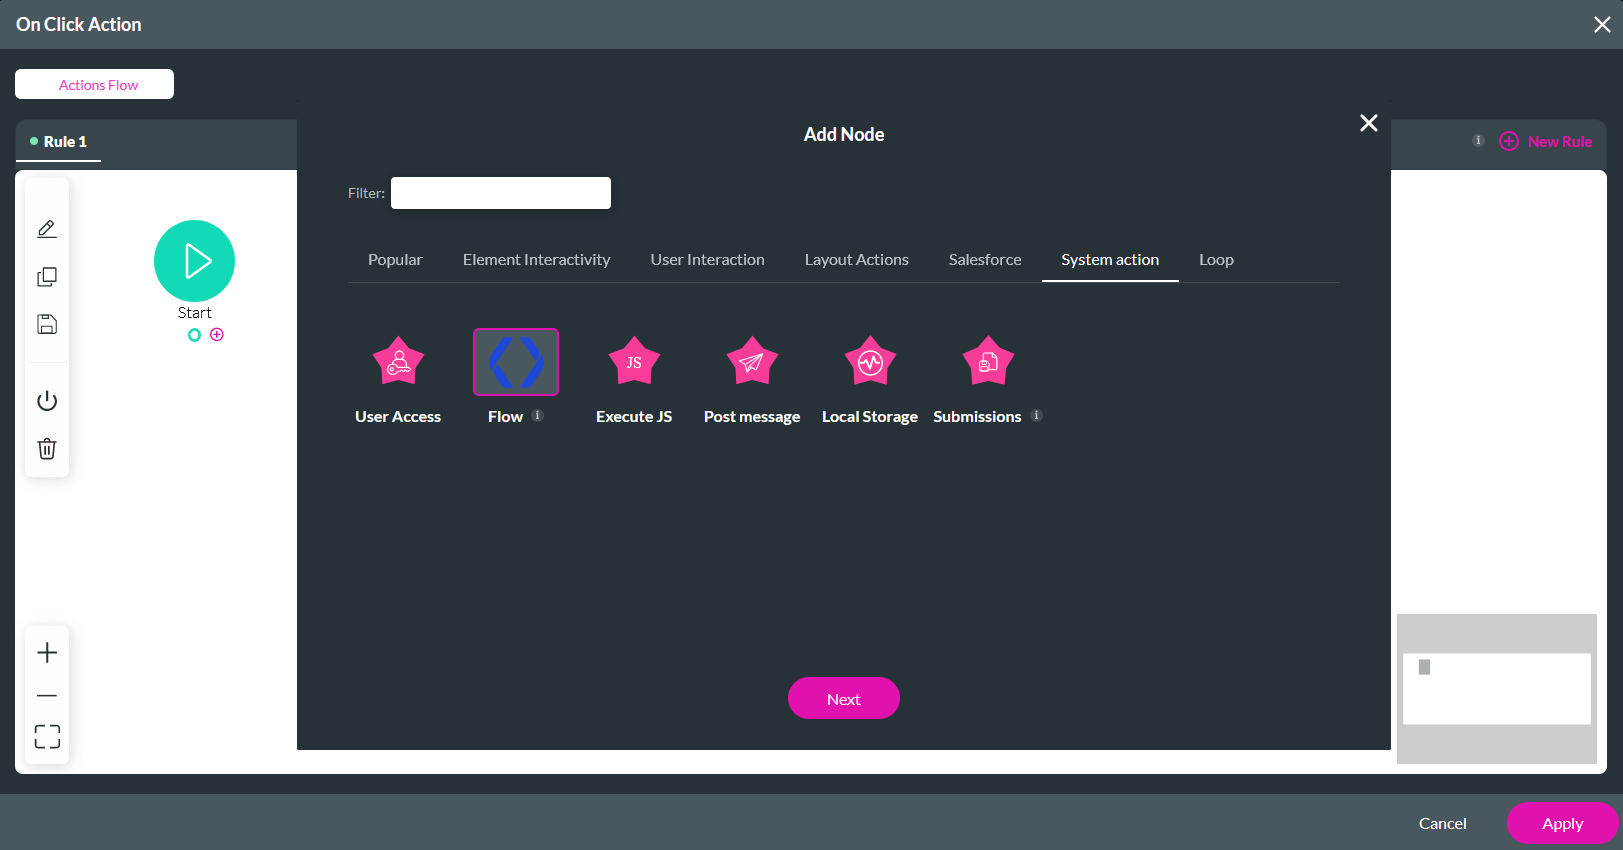
3.
Use the dropdown to select your Flow, disable Run in the Background if you want your screen to freeze when the Flow is
triggered, and add a custom message.
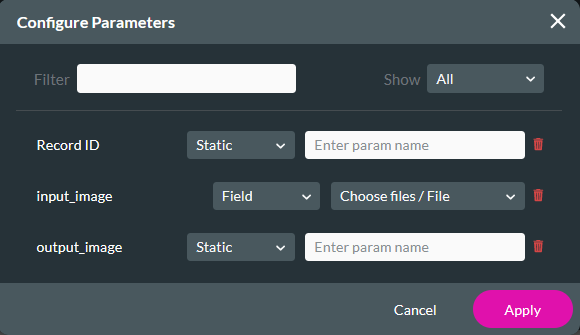
4. Click Configure Parameters.
- input_image - field: Choose files/File
05 Preview
When an image file is added to the project and the button is clicked, the flow is invoked to resize the image and upload it to Salesforce.
06 Image Watermark
Before completing the following steps, the existing image node was deleted.
1. Select the Any + icon, choose Image Watermark as the node, and click Next.
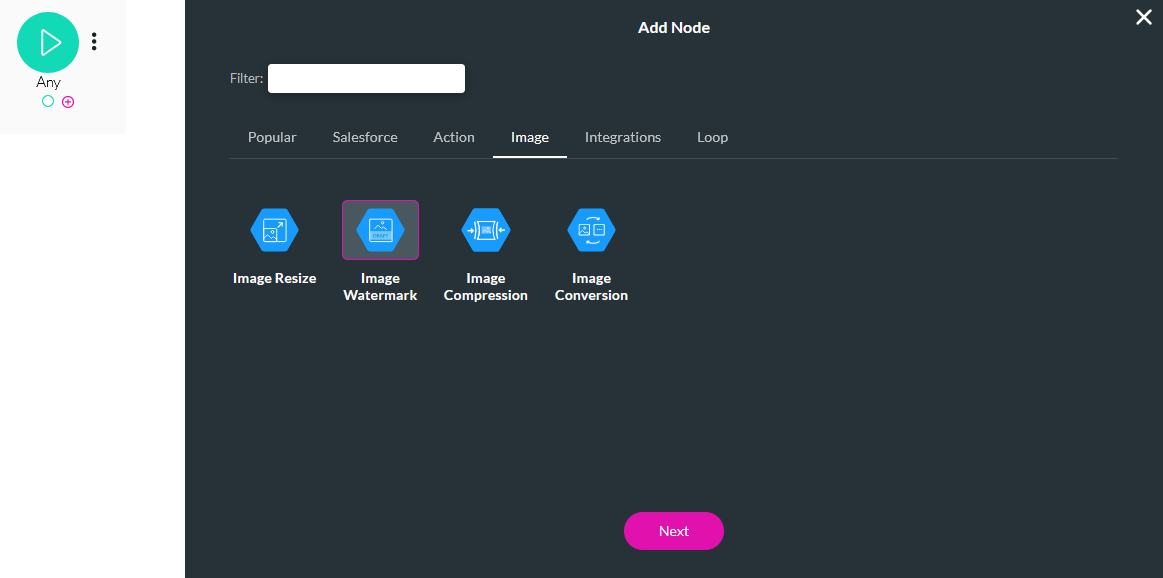
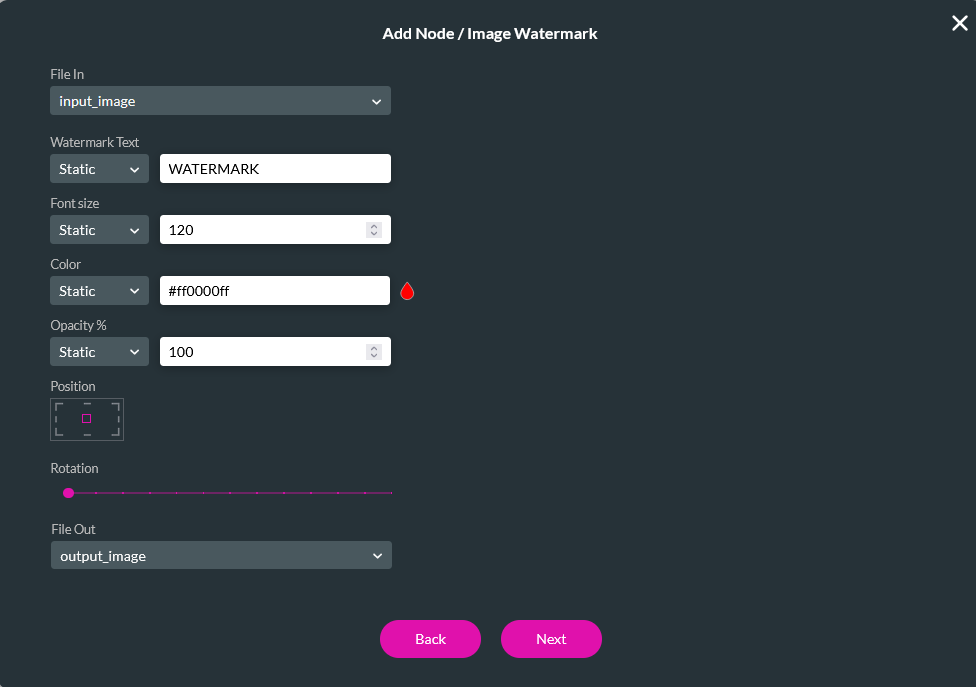
2. Configure the following and click Next.
- File In - input_image
- Watermark Text - WATERMARK
- Font Size - 120
- Color - Red Opacity% % - 100
- Position - Centre
- Rotation - None
- File Out - output_image
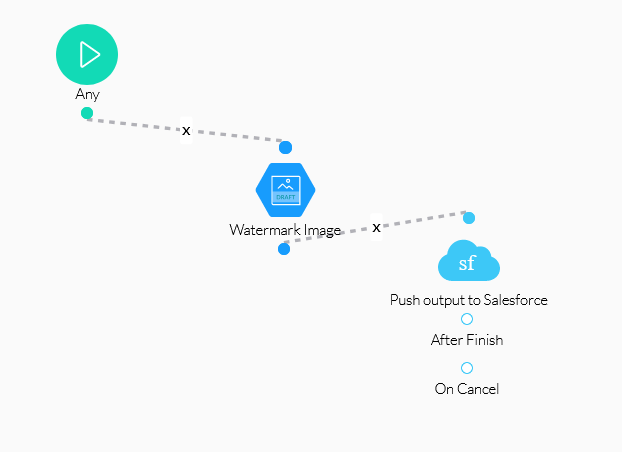
3. Enter a Tag name and click Insert.
You can link this node to the Salesforce Action. Ensure you save and publish your Flow.
07 Preview
When an image file is added to the project and the button is clicked, the flow is invoked to add a watermark to the image and upload it to Salesforce.

08 Image Compression
Before completing the following steps, the existing image node was deleted.
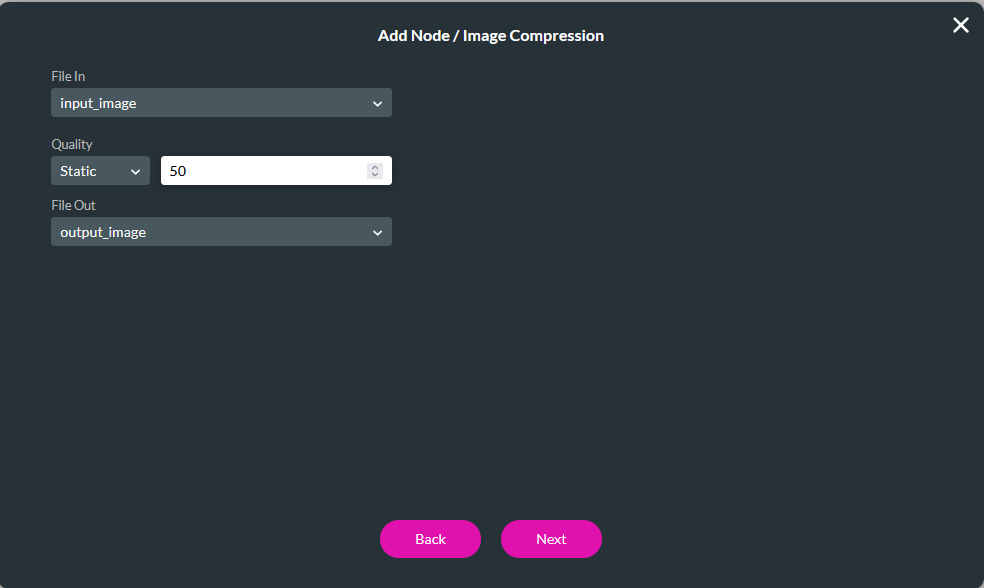
1. Select the Any + icon, choose Image Compression as the node, and click Next.
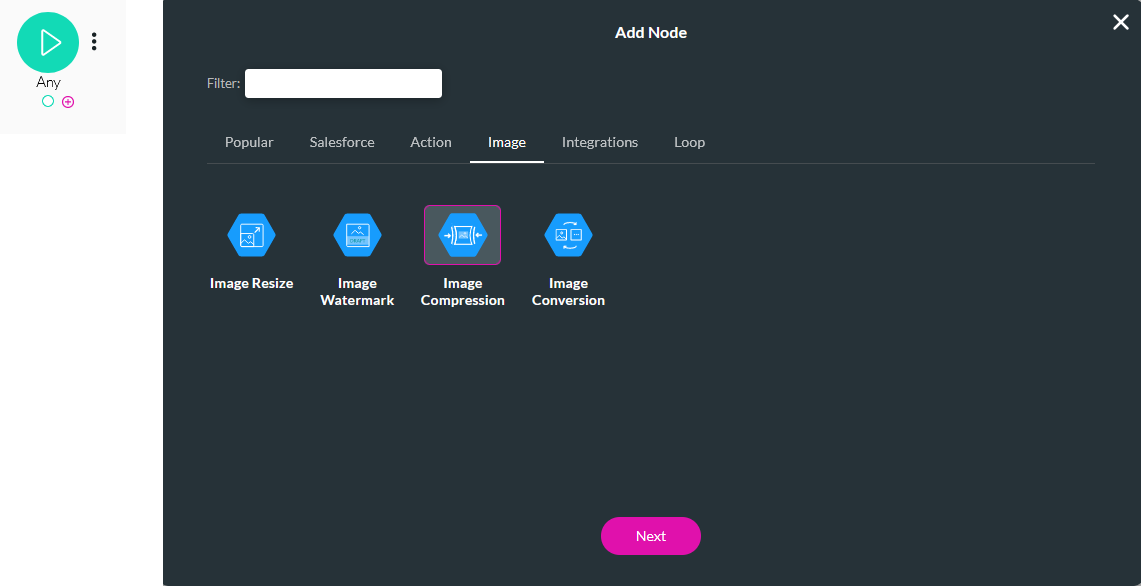
2. Configure the following and click Next.
- File In - input_image
- Quality - 50. This will reduce the quality by 50%.
- File Out - output_image
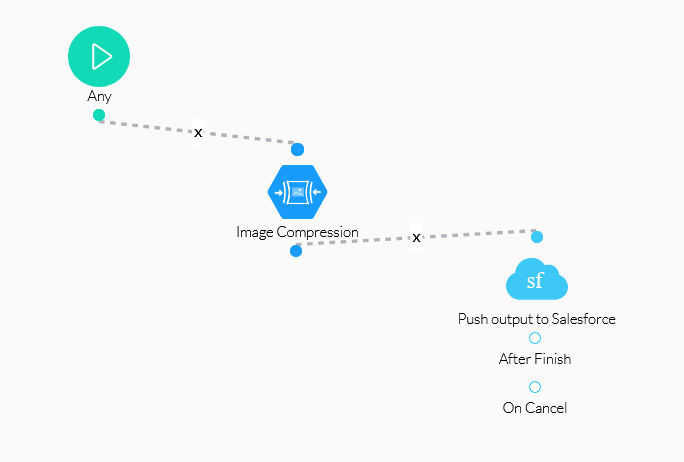
3. Enter a Tag and click Insert.
You can link this node to the Salesforce Action. Ensure you save and publish your Flow.
09 Preview
When an image file is added to the project and the user clicks the button, the flow is invoked to compress the image and upload it to Salesforce.

10 Image Conversion
Before completing the following steps, the existing image node was deleted.
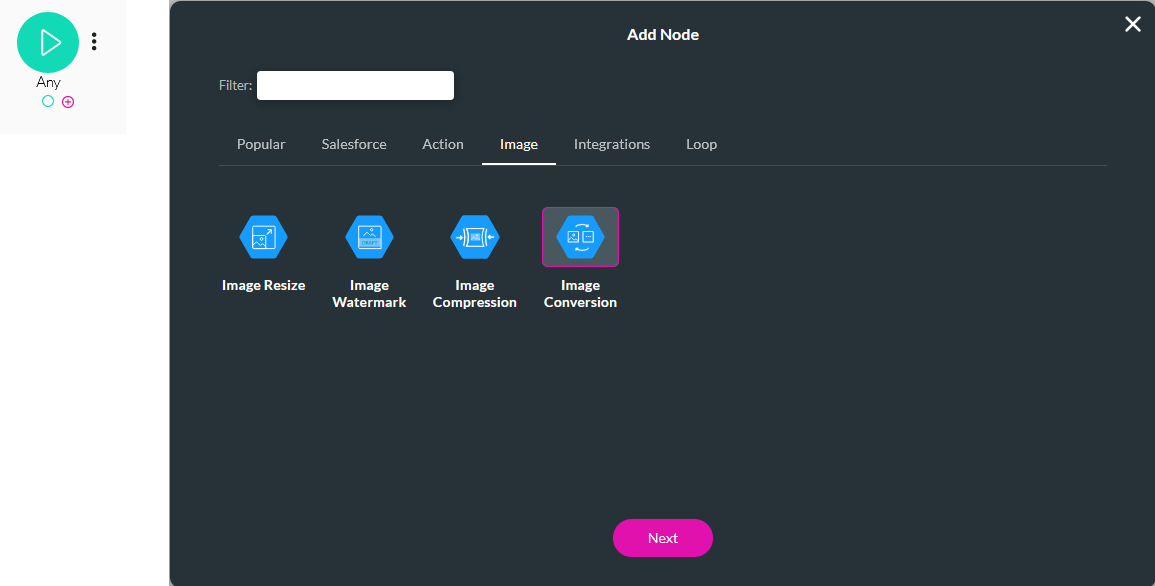
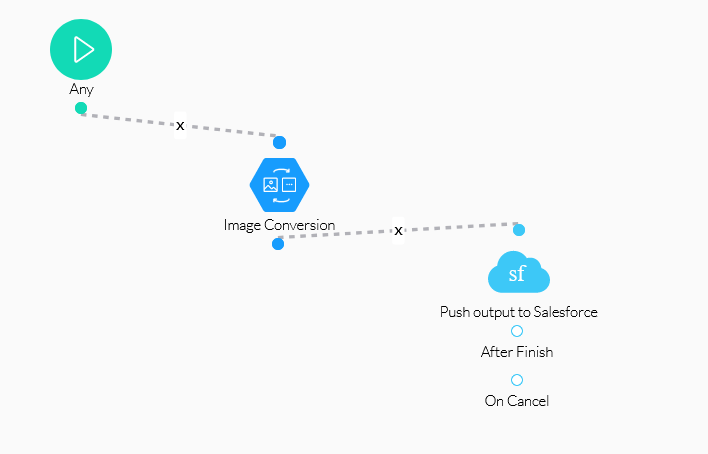
1. Select the Any + icon, choose Image Conversion as the node, and click Next.
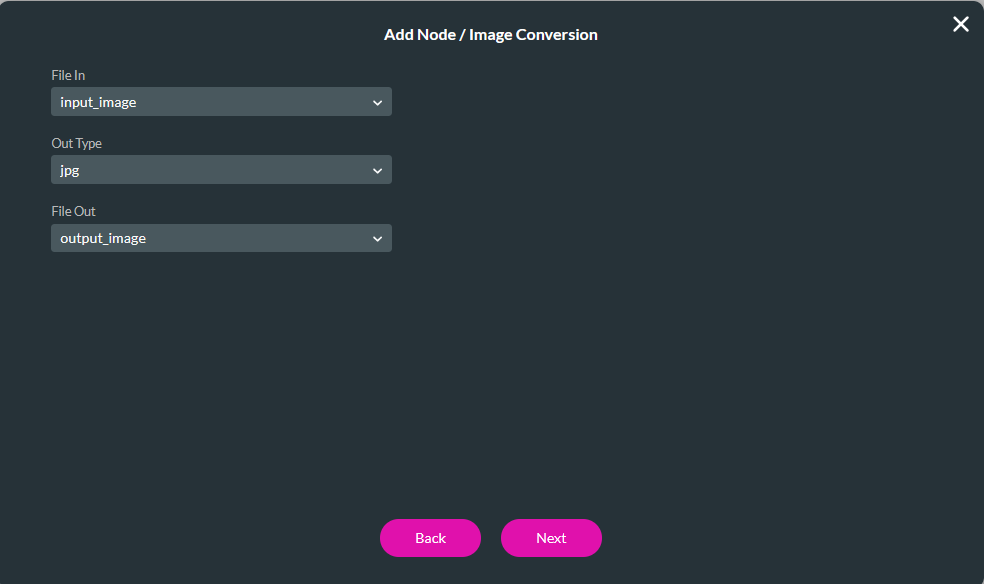
2. Configure the following and click Next.
- File In - input_file
- Out Type - jpg
- File Out - output_file
3. Enter a Tag and click Insert.
You can link this node to the Salesforce Action. Ensure you save and publish your Flow.
11 Preview
When an image file is added to the project and the button is clicked, the flow is invoked to convert the image and upload it to Salesforce.
