Conditions (12 min)
01 Getting Started
02 Setup
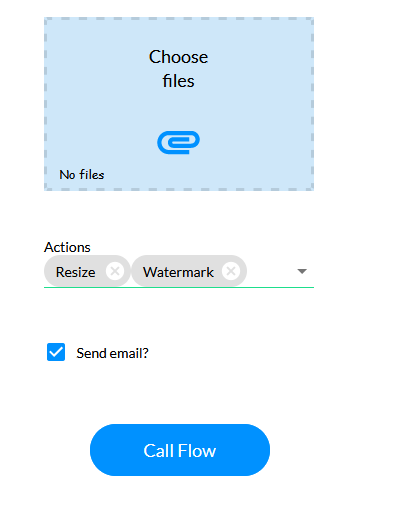
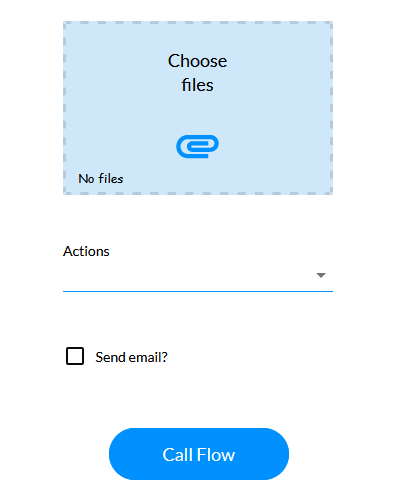
A web project was created with a file upload, multi-select picklist, checkbox, and button elements. The multi-select picklist was configured with two static values: Resize and Watermark. The Flow will be configured to take the image uploaded, perform the chosen action, and send an email if selected.
03 Variables
Navigate to your Titan Flow project.
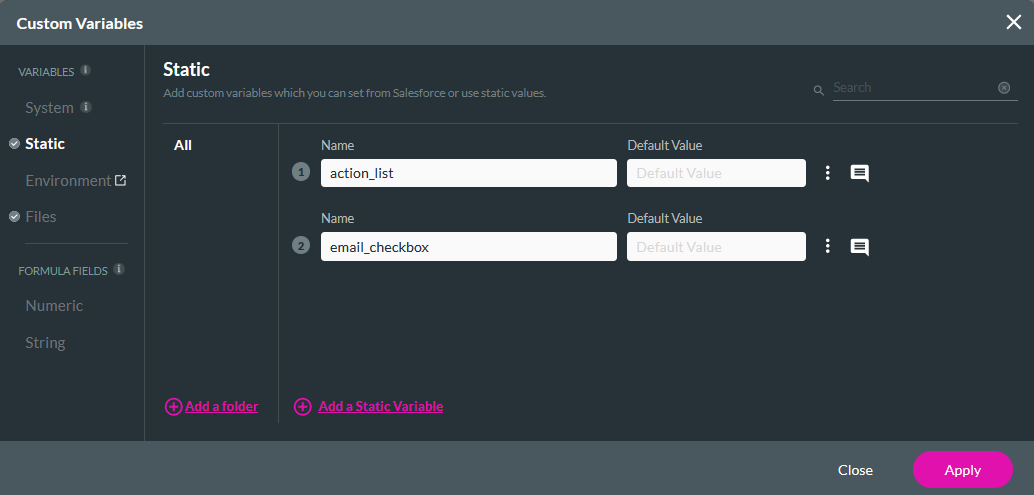
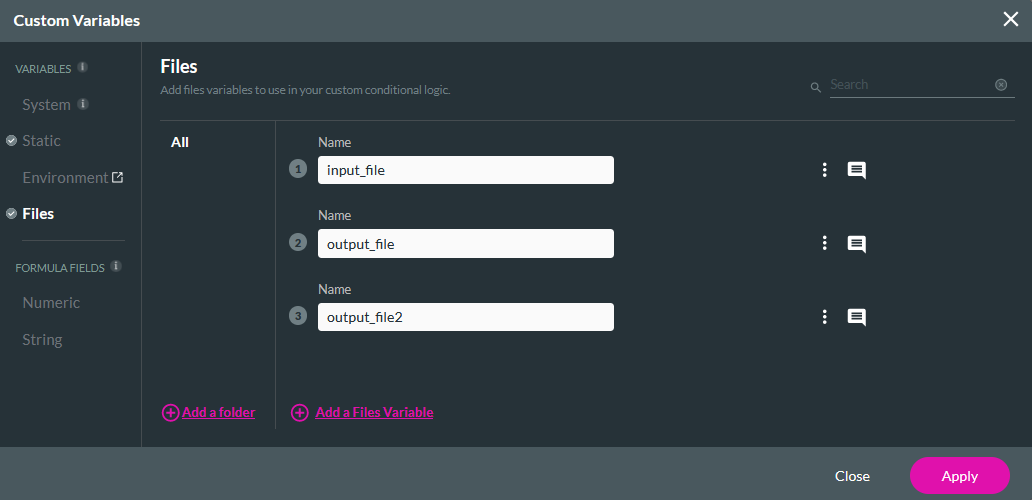
Create the following Variables:
- Static: action_list and email_checkbox
- Files: input_file, output_file, output_file2
04 Condition
1. Select the Any + icon, choose Condition as the node, and click Next.
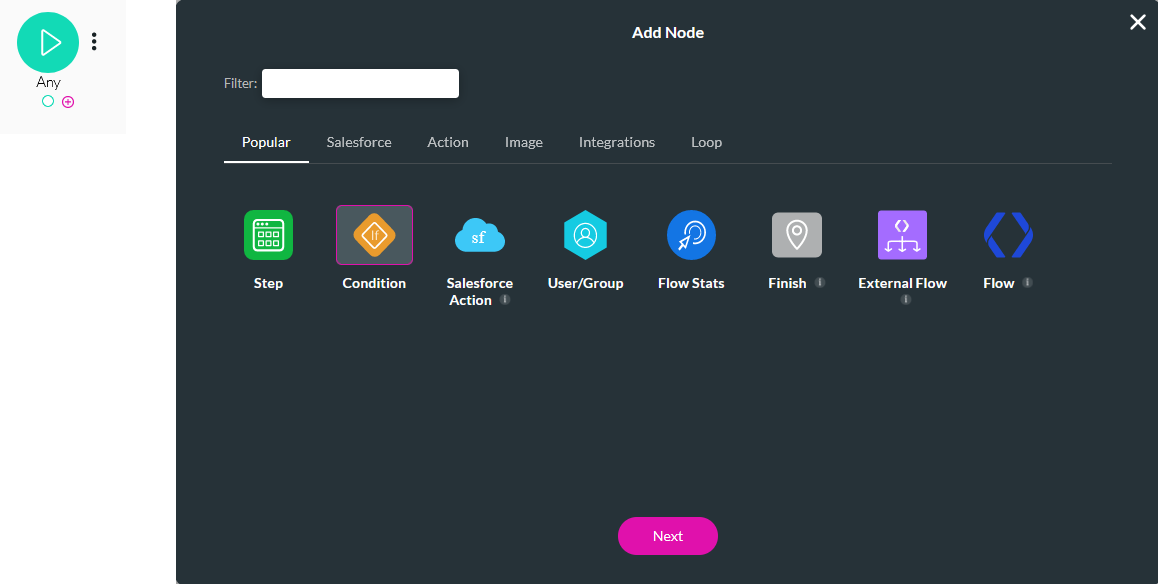
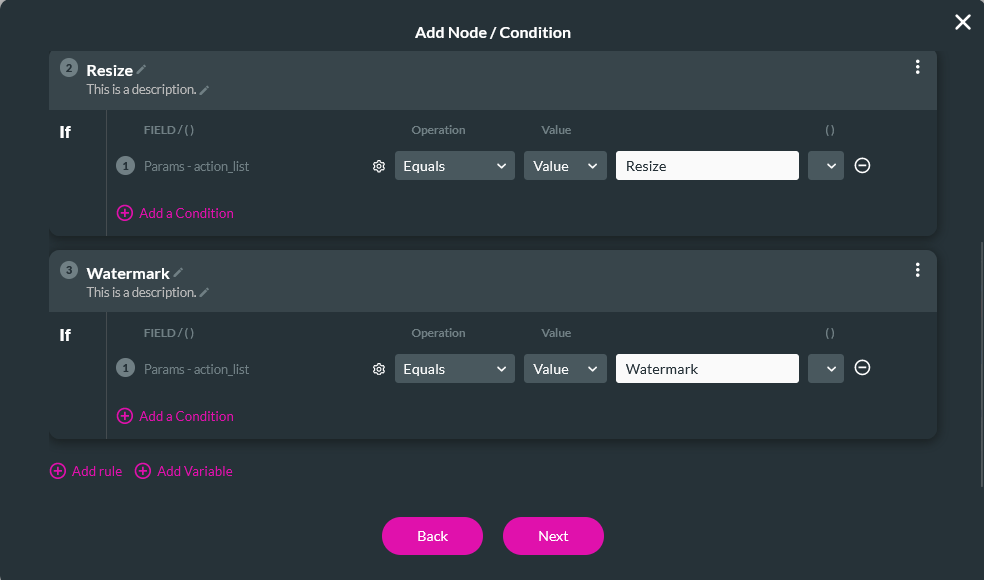
Three rules will be configured.
2. Click the Select Field gear icon.
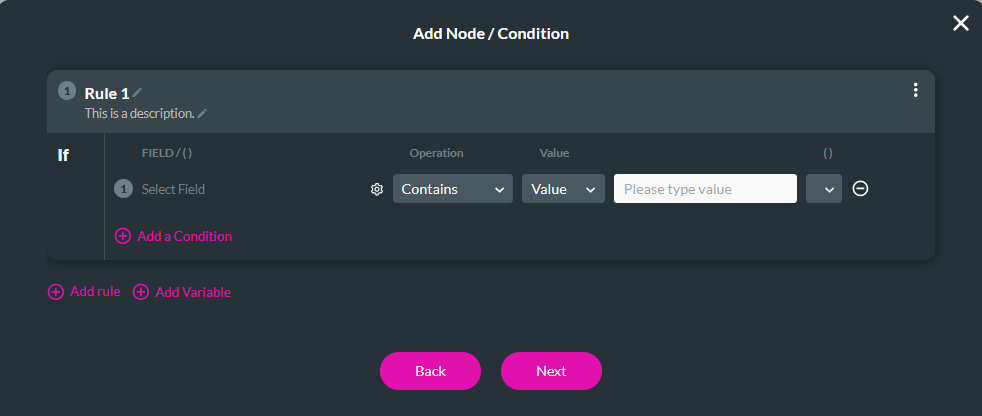
3. Use the dropdowns to select; Params as the Type and action_list as the Parameter. Click Apply.
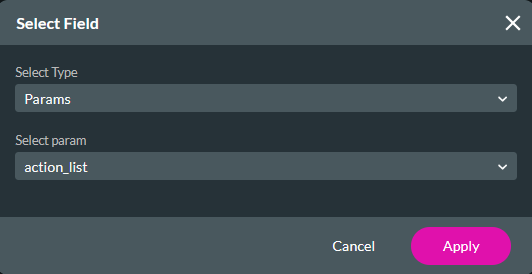
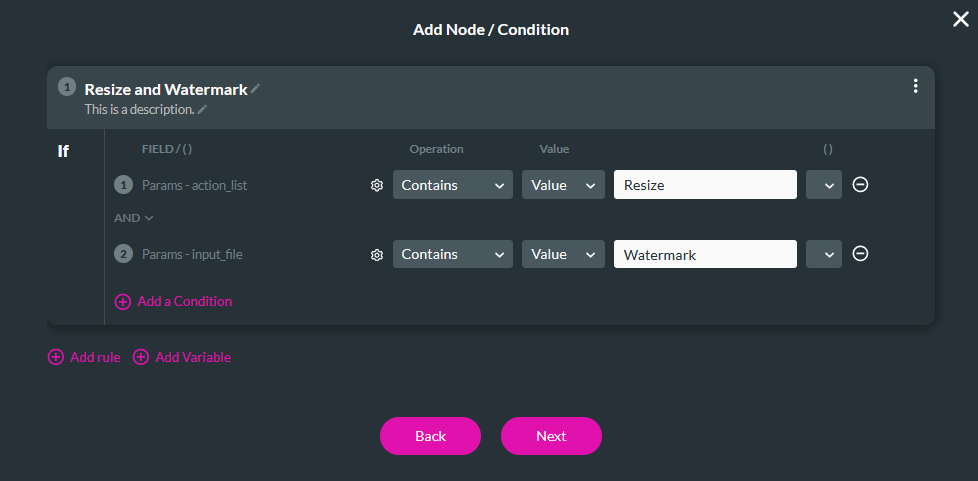
4. Set the Contains value as Resize.
5. Repeat the same steps but set the value to Watermark.
6. Update the rule name.
7. Add a second rule and click the Select Field gear icon.
8. Choose Params as the Type and action_list cont as the Select param.
9. Set the Equals value as Resize.
10. Update the rule name.
11. Add a third rule and click the Select Field gear icon.
12. Choose Params as the Type and action_list cont and the Select param.
13. Set the Equals value as Watermark.
14. Update the rule name and click Next.
15. Enter a Tag name and click Insert.
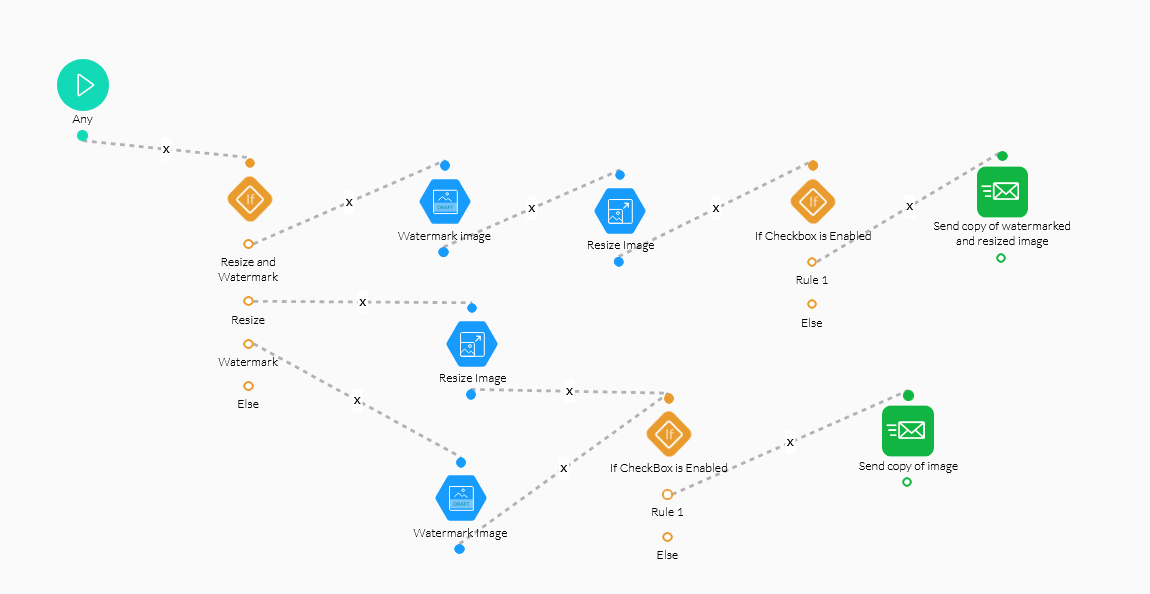
The three rules that were created will display as their own separate node.
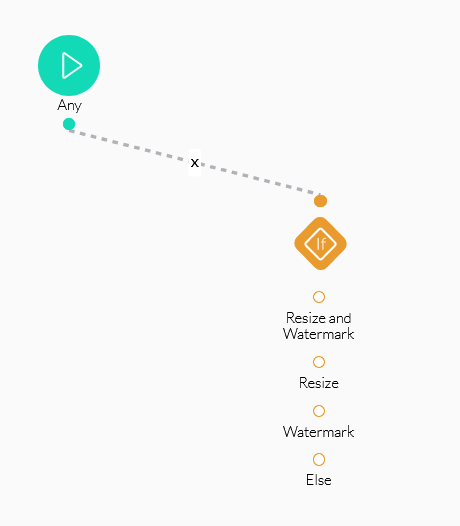
05 Resize and Watermark
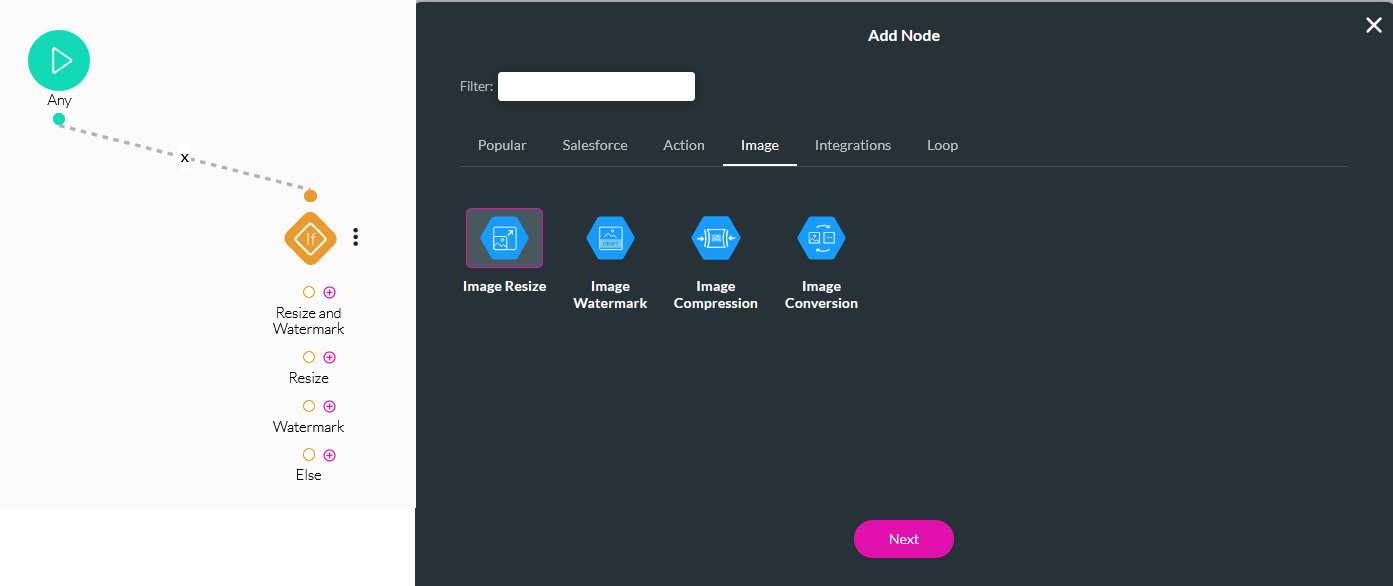
1. Select the Resize and Watermark + icon, choose Image Resize as the node, and click Next.
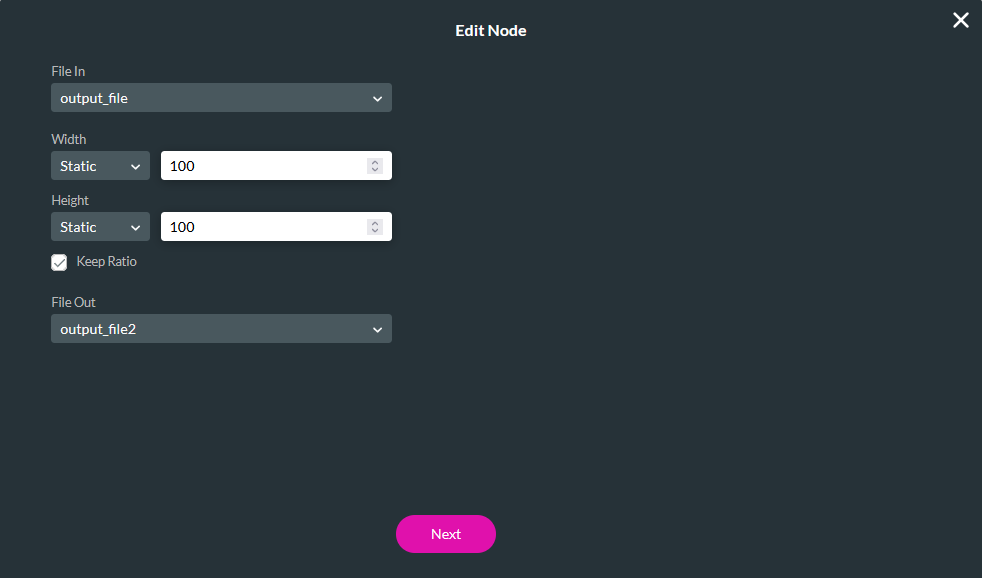
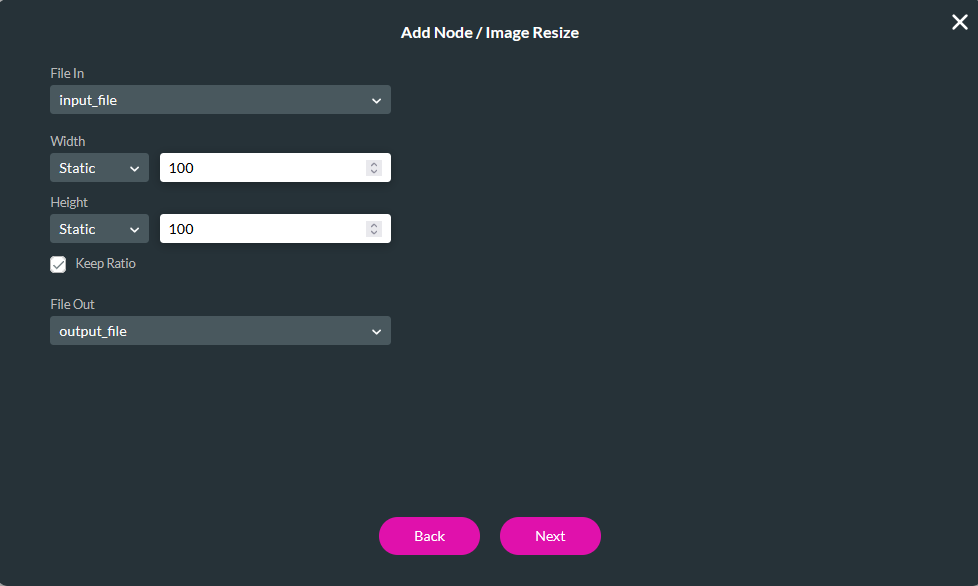
2. Configure the following and click Next. File In - output_file Width - 100 Height - 100 Keep Ratio - Enabled File Out - output_file2
3. Enter a Tag and click Insert.
4. Select the Resize and Watermark + icon, choose Image Watermark as the node, and click Next.
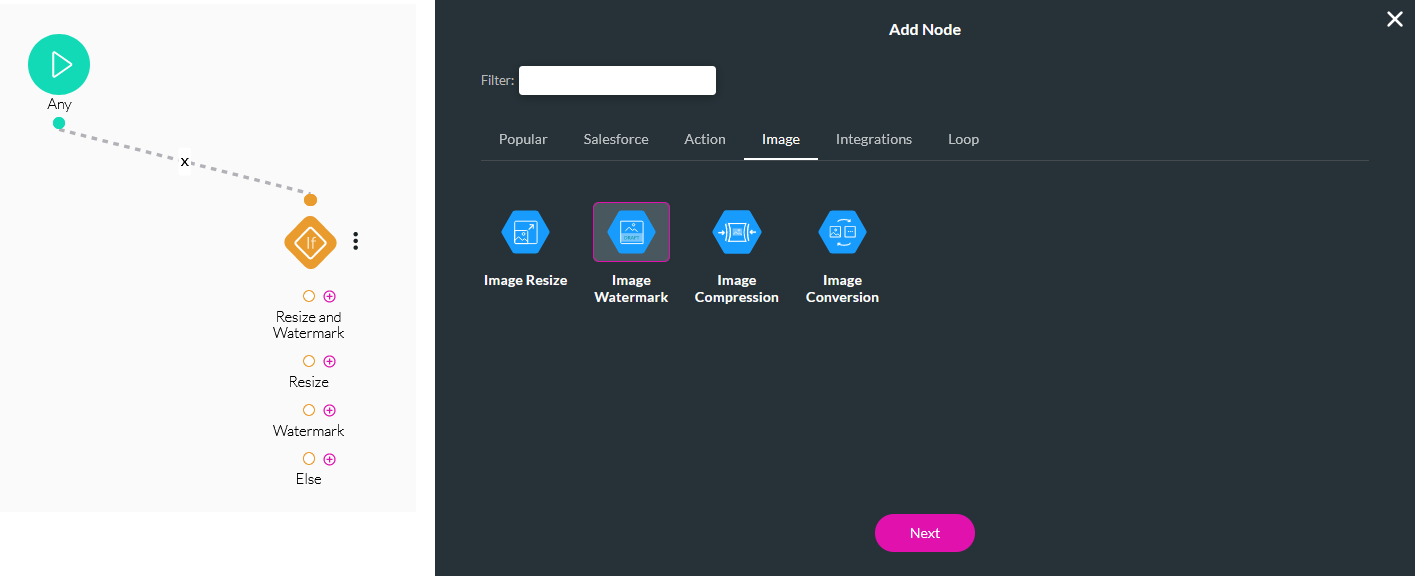
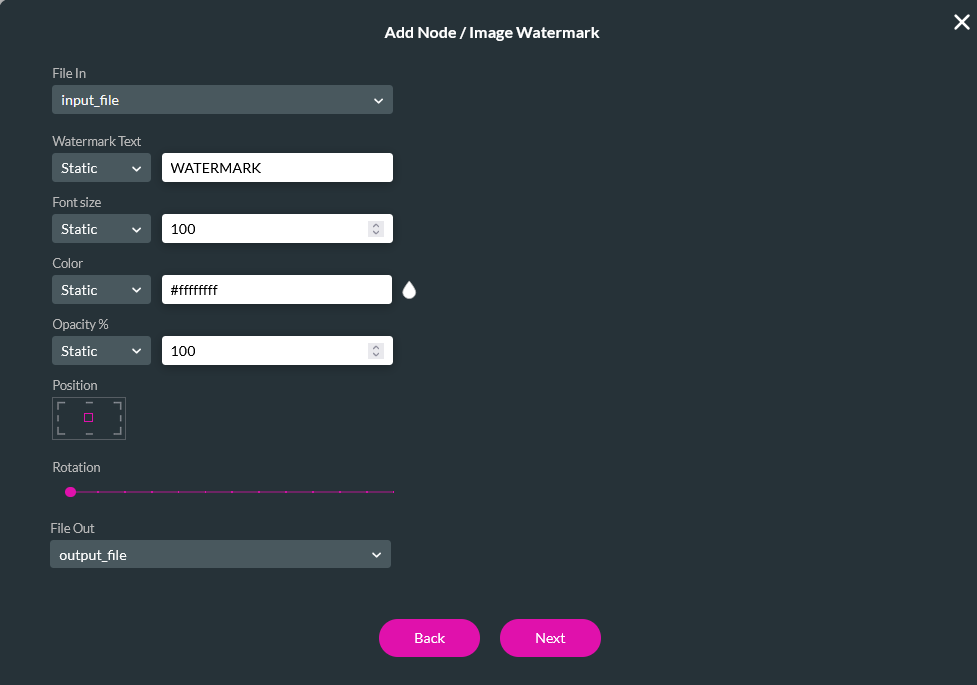
5. Configure the following and click Next.
- File In - input_file
- Watermark Text - WATERMARK
- Font Size - 100
- Color - White
- Opacity % - 100
- Position - middle
- File Out - output_file
6. Enter a Tag name and click Insert.
7. Ensure the Resize and Watermark nodes are linked as Watermark first and Resize second.
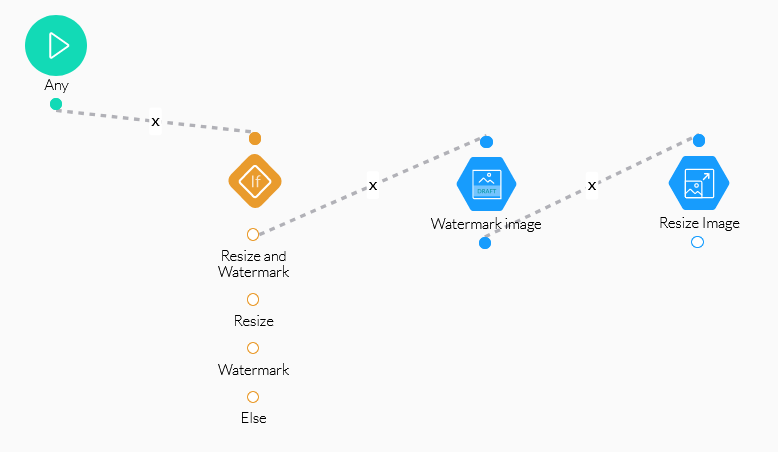
8. Click the Resize Image + icon, select Condition as the node, and click Next.
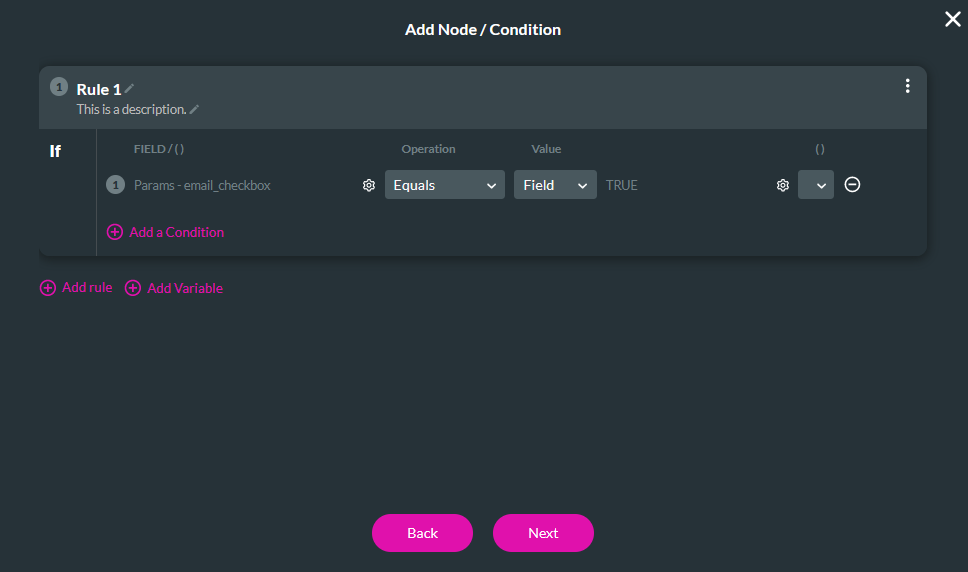
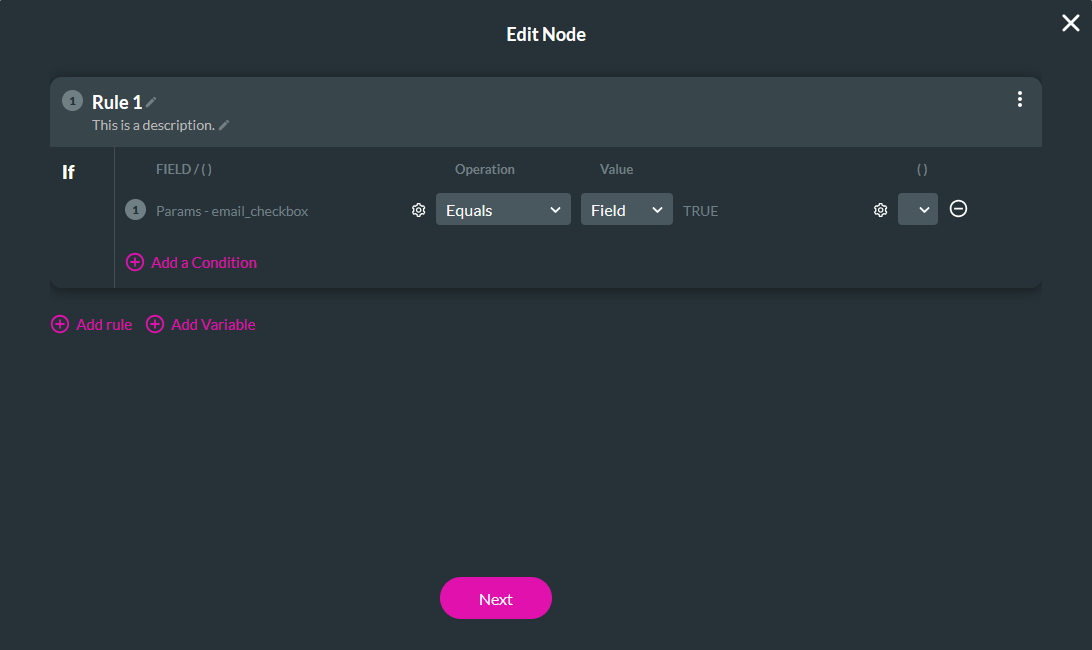
9. Click the Select Field gear icon, choose Params as the Type, select email_checkbox as the Select param, and click Apply.
10. Set the Equals value as Field Boolean True. Click Next.
11. Enter a Tag and click Insert.
12. Select the Rule 1 + icon, choose Send Email as the node, and click Next.
13. Configure your Email to attach the edited output_file2 file. Next Next.
14. Add a Tag and click Insert.
06 Resize
Follow steps 1-3 listed in section 5 above; however, when configuring the File In and File Out, different variables must be selected, as this is the only action to be completed.
The following condition node was configured with a send email node.
07 Watermark
Follow steps 4-6 listed in section 5 above. The same Condition and Send Email rule configured in section 06 should be used. The final config should display as follows:
Once the configuration is completed, save and publish the flow.
08 Invoking the Flow
The button was configured to invoke the created Flow when clicked.
1. Select the button and click the Interactivity icon in the menu.
2. Select the Start + icon, choose Flow as the node, and click Next.
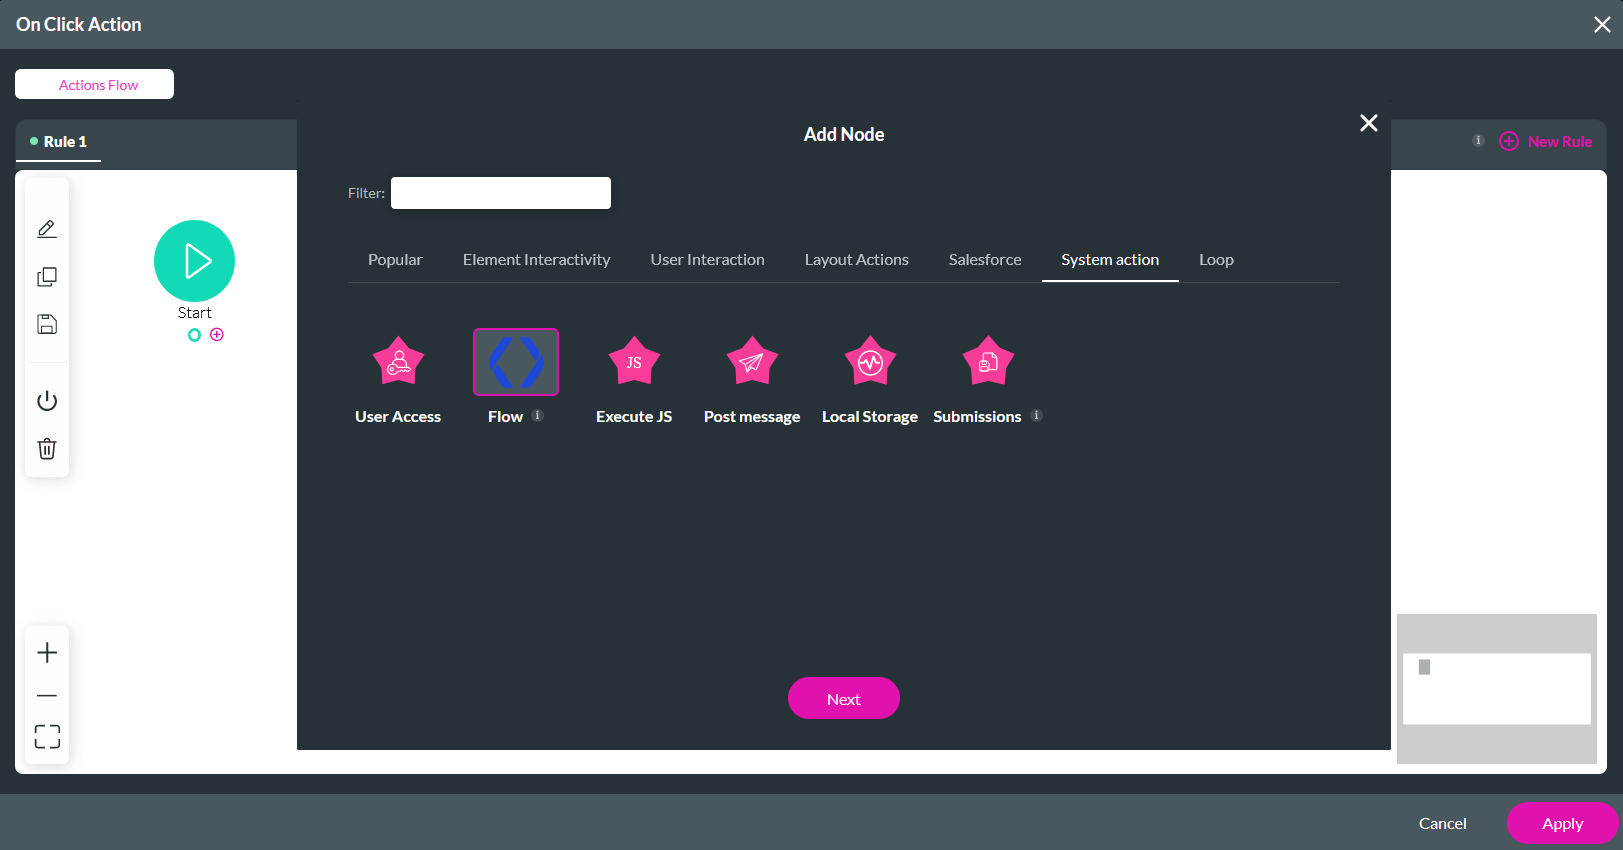
3.
Use the dropdown to select your Flow, disable Run in the Background if you want your screen to freeze when the Flow is
triggered, and add a custom message.
4. Click Configure Parameters.
- input_file - Field/Choose files
- action_list - Field/Actions Label
- email_checkbox - Field/Checkbox Send Email
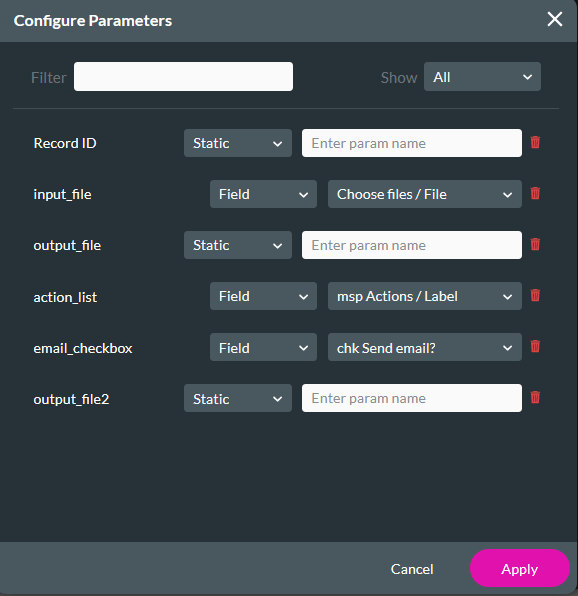
5. Click Next, enter a Tag name, and select Insert.
09 Preview
Three options can occur in the current project:
- One—The user uploads a file, chooses both resize and watermark actions, enables the checkbox, and clicks Call Flow. This triggers the flow to watermark and resize the image, then sends a copy of the watermarked and resized image via email.
- Two—The user uploads a file, chooses the resize action, enables the checkbox, and clicks Call Flow. This triggers the flow to resize the image and then sends a copy of the resized image via email.
- Three—The user uploads a file, chooses the watermark action, enables the checkbox, and clicks Call Flow. This triggers the flow to watermark the image and then send a copy of the watermarked image via email.
