Upload Files to Cloud Storage (6 min)
01 Getting Started
This tutorial explains how to use Titan Files to upload files from various Salesforce objects into their respective repositories on Amazon S3.
With Titan Files, you can upload files to diverse cloud storage services, including Google Drive, Box, Dropbox, Amazon S3, and FTP.
02 The Setup
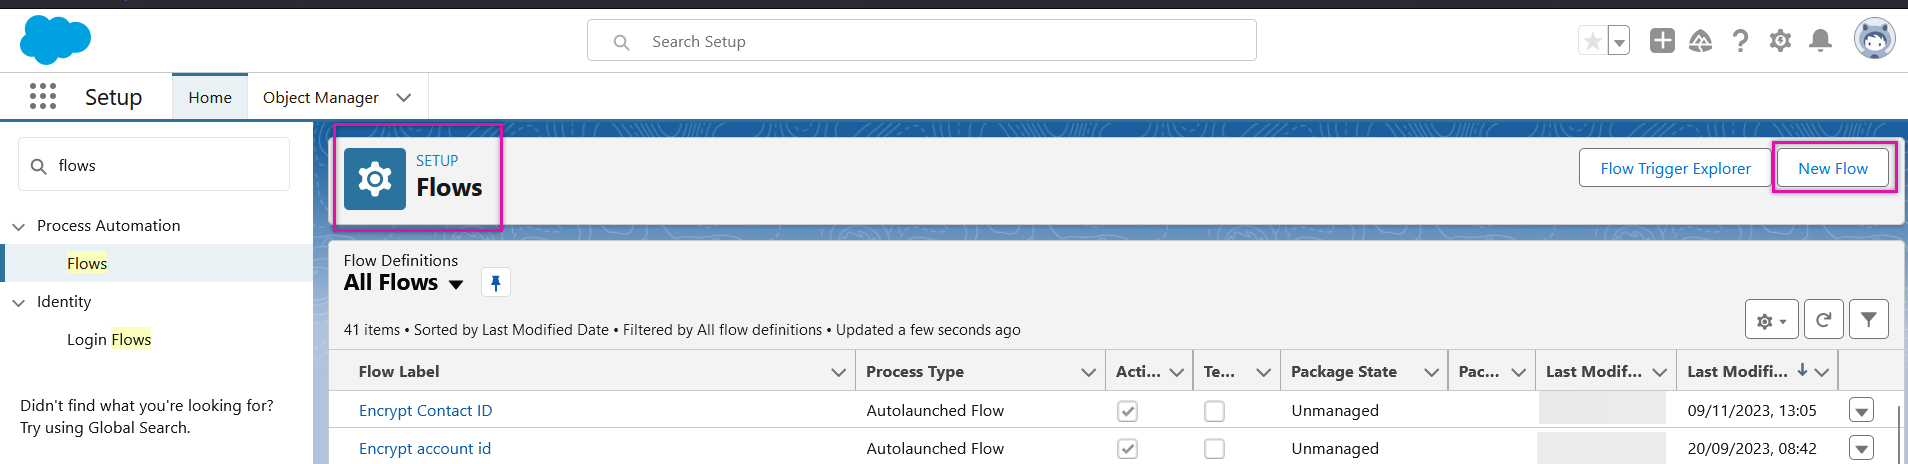
1. Navigate to the Salesforce Setup window and search for Flows.
2. Select Flows under Process Automation and click New Flow.
3. Select Record-Triggered Flow and click Create.

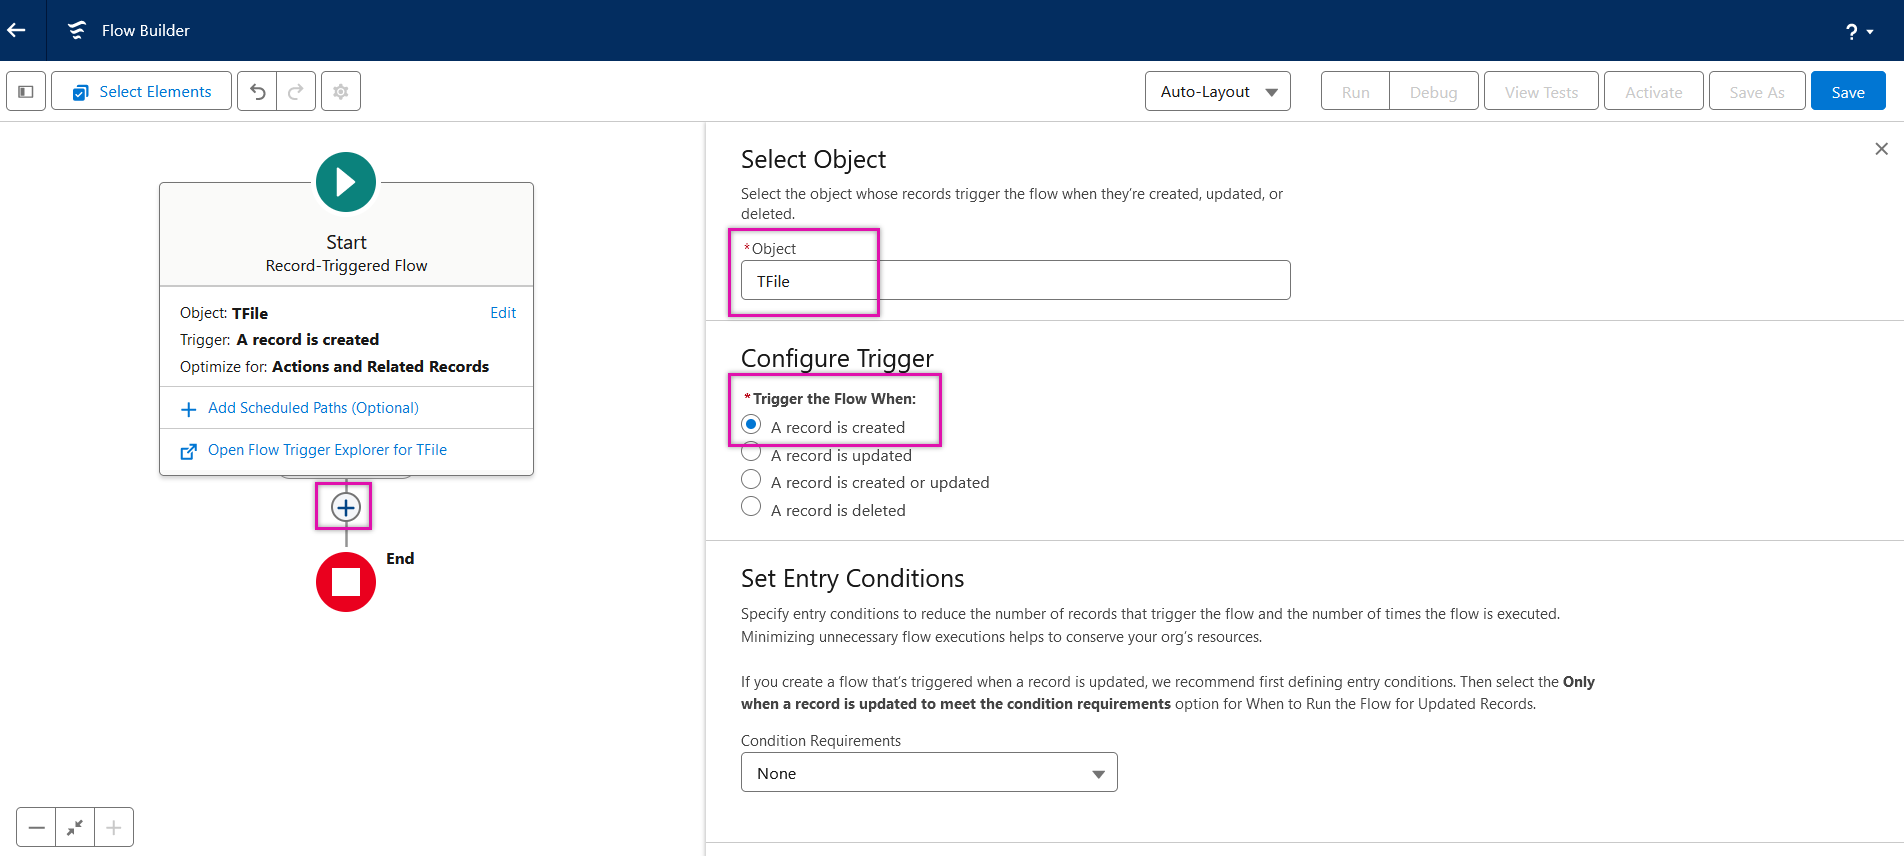
We will configure this flow to trigger whenever a new TFile record is created.
4. Configure the following:
- Object - TFile
- Trigger - A record is created.
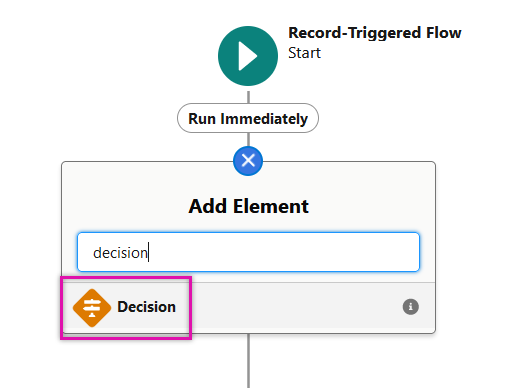
5. Click the + icon under your flow in the left-hand window.
6. Search for the Decision element and select it.
This node will differentiate which object the file was uploaded to.
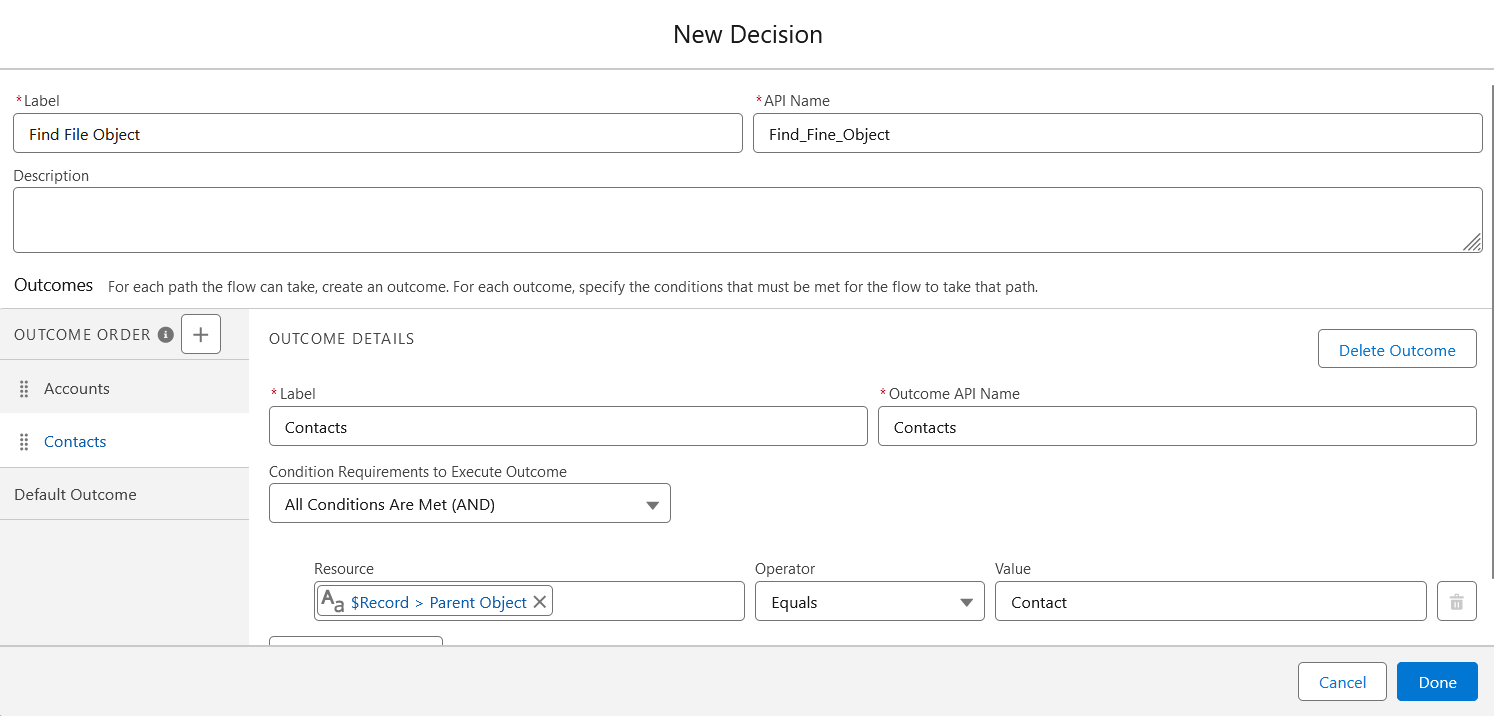
7. In the New Decision window, configure:
- Label - Find File Object
- Outcome Details Label - Accounts
- Condition - Record > Parent Object Equals Account.

8. Click the Outcome Order + icon and configure the following:
- Label - Contacts
- Condition - Record > Parent Object Equals Contact.
9. Click Done.
03 File Action for Accounts and Contacts
The next step is to create a file action for Accounts and Contacts. Before continuing, save and label your flow.

1. Click the + icon under Account.

2. Search for File Action and select the node.

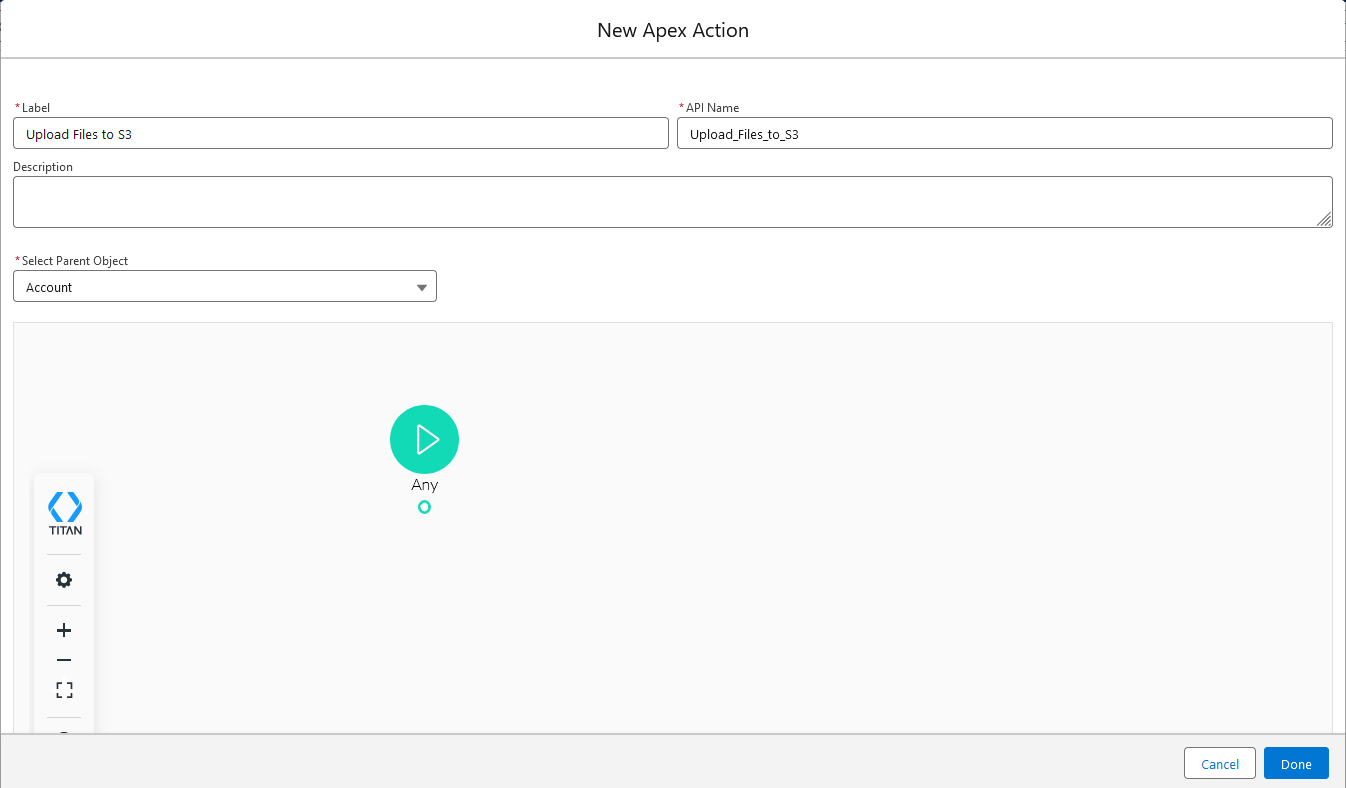
3. Configuring the Apex action as follows:
- Label - Upload Account Files to S3
- Parent Object - Account
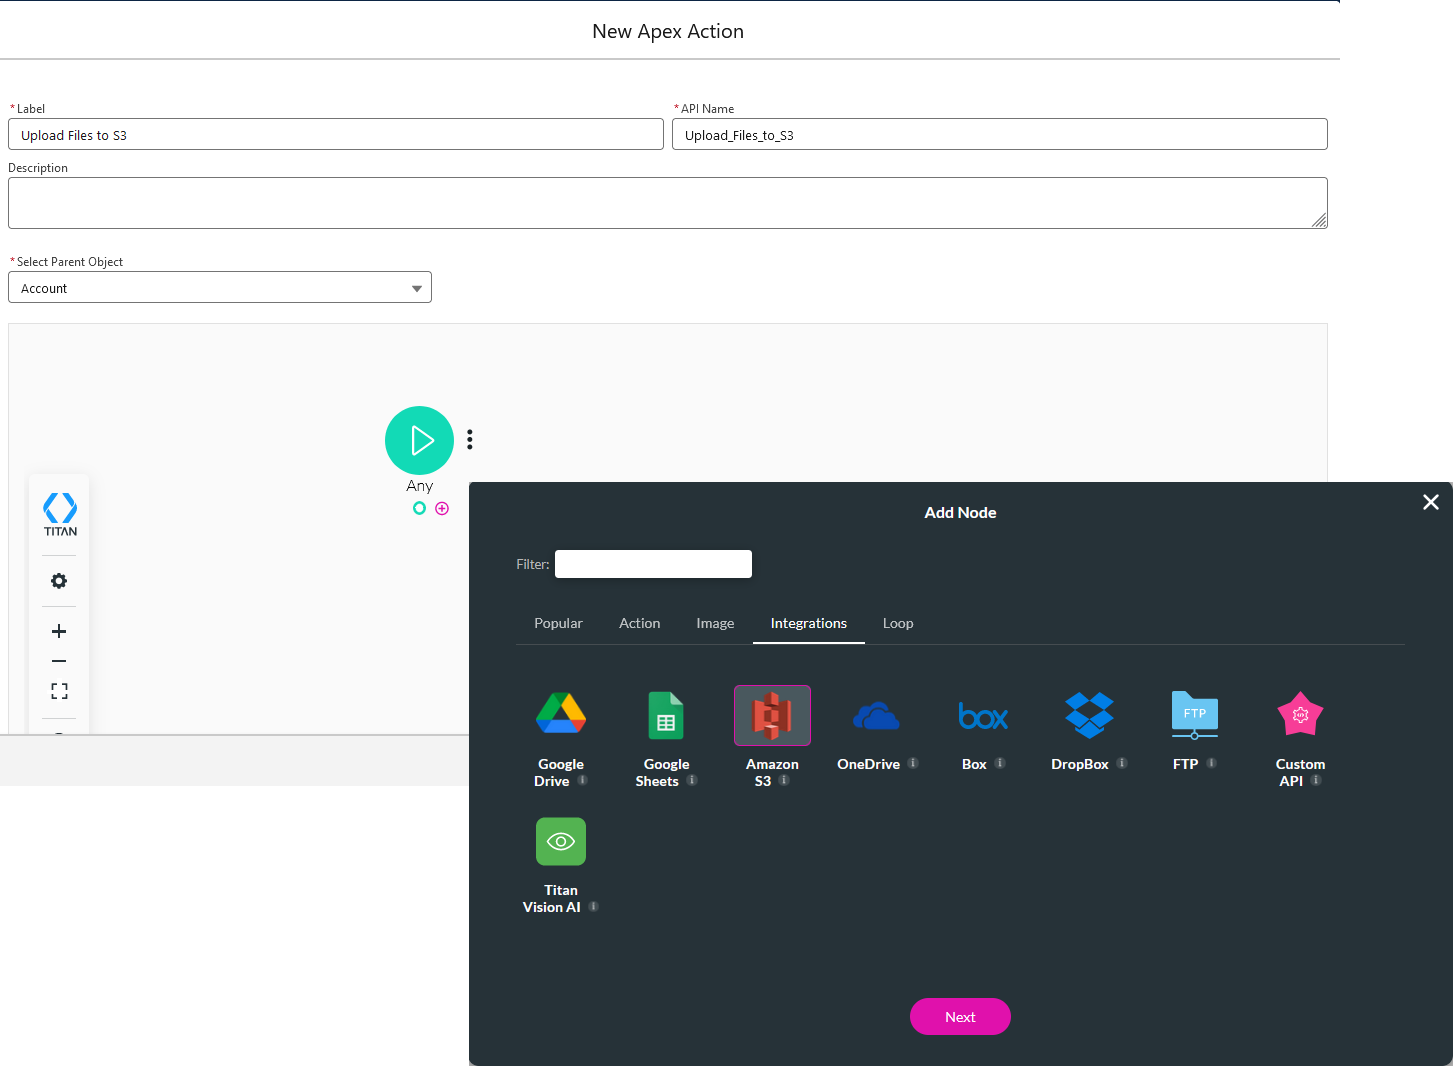
4. Click the Any + and select Amason S3 as the node. Click Next.
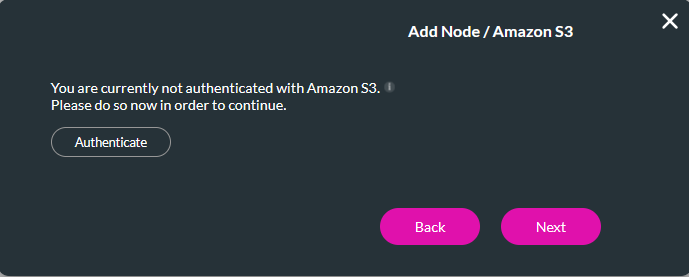
5. Click Authenticate to authenticate with your Amazon S3 account.
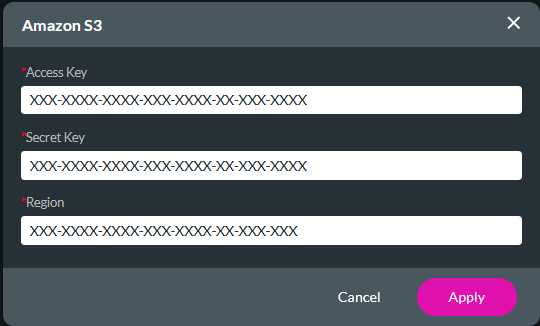
6. Enter your security information and click Apply.
7. Once Authentication is completed, click Next.

8. Configure the Amazon Node as required and click Next.

You can complete the same steps for your Contacts node. The only difference is that the parent object is now Contact.
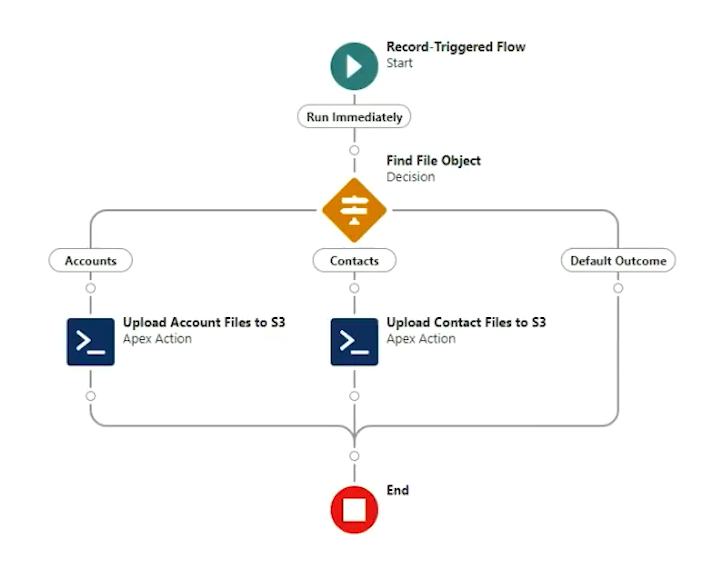
When you upload a file to a Salesforce Account or Contact, the file is automatically uploaded to Amazon S3.