Setup (5 min)
01 Getting Started
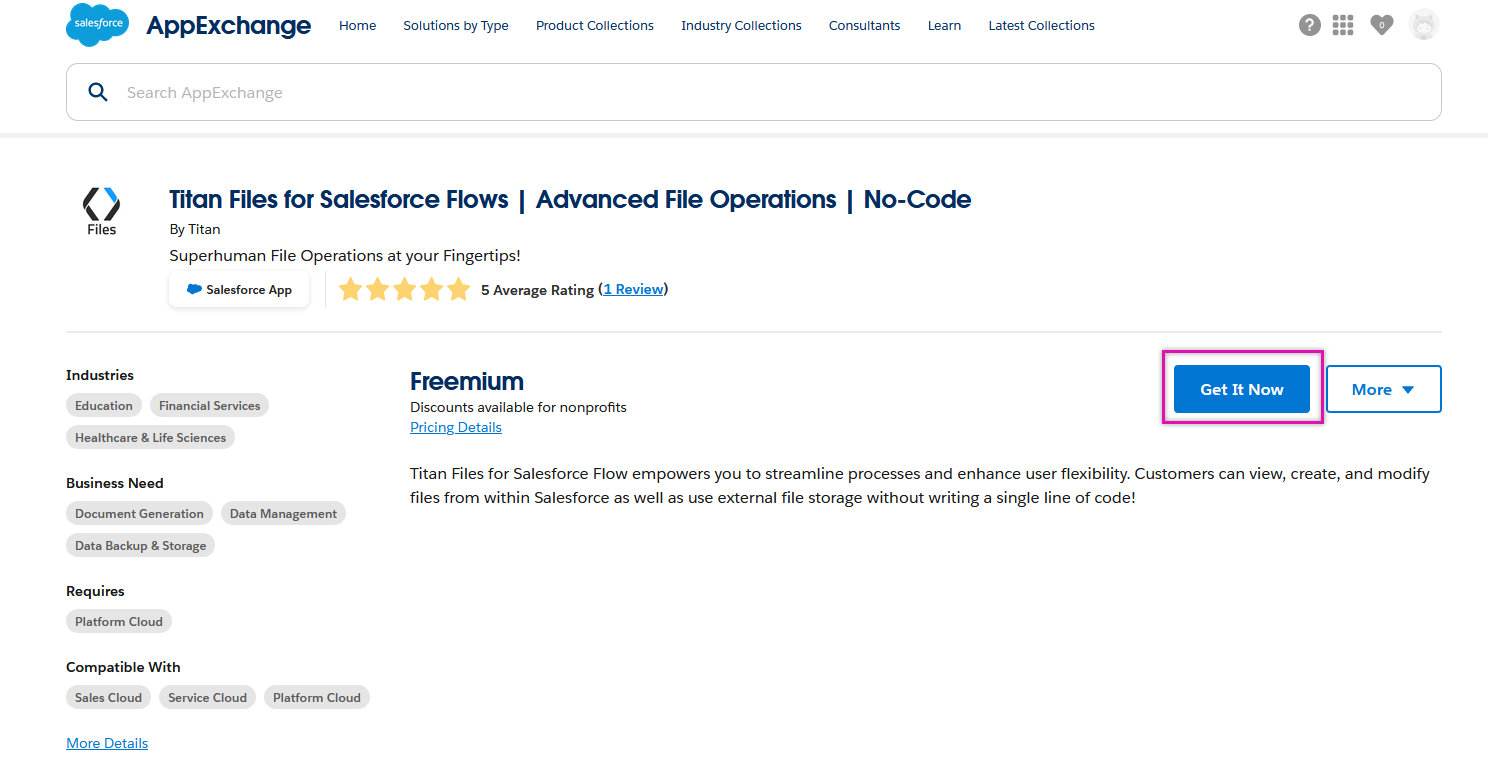
02 App Exchange
1. Navigate to the Salesforce App Exchange, search for Titan Files, and select it from the results.
2. Select Get It Now.
3. Click Install in Production.

4. Agree to the Terms and Conditions and click Confirm and Install.

You will be redirected to the Salesforce Login page.
03 Salesforce
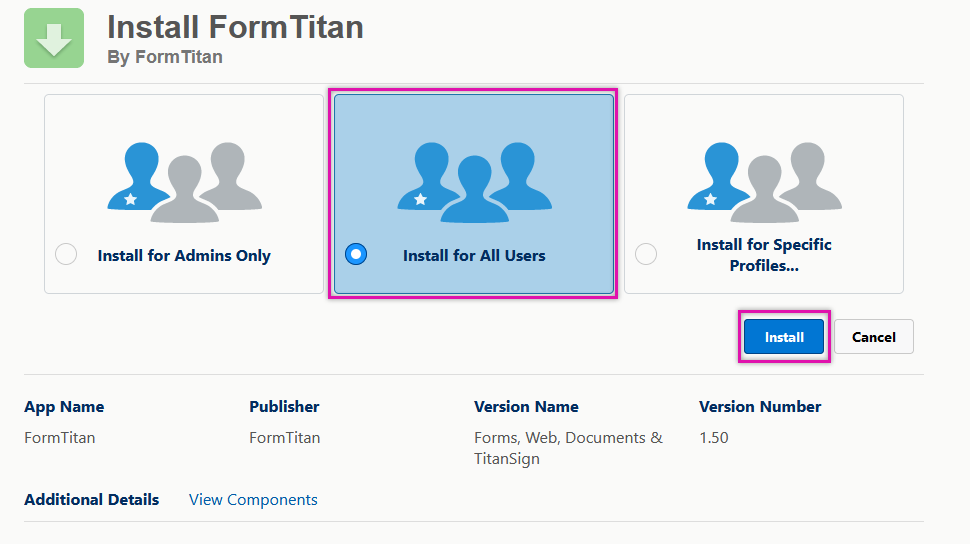
1. Log in to Salesforce using your credentials. The Install FormTitan screen is displayed.
2. Select Install for All Users and click Install.
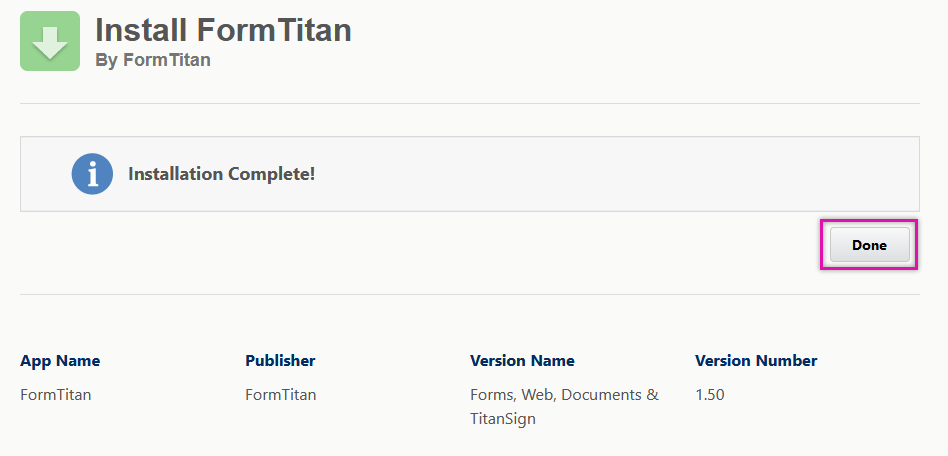
3. After the Installation is completed, click Done.
04 Installed Packages
Under Setup, the FormTitan package will display in the Installed Packages window.

05 Existing and New Titan User Differences
This process will differ depending on whether you install this as a brand-new or existing Titan User.
If you already have a Titan account, you will need to log in to your Titan Account, authenticate Salesforce, and enable API access.
For this example, we will assume that you do not have an existing Titan Account. You can then navigate to Flows to create a brand new account.
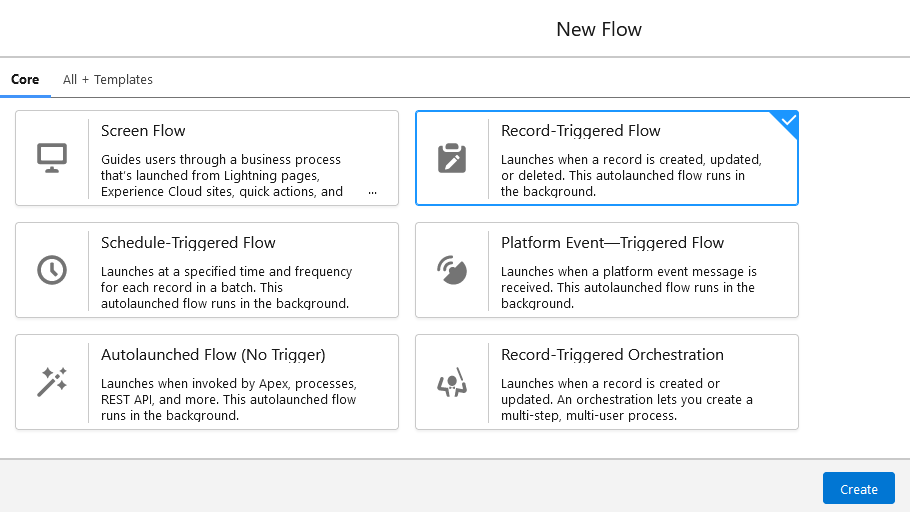
1. In the Flows window, click New Flow.

2. Select Record-triggered Flow and click Create.
3. Select TFile as the Object and click Save. We used the Label Setup to save the flow.

4. Click the + icon in your flow.
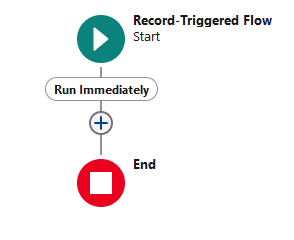
5. Search for the File Action node and select it.

6. Configure the File Action as follows:
- Label - Setup
You will see the Titan Files Wizard window. In the Welcome window, click Next.

You will be prompted to agree to the Terms and Conditions.

Next, you will need to authenticate Salesforce with Titan. The user you authenticate must have the correct permissions set.

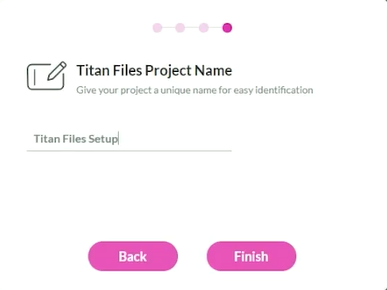
Give your Files project a name and click Finish. You will now be able to use Titan Files.
06 Permission Sets
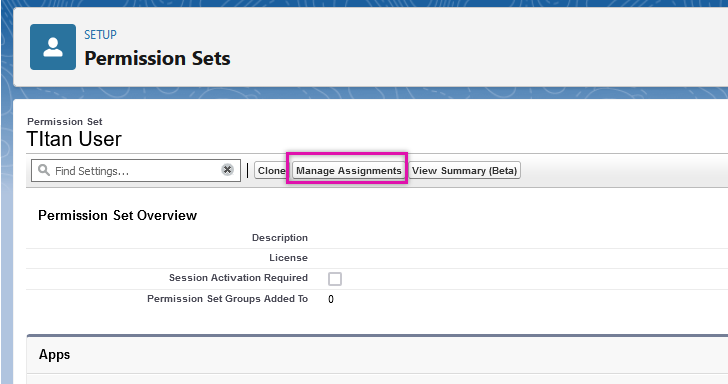
1. Navigate to the Permission Sets setup.
2. Locate the Titan User label and select it.

3. Click Manage Assignments.
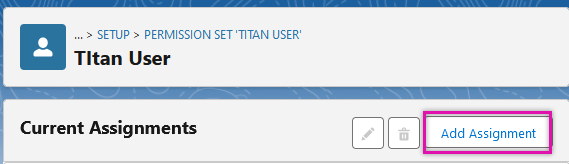
4. Click Add Assignment.
5. Select your user credentials to authenticate the app and click Next.

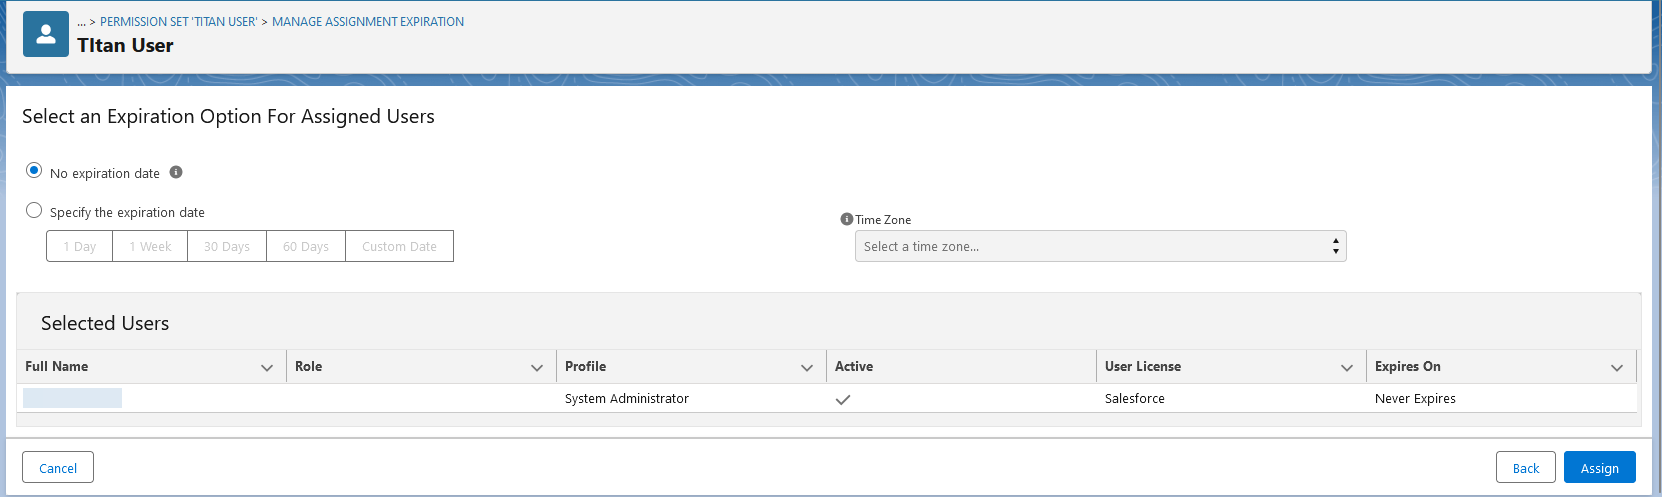
6. Configure the expiration date details if they are required, and click Assign.
Titan Files is now configured and ready.