Add Watermark and Convert (8 min)
01 Getting Started
02 Watermark and Conversion Flows
1. Navigate to Process Automation Flows in Salesforce and click New Flow.

2. Select Record-Triggered Flow and click Create.

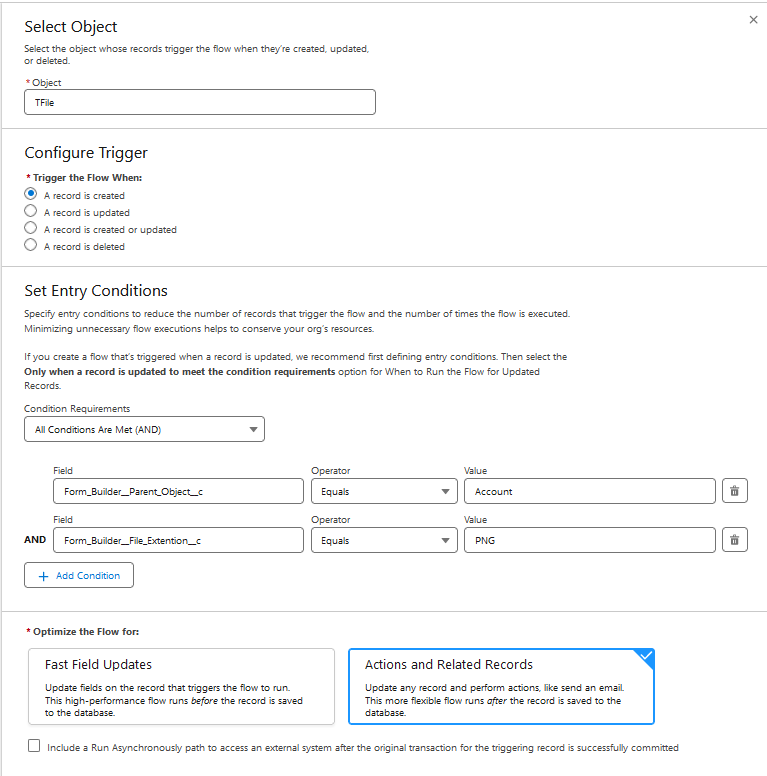
3. Configure the following:
- Object - TFile
- First condition - The Parent Object equals Account. This can be any object to which the image is uploaded.
- Second condition - The File Extension equals PNG.
4. Save and label your flow.
5. Click the + icon.

6. Search for the File Action node and select it.

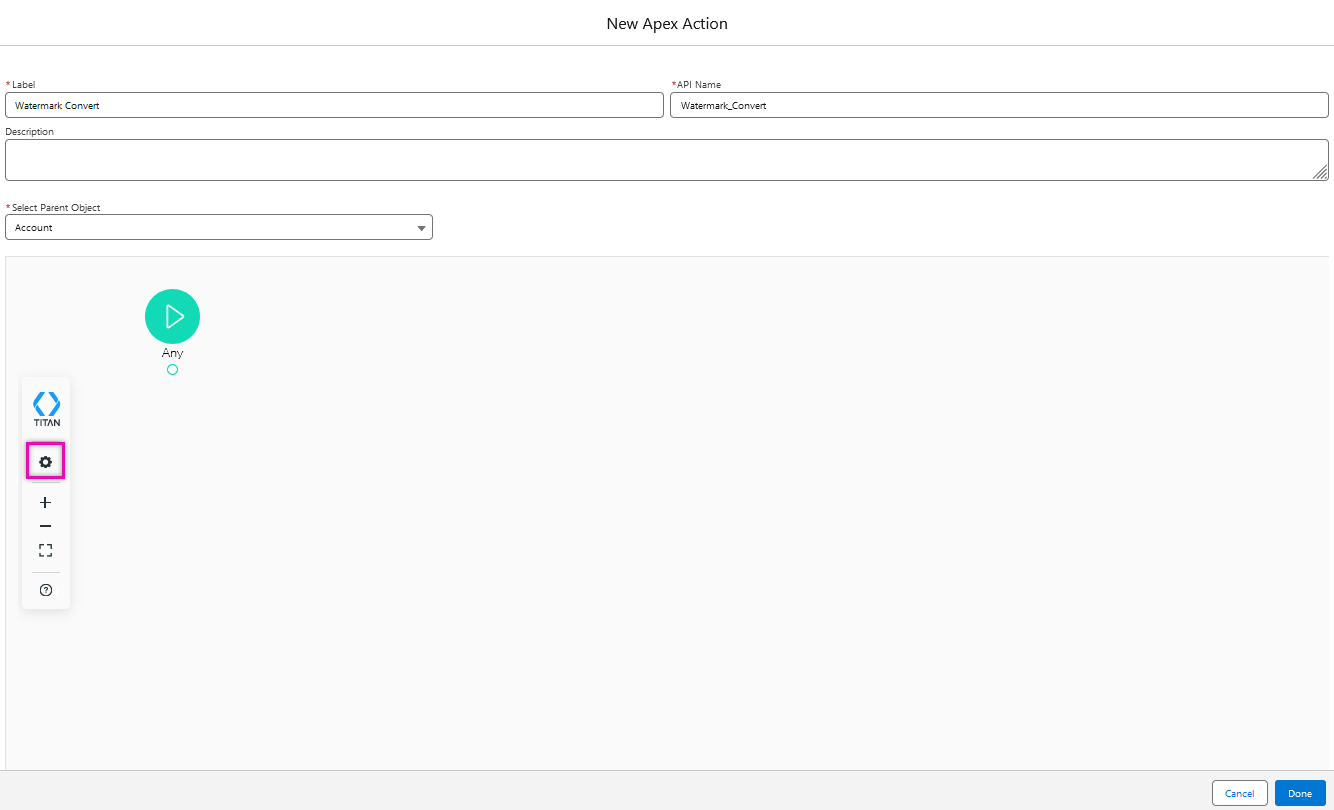
7. Configure the following:
- Label - Watermark Convert
- Parent Object - Account
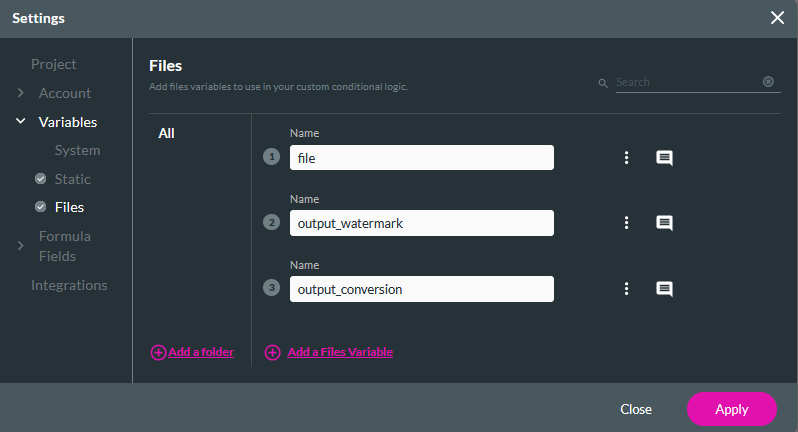
8. Select the Settings icon in the Flow window.
9. Click the Files menu item under Variables and add two new Files Variables: output_watermark and output_conversion. These variables will hold the outputs for each step. Click Apply.
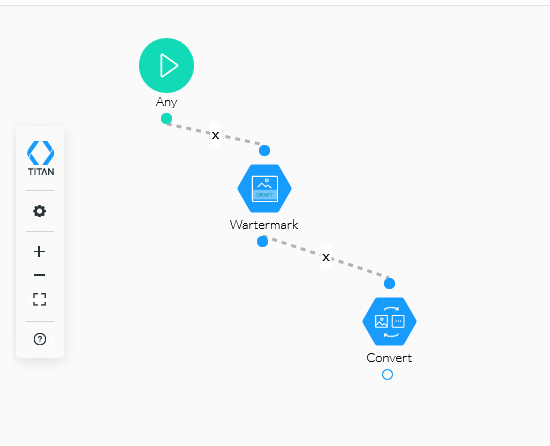
10. In the Titan Flow window, click the Any + icon and select Image Watermark as the node. Click Next.

11. Select the file variable in the File In dropdown.
12. Configure the text and formatting to be applied to your image.
13. Select the output_watermark variable in the File Out dropdown. Click Next.

14. Add a tag and click Insert.
15. Click the Watermark + icon and choose Image Conversion as the node. Click Next.
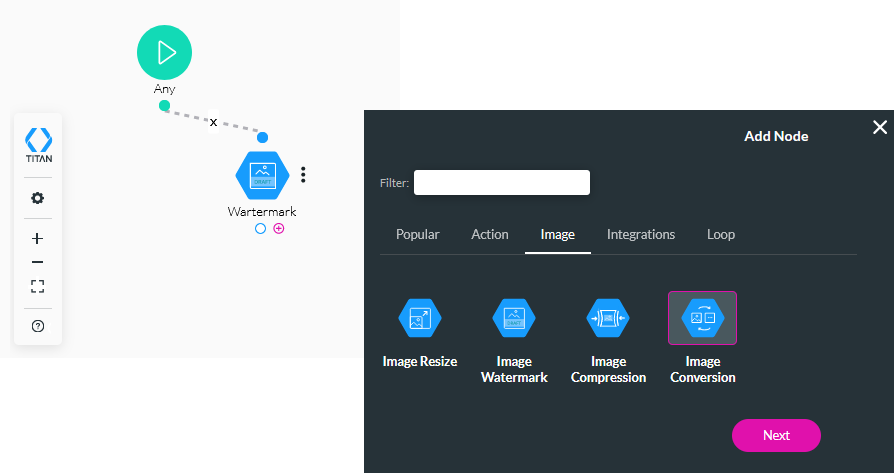
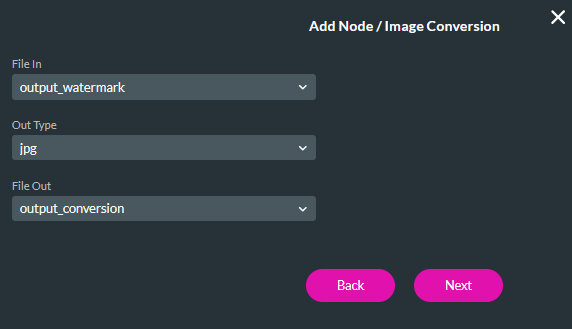
16. In the File In dropdown, select the output_watermark variable. This will convert the watermarked image.
17. Select the JPG format in the Out Type dropdown.
18. Select the output_conversion variable in the File Out dropdown. Click Next.
19. Add a tag and click Insert.
Currently, PNG images will have a watermark added and then be converted to JPG files. Next, we will configure Salesforce actions to run on these images.
03 Salesforce Action Flow
First, we will create an action to upload the watermarked and converted file to the same Salesforce object that the file was initially uploaded to.
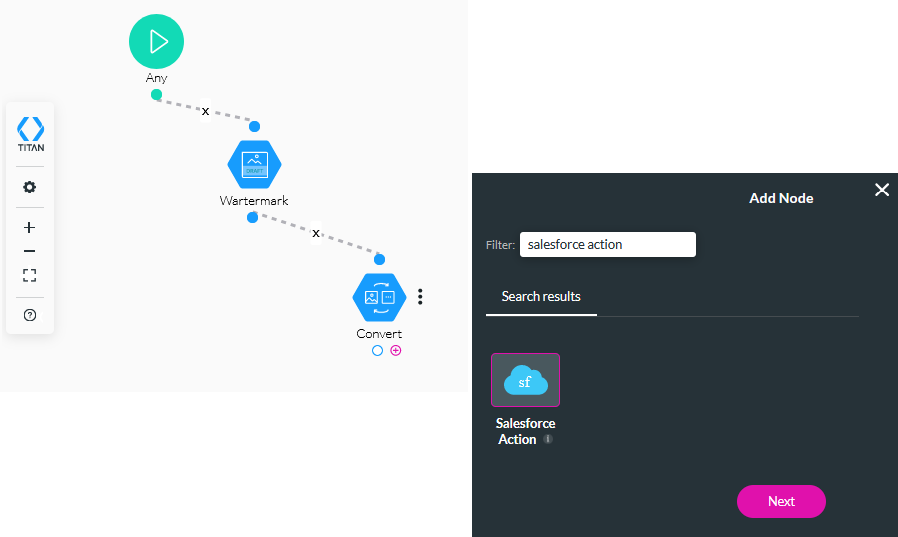
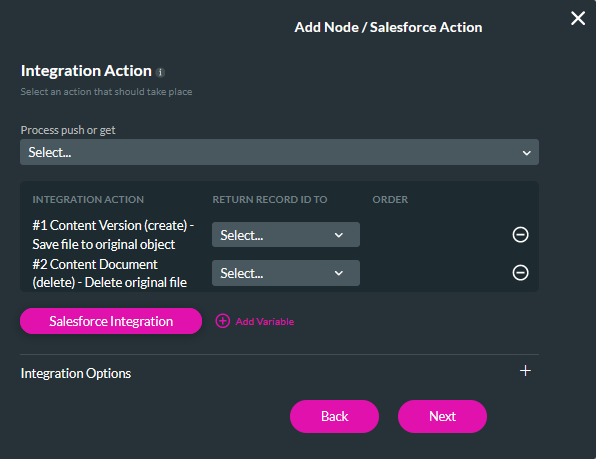
1. Click the Convert + icon and choose Salesforce Action as the node. Click Next.
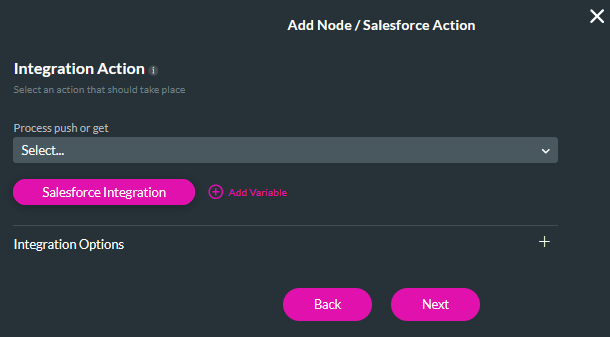
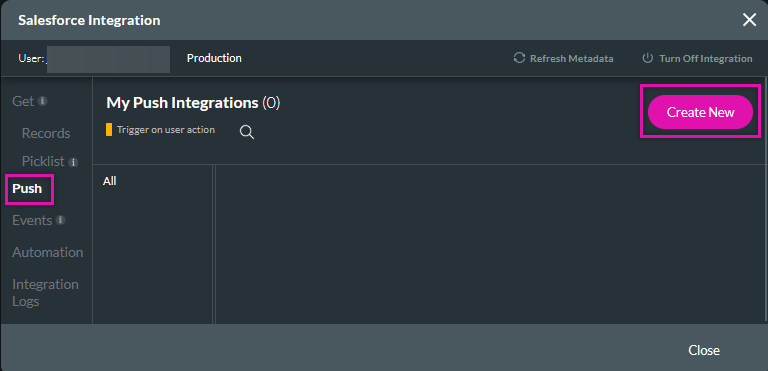
2. Click Salesforce Integration.
3. Select the Push tab and click Create New.
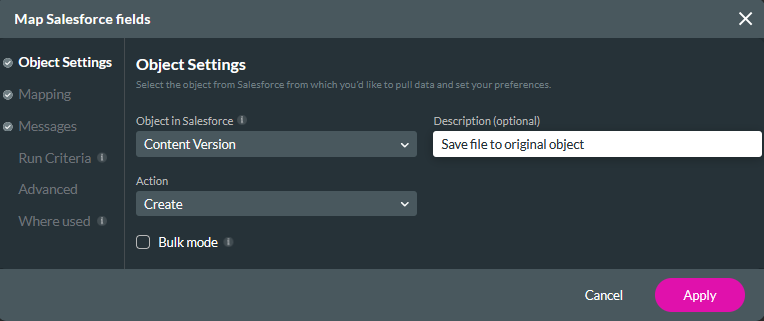
4. In the Object Settings tab, configure the content version as the Salesforce object, create as the action, and create files as the description.
5. In the Mapping tab, map the following and click Apply.
- Version data - GV/output_conversion
- First Publish Location ID - GV/parentRecordId

Next, we will configure a delete push to delete the original file.
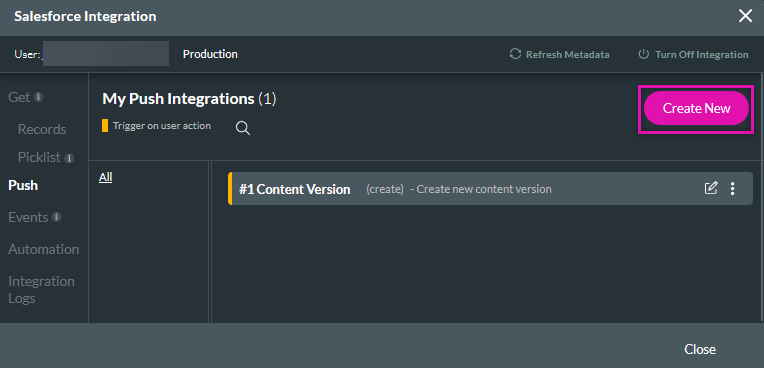
1. Click Create New.
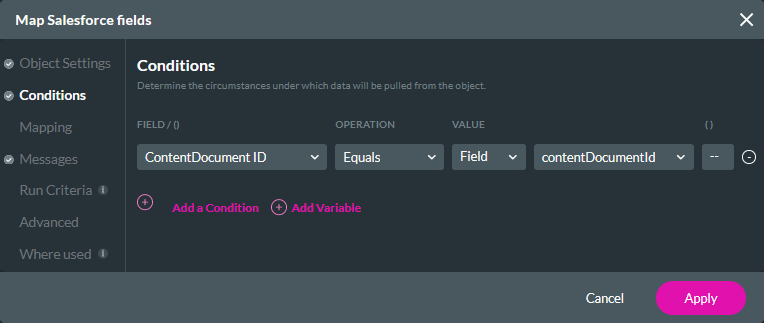
2. In the Object Settings tab, configure the content document as the Salesforce object, delete as the action, and create files as the description.
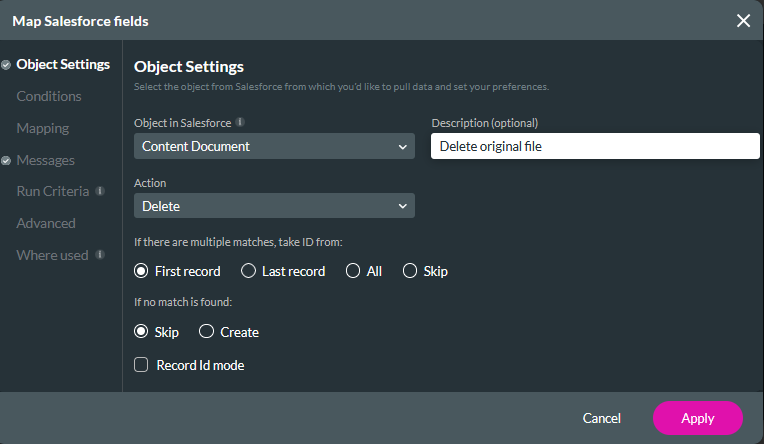
3. In the Conditions tab, configure the Content Document ID to equal the contentDocumentId field. Click Apply and Close.
4. Using the dropdown to select both Salesforce pushes. Ensure you choose the pushes in the order they should run, i.e., save the watermarked and converted file first, then delete the original. Click Next.
5. Add a tag and click Insert.
6. Click Done in the Apex configuration window.
7. Save the updated flow and Activate.
The current configuration will be triggered when a PNG file is added to an account. The image will be watermarked and converted to a JPG. After this has been completed, the original file will be deleted.