Salesforce Push Settings(6:30 min)
Completion requirements
01 Getting Started
This tutorial covers pushing a document generated by Titan Web to Salesforce. Before proceeding, ensure you have gone through the Auto PDF lesson.
02 Enable Salesforce Push for the Template
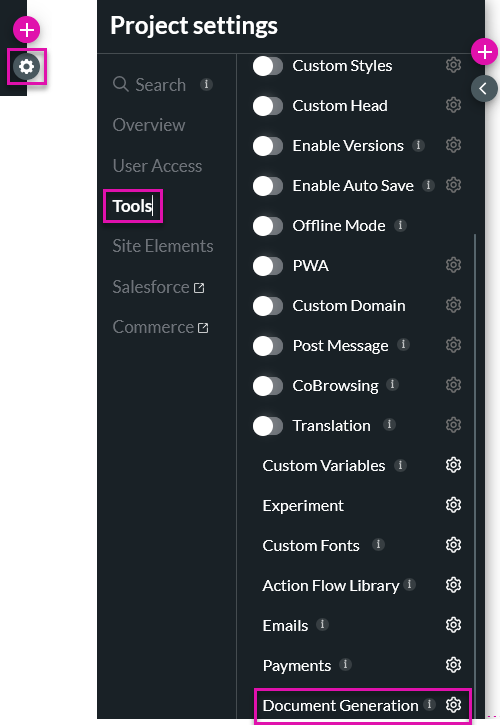
1. Select the Project Settings gear icon.
2. Click the Tools tab and select Document Generation.
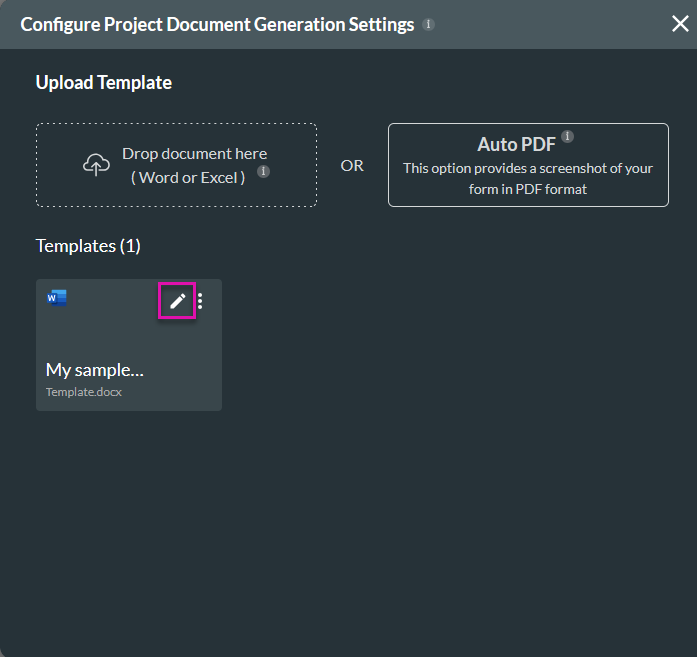
3. Click the template edit icon.
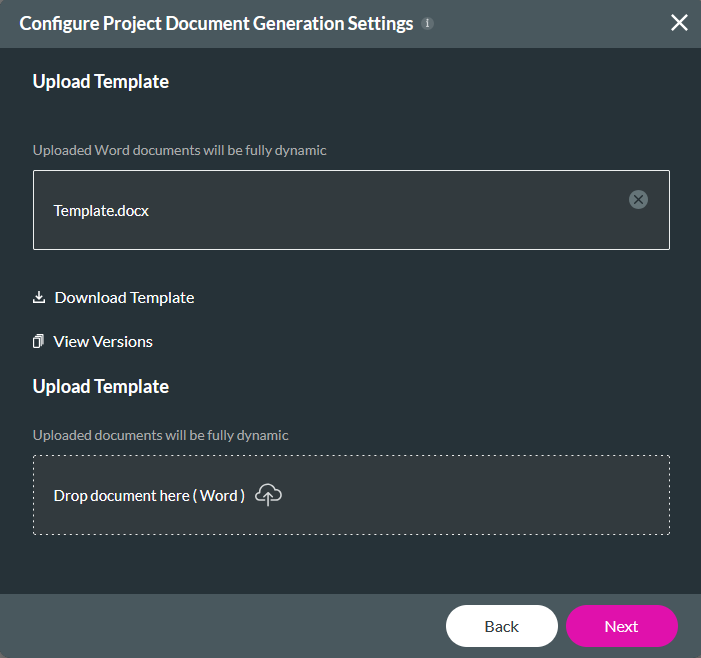
4. Click Next.
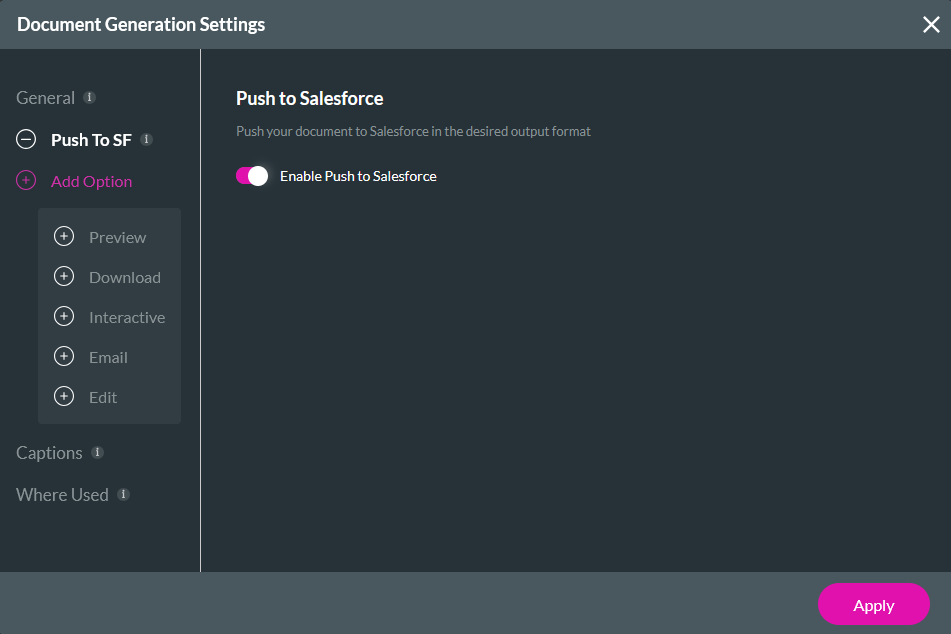
5. Click + Add Option and select Push to SF.
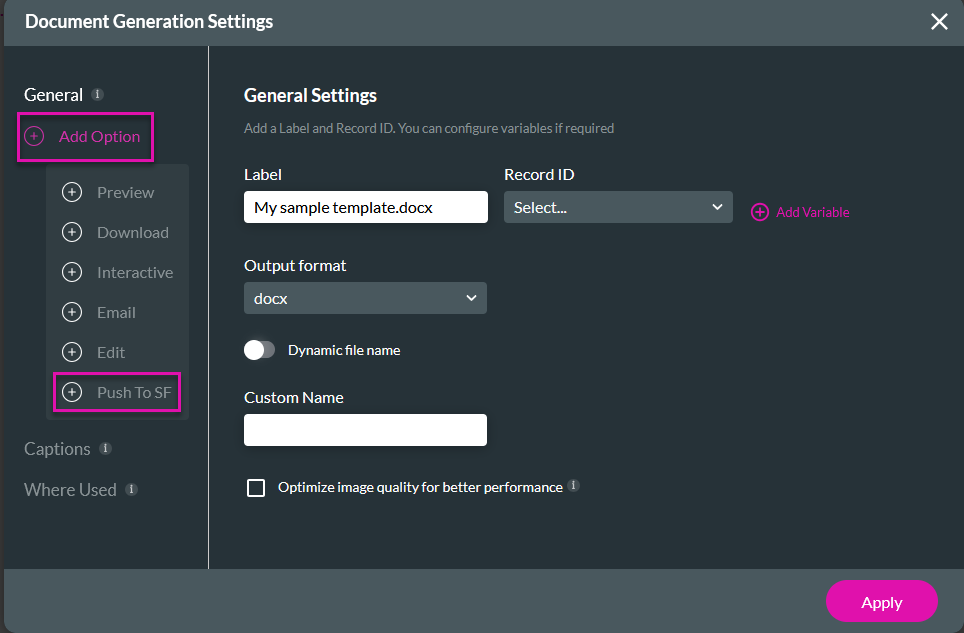
6. Ensure the Enable Push to Salesforce is turned on. Click Apply.
2. Click the Tools tab and select Document Generation.

3. Click the template edit icon.

4. Click Next.

5. Click + Add Option and select Push to SF.

6. Ensure the Enable Push to Salesforce is turned on. Click Apply.

03 Configure the Salesforce Push
1. Select the Project Settings gear icon and click the Salesforce tab.
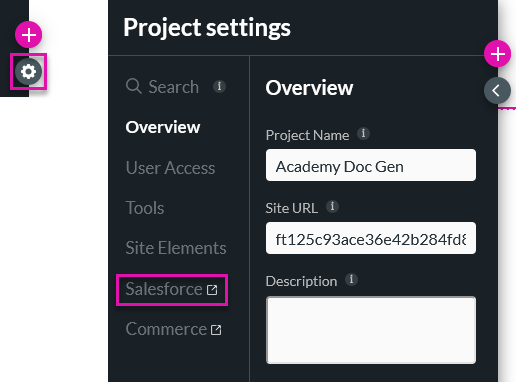
2. Click the Push tab and select Create New.
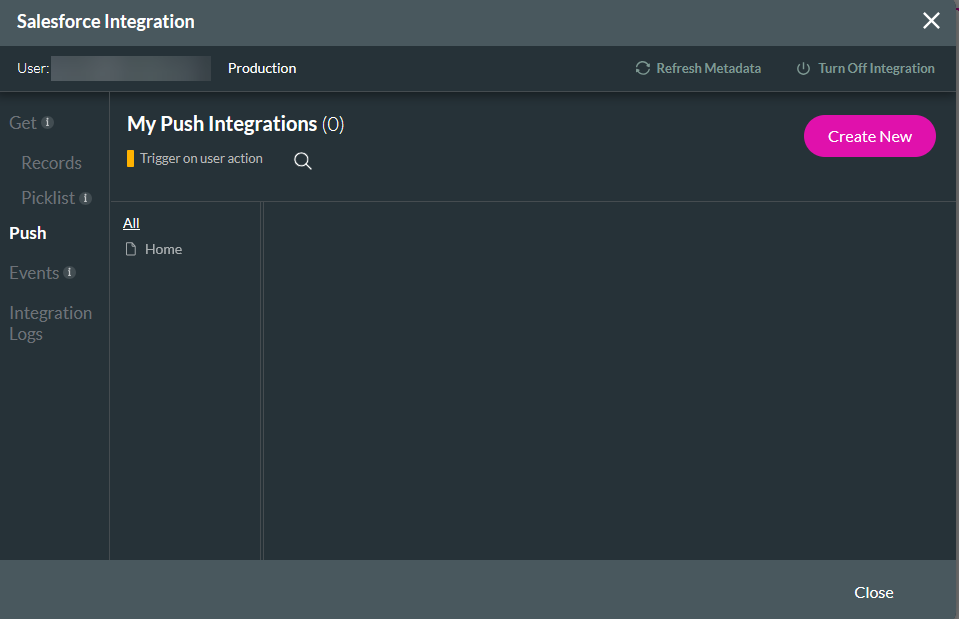
3. In the Object Settings tab, choose Content Version as the Object, Create as the Action, and enter a Tag Name.
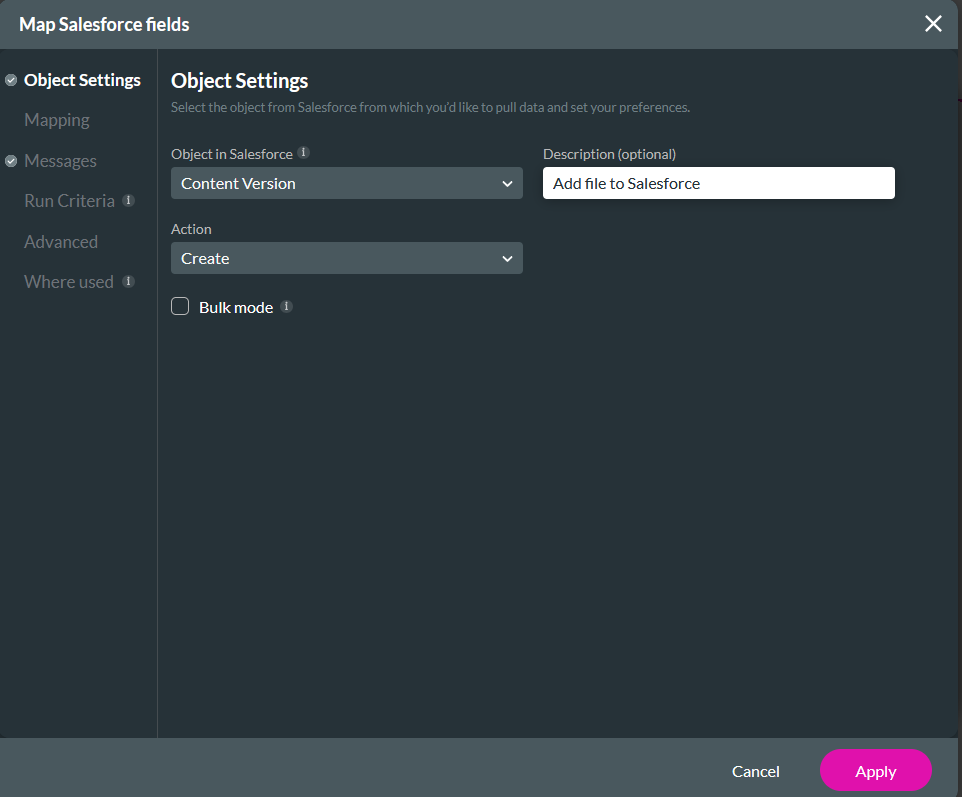
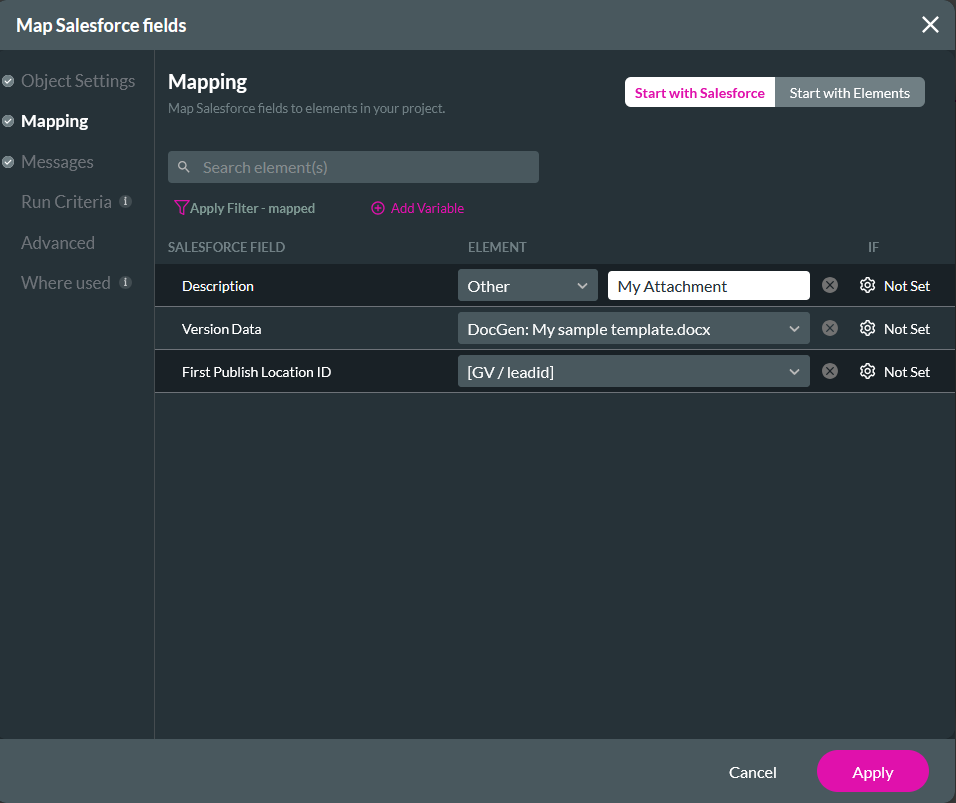
4. In the Mapping tab, configure the following and click Apply.

2. Click the Push tab and select Create New.

3. In the Object Settings tab, choose Content Version as the Object, Create as the Action, and enter a Tag Name.

4. In the Mapping tab, configure the following and click Apply.
- Description - Other - My Attachment. This step is optional, and the title can be anything you choose.
- Version Data - DocGen. Name of your template. This is the field in Salesforce that will hold your generated file.
- First Publish Location ID - You must save a Salesforce Record ID. This is where your document will be attached.
04 Invoking the Action
1. Select the button and click the interactivity icon. The On Click Action window opens.

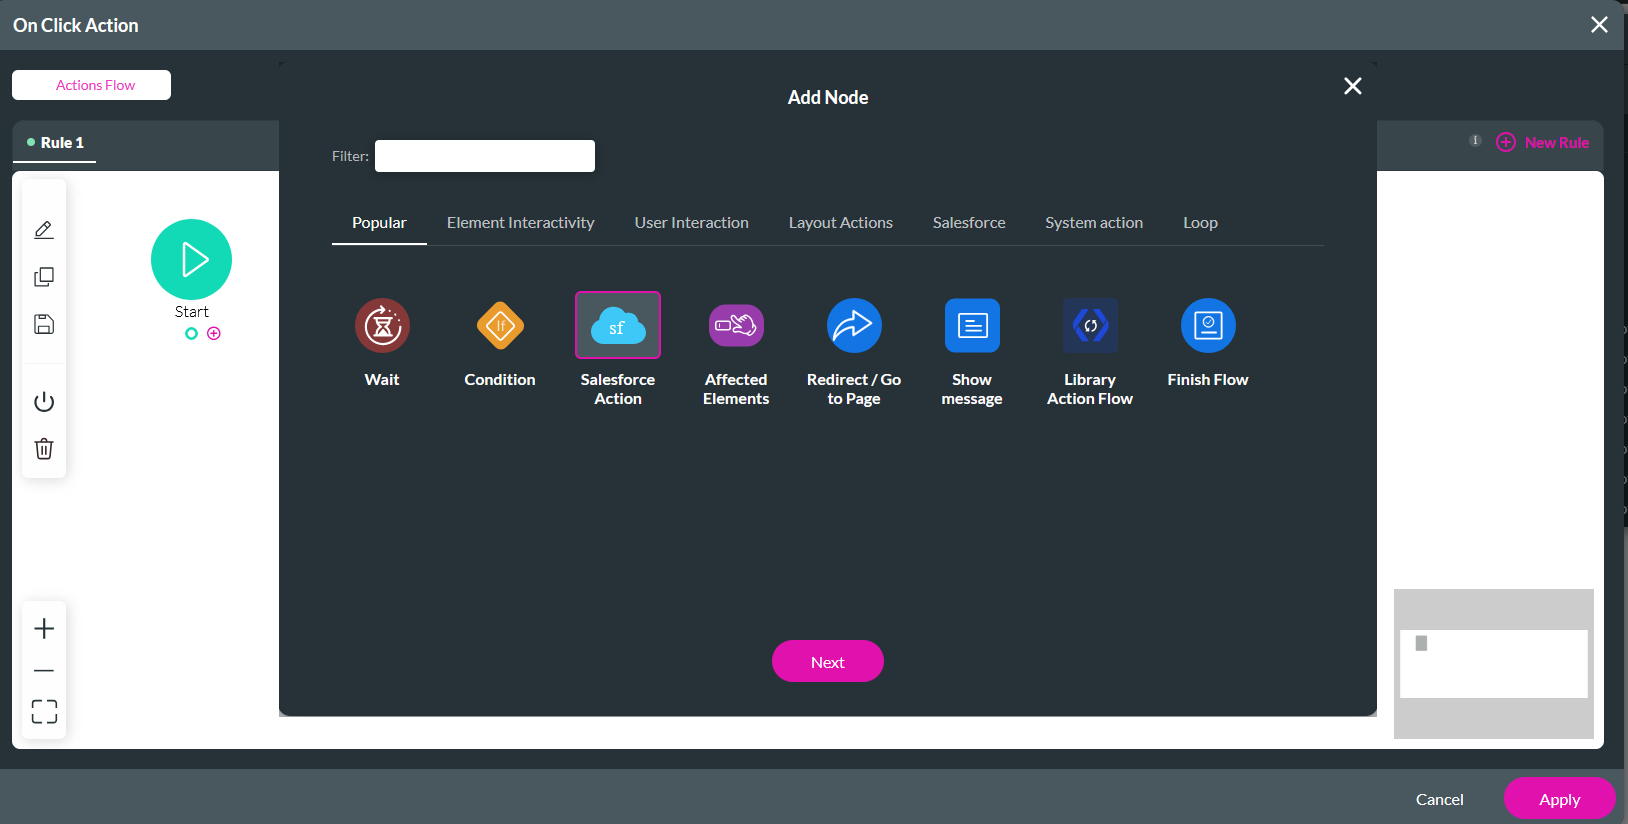
2. Select the Start + icon, select Salesforce Action as the node, and click Next.
3. Choose the configured Salesforce Action and click Next.
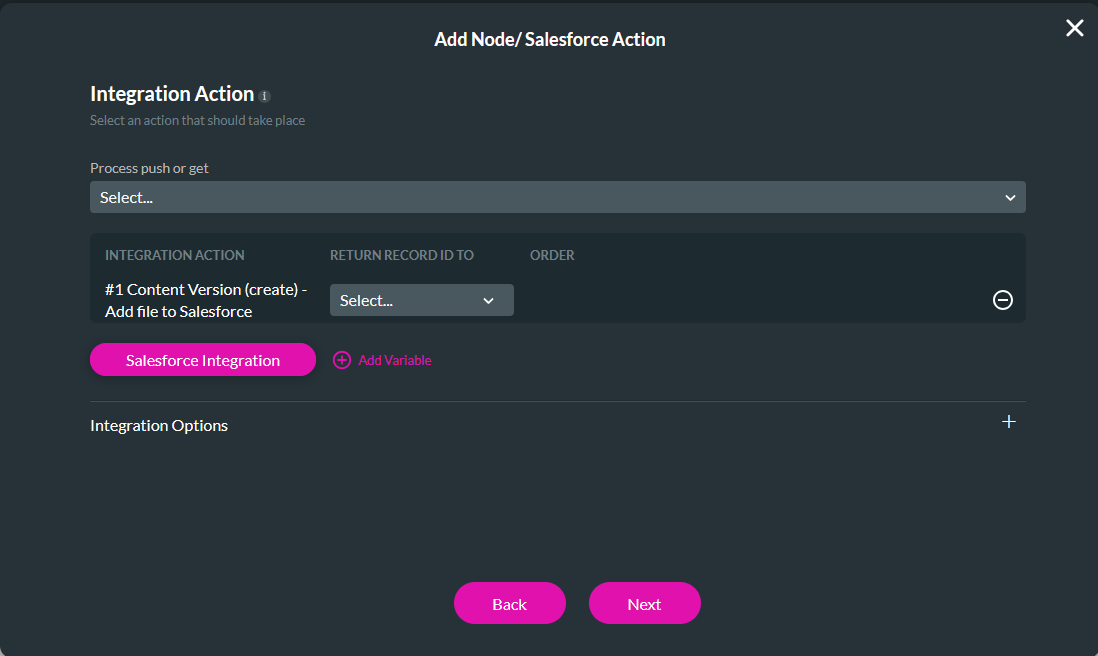
4. Enter a Tag name and click Insert.
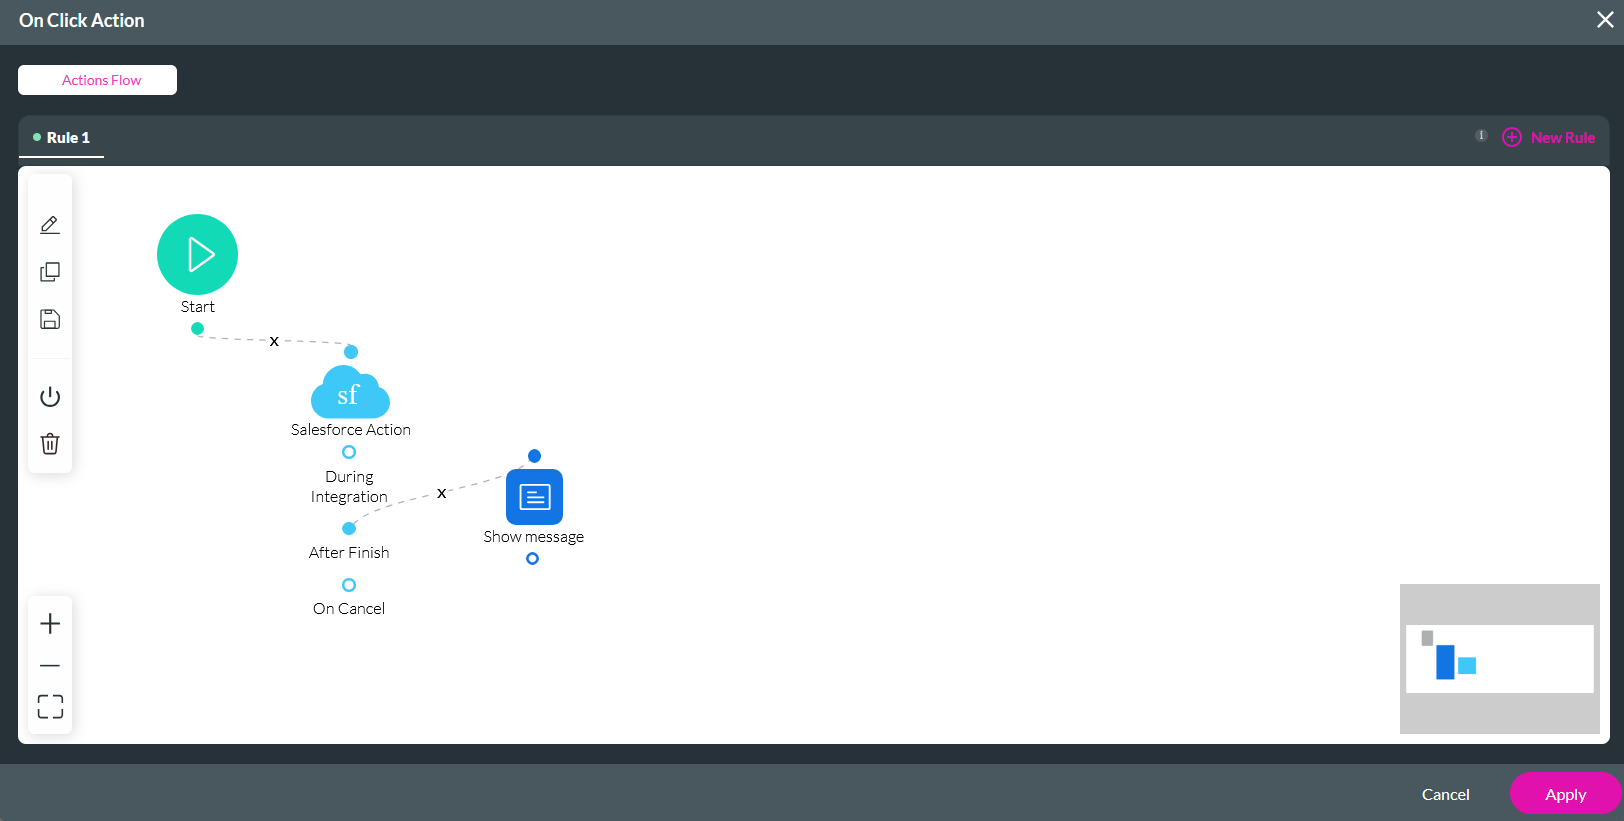
For example, you can configure any other node to run a confirmation message that displays when the file has been successfully uploaded.
The document will be sent to Salesforce when the user completes the form and clicks the button.

2. Select the Start + icon, select Salesforce Action as the node, and click Next.

3. Choose the configured Salesforce Action and click Next.

4. Enter a Tag name and click Insert.
For example, you can configure any other node to run a confirmation message that displays when the file has been successfully uploaded.
The document will be sent to Salesforce when the user completes the form and clicks the button.
