Email Settings (10 min)
Completion requirements
01 Getting Started
This tutorial covers how to email a document generated in Titan Web.
02 Email Document Configuration
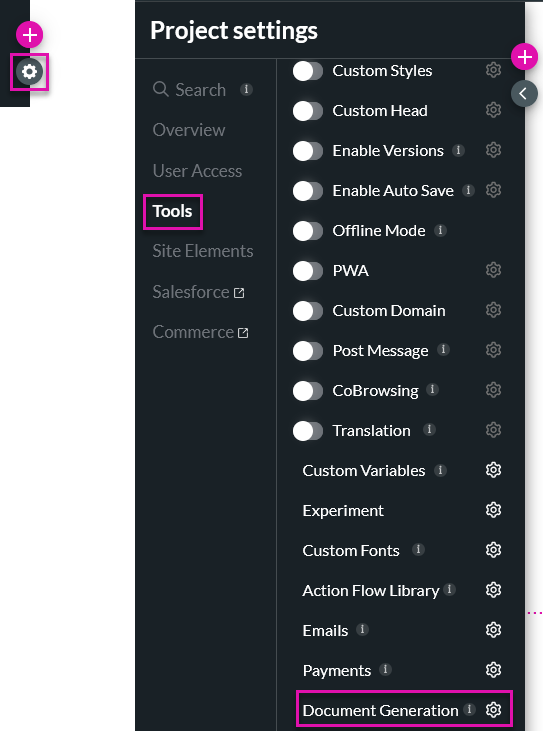
1. Click the Project Settings Gear icon, select the Tools tab, and click Document Generation.
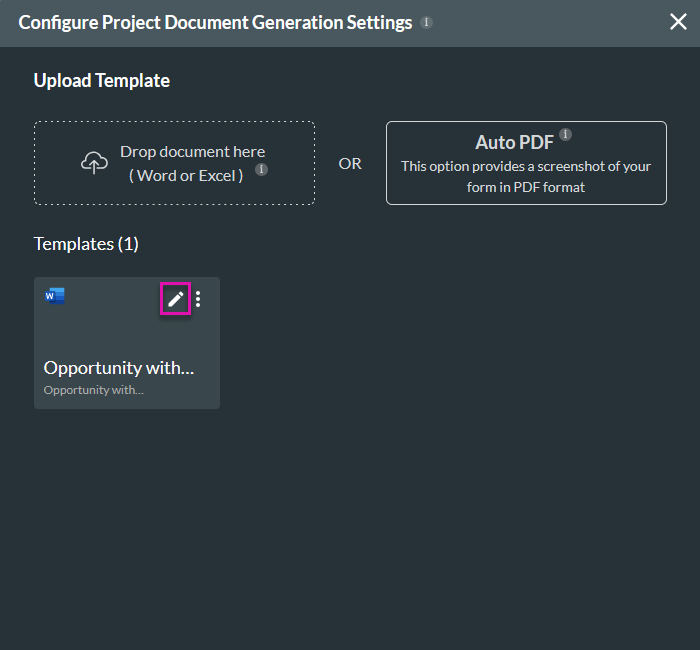
2. Click on the Edit icon of the template you want to edit.
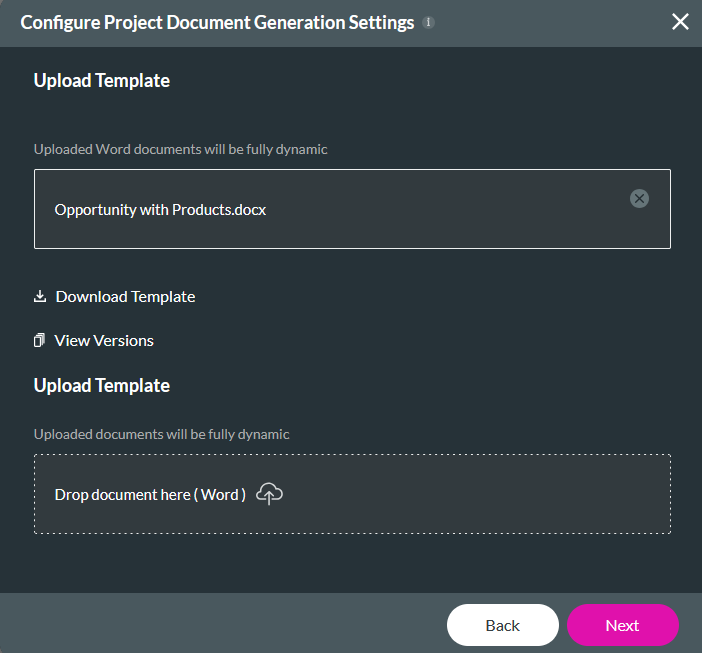
3. Click Next.
4. Click the Email tab under General, or click + Add Option and select the Email option.
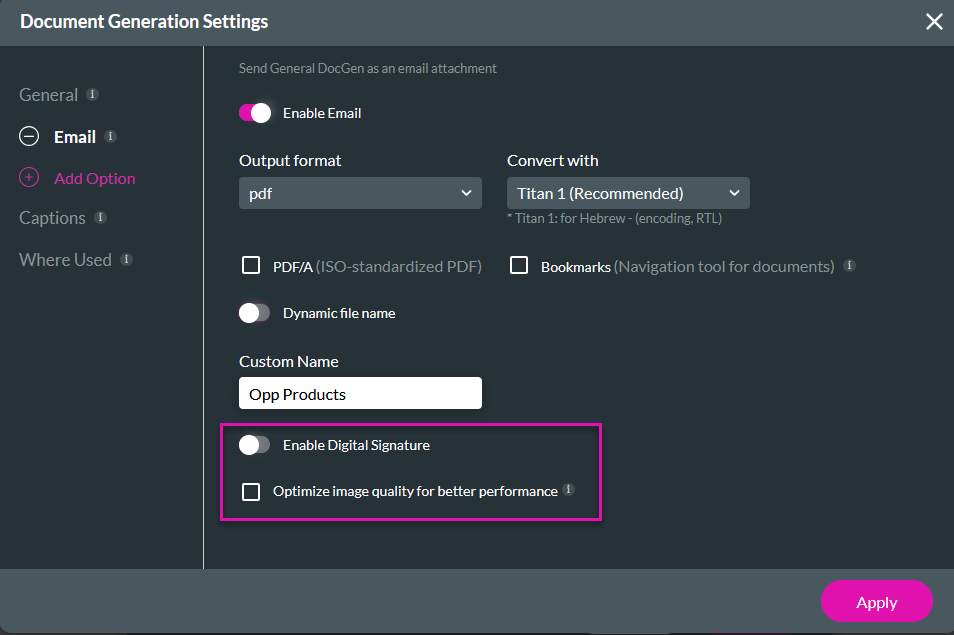
5. Switch the Enable Email toggle on.
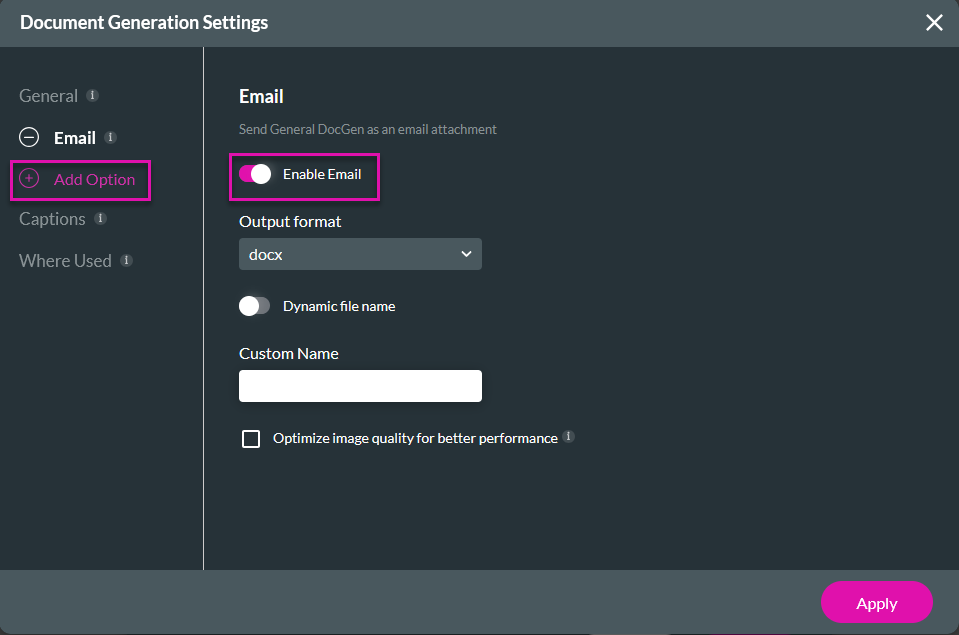
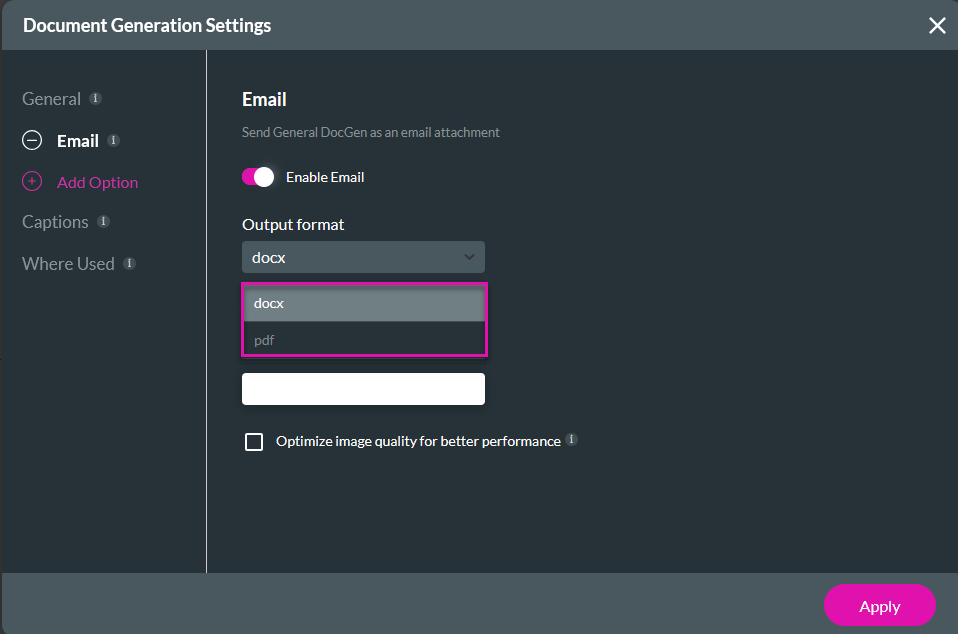
6. Select the Output Format of your document using the dropdown.
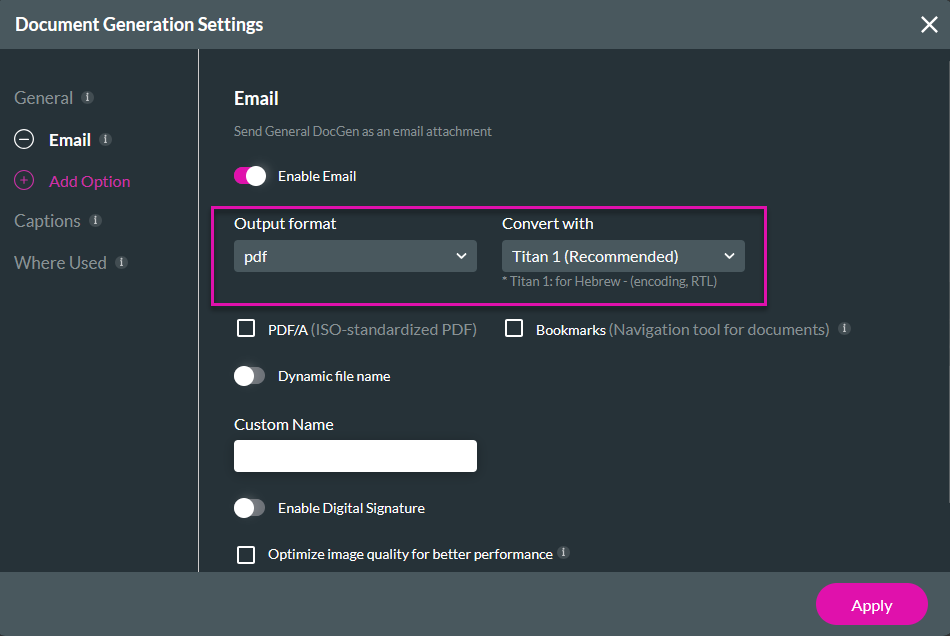
If you choose the PDF format, you can select the tool to convert the document. We recommend you choose Titan 1.
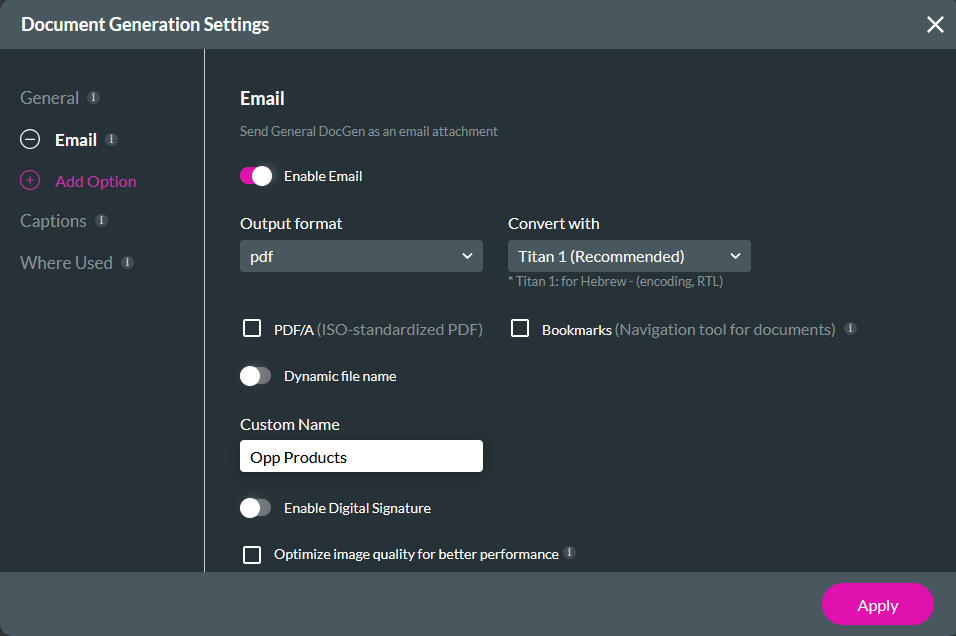
7. Set a Custom Name for your document. You can choose between a static or a dynamic file name.
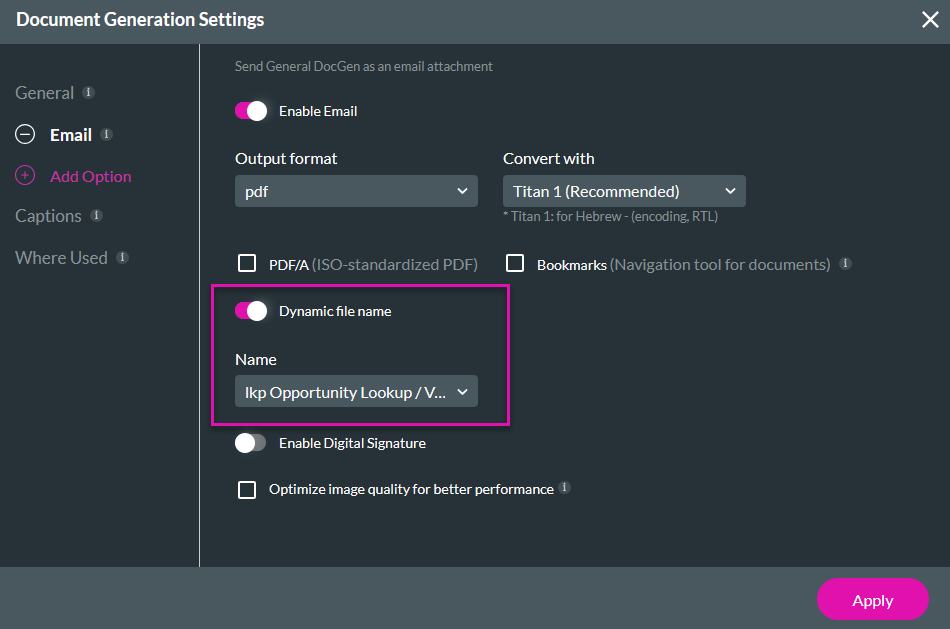
If you choose a dynamic file name, you must select a field name, or you can create a variable for your project.
You can enable digital signatures and optimize image quality for better performance if your document requires it.
8. Click Apply.

2. Click on the Edit icon of the template you want to edit.

3. Click Next.

4. Click the Email tab under General, or click + Add Option and select the Email option.
5. Switch the Enable Email toggle on.

6. Select the Output Format of your document using the dropdown.

If you choose the PDF format, you can select the tool to convert the document. We recommend you choose Titan 1.

7. Set a Custom Name for your document. You can choose between a static or a dynamic file name.

If you choose a dynamic file name, you must select a field name, or you can create a variable for your project.

You can enable digital signatures and optimize image quality for better performance if your document requires it.
8. Click Apply.

03 Invoking the Action
1. Click on the button and select the Interactivity icon. The On Click Action window opens.

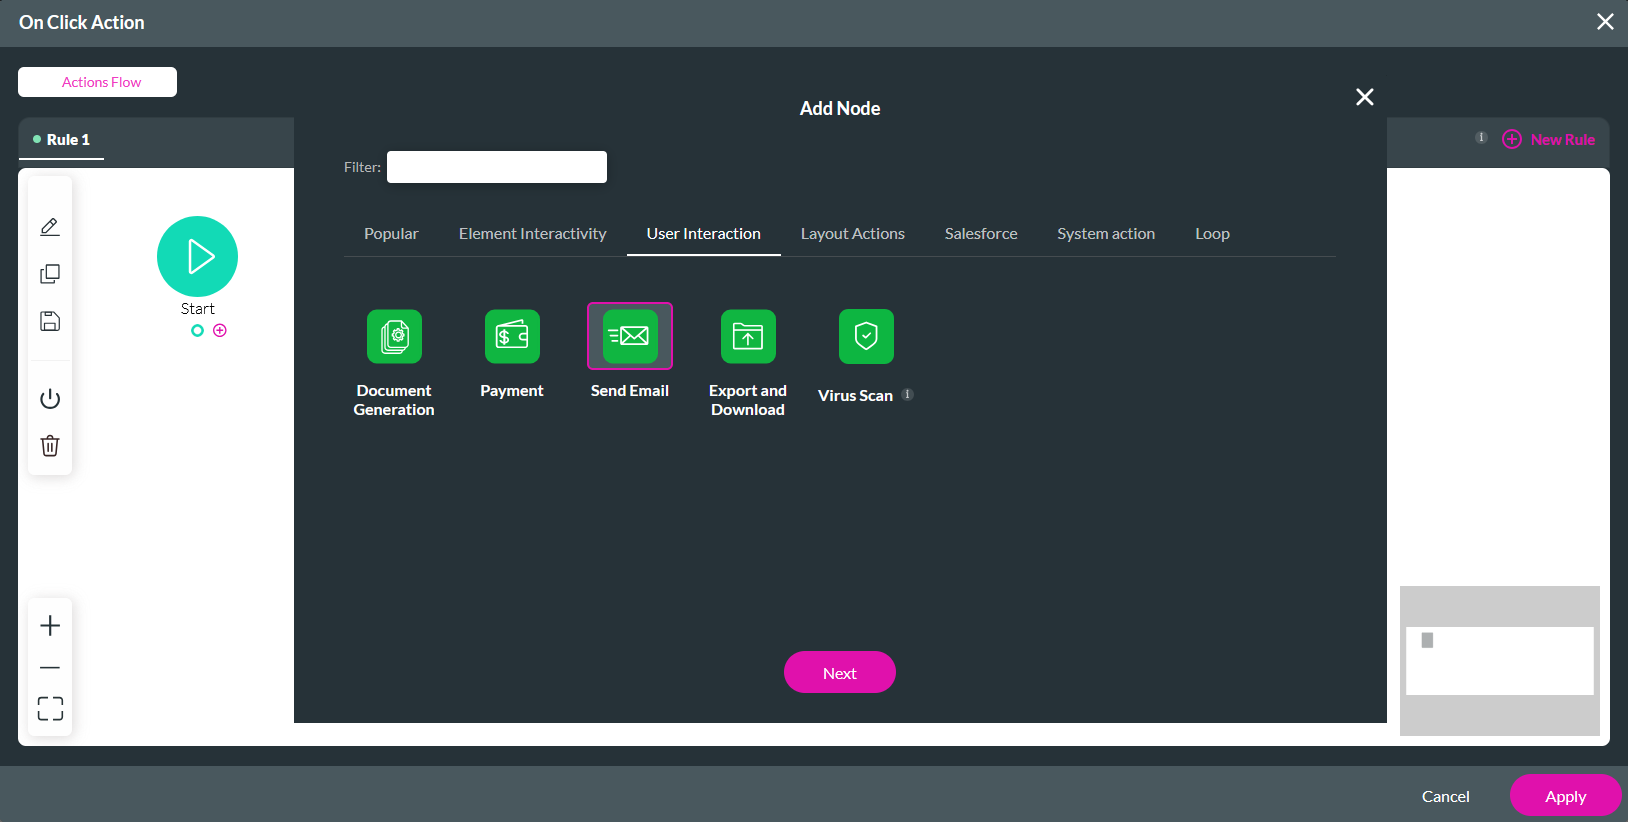
2. Select the Start + icon, choose Send Email as the node, and click Next.
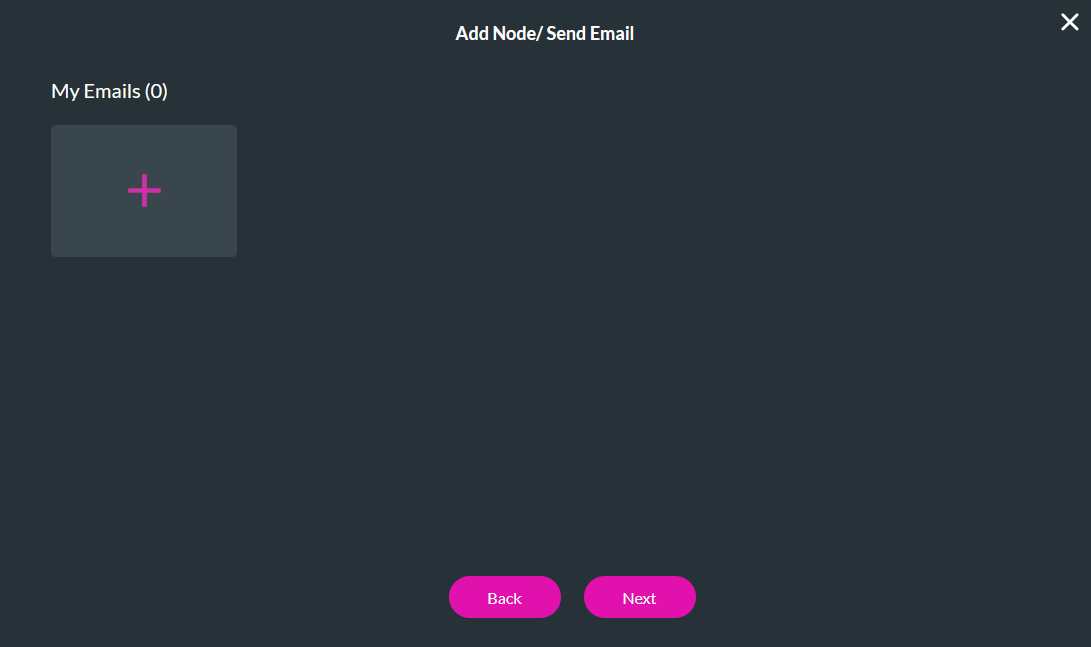
3. Select a previously configured email or create a new one. To create a new one, click the + icon.
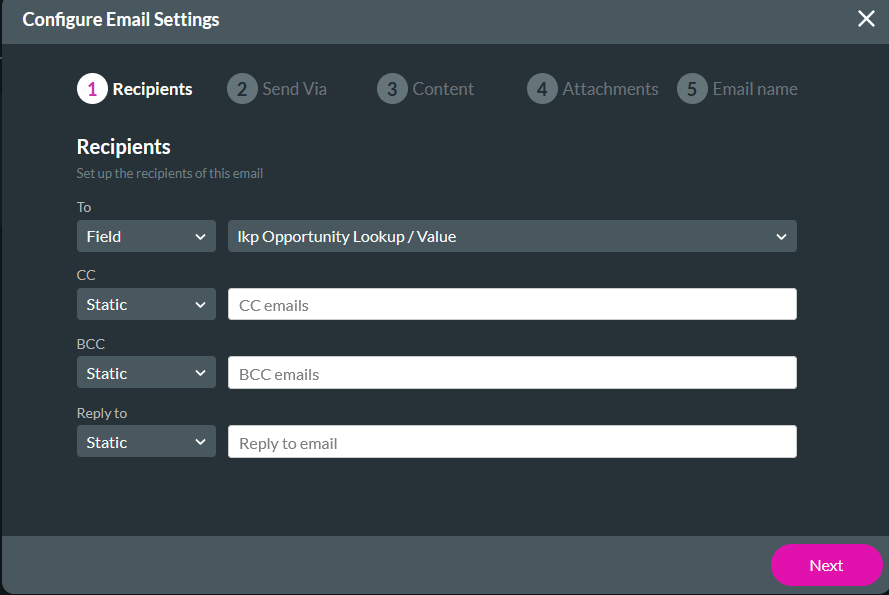
4. In Recipients, configure the recipients for the email. You can set static email addresses or select fields from the project. Click Next.
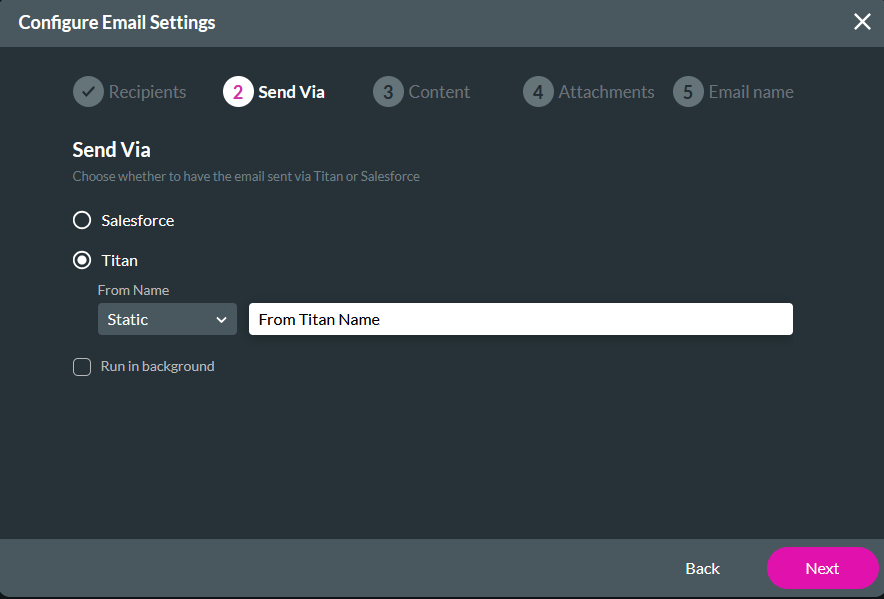
5. In Send Via, select whether to send your email via Salesforce or Titan. When sending from the Titan server, you must configure a From Name. Click Next.
6. In Content, your options will differ depending on the selection made in Send Via. If you select Salesforce, you can choose your template from the dropdown. Click Next.
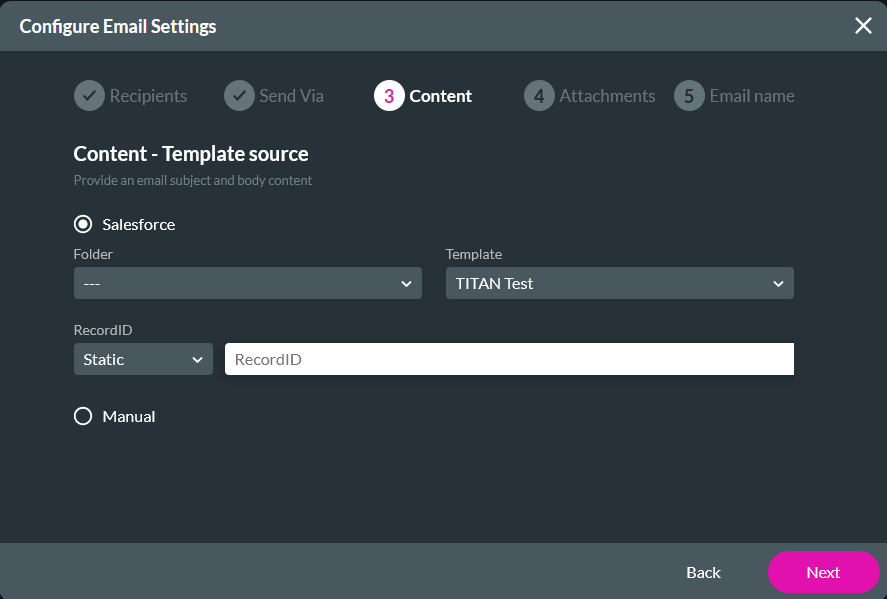
Or create the content manually.

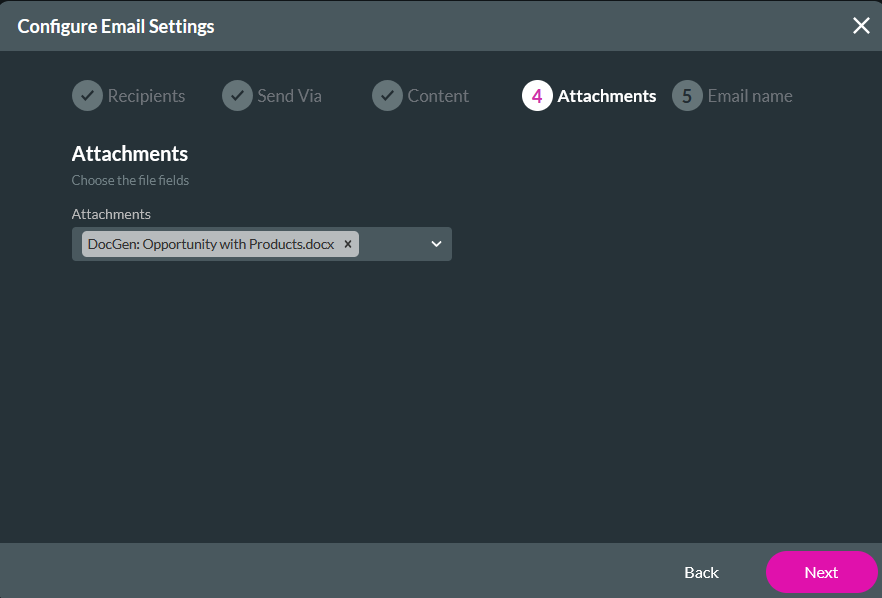
7. In Attachments, select the file that will attach to your email. Click Next.
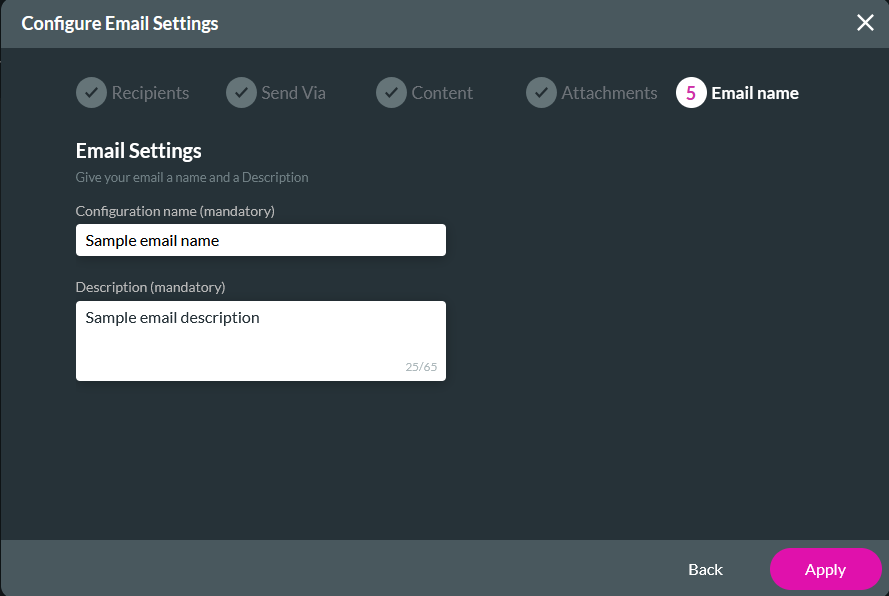
8. Configure an email name and description. Click Apply.
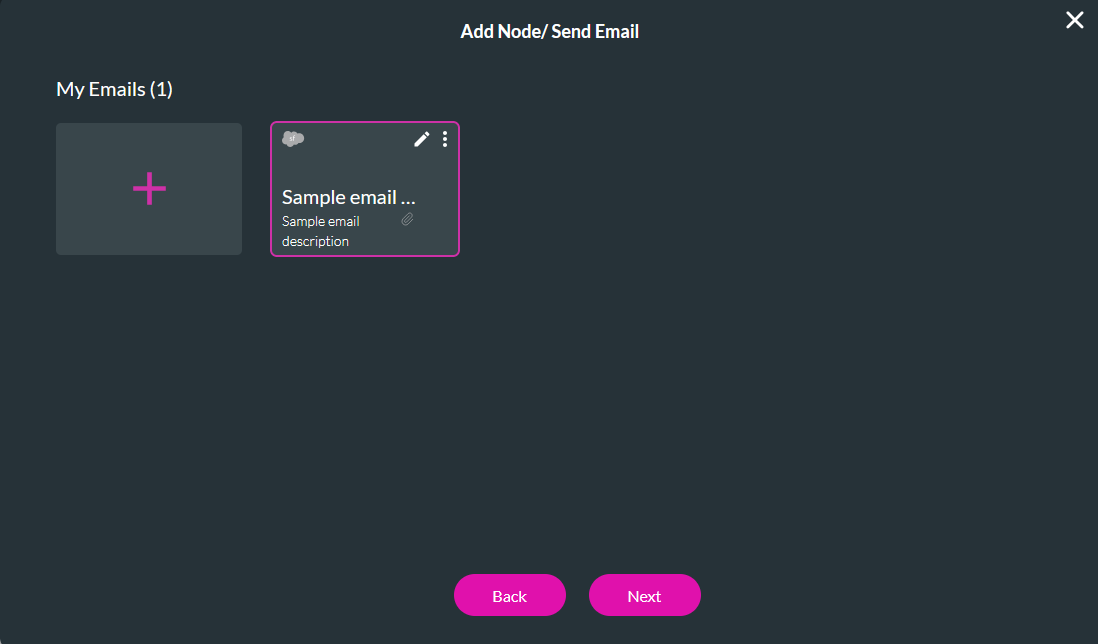
9. Select your email from the list and click Next.
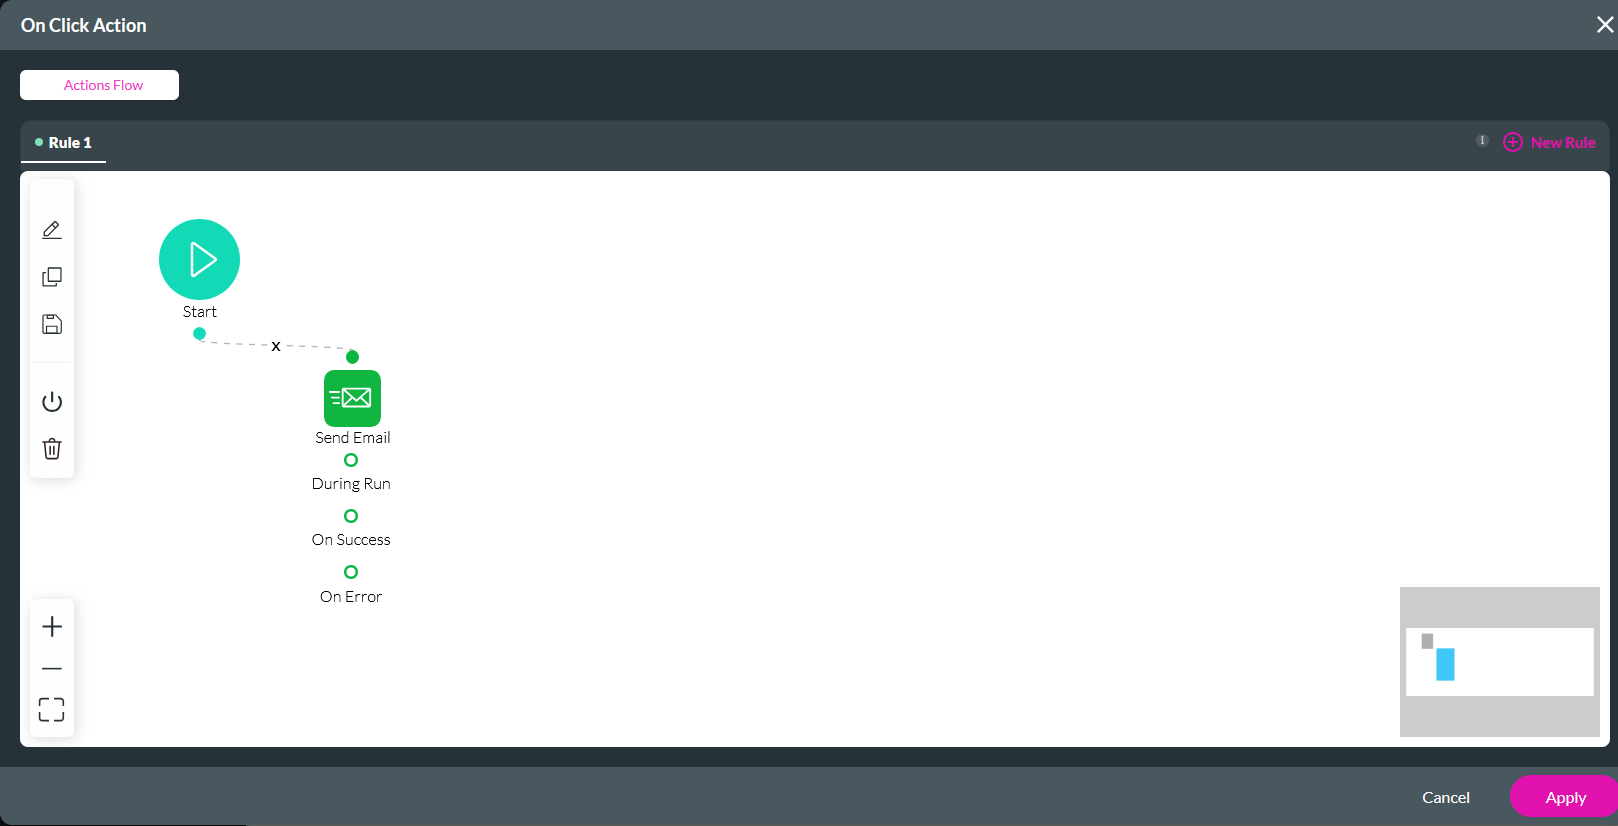
10. Enter a Tag name and click Insert. Your node is configured. From here, you can configure any other action to run. For example, you can display a toast message if the email is successfully sent.
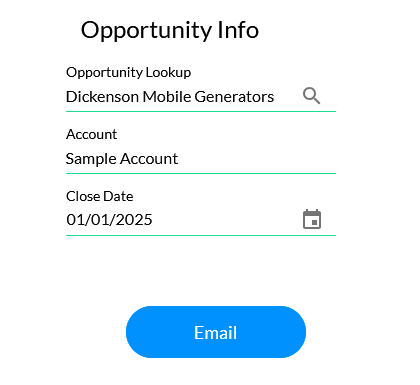
The configured email action will run when the user completes the form and clicks the email button.
2. Select the Start + icon, choose Send Email as the node, and click Next.

3. Select a previously configured email or create a new one. To create a new one, click the + icon.

4. In Recipients, configure the recipients for the email. You can set static email addresses or select fields from the project. Click Next.

5. In Send Via, select whether to send your email via Salesforce or Titan. When sending from the Titan server, you must configure a From Name. Click Next.

6. In Content, your options will differ depending on the selection made in Send Via. If you select Salesforce, you can choose your template from the dropdown. Click Next.

Or create the content manually.

7. In Attachments, select the file that will attach to your email. Click Next.

8. Configure an email name and description. Click Apply.

9. Select your email from the list and click Next.

10. Enter a Tag name and click Insert. Your node is configured. From here, you can configure any other action to run. For example, you can display a toast message if the email is successfully sent.

The configured email action will run when the user completes the form and clicks the email button.
