Edit Settings (8 min)
Completion requirements
01 Getting Started
This tutorial covers how to edit documents generated from Titan Web projects.
02 Edit Document Configuration
1. Click the Project Settings Gear icon, select the Tools tab, and click Document Generation.

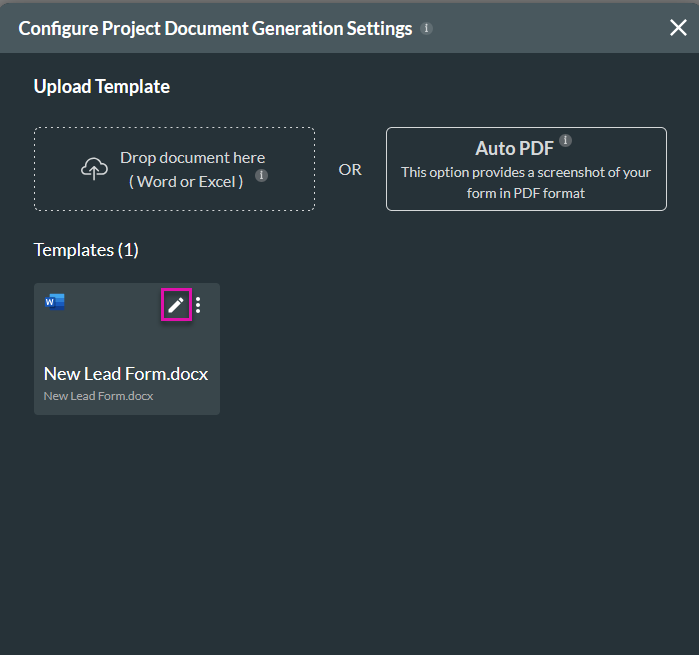
2. Click on the Edit icon of the template you want to edit.
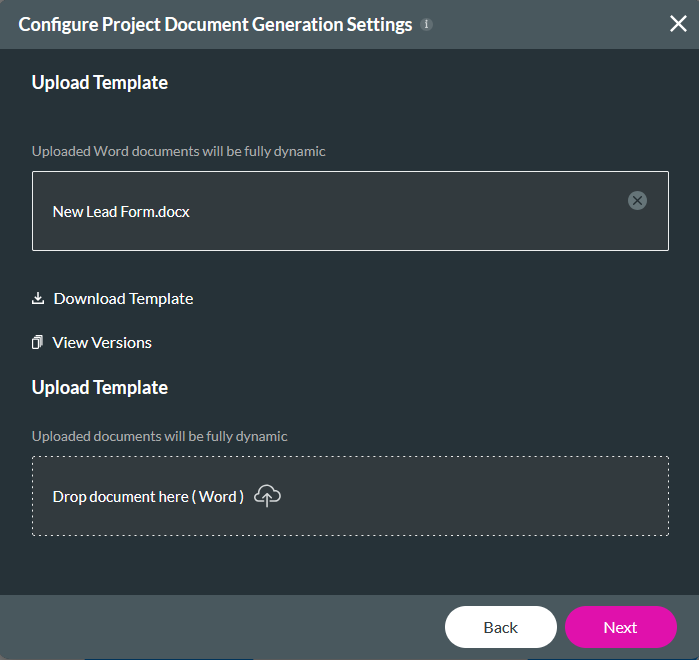
3. Click Next.
4. Click the Edit tab under General, or click + Add Option and select the Edit option.
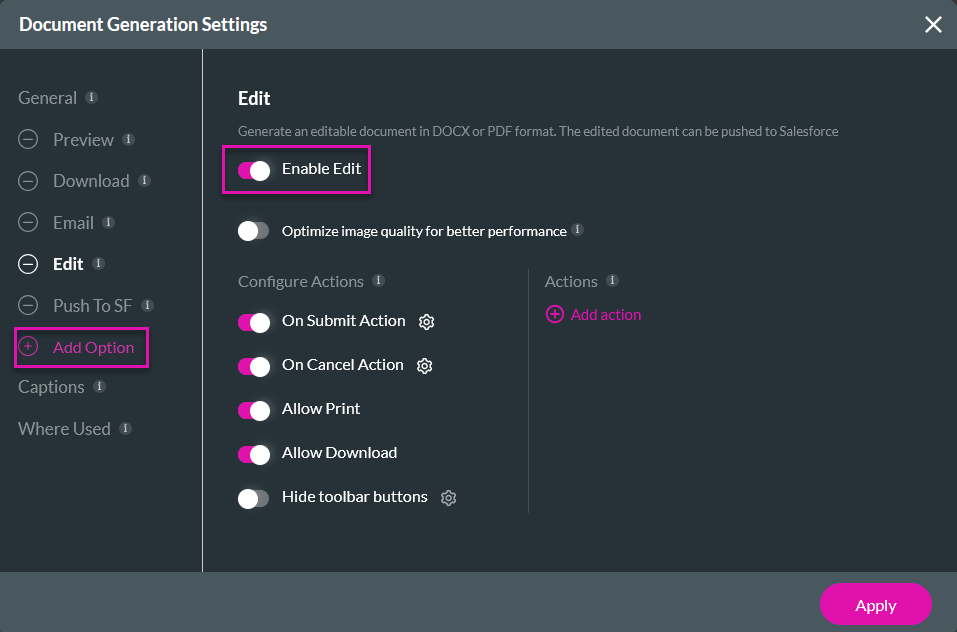
5. Switch the Enable Edit toggle on.
There are multiple actions and options you can enable for your document.
When the edit option is selected, data is retrieved from Salesforce and shown to the user for editing. You need to configure actions for when users submit their changes or cancel the edit.
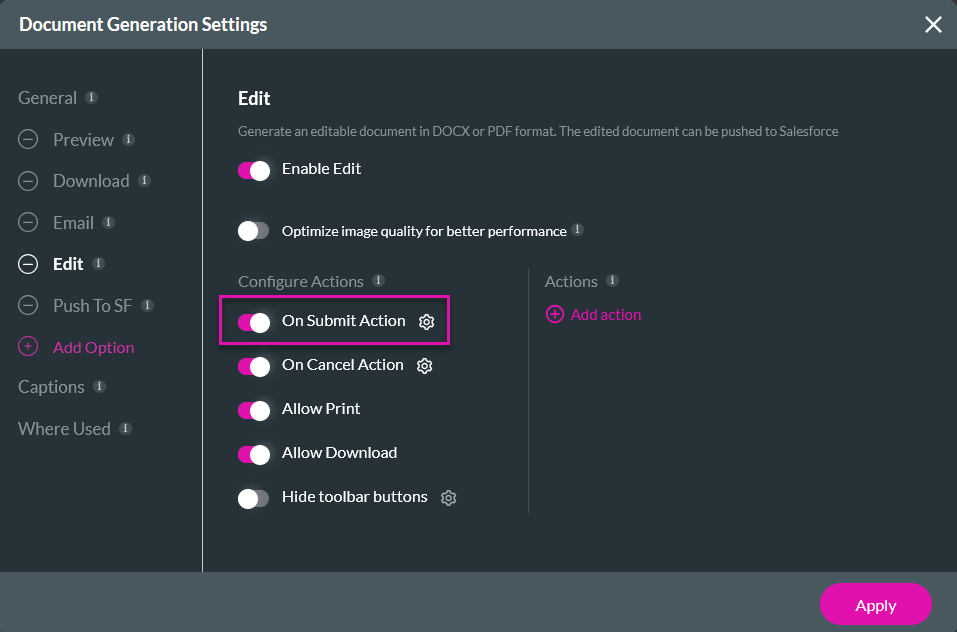
6. Switch the On Submit toggle on and click the gear icon. The On Action window opens.
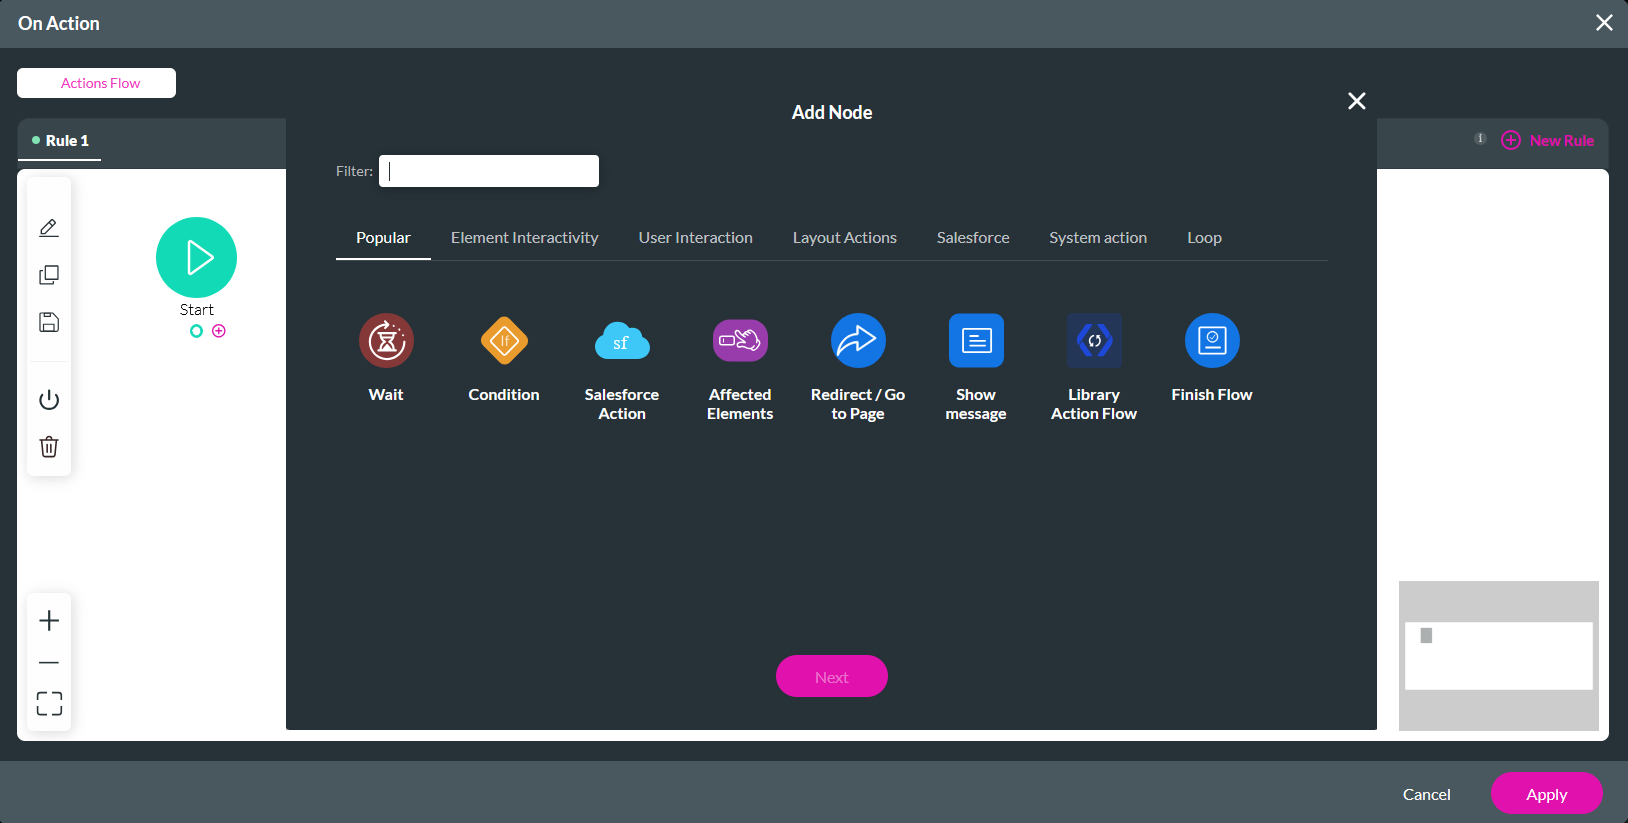
7. Click the Start + icon, and choose any node you want to configure—for example, a Salesforce Action to update the edited information in your Salesforce or publish a document. Please refer to this lesson to learn how to configure this action.
Once your configuration is completed, your user will be able to preview a document, edit it, and submit or cancel their edits.

2. Click on the Edit icon of the template you want to edit.

3. Click Next.

4. Click the Edit tab under General, or click + Add Option and select the Edit option.

5. Switch the Enable Edit toggle on.
There are multiple actions and options you can enable for your document.
When the edit option is selected, data is retrieved from Salesforce and shown to the user for editing. You need to configure actions for when users submit their changes or cancel the edit.
6. Switch the On Submit toggle on and click the gear icon. The On Action window opens.

7. Click the Start + icon, and choose any node you want to configure—for example, a Salesforce Action to update the edited information in your Salesforce or publish a document. Please refer to this lesson to learn how to configure this action.

Once your configuration is completed, your user will be able to preview a document, edit it, and submit or cancel their edits.