Download Settings (7 min)
Completion requirements
01 Getting Started
This tutorial covers document management options for documents generated from Titan Web.
02 Download Document Configuration
1. Click the Project Settings Gear icon, select the Tools tab, and click Document Generation.
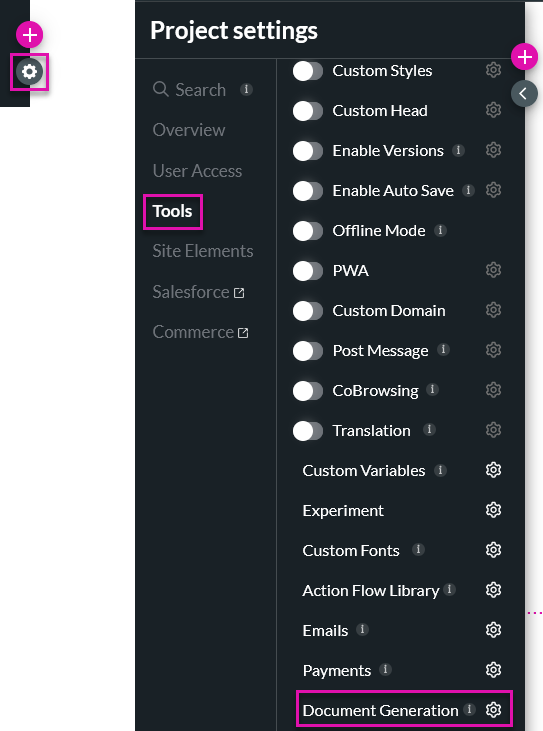
2. Click on the Edit icon of the template you want to edit.
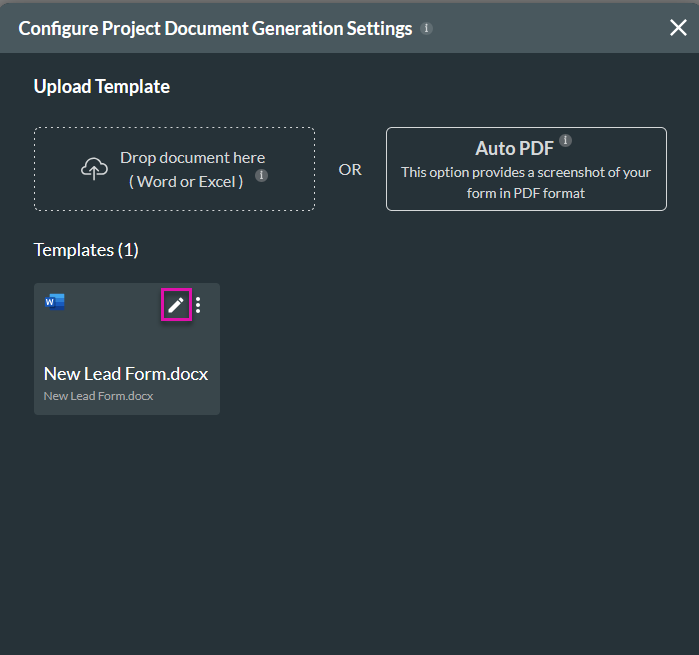
3. Click Next.
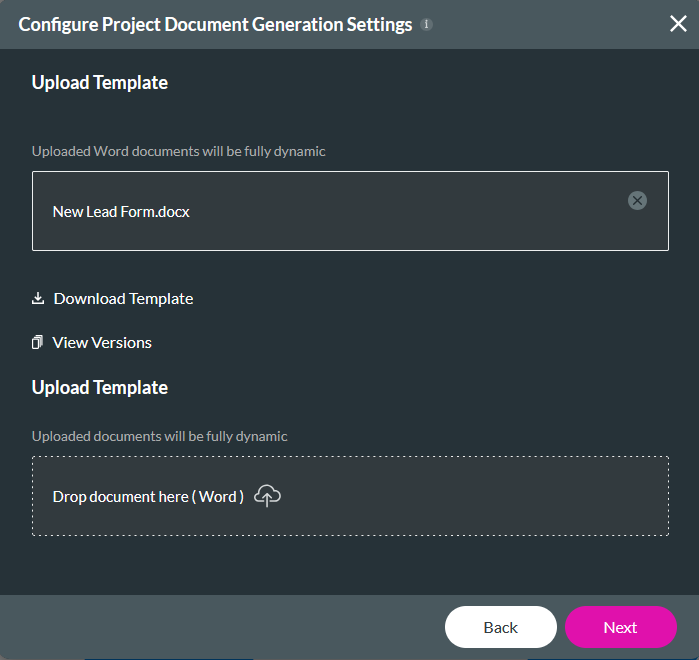
4. Under General, you can see the various actions you can set for your template. Click the + Add Option to add another action to your template.
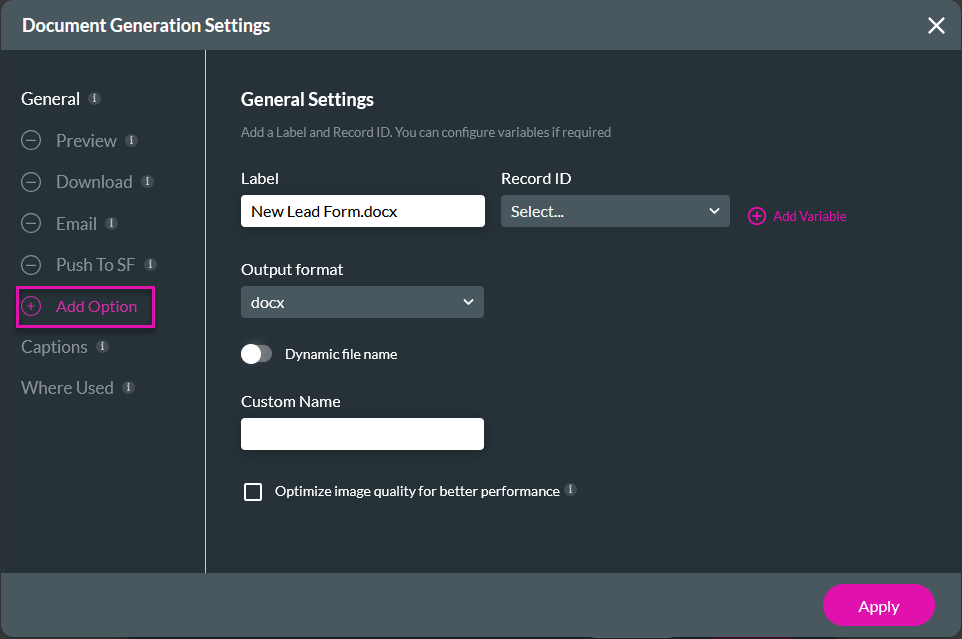
5. Click Download to start editing the download option. Set your Enable Download toggle on.
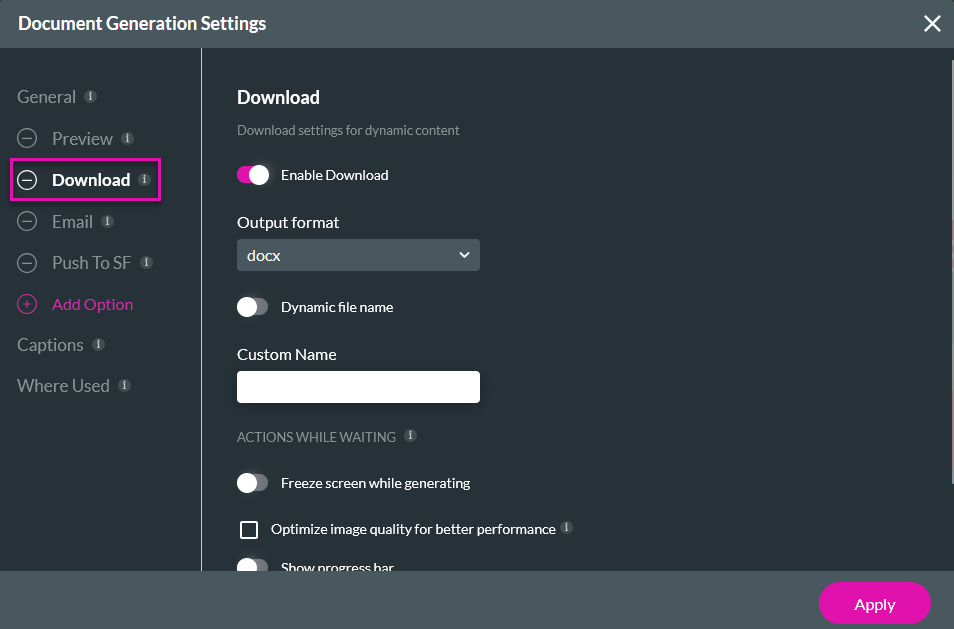
6. Select the Output Format of your document using the dropdown.
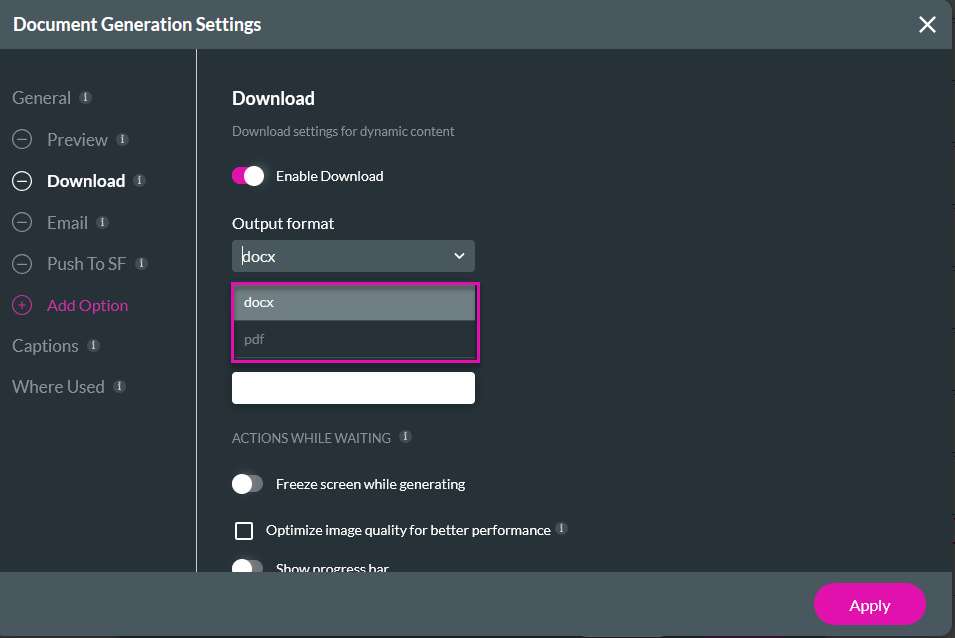
If you choose the PDF format, you can select the tool to convert the document. We recommend you choose Titan 1.

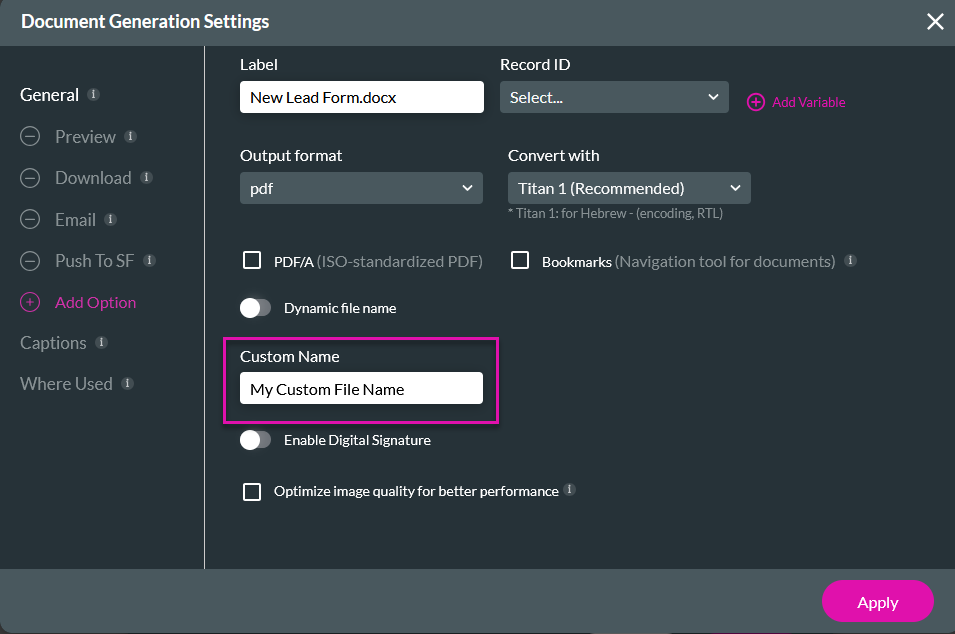
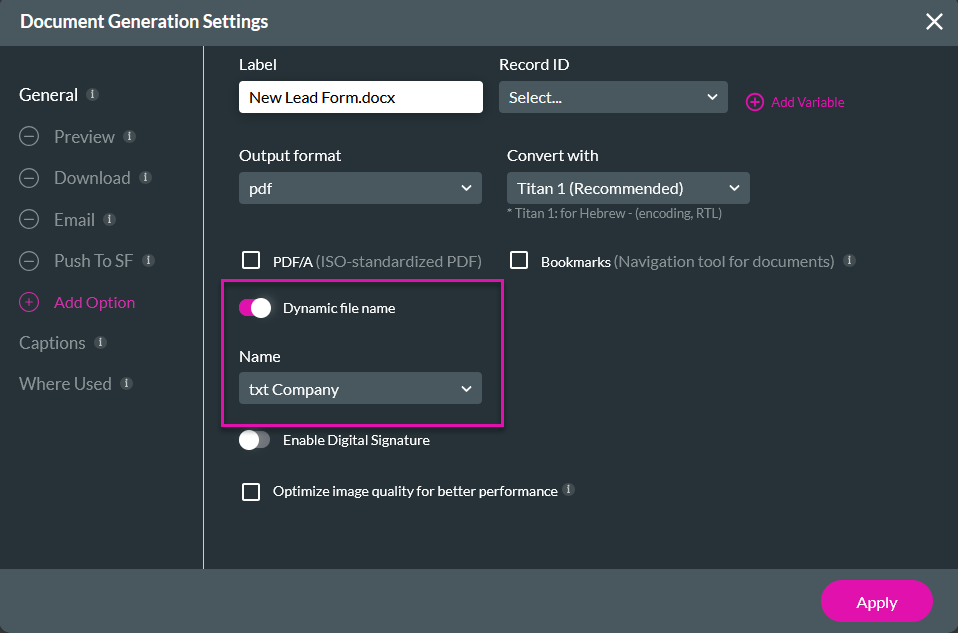
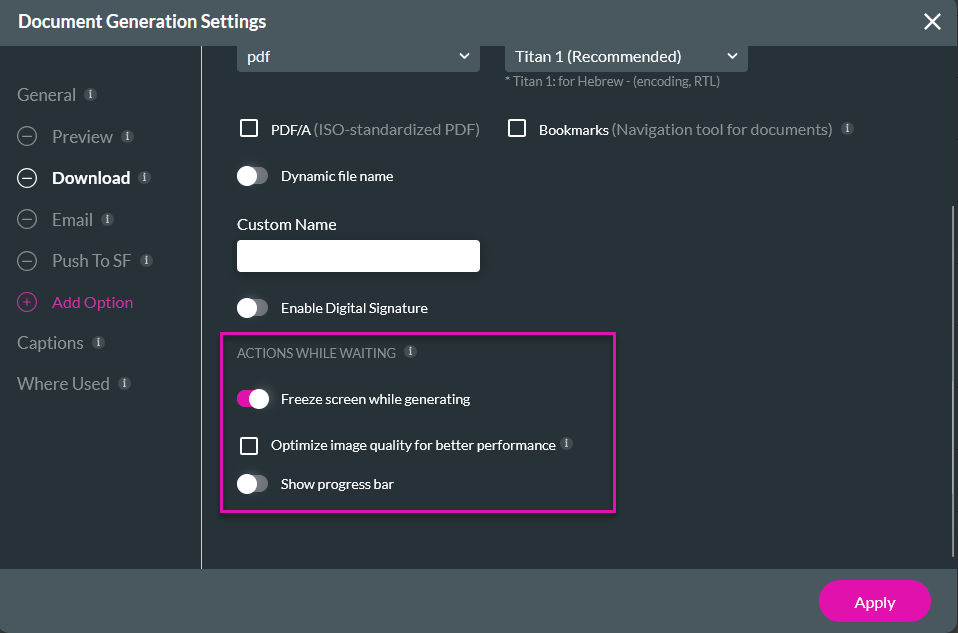
7. Set a Custom Name for your document. You can choose between a static or a dynamic file name.
If you choose a dynamic file name, you must select a field name, or you can create a variable in your project.
8. Turn the Freeze Screen While Generating toggle switch to indicate to users that a document is loading.
9. Enable Optimize Image Quality for Better Performance if your document contains multiple images.
10. Enable the Progress Bar to indicate the progression of the document.
Note that the best practice is to enable either Freeze Screen or Show Progress Bar, but not both.
Click Apply.

2. Click on the Edit icon of the template you want to edit.

3. Click Next.

4. Under General, you can see the various actions you can set for your template. Click the + Add Option to add another action to your template.

5. Click Download to start editing the download option. Set your Enable Download toggle on.

6. Select the Output Format of your document using the dropdown.

If you choose the PDF format, you can select the tool to convert the document. We recommend you choose Titan 1.

7. Set a Custom Name for your document. You can choose between a static or a dynamic file name.

If you choose a dynamic file name, you must select a field name, or you can create a variable in your project.

8. Turn the Freeze Screen While Generating toggle switch to indicate to users that a document is loading.
9. Enable Optimize Image Quality for Better Performance if your document contains multiple images.
10. Enable the Progress Bar to indicate the progression of the document.
Note that the best practice is to enable either Freeze Screen or Show Progress Bar, but not both.
Click Apply.

03 Custom Loader
You can display a custom loader while an action is running.
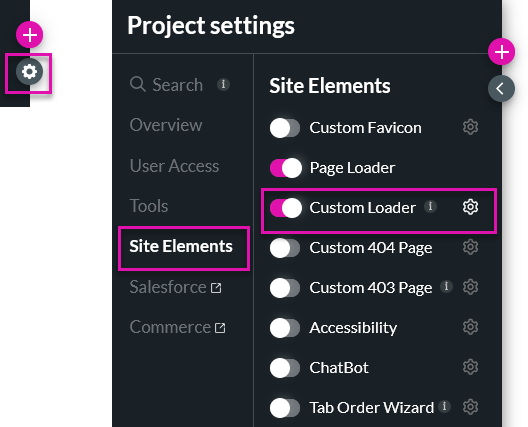
1. Click the Project Settings Gear icon, and select the Site Elements tab.
2. Turn the Custom Loader toggle switch on and click the gear icon.
3. In the Customize Salesforce Preloader window, you can style how your loader will display to users.
1. Click the Project Settings Gear icon, and select the Site Elements tab.
2. Turn the Custom Loader toggle switch on and click the gear icon.

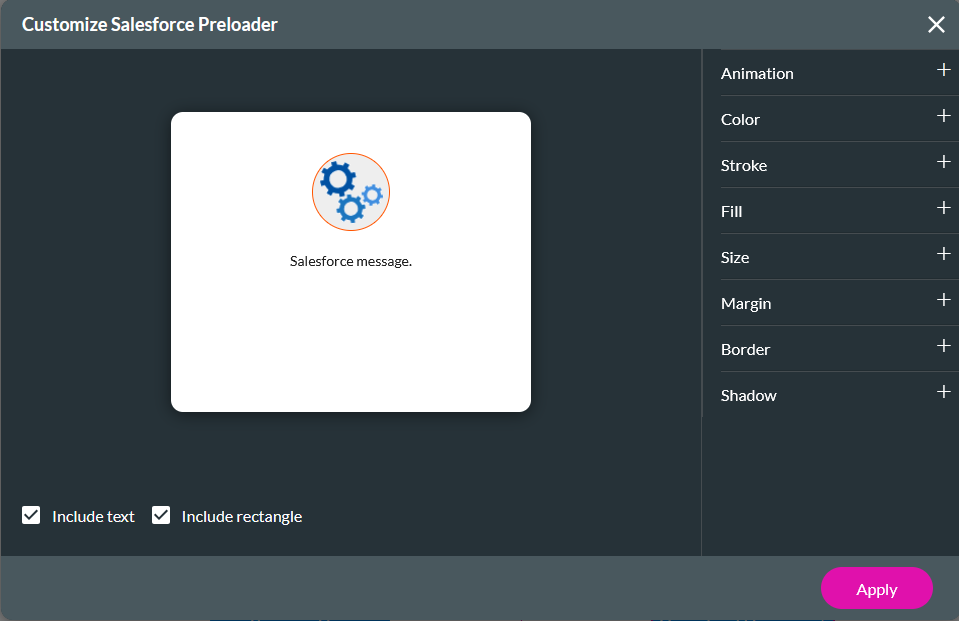
3. In the Customize Salesforce Preloader window, you can style how your loader will display to users.
