Layout - Salesforce Table (5 min)
Completion requirements
01 Getting Started
You should use the table functionality when you want to display a list of related records, such as a list of contacts related to an account.
02 Insert a Table
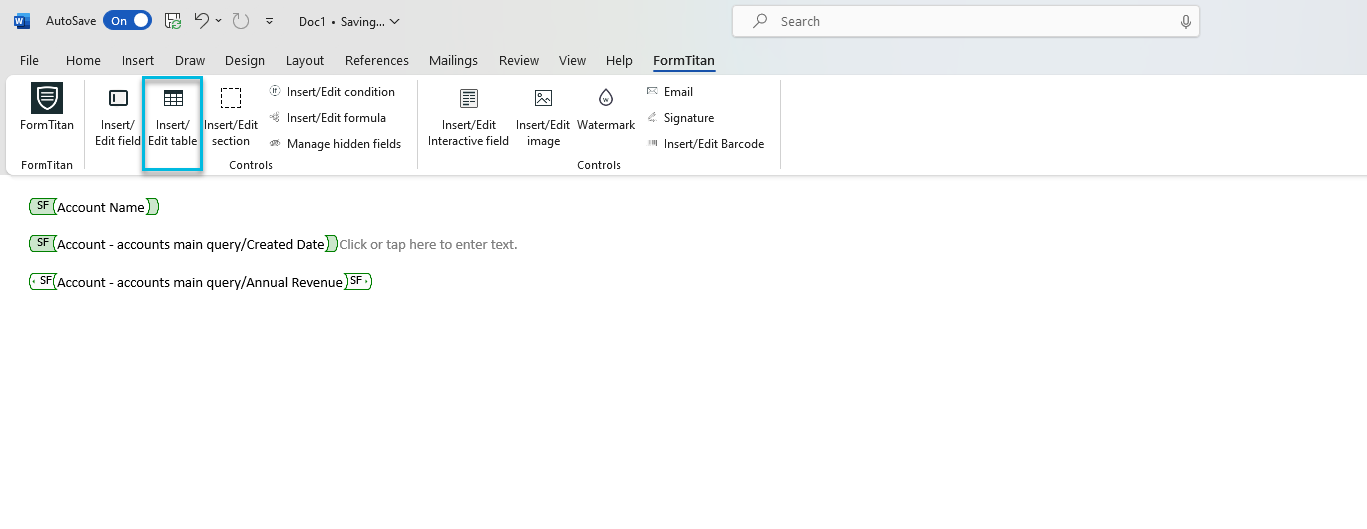
1. In your Word Add-In, click Insert/Edit Table:
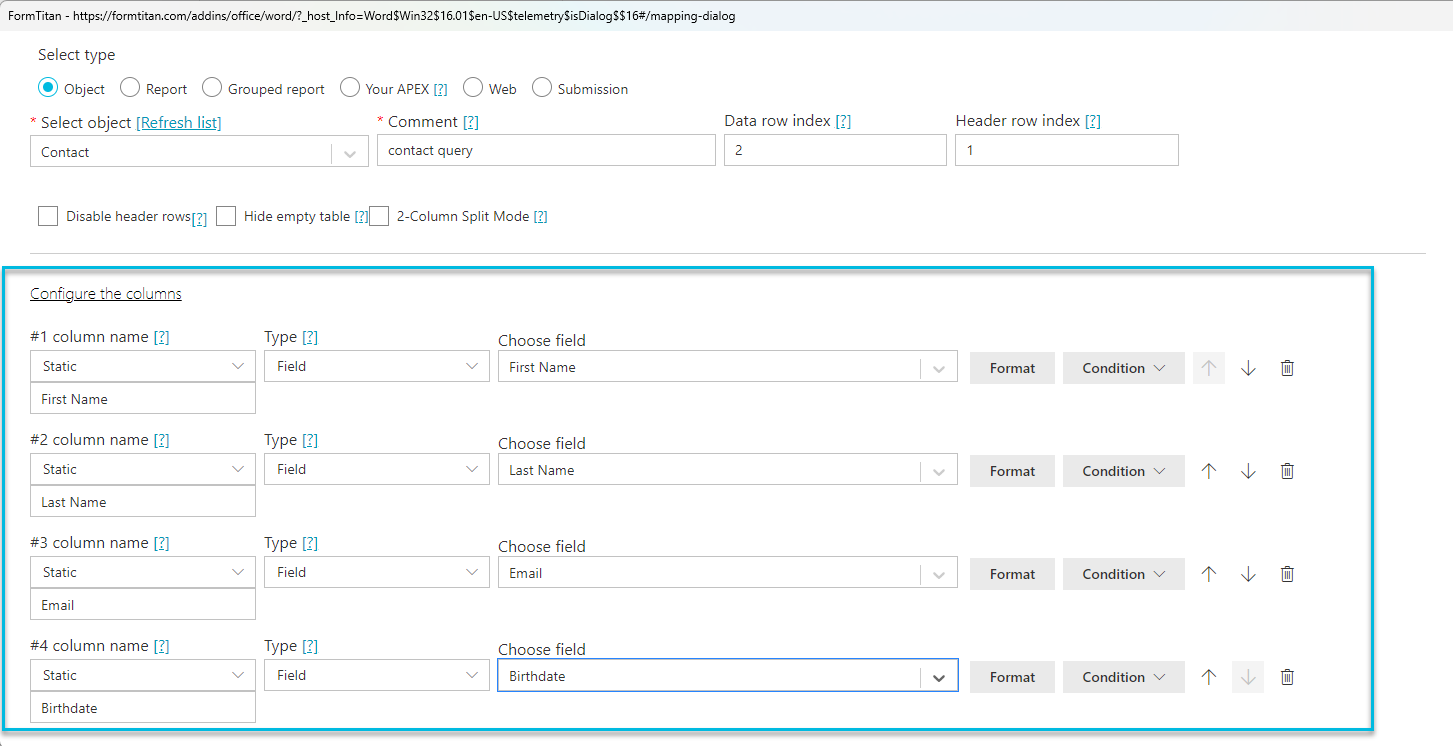
2. Choose your data source: Object, Report, Grouped report, Your APEX, Web, or Submission. In this tutorial, we will focus on Salesforce Object.

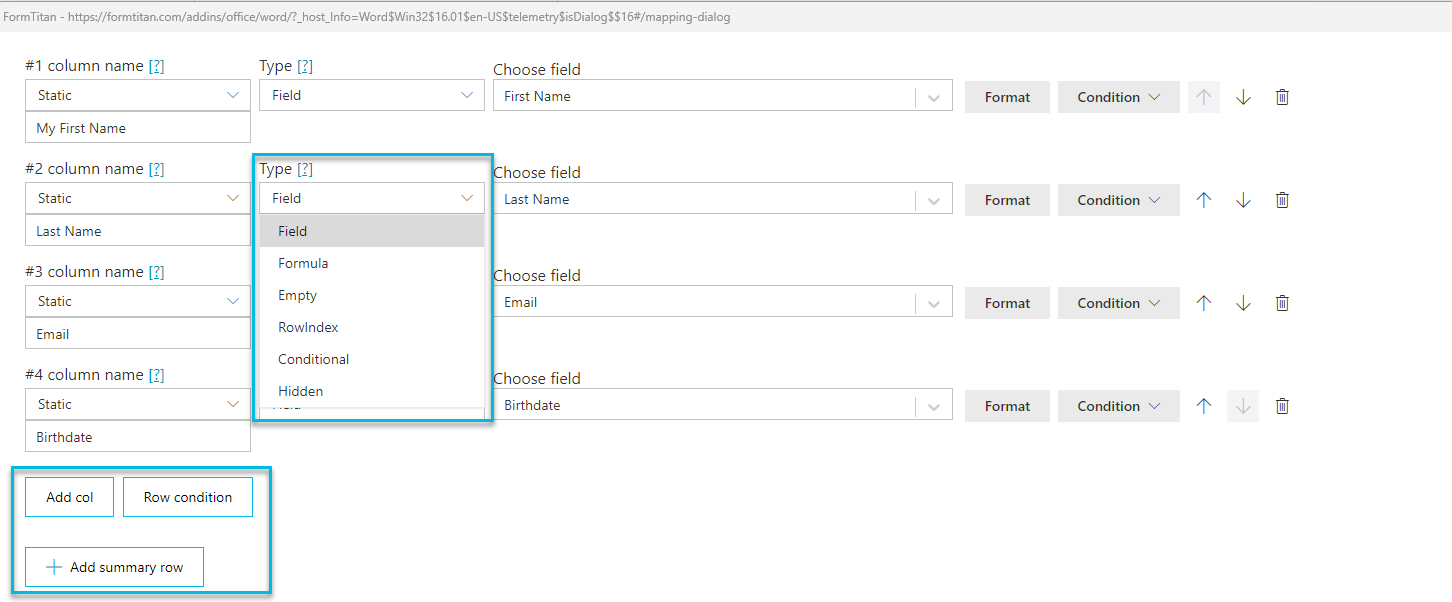
3. Next, add columns. By default, three columns are added. You can click “Add col” to add more columns or delete columns by selecting the trash icon.
4. By default, Titan will give the column the same name as the field. To edit this, click the column name dropdown and manually type your desired name. For example, below we have changed “First Name” to “My First Name”:

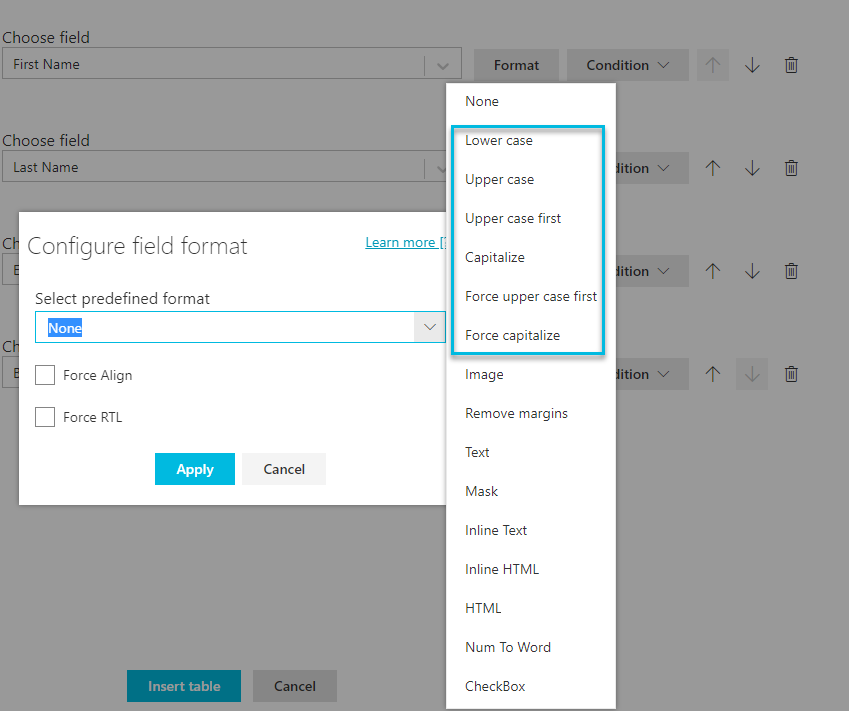
5. You can also click on Format> Select predefined Format to choose predefined formats relevant to your data type. In this example, the data type is text, so choosing Lower case, Upper Case, Capitalize, Force upper case first, and Force capitalize are all appropriate formats:
6. Similarly, you can click Format to choose a predefined format for your Birthdate. Below we have selected month/ date/year/numerical. You can also choose custom options if you prefer.
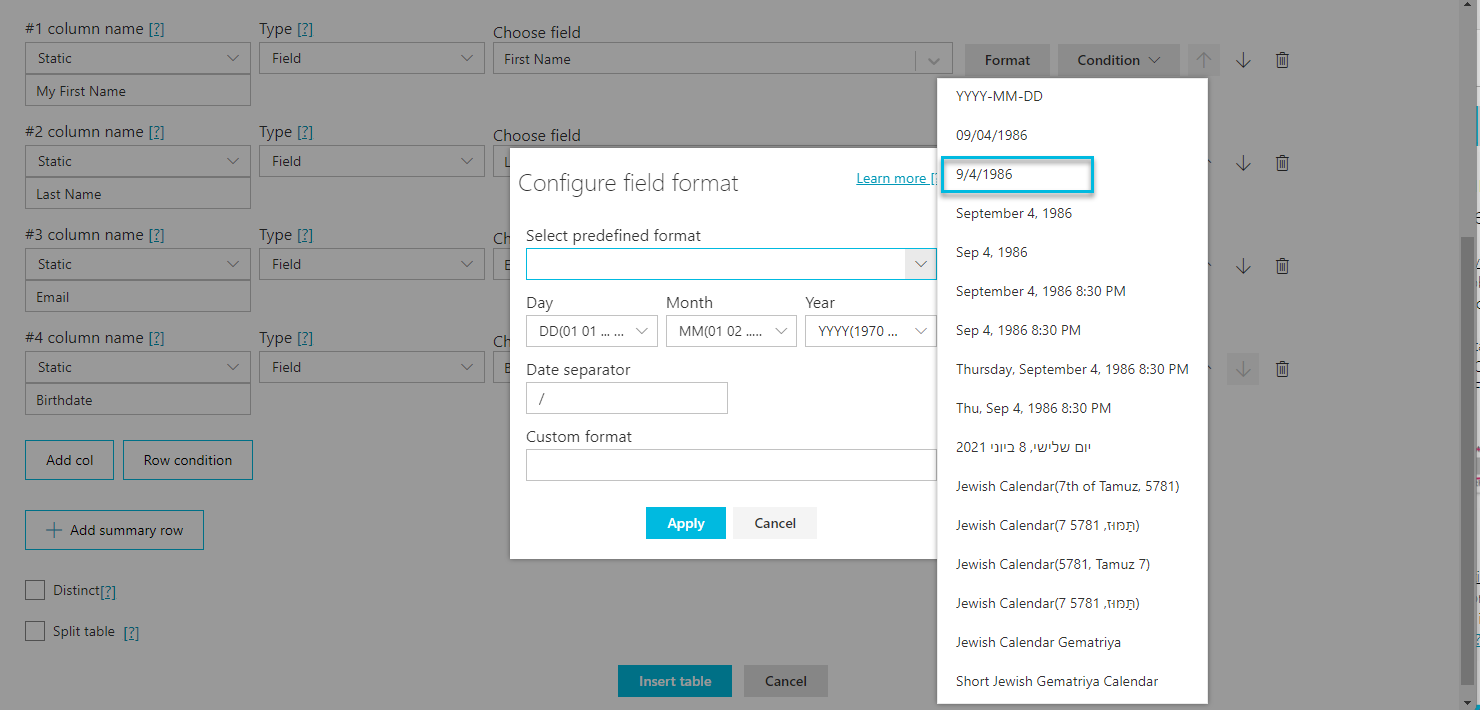
7. You are not limited to using Salesforce as your field data type, but you can also use Formula, Empty Rows, RowIndex, Conditional, and Hidden fields. You can add row conditions and summary rows too. All options not elaborated on in this tutorial will be covered in other courses:
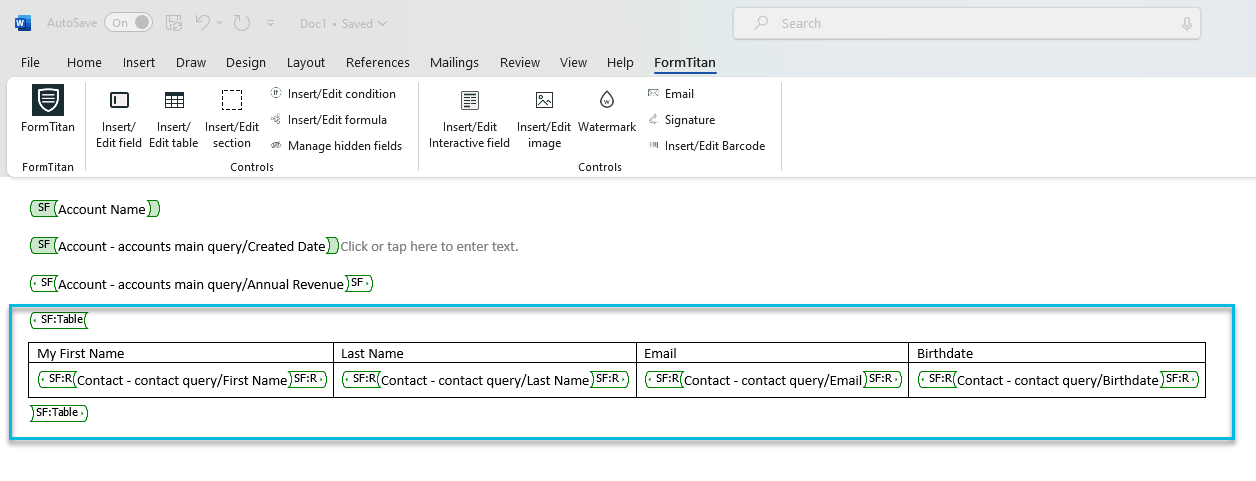
8. Go ahead and insert your table. You will see merged data from Salesforce in a table in Word Format:
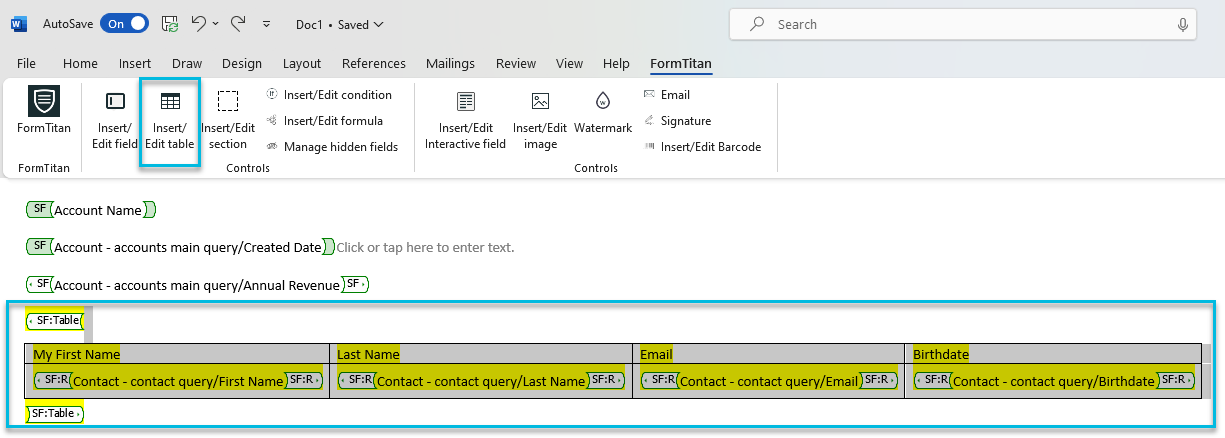
9. Anytime you want to edit the table, select the table element, click Insert/ Edit table, and make desired changes:
2. Choose your data source: Object, Report, Grouped report, Your APEX, Web, or Submission. In this tutorial, we will focus on Salesforce Object.
- Below, we have selected the Contact Object and named the query.
- Using the Hide empty table option, you can remove headers using the Disable header rows option, or clear the table and headers if your query returns no data. There is also 2-Column Split Mode, which is covered in our advanced course.
3. Next, add columns. By default, three columns are added. You can click “Add col” to add more columns or delete columns by selecting the trash icon.
- In this tutorial, we will add a first name field, a last name, and an email, and add an extra column for Birthdate:
4. By default, Titan will give the column the same name as the field. To edit this, click the column name dropdown and manually type your desired name. For example, below we have changed “First Name” to “My First Name”:
5. You can also click on Format> Select predefined Format to choose predefined formats relevant to your data type. In this example, the data type is text, so choosing Lower case, Upper Case, Capitalize, Force upper case first, and Force capitalize are all appropriate formats:
6. Similarly, you can click Format to choose a predefined format for your Birthdate. Below we have selected month/ date/year/numerical. You can also choose custom options if you prefer.
7. You are not limited to using Salesforce as your field data type, but you can also use Formula, Empty Rows, RowIndex, Conditional, and Hidden fields. You can add row conditions and summary rows too. All options not elaborated on in this tutorial will be covered in other courses:
8. Go ahead and insert your table. You will see merged data from Salesforce in a table in Word Format:
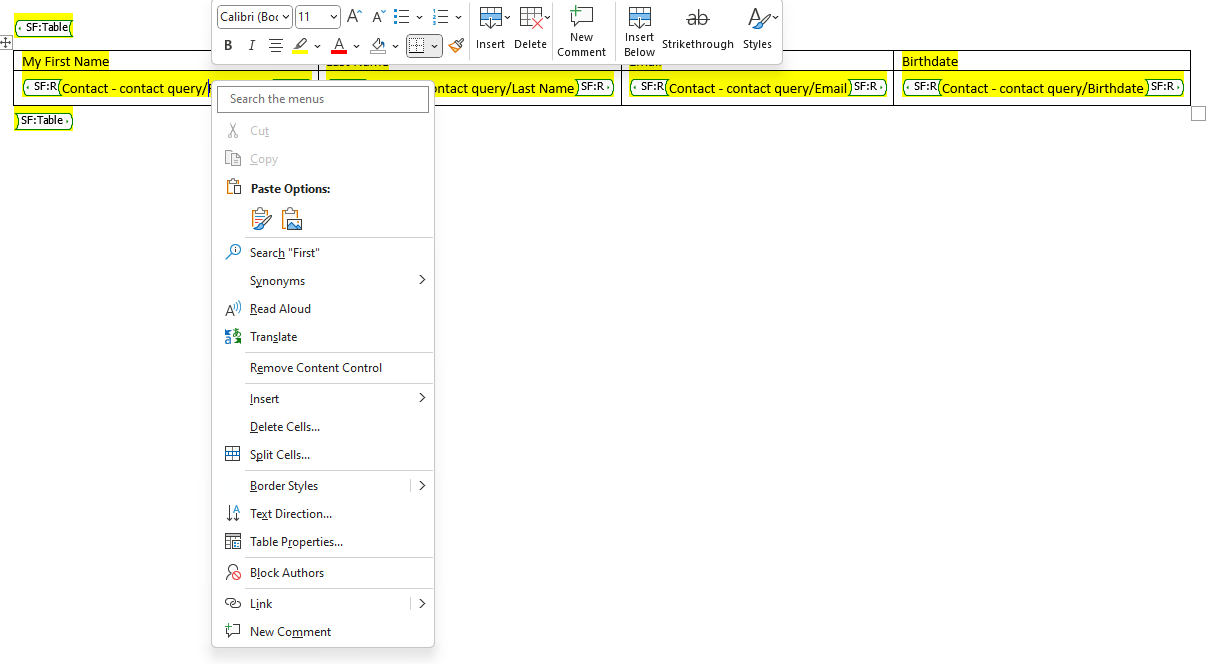
- The advantage of having your table in Word format is that you can use Word formatting and table tools to customize the table, for example, fill the table in yellow:
9. Anytime you want to edit the table, select the table element, click Insert/ Edit table, and make desired changes: