Layout - Sections (5 min)
Completion requirements
01 Getting Started
Let's explore Sections! But before we do, we want to remind you that we have previously covered tables in other articles and videos.
Why do we mention this here? This is just a quick note to remember that tables are a Titan feature that can be used to display a varying number of records, such as a list of contacts related to an account.
However, if you would like to show this exact example but don't want to show the data formatted in a table layout, we recommend using a freehand or freestyle format. Is this what you need? Join us below as we cover how to use a Section field!
02 How to Add a Section
1. Click FormTitan in your Word Menu, then choose Insert/Edit Section.

2. Choose your provider. For this tutorial, we shall choose Salesforce and click the Next button.
The other two providers are Titan Web and Titan Submission. The advanced tutorial will cover these providers.

3. Select an Object from the drop-down menu. In our tutorial, we want to show a list of cases related to a Salesforce account so that we can pick a Case.
4. Add a comment to help distinguish the purpose of the query and click on the Insert button.
The varying advanced tutorial will cover the options displayed as checkboxes beneath the comment field. Notice that a section has been added to your Word document.

2. Choose your provider. For this tutorial, we shall choose Salesforce and click the Next button.
The other two providers are Titan Web and Titan Submission. The advanced tutorial will cover these providers.
3. Select an Object from the drop-down menu. In our tutorial, we want to show a list of cases related to a Salesforce account so that we can pick a Case.
4. Add a comment to help distinguish the purpose of the query and click on the Insert button.
The varying advanced tutorial will cover the options displayed as checkboxes beneath the comment field. Notice that a section has been added to your Word document.
03 Adding Merge Fields to the Section Field
1. Remove the default text from your Section field and provide space within the tags.
2. Click the Insert/Edit field button to add the fields you want to display within the Section.
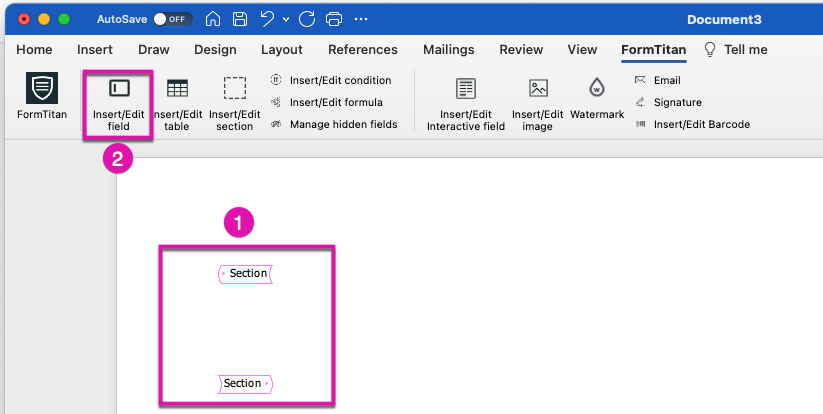
Titan recognizes this is a case query because we are working within the case Section field we just created.
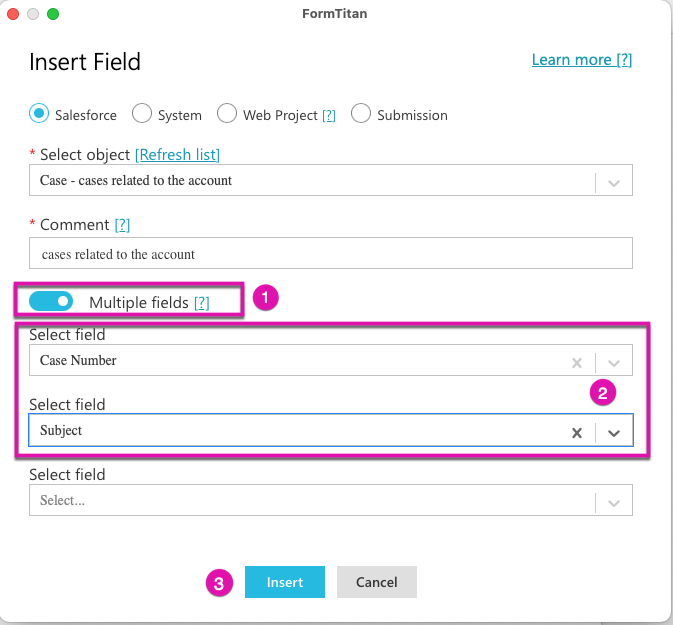
3. Choose the required field. If you want to add several fields in one action, you can use the Multiple fields toggle.
4. For this tutorial, we shall choose Case Number and Subject before clicking the Insert button.
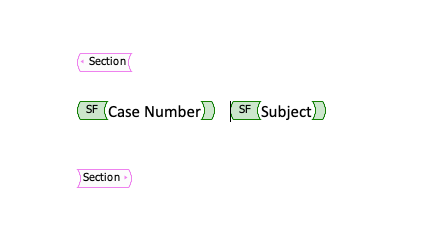
5. Clean up the titles by deleting the text you do not need, and add a tab space between Case Number and Subject in your Section field.
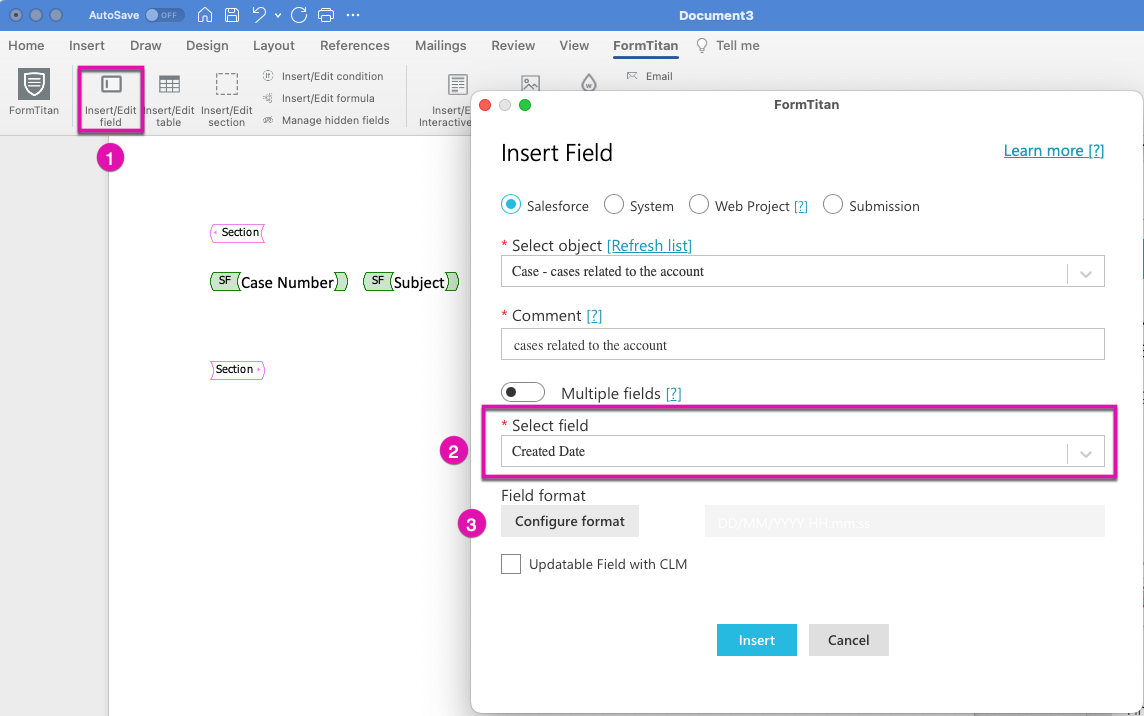
6. We want the case creation date on the next line. Click the Insert/Edit Field button and select a field from the drop-down menu.
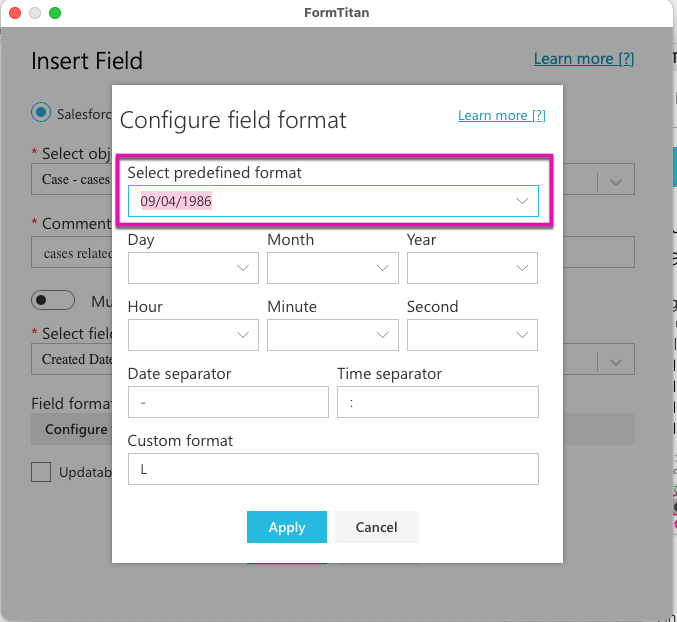
7. Click the Configure Format button to set up your field’s format.
8. For this tutorial, we will choose a predefined format from the drop-down menu and click the Apply button to proceed.
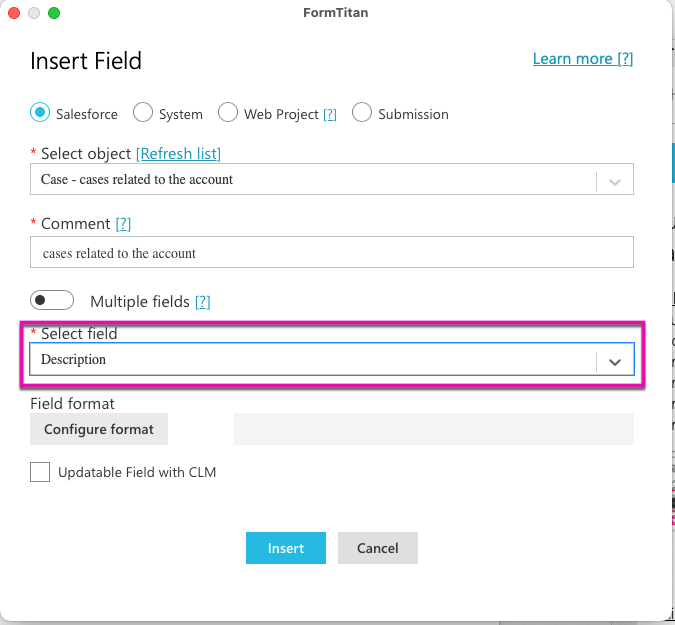
9. Add another field to your section field. We will now add a case description to show that it is a good option for a long text area. As in previous examples of adding fields, choose a field from the drop-down menu and click the Insert button.
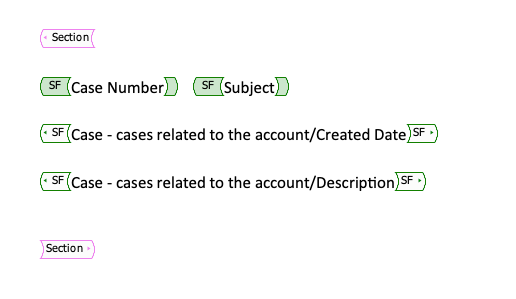
Notice that your section field now has a Case Number and a Subject on the first row. The Created Date and Description fields are found in new rows.
This section field will repeat for every case retrieved by the query we created. For example, if you filter the query to bring back cases associated with your Salesforce account, it will repeat as follows:
2. Click the Insert/Edit field button to add the fields you want to display within the Section.
Titan recognizes this is a case query because we are working within the case Section field we just created.
3. Choose the required field. If you want to add several fields in one action, you can use the Multiple fields toggle.
4. For this tutorial, we shall choose Case Number and Subject before clicking the Insert button.
5. Clean up the titles by deleting the text you do not need, and add a tab space between Case Number and Subject in your Section field.
6. We want the case creation date on the next line. Click the Insert/Edit Field button and select a field from the drop-down menu.
7. Click the Configure Format button to set up your field’s format.
8. For this tutorial, we will choose a predefined format from the drop-down menu and click the Apply button to proceed.
9. Add another field to your section field. We will now add a case description to show that it is a good option for a long text area. As in previous examples of adding fields, choose a field from the drop-down menu and click the Insert button.
Notice that your section field now has a Case Number and a Subject on the first row. The Created Date and Description fields are found in new rows.
This section field will repeat for every case retrieved by the query we created. For example, if you filter the query to bring back cases associated with your Salesforce account, it will repeat as follows:
- 4 Salesforce cases will ensure the Section field repeats 4 times!