FT Button (12 min)
Completion requirements
01 Getting Started
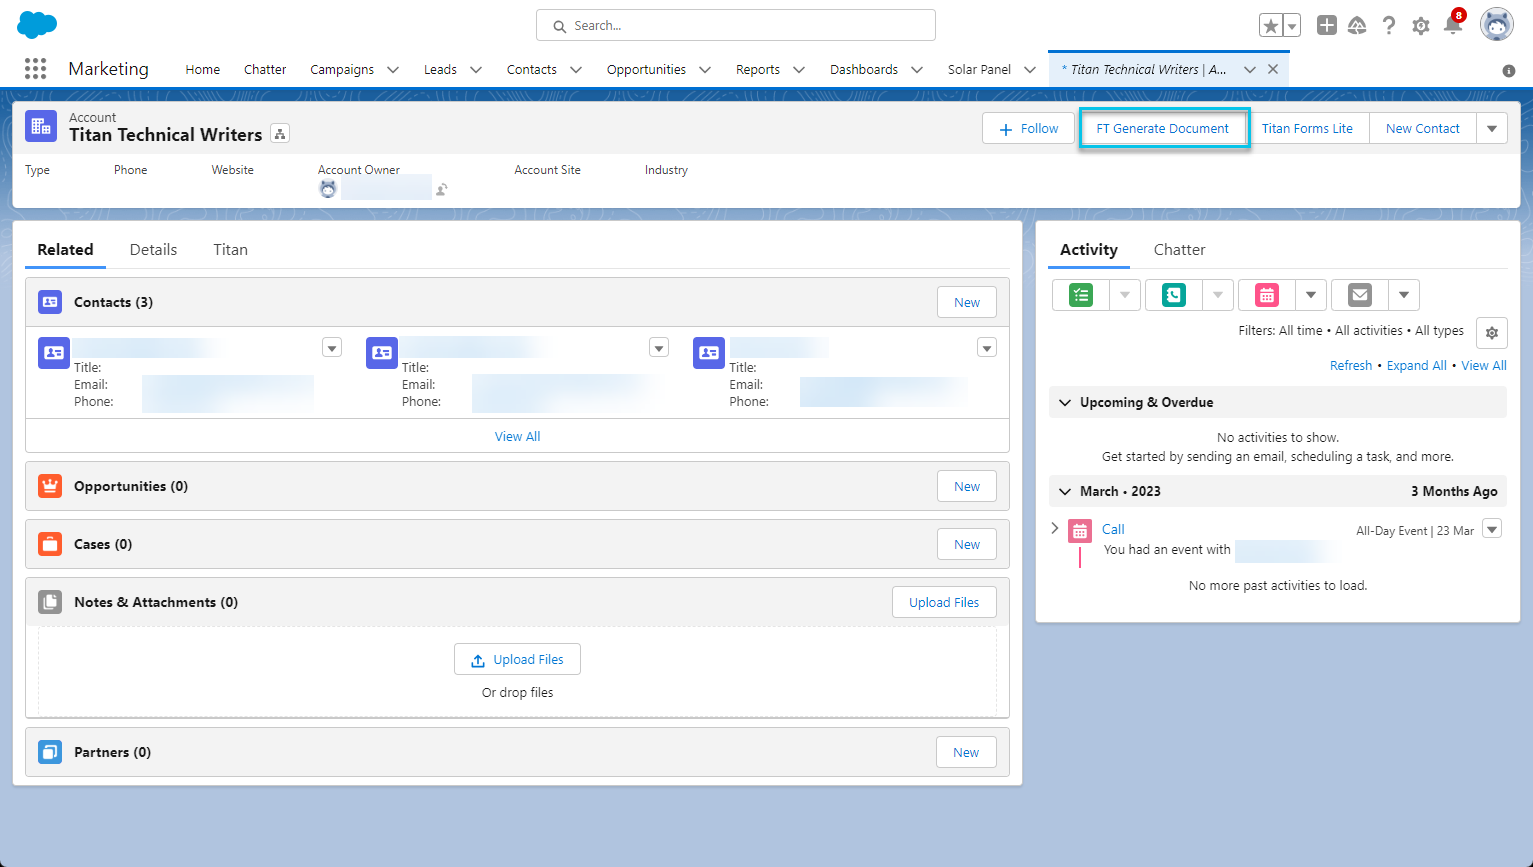
Use the FT Generate Document button in Salesforce to trigger document generation and emails. The button is part of Salesforce's Titan package. When you install the Titan package, the button is created automatically for the main standard objects (you can easily make the button for other objects as well). You need to add the button to the object layout (such as Account or Opportunities) where you need it.
When you click on the FT Generate Document button, a screen with a list of (for instance, Titan documents and Sign projects) opens. The options in the list are available for the selected record. In the case of the document we created in Word, it was populated with information from an account.
When you click on the FT Generate Document button, a screen with a list of (for instance, Titan documents and Sign projects) opens. The options in the list are available for the selected record. In the case of the document we created in Word, it was populated with information from an account.
02 Give Permissions
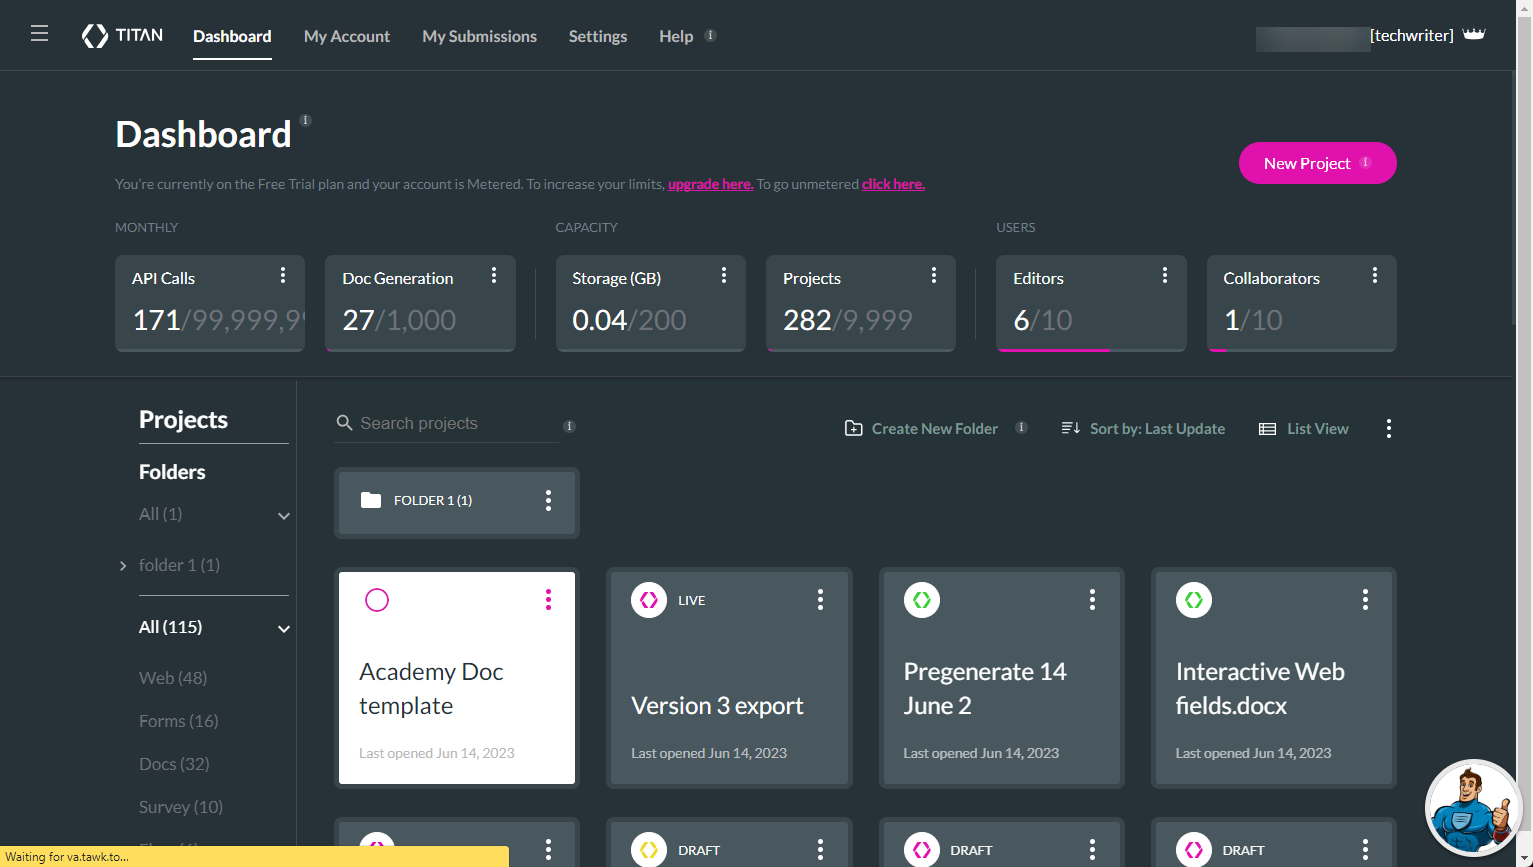
Let’s first go to the Titan Dashboard.
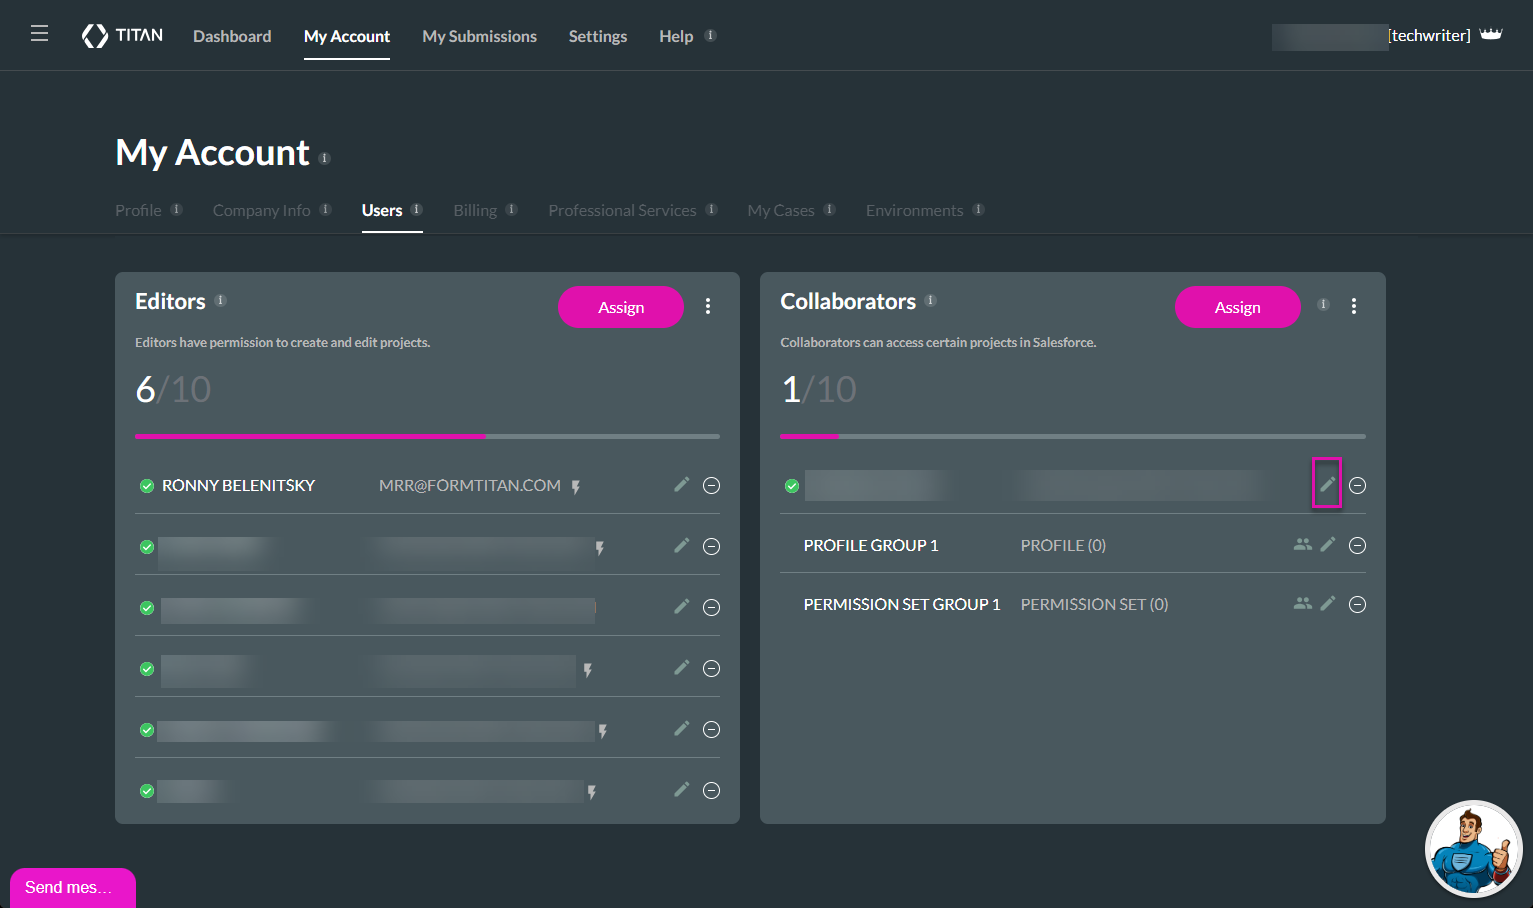
1. Browse to My Account > Users. To use the document, you must give at least one group of collaborators permissions.
2. Click the Edit icon next to your name on the Collaborators tile. The Edit Collaborators screen opens.
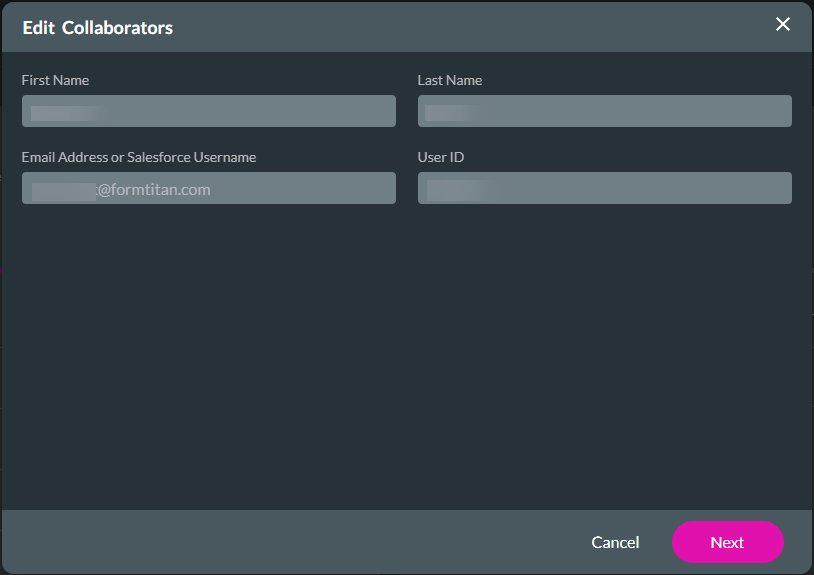
3. Click the Next button.
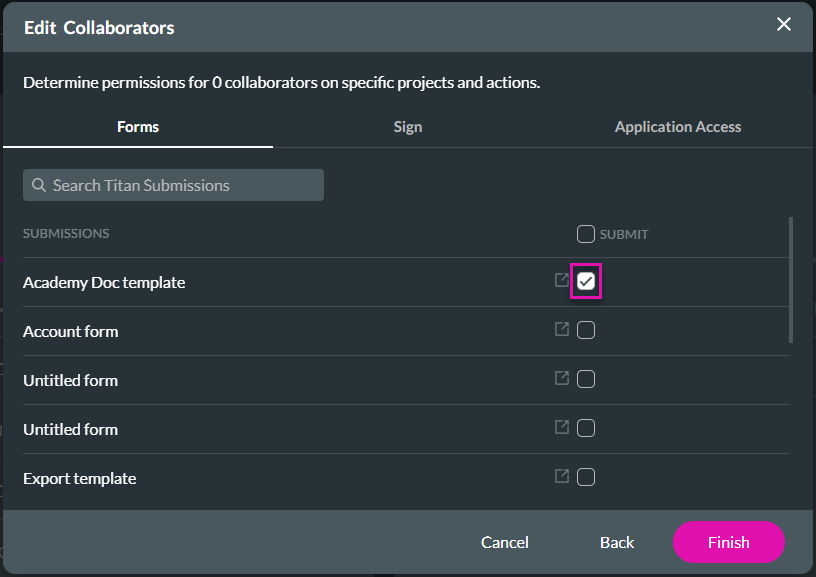
4. Click the checkbox next to the document template name and click the Finish button. If this checkbox is not enabled, the document will not appear in the list in Salesforce when you click the FT Generate Document button.
1. Browse to My Account > Users. To use the document, you must give at least one group of collaborators permissions.
2. Click the Edit icon next to your name on the Collaborators tile. The Edit Collaborators screen opens.
3. Click the Next button.
4. Click the checkbox next to the document template name and click the Finish button. If this checkbox is not enabled, the document will not appear in the list in Salesforce when you click the FT Generate Document button.
03 View the Salesforce Configuration in the Titan Forms Project
1. On the Titan Dashboard, open the Titan Forms project.
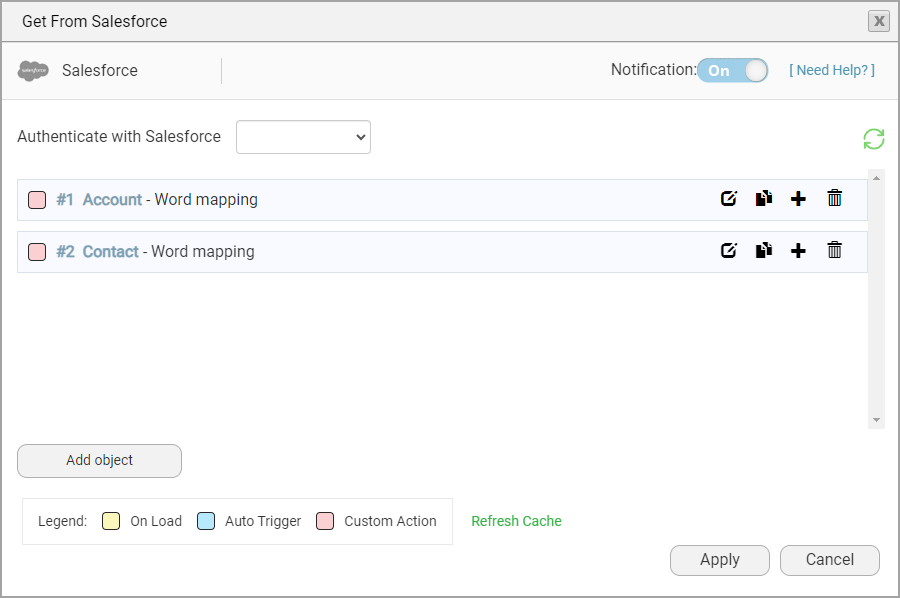
2. Expand the Salesforce integration list and click the Set Get button. The Get from Salesforce screen shows the configurations done in the Word template.
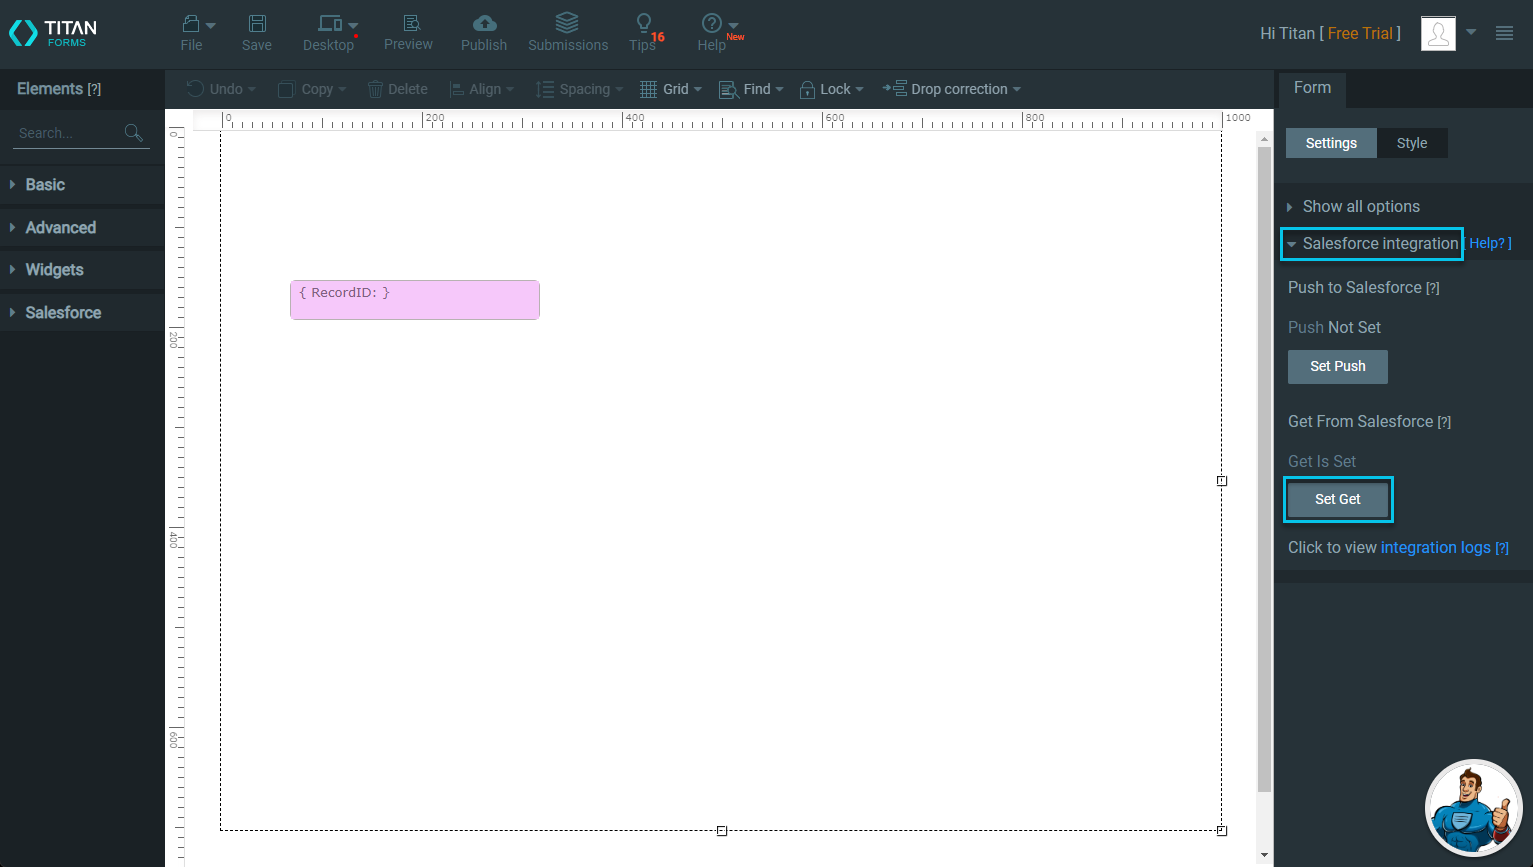
3. Click the Cancel button to close the screen.
2. Expand the Salesforce integration list and click the Set Get button. The Get from Salesforce screen shows the configurations done in the Word template.
3. Click the Cancel button to close the screen.
04 View the Word Mapping
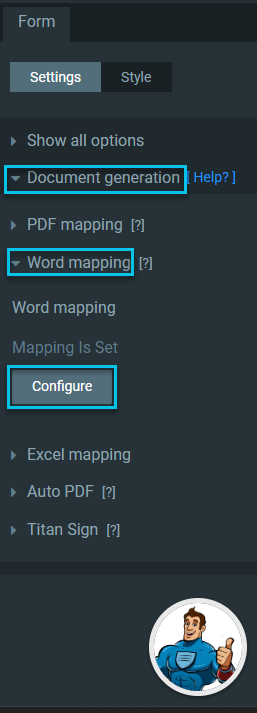
1. Expand the Document generation list and click the Word mapping option.
2. Click the Configure button.
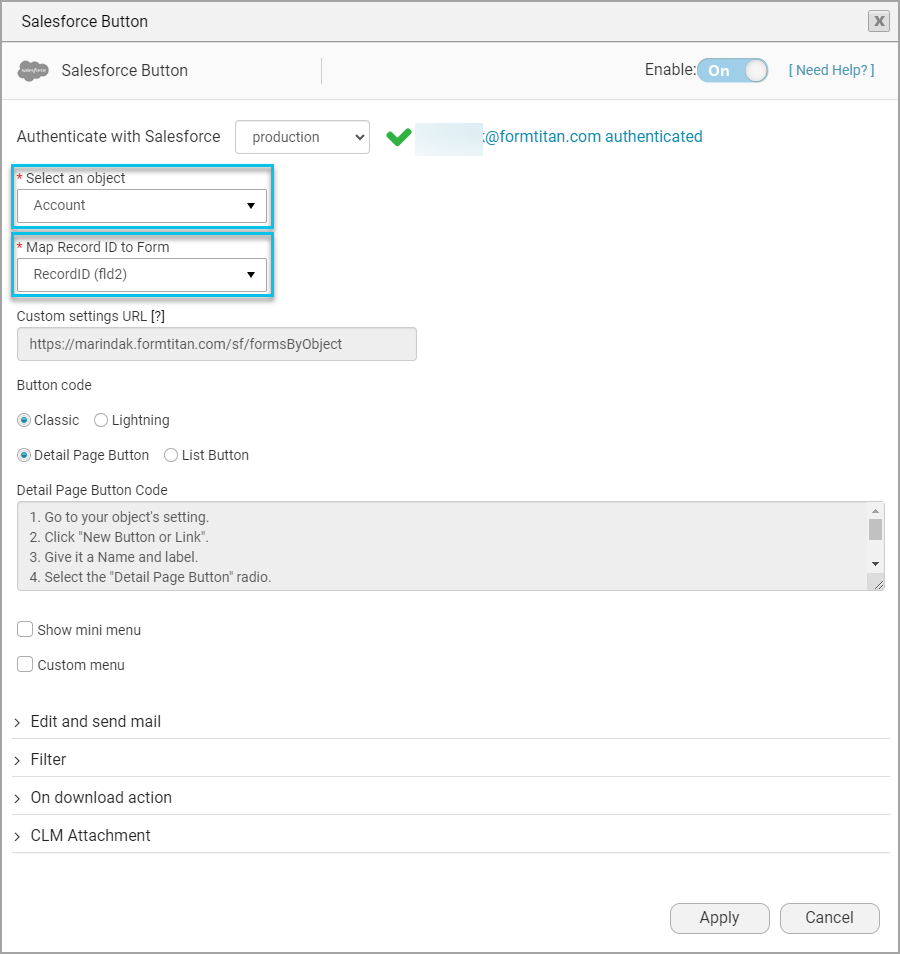
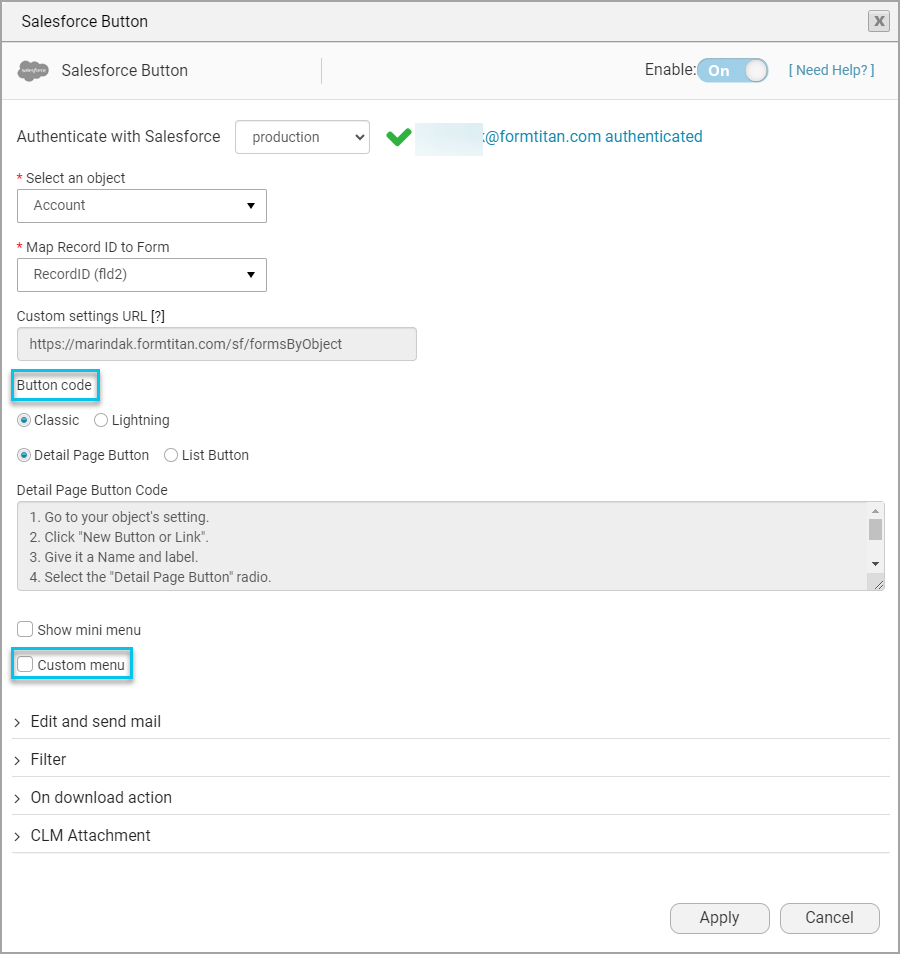
3. Check the options you created in Word, for instance, to ensure that the Record ID is set correctly.
4. Use the View with drop-down list to select an option to preview the document.

6. Click the Apply button to close the Salesforce Button screen.
7. Click the Apply button to close the Word mapping screen.
8. Save the project by clicking the Save icon on the menu banner.
2. Click the Configure button.
3. Check the options you created in Word, for instance, to ensure that the Record ID is set correctly.
4. Use the View with drop-down list to select an option to preview the document.
- The default is Microsoft, as you are importing a Word document.
- You can select Google, which runs slower but has more features.
- You can also use Titan (PDF only) or Titan Mini (PDF only). In this option, we use the Titan (PDF only) option. When the user previews the document, it will be in PDF format.
- Most fields on the Salesforce button screen should be populated automatically based on the Word template using the Titan Word add-in.
- Titan Forms got the object “Account” from the template.
- The record ID of the account is automatically mapped to the Record ID field on the template.
- If you use it on a custom object, the button code section has further instructions for the FT Generate Document button. In this lesson, we are using the standard object “Account.” The Titan package adds to the button to lead, opportunity, account, case, and contact objects. If you require the button on other objects, click the Lightning radio button and follow the steps shown on the screen.
- You can customize the menu that appears in a list, but for the moment, we will use the standard menu.
6. Click the Apply button to close the Salesforce Button screen.
7. Click the Apply button to close the Word mapping screen.
8. Save the project by clicking the Save icon on the menu banner.
05 Open Salesforce
Let’s look at how you can generate the document from Salesforce.
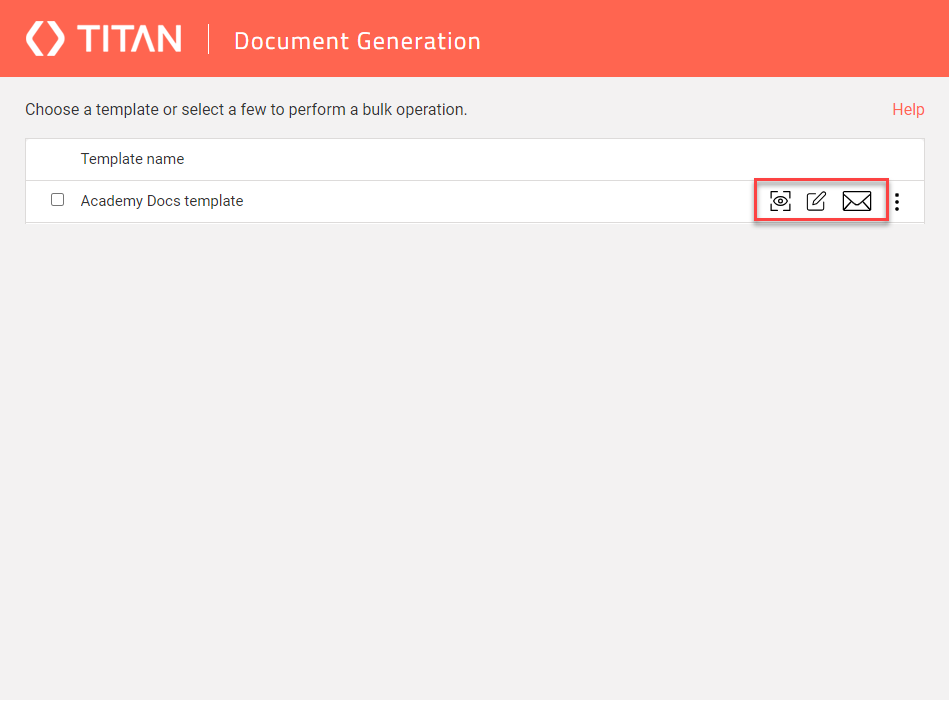
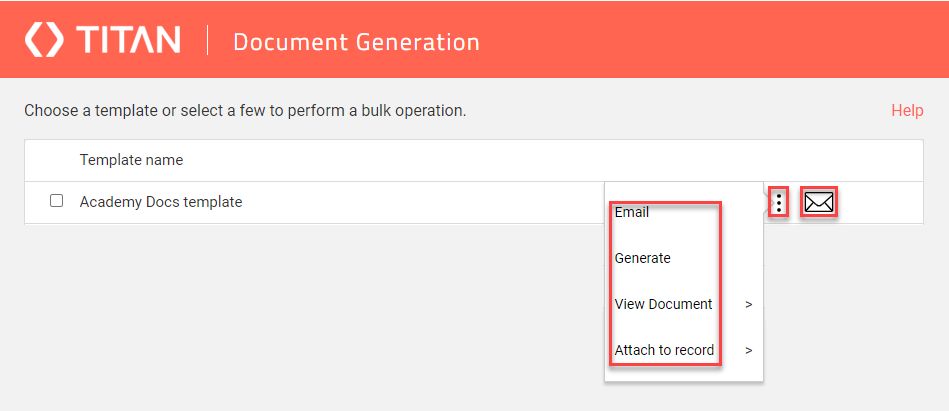
1. Click the FT Document Generation button. The Titan Document Generation screen opens.
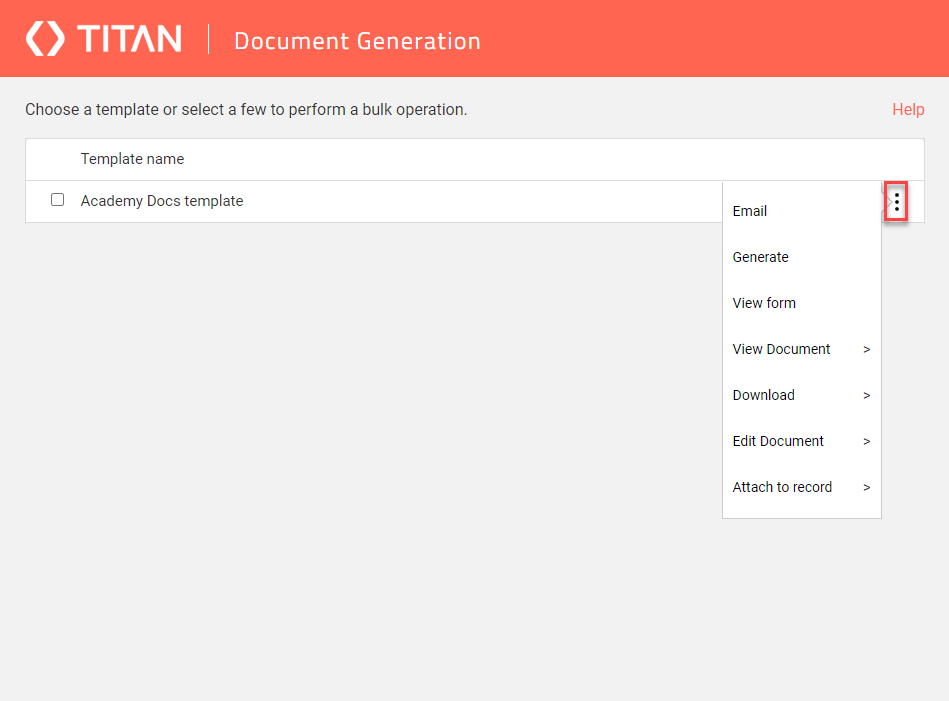
2. Click the Kebab icon to open the sub-menu.
You can customize these options in the Salesforce button section inside the Word Mapping menu.
1. Click the FT Document Generation button. The Titan Document Generation screen opens.
- The customization you did in the previous section is for the View, Edit, and Email options.
2. Click the Kebab icon to open the sub-menu.
- Generate
- View Form
- View Document
- Download
- Edit Document
- Attach to record
You can customize these options in the Salesforce button section inside the Word Mapping menu.
06 Customize the Menu
1. Go to the open project in Titan Docs.
2. Expand the Document generation list and click the Word mapping option.
3. Click the Configure button.
4. Expand the Salesforce button list and click the Configure button. The Custom Menu screen opens. Check the custom menu check box and click configure
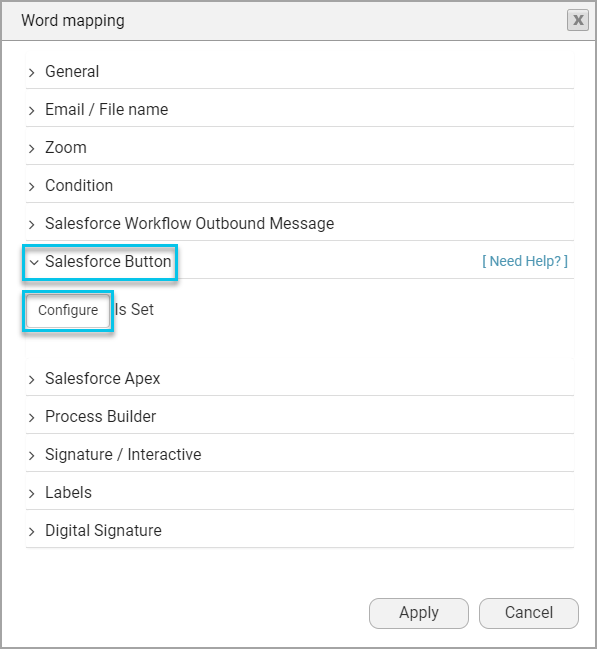
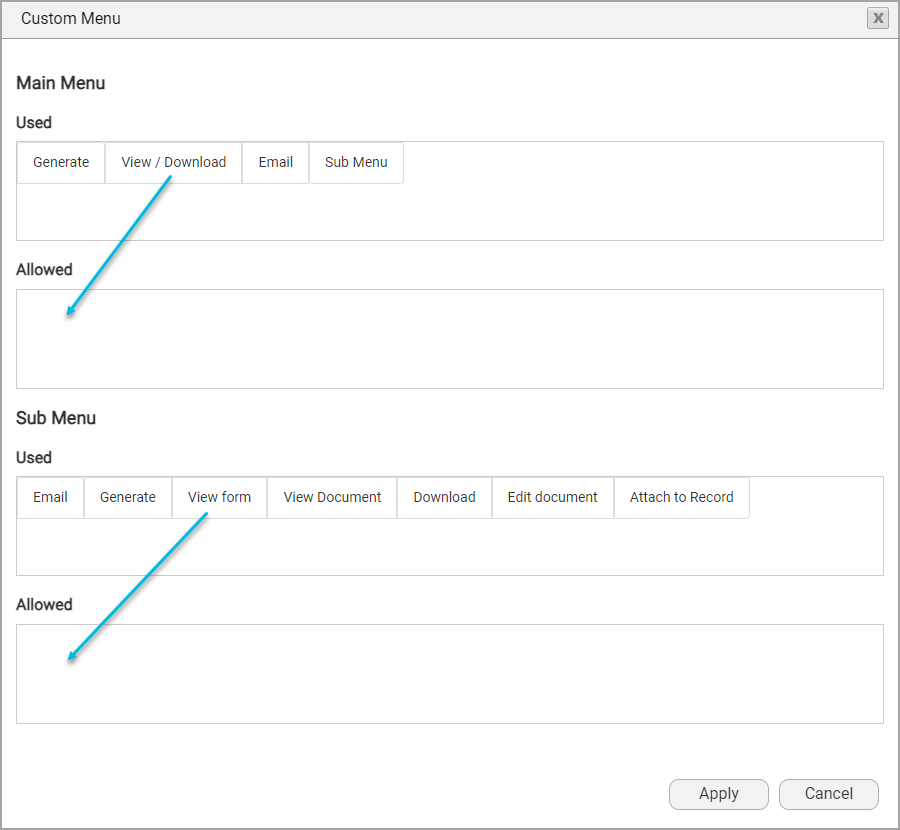
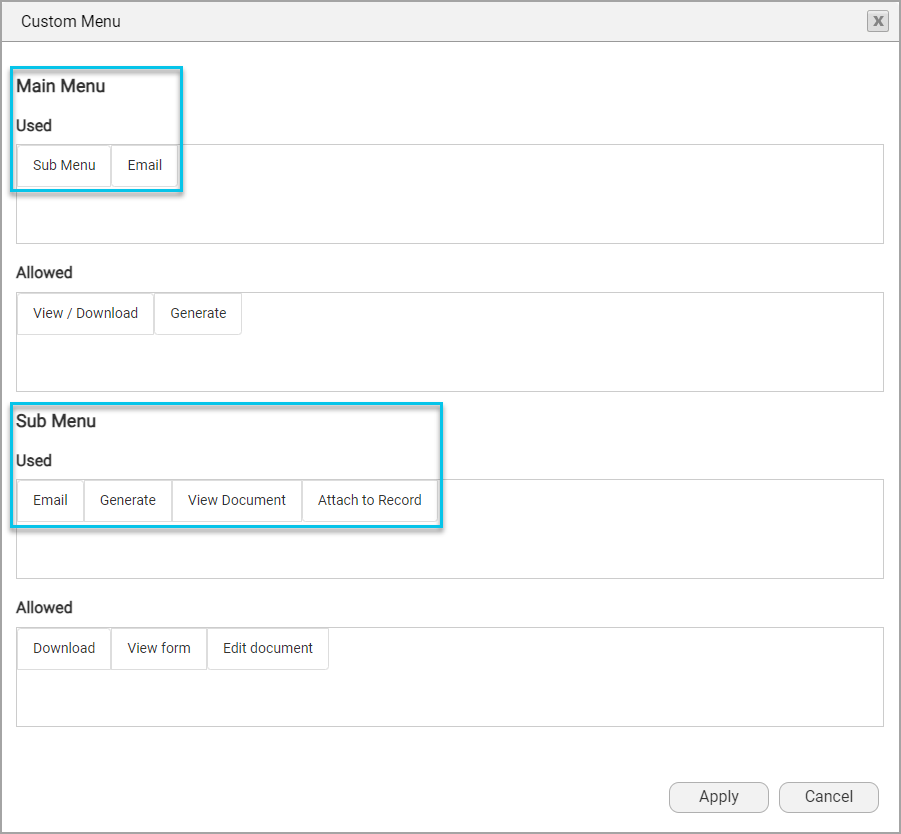
5. Drag the options from "Used" to 'Allowed" for the Main Menu and/or the Sub Menu. Only the menu options under "Used" will be available on the Document Generation screen.
6. Click the Apply button.
7. Click the Apply button to close the Salesforce Button screen.
8. Click the Apply button to close the Word mapping screen.
9. Save the project by clicking the Save icon on the menu banner.
2. Expand the Document generation list and click the Word mapping option.
3. Click the Configure button.
4. Expand the Salesforce button list and click the Configure button. The Custom Menu screen opens. Check the custom menu check box and click configure
5. Drag the options from "Used" to 'Allowed" for the Main Menu and/or the Sub Menu. Only the menu options under "Used" will be available on the Document Generation screen.
6. Click the Apply button.
7. Click the Apply button to close the Salesforce Button screen.
8. Click the Apply button to close the Word mapping screen.
9. Save the project by clicking the Save icon on the menu banner.
07 Let’s Go Back to Salesforce
1. Click the FT Document Generation button. The Titan Document Generation screen opens.
- Only the Email option is now available.
- The sub-menu options have also changed.
- For this lesson, we have added the View/Download option to the Main Menu and the View form and Download options to the Sub Menu again.
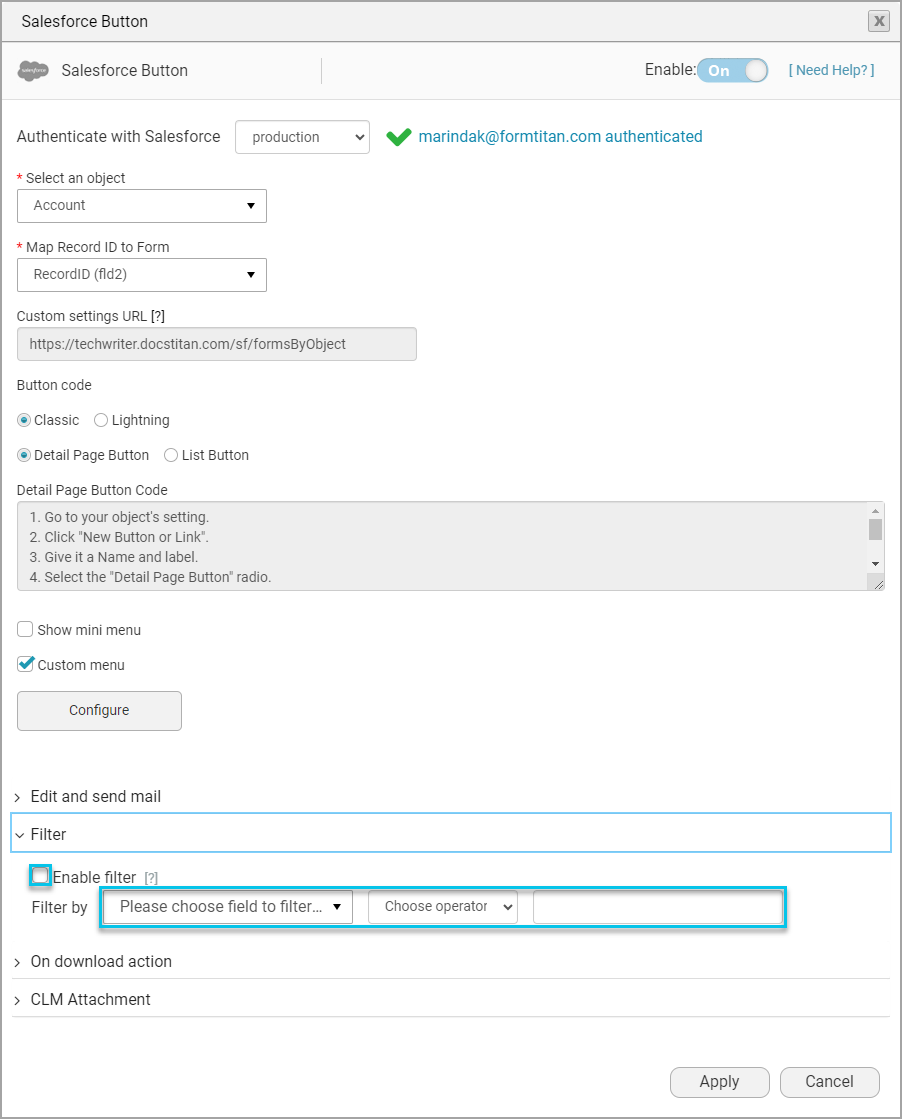
08 Apply Filters
Using the FT generate button, you can add filters to make the document available.
1. Click the Enable checkbox to enable the filter.
2. Select any field on the record from the drop-down list, such as "Account Type is equal to Customer Channel."
3. Click the Apply button to close the Salesforce Button screen.
4. Click the Apply button to close the Word mapping screen.
5. Save the project by clicking the Save icon on the menu banner.
09 Open Salesforce to View the Effect of the Filter
Our example account's account type is Customer Channel, so the document will be available for this account.
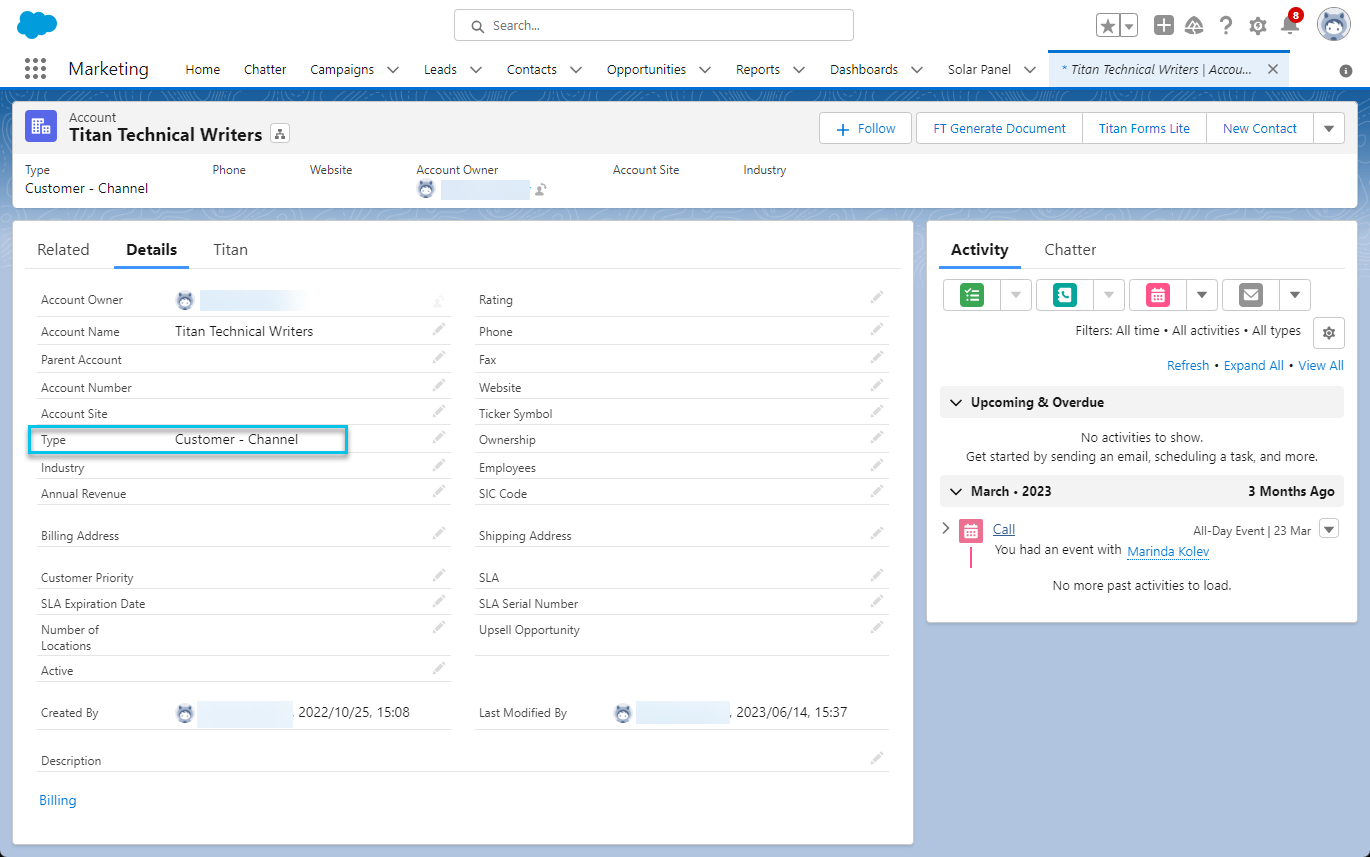
However, if we change the account type to Installation Partner, the document will not be available when we click the FT Document Generation button.
If we change the account type back to Customer Channel, the document will be available again.
However, if we change the account type to Installation Partner, the document will not be available when we click the FT Document Generation button.
If we change the account type back to Customer Channel, the document will be available again.
10 Configure the Document to be Sent as an Email using the FT Generate Button
1. Go to the open project in Titan Docs.
2. Expand the Document generation list and click the Word mapping option.
3. Click the Configure button.
4. Expand the Salesforce button list and click the Configure button.

5. Click the Edit and send email option to expand the list.
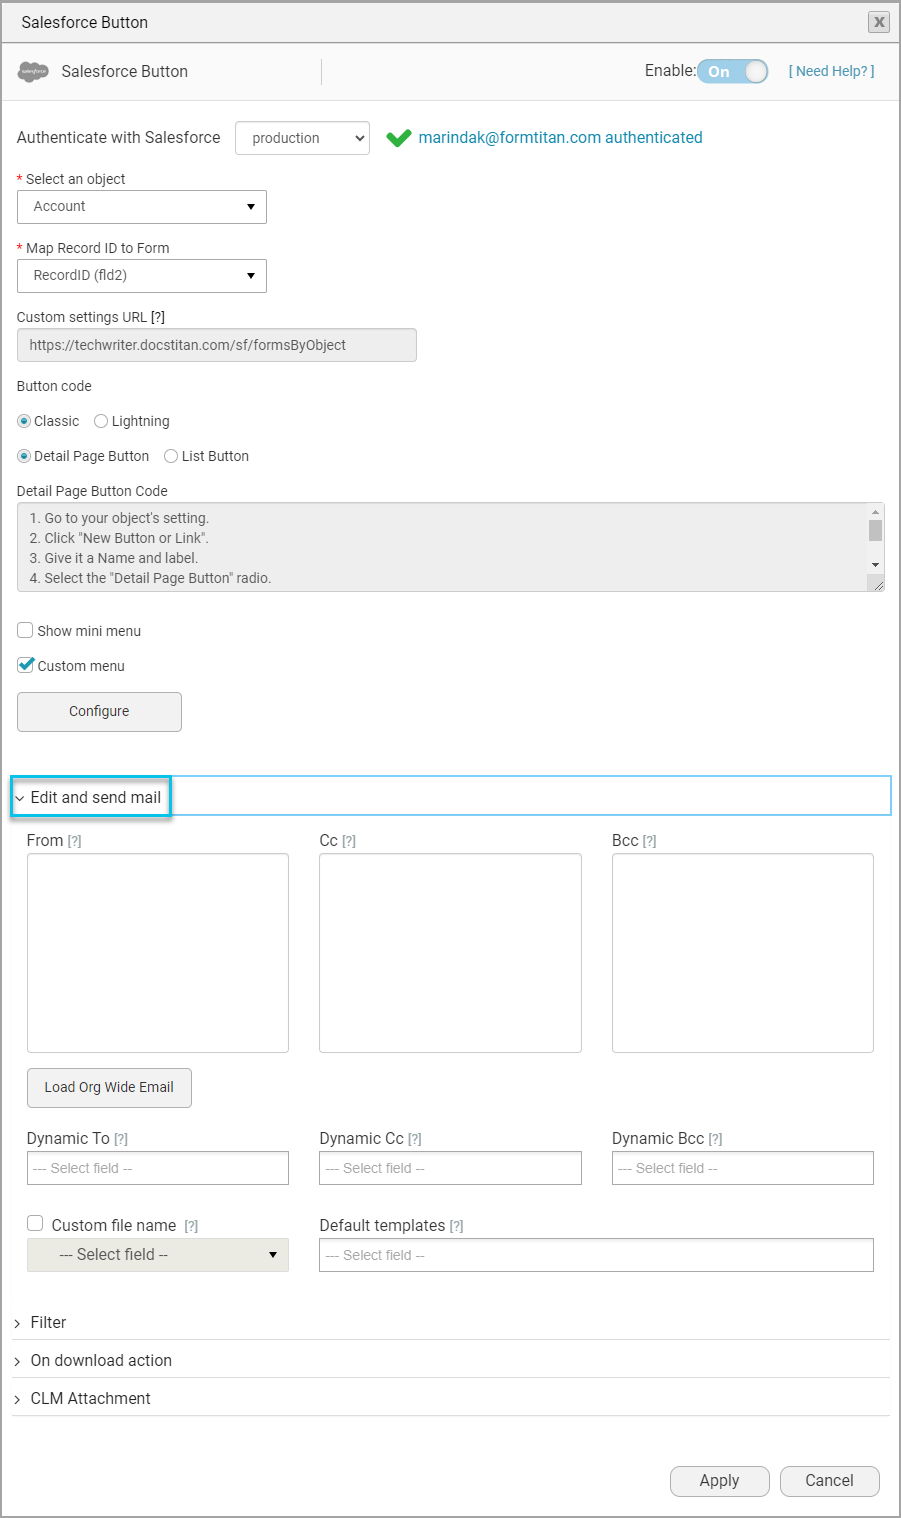
6. Use the Load Org Wide Email button to add your organizational email to the From section.
7. If emails are on the Salesforce record, set a Dynamic To (or Dynamic CC) using the drop-down list/s.
8. Click the Customize file name checkbox to use a custom file name. You can choose any field from Salesforce.

9. Click the Apply button to close the Salesforce Button screen.
10. Click the Apply button to close the Word mapping screen.
11. Save the project by clicking the Save icon on the menu banner.
This summary summarizes some of the more common configurations you can set on your document.
2. Expand the Document generation list and click the Word mapping option.
3. Click the Configure button.
4. Expand the Salesforce button list and click the Configure button.
5. Click the Edit and send email option to expand the list.
6. Use the Load Org Wide Email button to add your organizational email to the From section.
7. If emails are on the Salesforce record, set a Dynamic To (or Dynamic CC) using the drop-down list/s.
8. Click the Customize file name checkbox to use a custom file name. You can choose any field from Salesforce.
9. Click the Apply button to close the Salesforce Button screen.
10. Click the Apply button to close the Word mapping screen.
11. Save the project by clicking the Save icon on the menu banner.
This summary summarizes some of the more common configurations you can set on your document.