Generating from Salesforce (10 min)
Completion requirements
01 Getting Started
This tutorial covers configuring and publishing a document so it can be generated from Salesforce.
02 Review the Filters
1. Select the Preview tab in the Form Titan Window.
2. Click the Copy to Publish button to copy your filtered conditions to the publish tab.
3. Click the Publish tab and review your filters. This is done by clicking the filter icon next to each object. It is essential to verify that your filters are applied correctly. For example, if you pull information from an account to retrieve associated contacts and cases, you would need the Account ID to equal the Record ID. Ensure you review each object filter.
2. Click the Copy to Publish button to copy your filtered conditions to the publish tab.

3. Click the Publish tab and review your filters. This is done by clicking the filter icon next to each object. It is essential to verify that your filters are applied correctly. For example, if you pull information from an account to retrieve associated contacts and cases, you would need the Account ID to equal the Record ID. Ensure you review each object filter.
03 Publish the Form
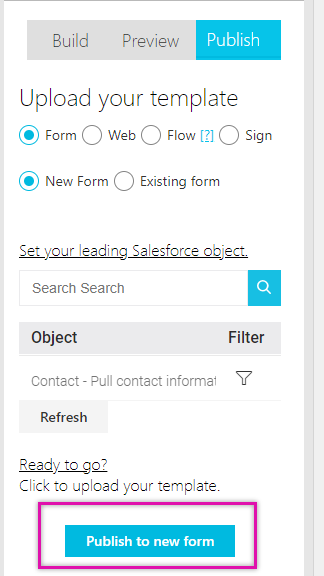
1. Click the publish tab. This is where you select which product the form will be uploaded to and whether this is a new form or an existing form.
Choose the Existing Form option if you are updating an already existing form. For this tutorial, we will create a new form.
2. Select and click Publish to New Form using the options under the 'Upload to template' section. The set form name window opens.
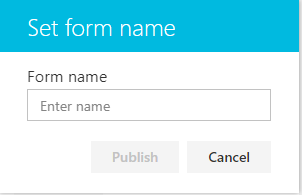
3. Enter your form name and click Publish.
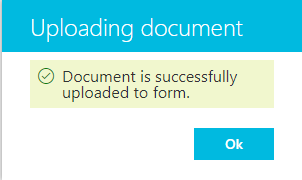
Once your document is successfully uploaded, a success message is displayed.
2. Select and click Publish to New Form using the options under the 'Upload to template' section. The set form name window opens.

3. Enter your form name and click Publish.

Once your document is successfully uploaded, a success message is displayed.

04 View Form in Titan
1. Navigate to your Titan Dashboard. Your uploaded document is displayed with your projects.

2. Double-click on the document to open it in the Titan Forms tool.
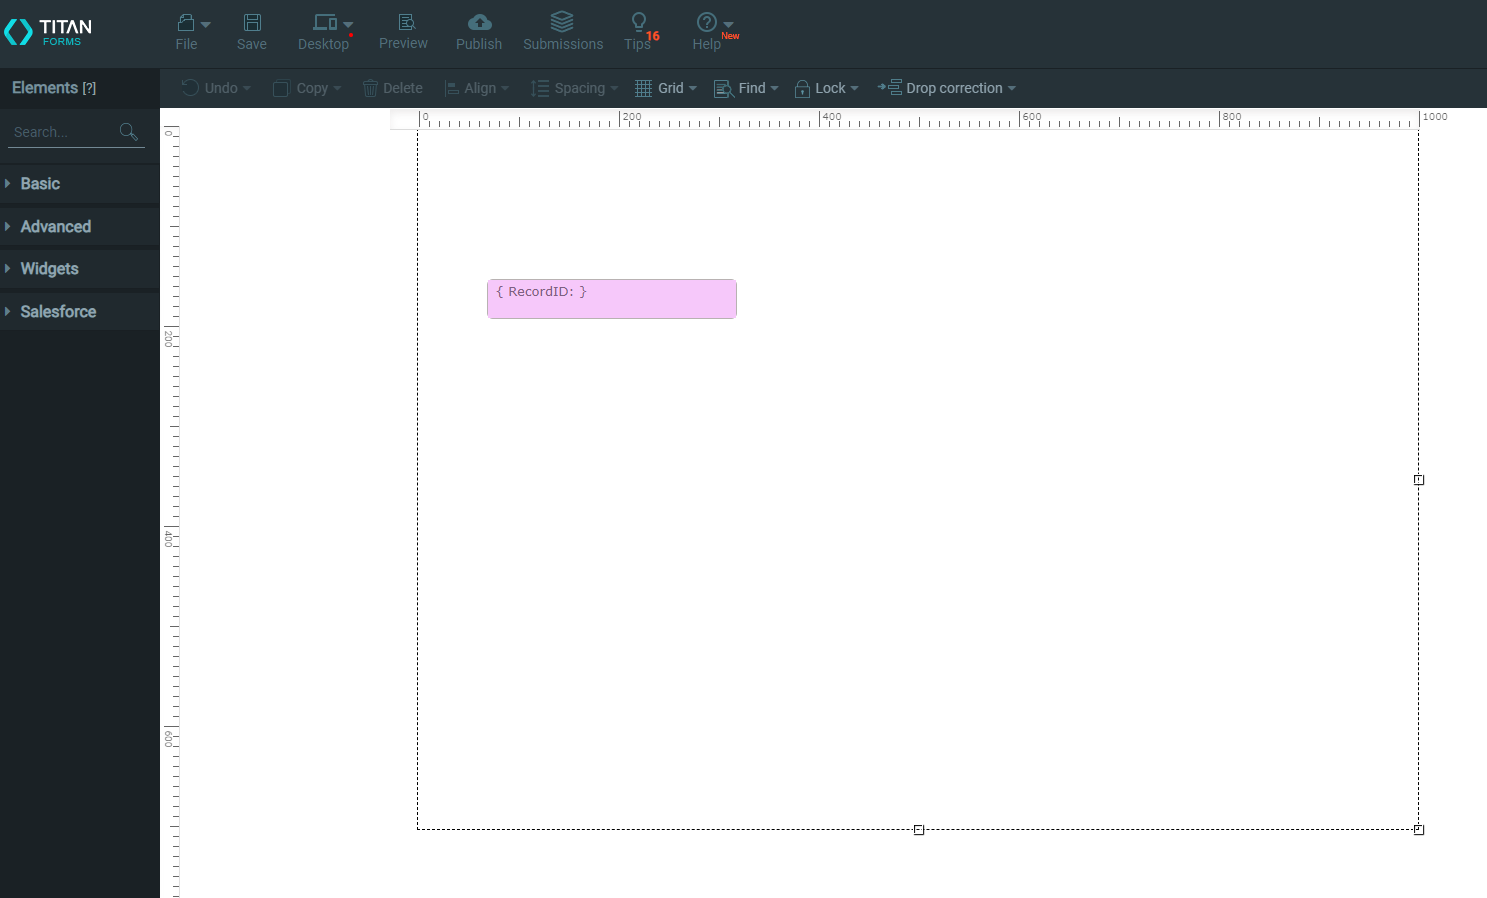

2. Double-click on the document to open it in the Titan Forms tool.

05 Form Settings
This tutorial will cover the following form settings:
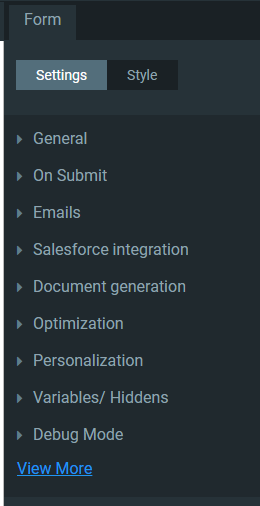
- Salesforce Integrations
- Document Generation

06 Salesforce Integration
1. Click the Salesforce Integration drop-down arrow. The template you see was configured from the Word doc you uploaded. However, you can create other templates here for any business needs.
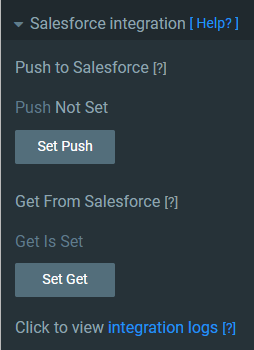
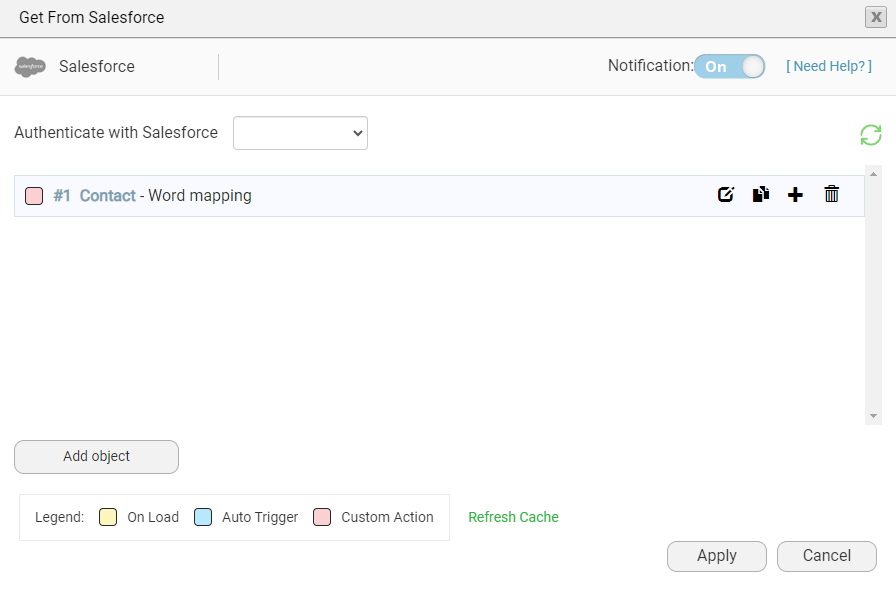
2. Select the Set Get button to review the get created in the Word document.
To generate the document without previewing it, you can save it in Salesforce as an attachment.
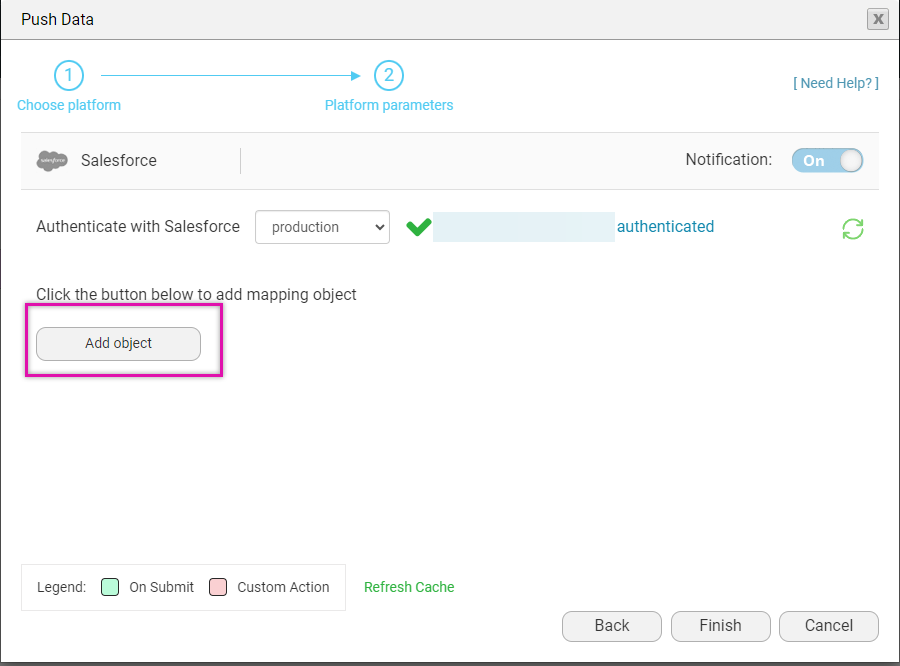
3. Select Set Push. The Push data window opens.
4. Click the Add Object button. The Map Salesforce Fields window opens.
5. Use the Select an Object drop-down to select Files and add a comment.
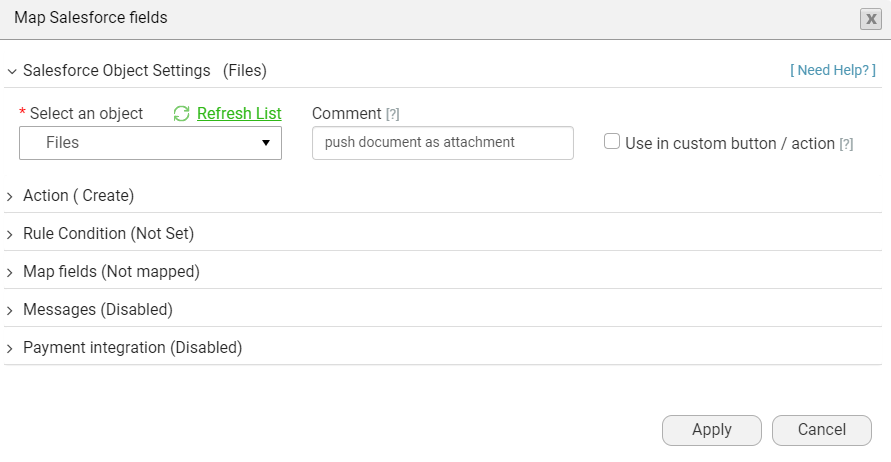
6. Ensure that your action is set to Create.
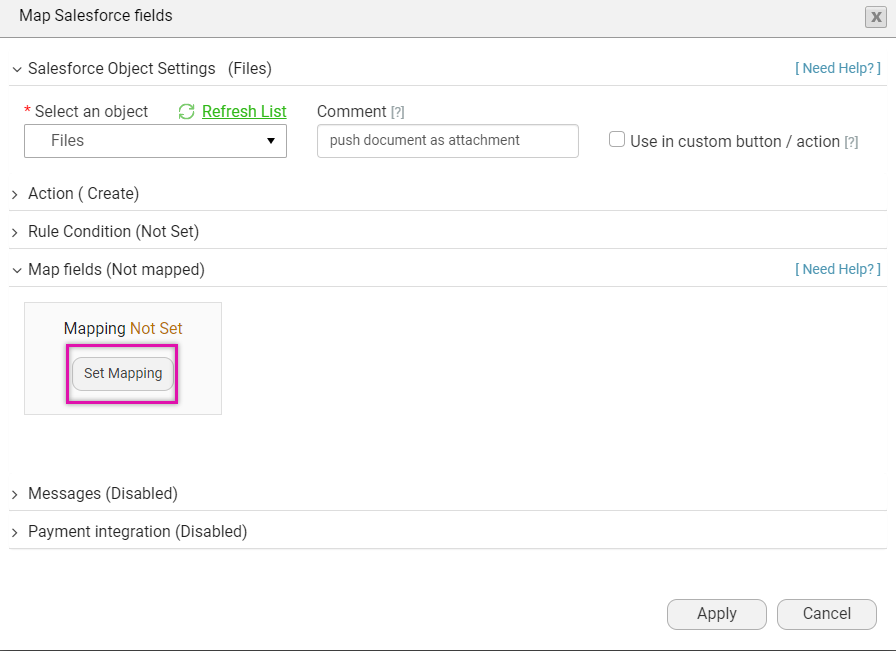
7. Click the Map Fields drop-down and select Set Mapping. The Salesforce Mapping Screen opens.
8. Set the First Publish Location ID. This must be set to the record ID to which the document must be attached. This is a mandatory step.
9. Set the Version Data to Word Mapping, which holds the document we generated from Word. This is a mandatory step.
10. Map any other fields required for your document. This step is not mandatory.
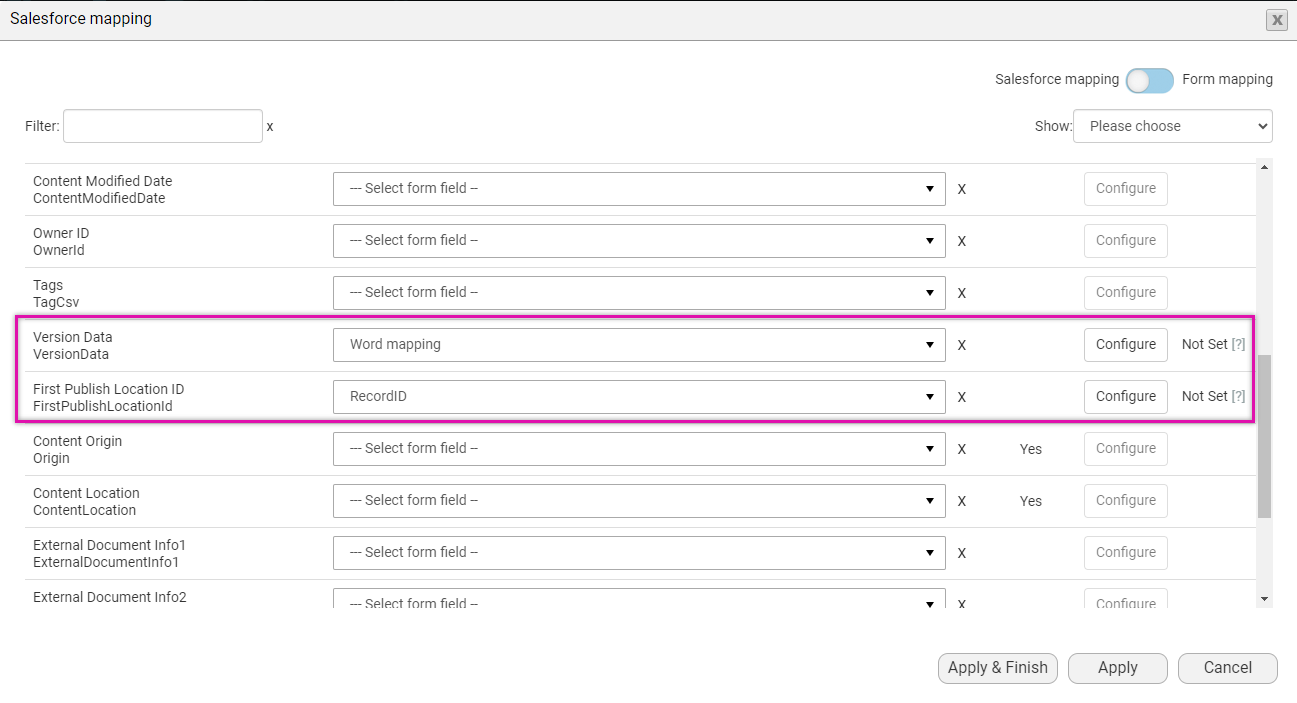
11. Once your mapping is set, click Apply and Finish. You can create child pushes to run other updates to your Salesforce.
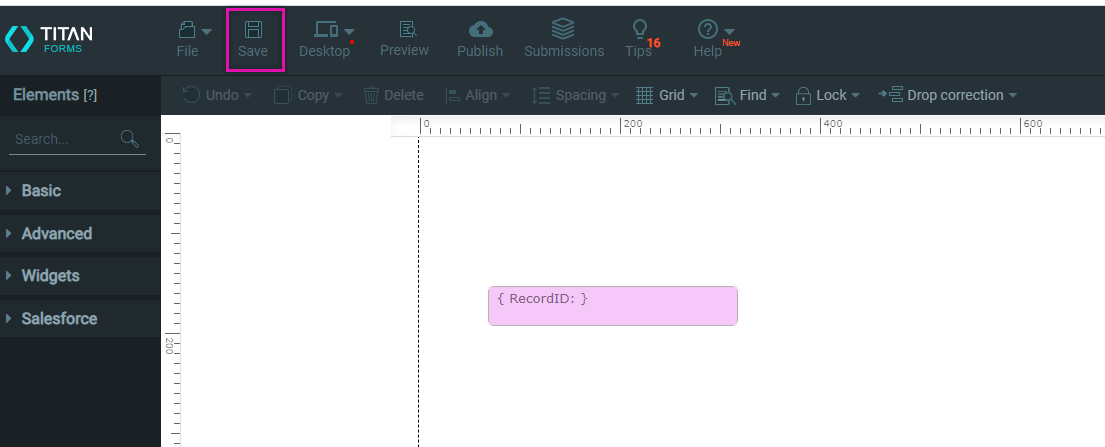
12. Click the save icon. This will save the document configuration.

2. Select the Set Get button to review the get created in the Word document.

To generate the document without previewing it, you can save it in Salesforce as an attachment.
3. Select Set Push. The Push data window opens.
4. Click the Add Object button. The Map Salesforce Fields window opens.

5. Use the Select an Object drop-down to select Files and add a comment.

6. Ensure that your action is set to Create.
7. Click the Map Fields drop-down and select Set Mapping. The Salesforce Mapping Screen opens.

8. Set the First Publish Location ID. This must be set to the record ID to which the document must be attached. This is a mandatory step.
9. Set the Version Data to Word Mapping, which holds the document we generated from Word. This is a mandatory step.
10. Map any other fields required for your document. This step is not mandatory.

11. Once your mapping is set, click Apply and Finish. You can create child pushes to run other updates to your Salesforce.
12. Click the save icon. This will save the document configuration.
07 Document Generation
1. Click the Document Generation drop-down arrow.
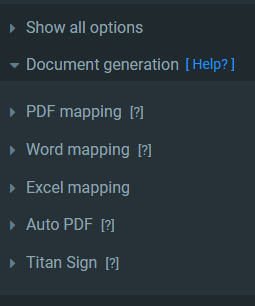
2. Select the Word mapping drop-down and click Configure.
The Word mapping screen opens.
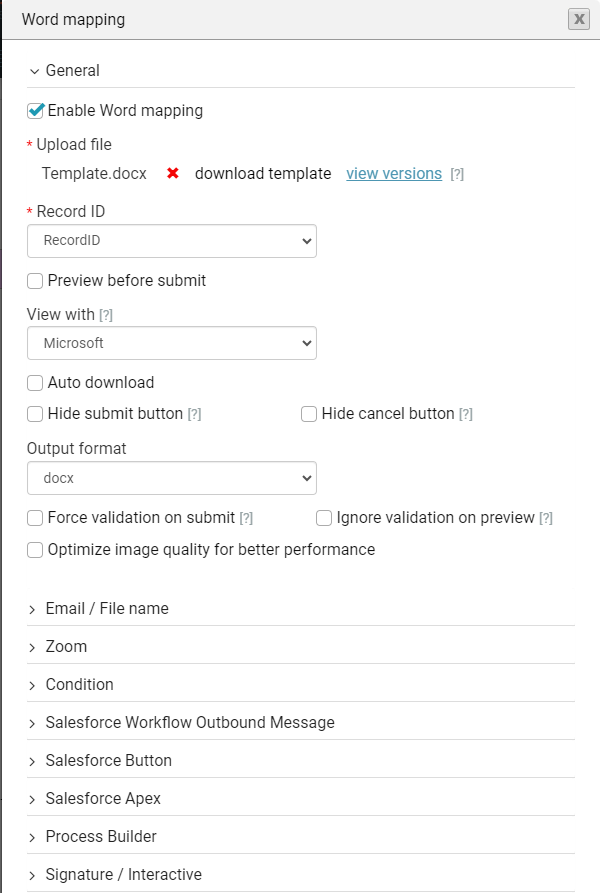

2. Select the Word mapping drop-down and click Configure.
The Word mapping screen opens.
- Download Template: Download a copy of the template you published to Forms.
- View Versions: View the different versions of your document.
- Record ID: This shows if the ID is mapped correctly. Here, you map the single value that will activate the word template (this is what the parent filter will receive).
- View with: Specify how you would like to preview your document. You can choose Microsoft, Google, Titan (PDF only), or Titan Mini (PDF only).
- Output Format: Choose between docx and PDF. In many cases, you will want to generate the document as a PDF. Once you have selected PDF, you will need to choose the conversion tool. We recommend Titan 1 as it is the most robust tool. Use Office 365 if you have fonts in your document that are not supported in Titan 1.
- Optimize image quality for better performance: This will reduce the quality of your images from 100% to 80%, which is not usually noticeable, but reduces the file size and generation time.
