Overview (10 min)
Completion requirements
01 Getting Started
This tutorial covers styling your forms projects.
02 Theme
You selected a theme when you created the project after you selected a template. But don’t worry! You can change it at any time.
1. Open the Project drop-down list and click the Theme option. The Theme panel is added to the right side of the project.
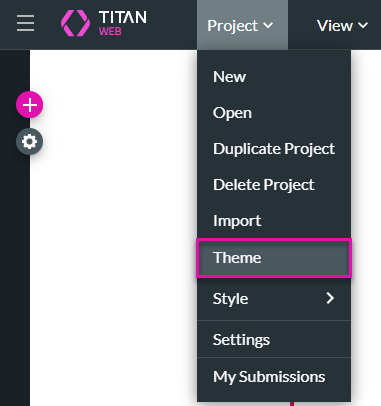
The Skyline theme was selected.
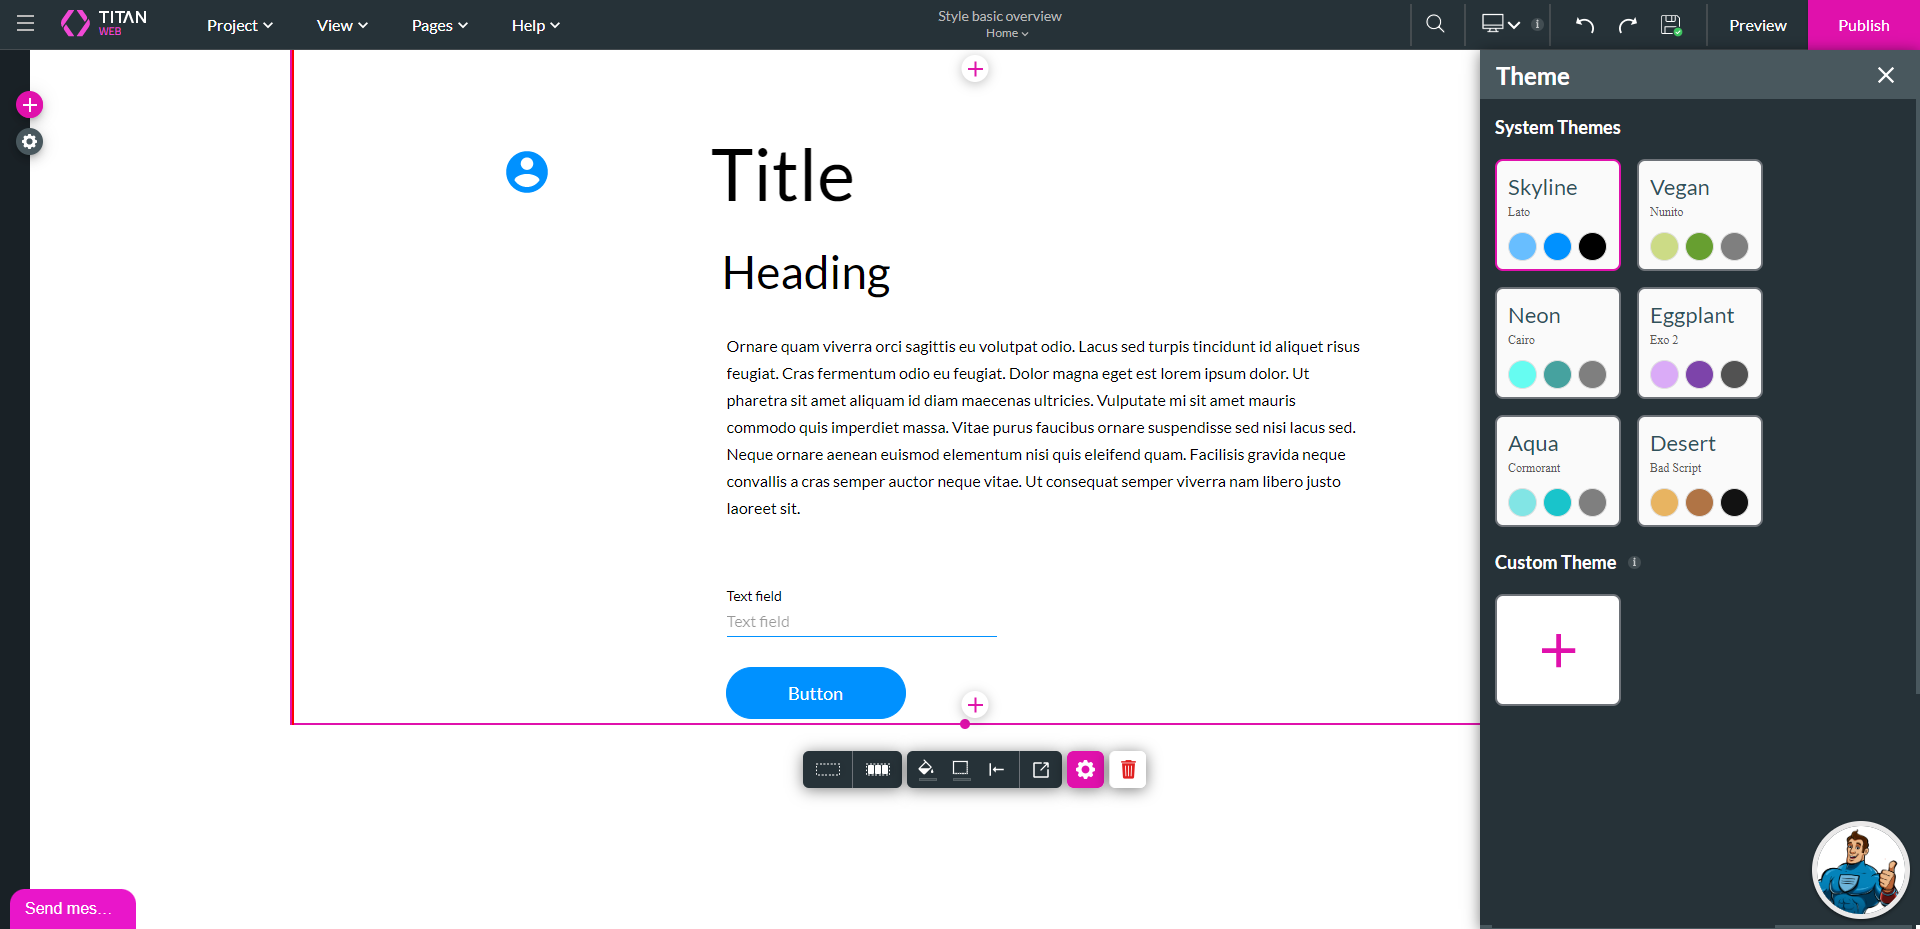
2. Select one of the other options, for instance, Vegan. The colors and font changes.
You can also create a custom theme.
1. Open the Project drop-down list and click the Theme option. The Theme panel is added to the right side of the project.
The Skyline theme was selected.
2. Select one of the other options, for instance, Vegan. The colors and font changes.
You can also create a custom theme.
03 Custom Theme
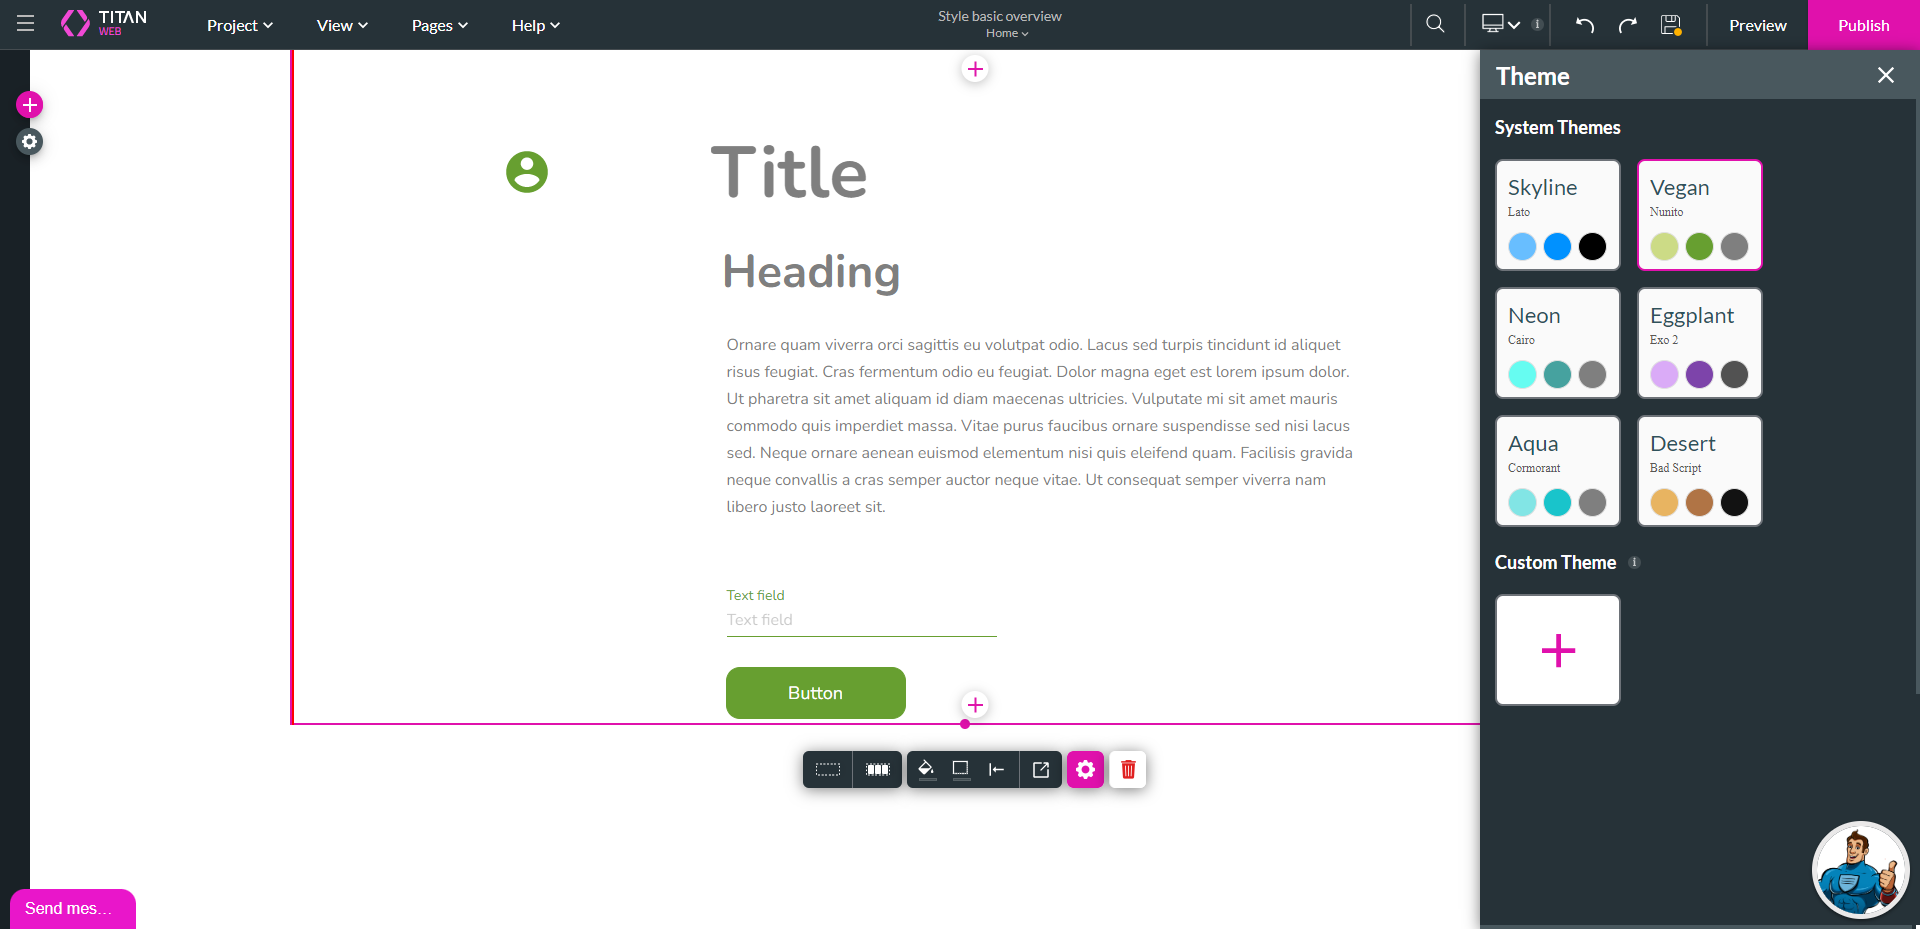
1. Click the + icon under Custom Theme to create a customized theme. The Custom Theme screen opens.

2. Type a name in the field and click the Let’s Start button.
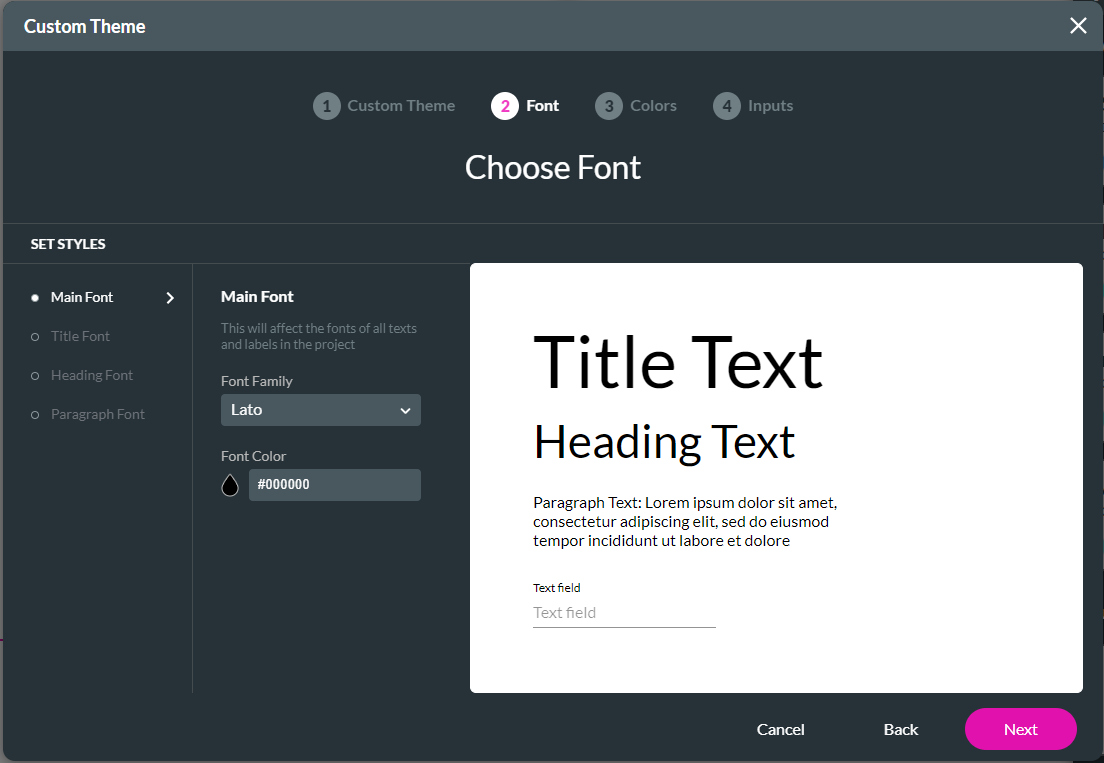
3. Choose the fonts for the following:
5. Select the font color.
6. For Title, Heading, and Paragraph Fonts, use the drop-down list to select the font family for the label and the input fonts.
7. Use the drop-down list to select the font size.
8. Select the font color.
9. Click the Next button.
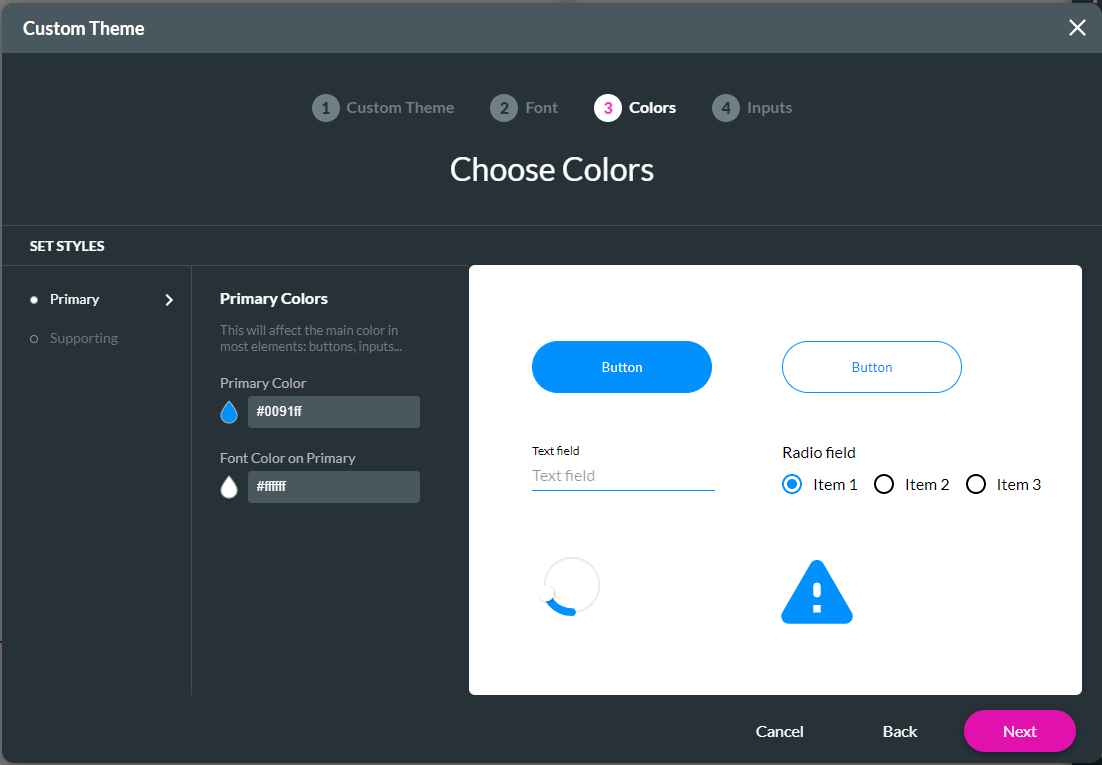
10. Choose the colors as follows:
12. For Supporting Colors, select the supporting color and the font color of the element.
13. Click the Next button.
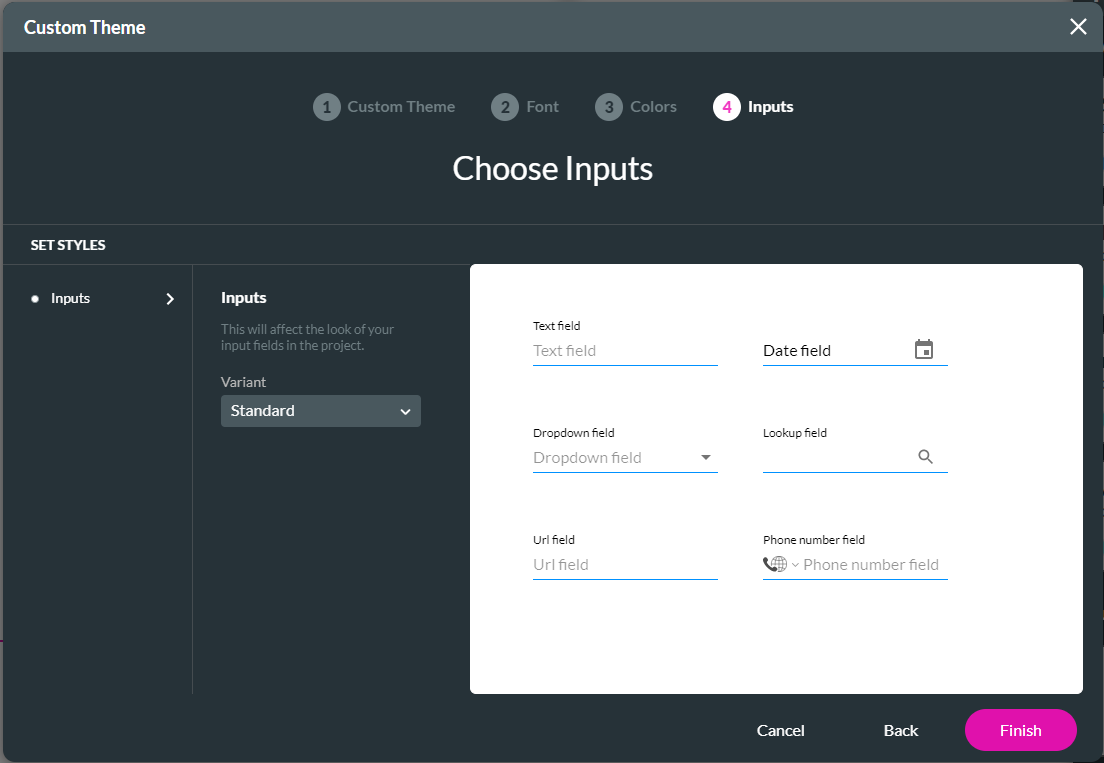
14. Use the drop-down list to select the variant. This will affect the look of your input fields in the project.
15. Click the Finish button.
Your custom theme is added to the list and will be available for all your projects.
2. Type a name in the field and click the Let’s Start button.
3. Choose the fonts for the following:
- Main Font: This will affect the fonts of all input fields in the project.
- Title Font: This will affect the fonts of all the title text elements in the project.
- Heading Font: This will affect the fonts of all the heading text elements in the project.
- Paragraph Font: This will affect the fonts of the paragraph text elements in the project.
5. Select the font color.
6. For Title, Heading, and Paragraph Fonts, use the drop-down list to select the font family for the label and the input fonts.
7. Use the drop-down list to select the font size.
8. Select the font color.
9. Click the Next button.
10. Choose the colors as follows:
- Primary Colors: This will affect the main color in most elements, for instance, buttons and input elements.
- Supporting Colors: This will affect the supporting color in more complex elements, for instance, accordion and table elements.
12. For Supporting Colors, select the supporting color and the font color of the element.
13. Click the Next button.
14. Use the drop-down list to select the variant. This will affect the look of your input fields in the project.
- Select the Standard option for a basic or common look of elements.
- Select the Filled option for a color-filled look of elements.
- Select the Outline option for an element with a border.
- Select the Fixed option to fix the label position of the element in comparison to the input. The label will not overlap the input of the element.
- Select the Classic option for a classic quality look of elements.
15. Click the Finish button.
Your custom theme is added to the list and will be available for all your projects.
04 Project Style
1. Open the Project drop-down list.
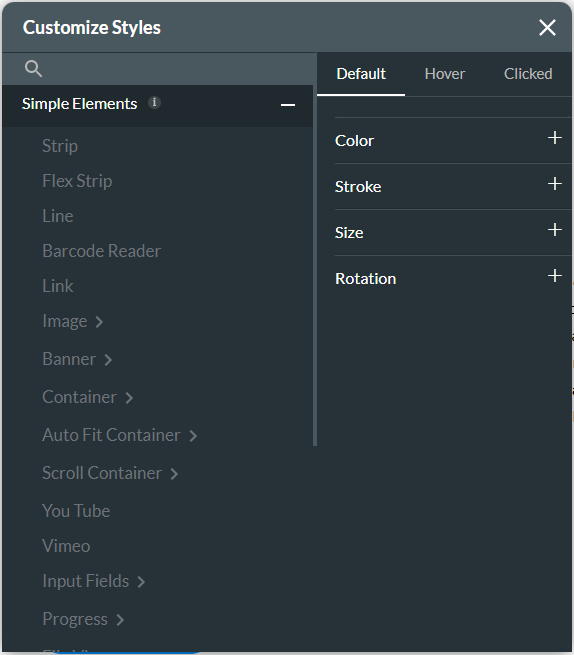
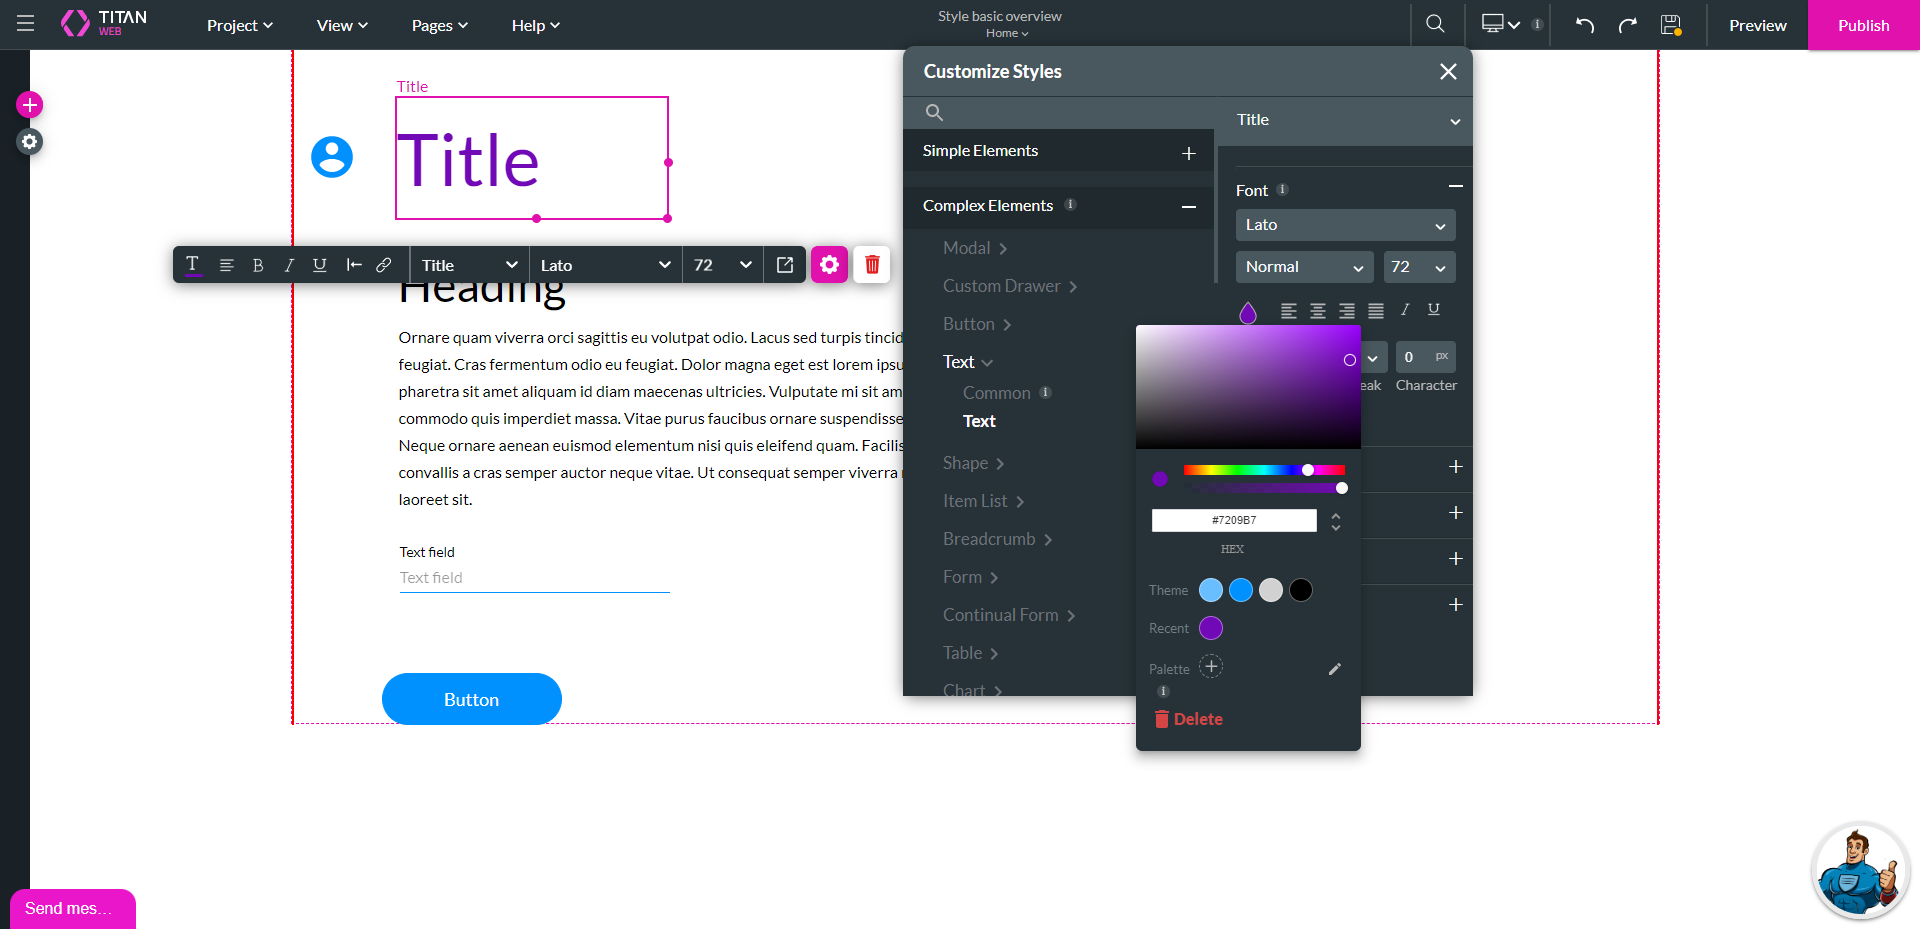
2. Select the Style and then the Configure option. The Customize Style screen opens. This screen holds all the components and elements and their style properties in Titan Web.
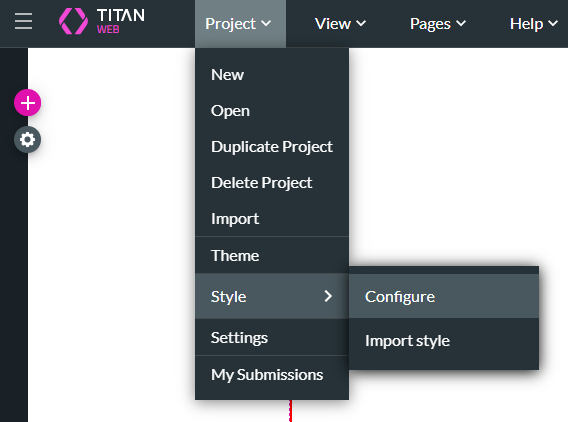
This screen applies style by type for all the elements that are the same in the project.
If you change the color of the Title element, all the Title elements in the project will be changed. This change also affects all the Title elements that you will add in the future. The advantages are that you can create a uniform look in your project in a few clicks, and you don’t have to style elements individually.
2. Select the Style and then the Configure option. The Customize Style screen opens. This screen holds all the components and elements and their style properties in Titan Web.
This screen applies style by type for all the elements that are the same in the project.
If you change the color of the Title element, all the Title elements in the project will be changed. This change also affects all the Title elements that you will add in the future. The advantages are that you can create a uniform look in your project in a few clicks, and you don’t have to style elements individually.
05 Element Style
This method only applies to the selected element. You can select a single element or multiple elements.
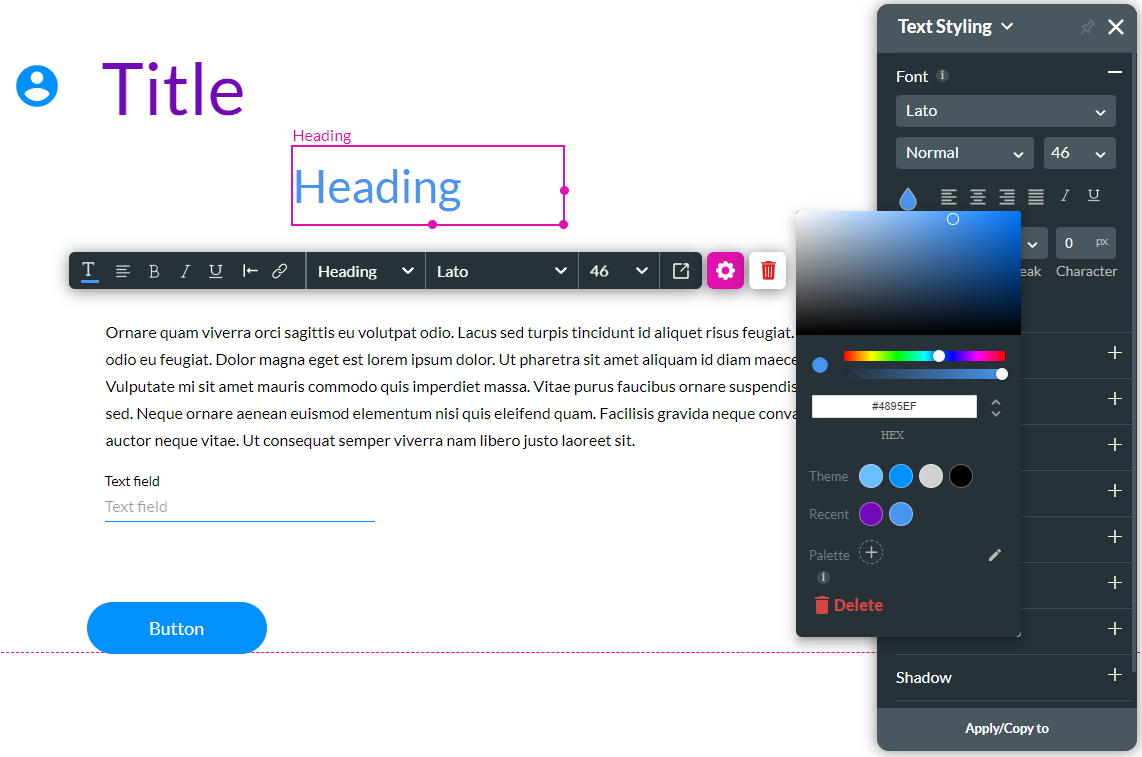
1. Click the Styling icon. The Styling screen opens.
2. Click the Font option to expand the list.
3. Click the Color icon to change the color of this element. Only the selected element changes.
1. Click the Styling icon. The Styling screen opens.
2. Click the Font option to expand the list.
3. Click the Color icon to change the color of this element. Only the selected element changes.
06 Style Classes
Every element has a system class name. This class name can be used to save a style that can be used in the future.
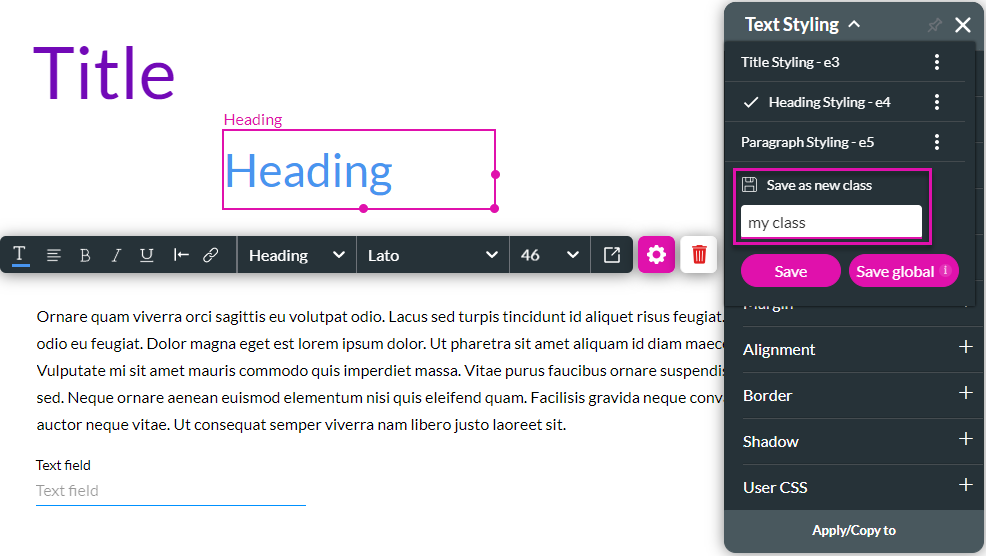
1. Click the Styling icon. The Styling screen opens.
2. Click the arrow next to the Styling screen’s name to open the list. The system class name of the selected element is labeled with a check mark.
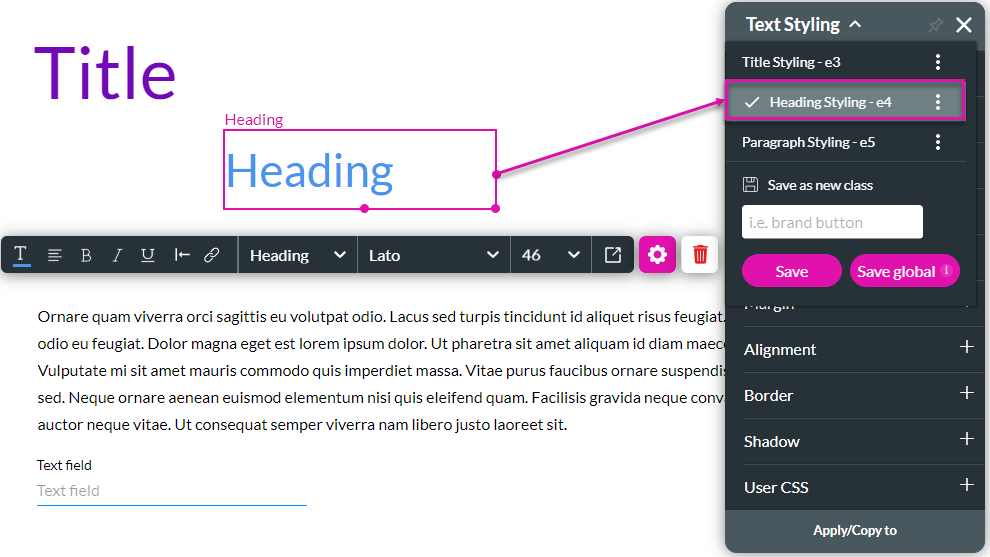
3.1 Type a name in the field to save the selected style as a new class and click the Save button. The class can only be applied to the same type of element (for instance, Text elements) on the current page.
3.2 Alternatively, Click the Save global button to save the class for the whole project. The class will be available for the same type of element (for instance, Text elements) on all project pages. We recommend that you use the Save Global option.
1. Click the Styling icon. The Styling screen opens.
2. Click the arrow next to the Styling screen’s name to open the list. The system class name of the selected element is labeled with a check mark.
3.1 Type a name in the field to save the selected style as a new class and click the Save button. The class can only be applied to the same type of element (for instance, Text elements) on the current page.
3.2 Alternatively, Click the Save global button to save the class for the whole project. The class will be available for the same type of element (for instance, Text elements) on all project pages. We recommend that you use the Save Global option.
07 CSS Styling
You can use CSS code.
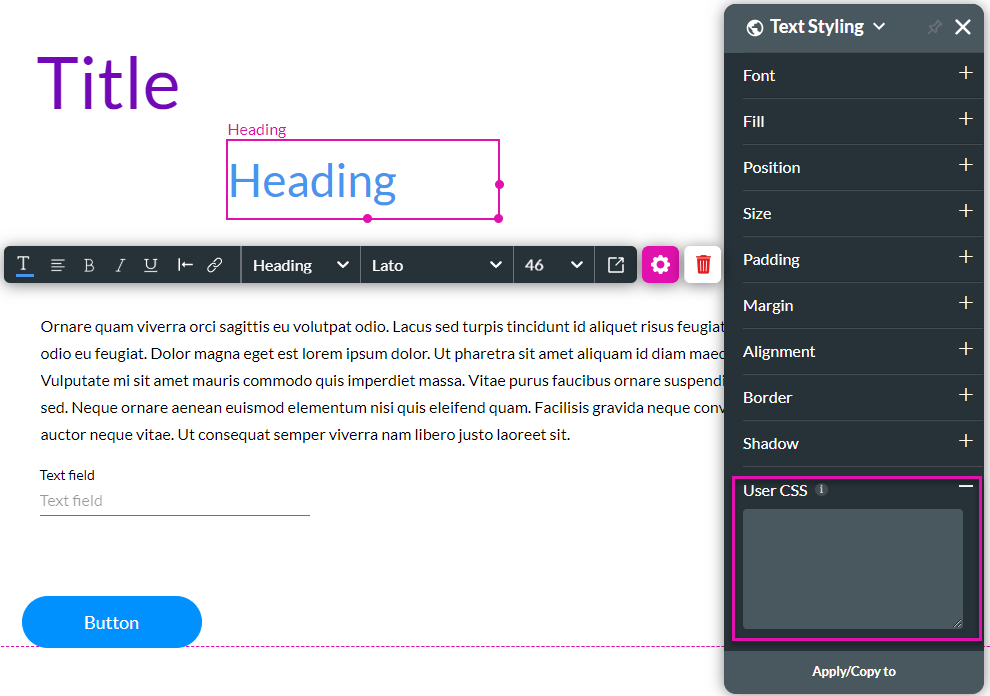
1. Click the Styling icon. The Styling screen opens.
2. Click the User CSS option to expand the option.
3. Add the CSS code in the field.
1. Click the Styling icon. The Styling screen opens.
2. Click the User CSS option to expand the option.
3. Add the CSS code in the field.