Getting Oriented (13 min)
01 Getting Started
This tutorial covers the orientation of Forms 2.0, including:
- Pulling data from and pushing data to Salesforce.
- How to upload a file to Salesforce.
- How to show and hide elements using conditional logic.
02 Salesforce Data
You can configure Push record and Get record integrations from Salesforce to pull data from and send data to your Salesforce instance.
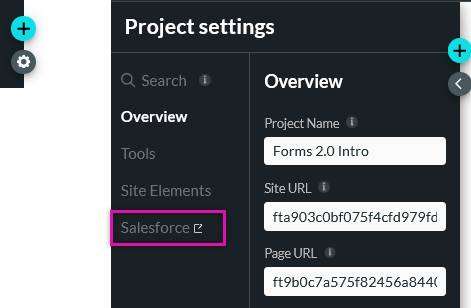
1. Select the Project Settings gear icon and click the Salesforce tab.
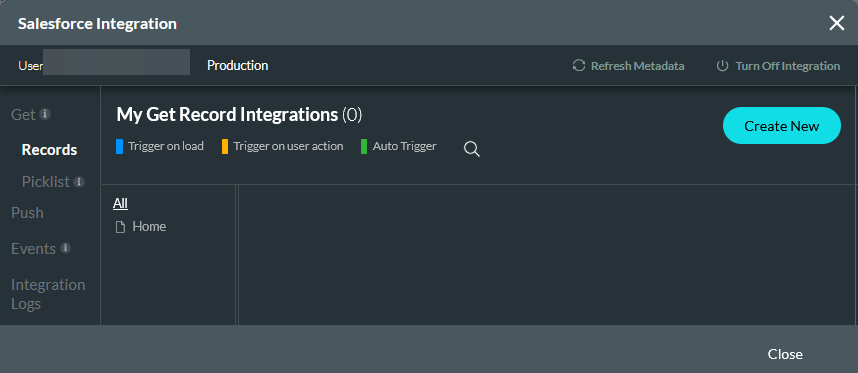
In the Salesforce Integration screen, you can create a variety of Salesforce actions to run.
03 Get
You can create a Get Record action to run when the configured trigger is met. This will populate your form with the applicable data from your Salesforce instance. For example, when the first and last name fields are completed, a Get will trigger to retrieve the remainder of the contact’s information. Triggers and actions are covered in the Salesforce Integration chapter of this course.
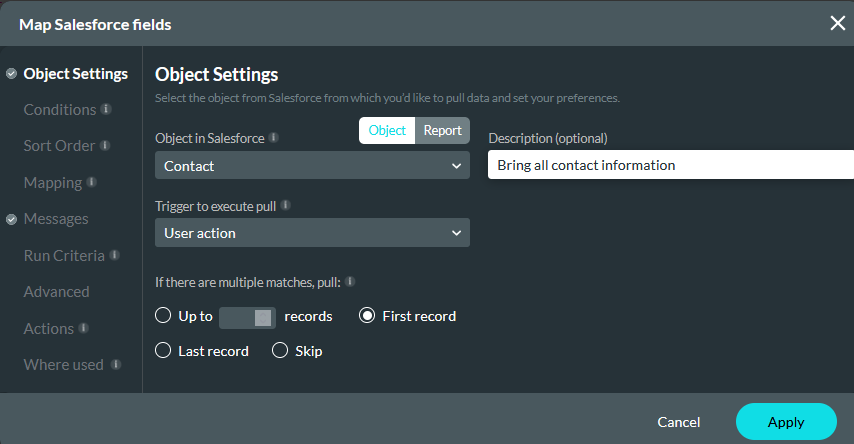
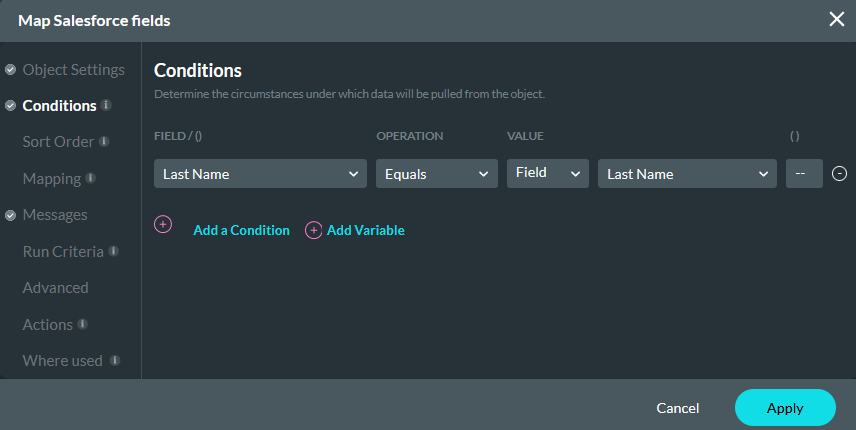
Configuring conditions will validate data according to whether it meets the criteria. This is useful to ensure that actions are only run on the required data. For example, the last name entered into the text field must match the last name field in Salesforce.
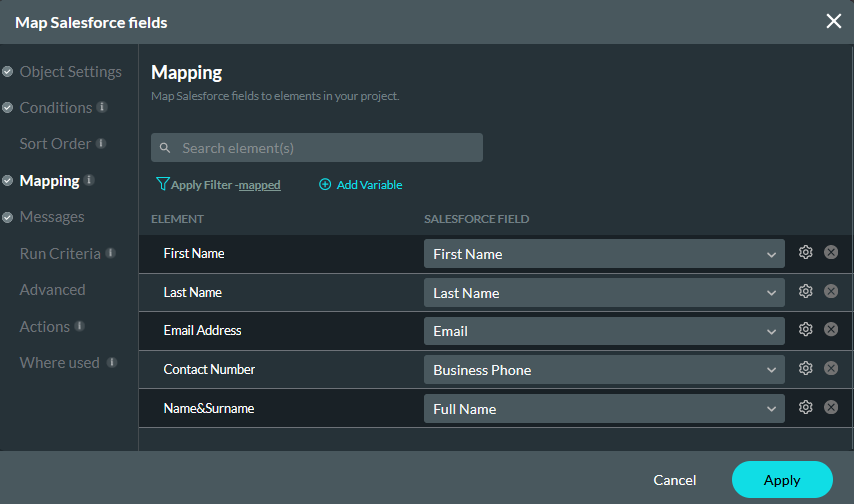
The mapping tab maps the fields in your project to those in Salesforce. This ensures that the fields are populated with the correct corresponding data.
04 Push
A Salesforce push can be configured to run from any user action. It is useful for sending data back to Salesforce. This ensures that if a user updates their details or uploads a file, the latest data will be captured in Salesforce. For example, if a contact updates their number on the form, the new number should be saved in Salesforce.
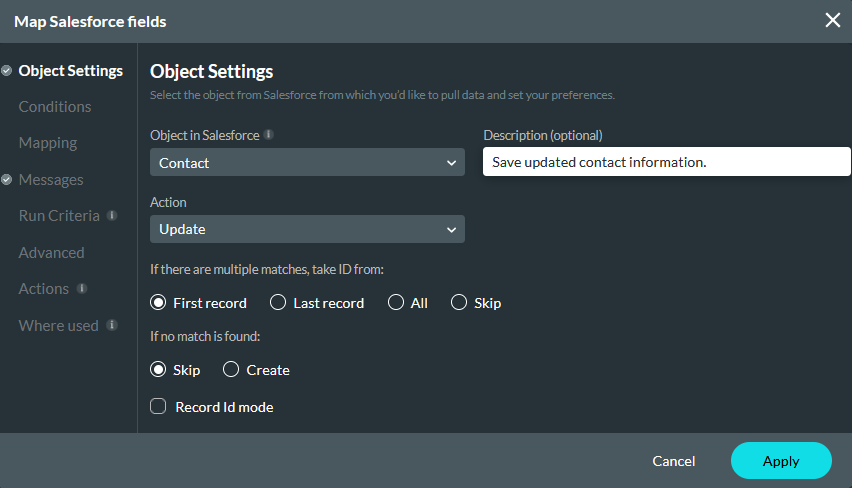
Note: If you choose to update, find, or delete actions, the condition tab will be displayed automatically so you can create criteria to validate the data. These lessons are covered in the Salesforce Integration chapter of this course.
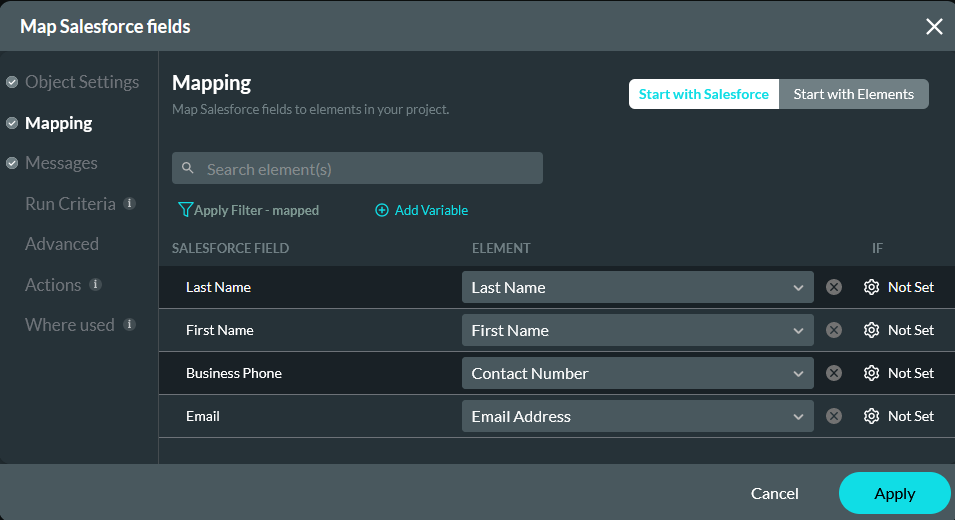
The mapping tab maps the fields in your project to those in Salesforce. This ensures that any updates are made to fields in the form with the correct corresponding data.
05 Invoking Actions
Salesforce actions can be invoked from multiple places in the project. In this example, we review invoking an action from the Button.
Select the Button that will trigger the action when the user clicks it, and select the interactivity icon.

After clicking the Start + icon, choose Salesforce Action as your node.
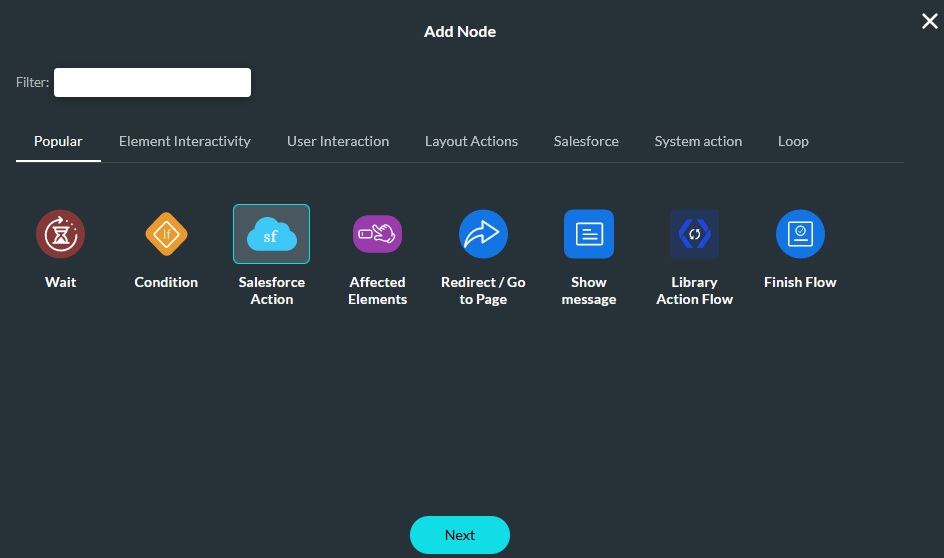
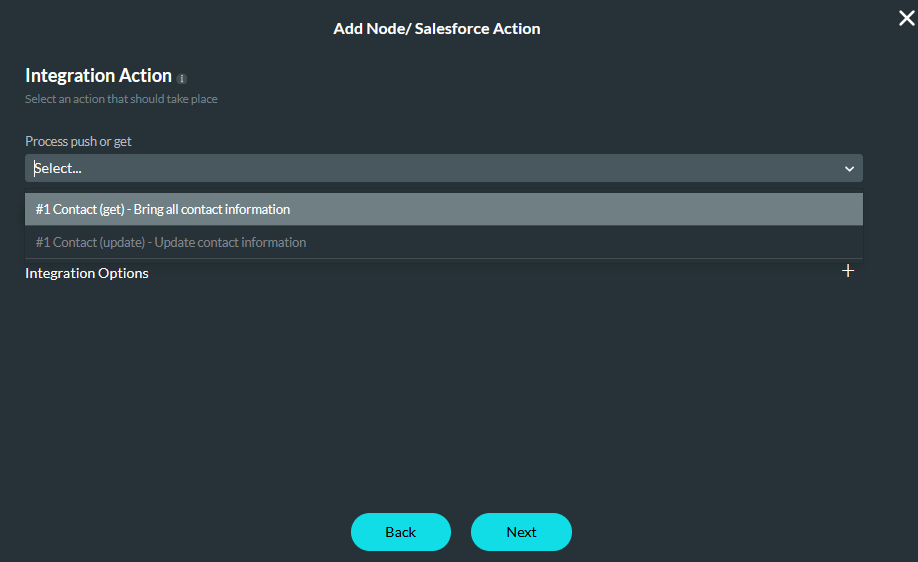
Next, you can choose from your configured Salesforce actions using the dropdown.
Note: It is strongly recommended that you add a description when creating Salesforce actions. This allows for easy identification when choosing which action to invoke.
When configuring On Click Actions, you can create a flow of nodes to run. For example, you want your form to reset after running the Salesforce Push action.
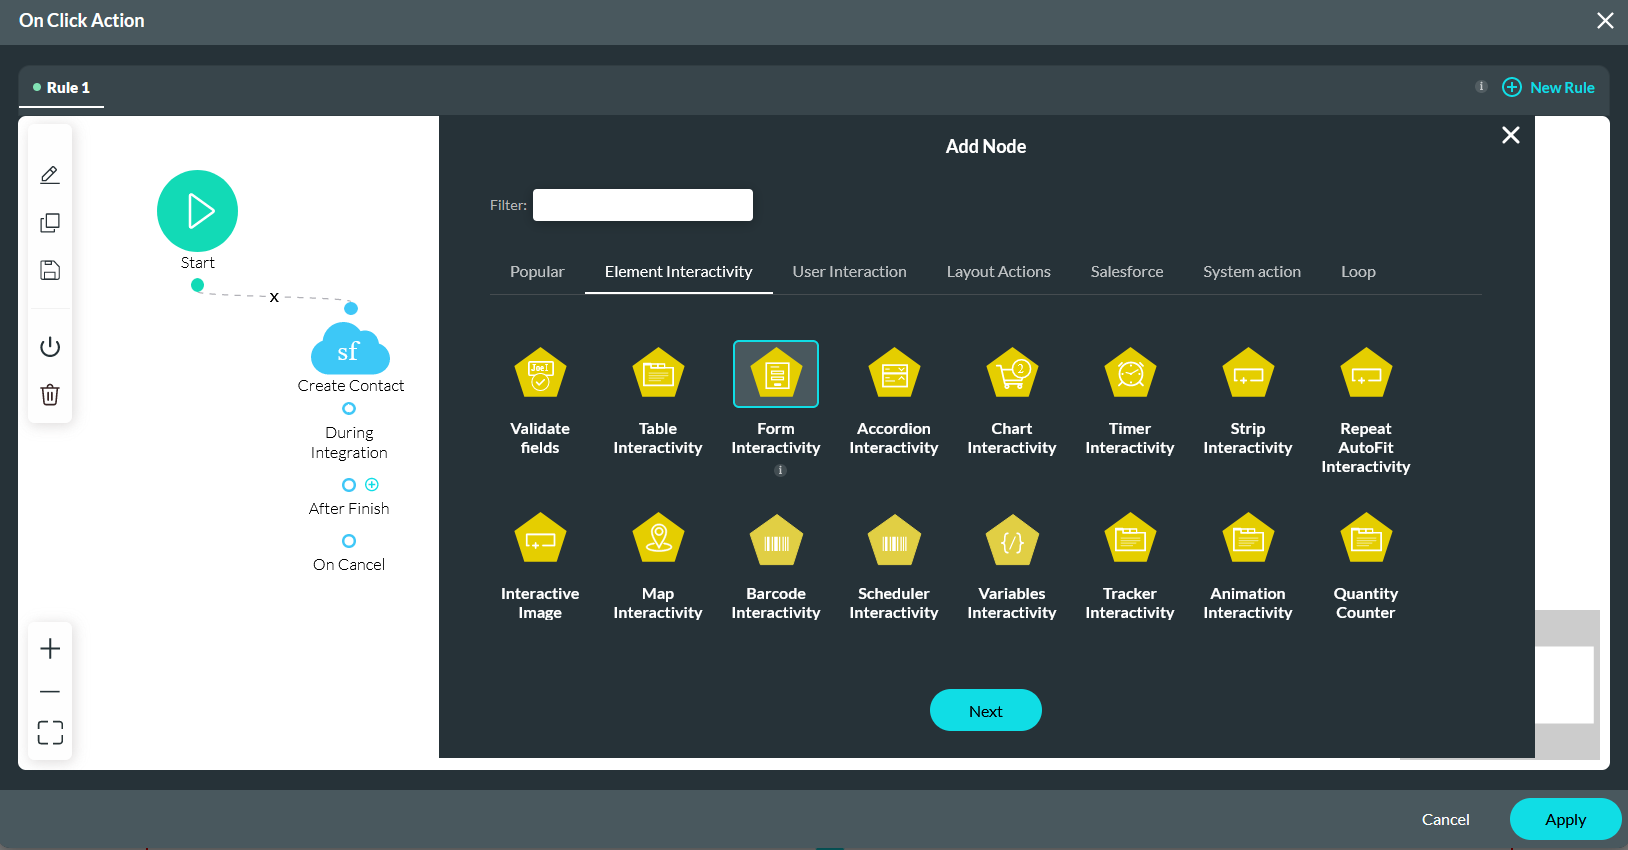
You can choose how the form is affected using the various options available.
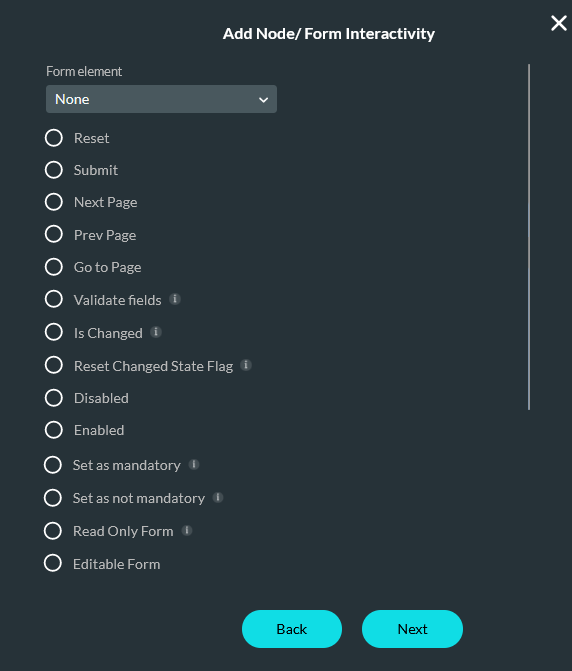
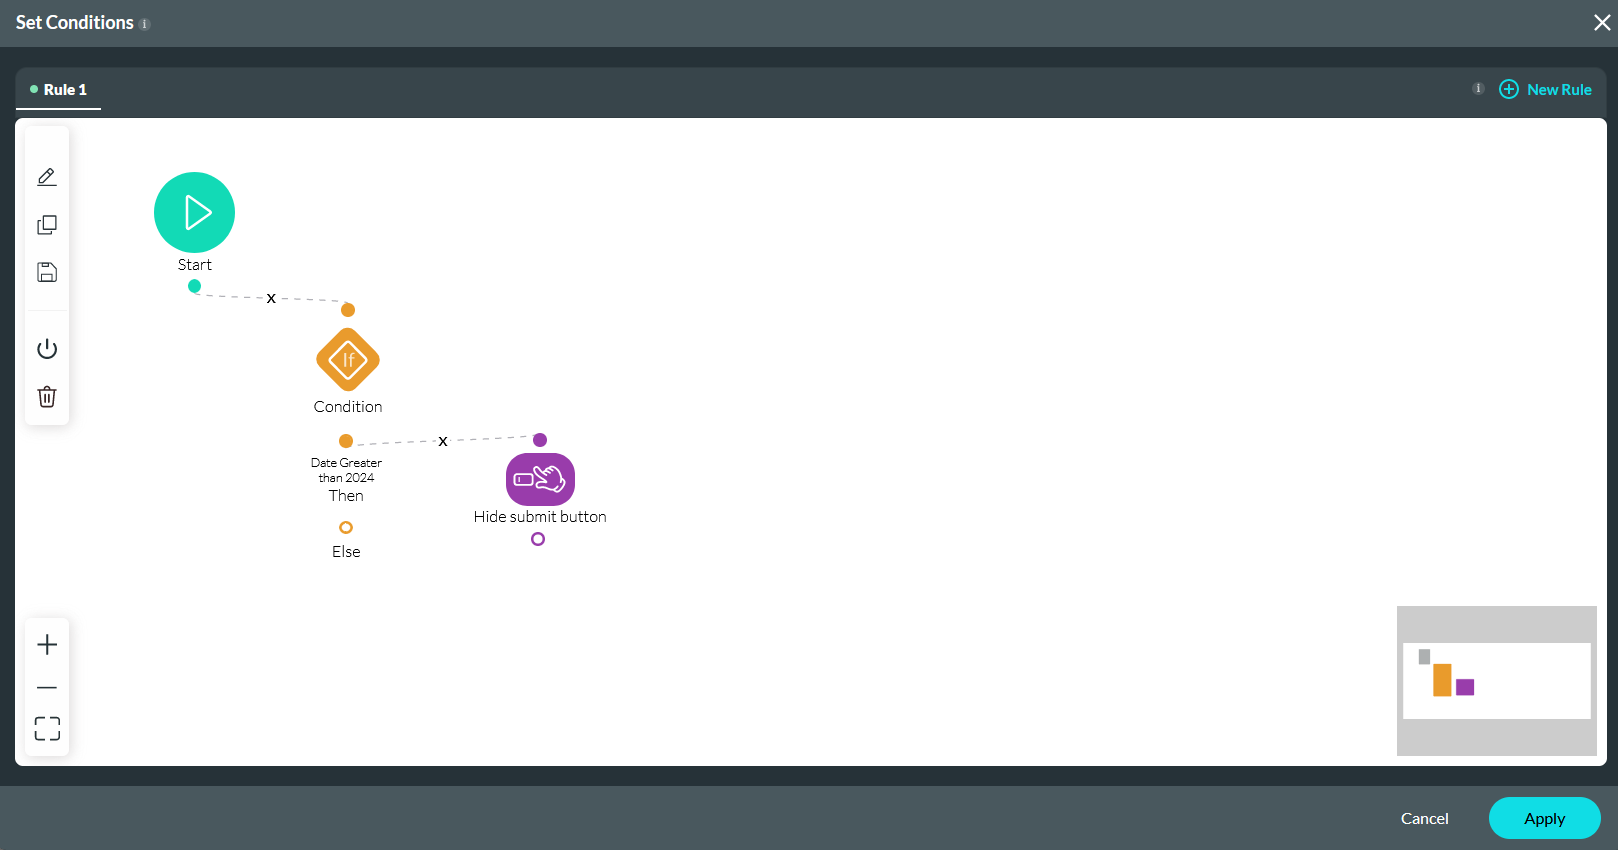
06 Show or Hide Fields
Click on the element gear icon to open the element settings menu. Select the Conditions tab. Click the Configure Conditions button to start configuring your condition.
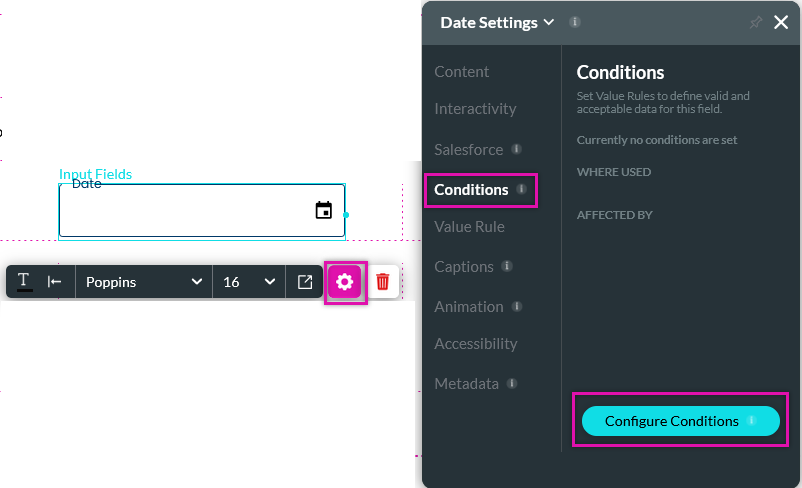
The first step is to configure your condition - for example, if the date field does not equal a deadline date, the user cannot see the submit button. Once your condition node is configured, you can add several nodes to invoke an action, such as an effect element node to hide the submit button.